Loading ...
Loading ...
Loading ...
Installation instructions
- 8 -
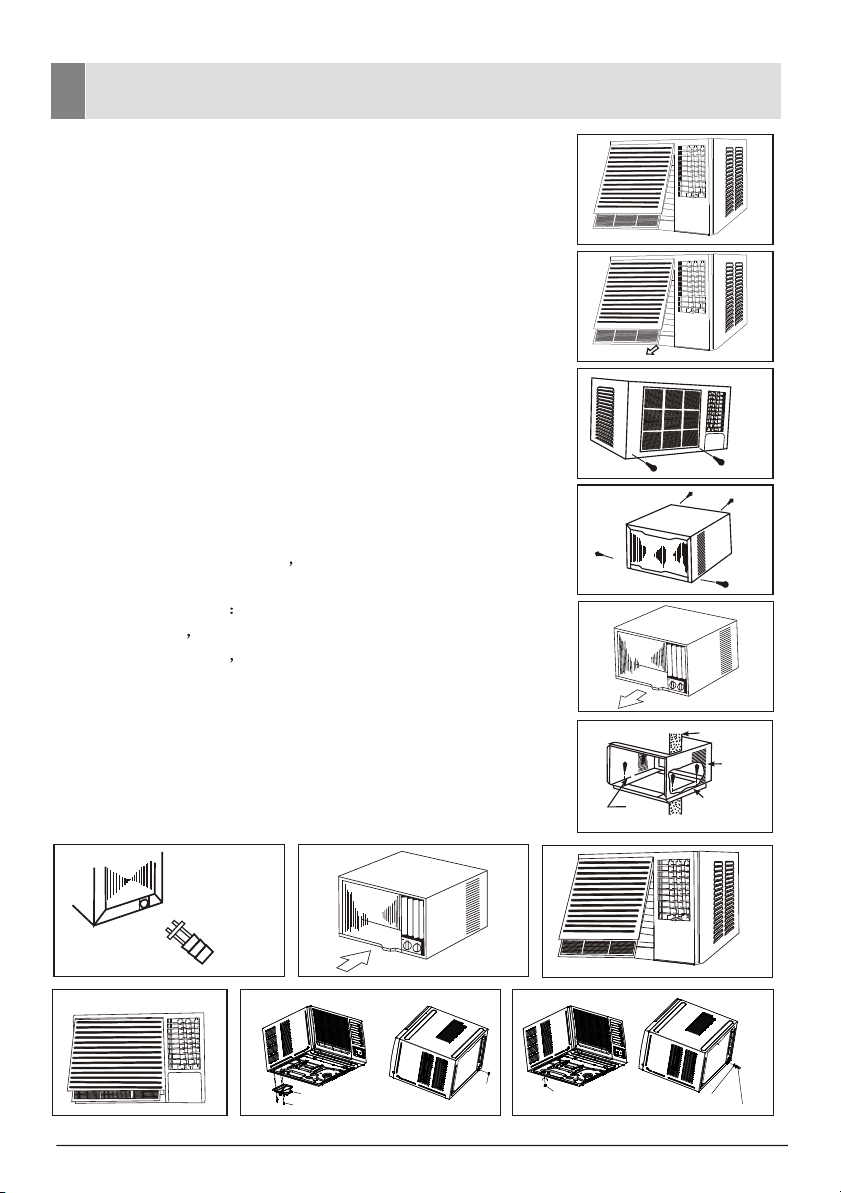
1) Remove the front panel. (Fig.5)
Remove the air filter. (Fig.6)
Remove screw at the botton of the front panel. (Fig.7)
Open the panel cover.
2) Remove the screws fix the chassis-fixing board and cabinet.
some Models have two more screws on the back of the
cabinet. (Fig.8)
3)
4)
5)
Grasp the handle on the front of the chassis and carefully
slide the air conditioner unit out of the cabinet. (Fig.9)
lnstall the drain tube connection into the hole provided
at the rear of the air conditioner chassis.(Fig.11)
To meet different requirements of different type of air
conditioner, there are two kinds of methods for your choice
to treat the condensed water. You can choose back
drainage or bottom drainage.
Bottom drainage way: the drain tray is fixed in position
through four pcs of screws and use the flare nut to block
the back drainage hole.(Fig.15)
Back drainage way using the flare nut to block the bottom
drainage hole and use water outlet pipe to connect the
back drainage hole
pay attention to increase the sealing
ring to prevent water leakage.(Fig.16)
lnstall the air conditioner cabinet on the installation shelf
(not included) with screws.(Fig.10)
6) Carefully slide the unit back into the cabinet.(Fig .12)
7) Reinstall the retaining bracket,front panel and mounting
screws.(Fig.8,7,13)
8) Reinstall the air filter.(Fig.14)
Fig.5
Fig.6
Fig.7
Fig.8
Fig.9
Wall
Cabinet
Screw
Installation shelf
Fig.10
Fig.11
Fig.12
Fig.13
Fig.14
drain tray
screw
falre nut
Fig.15
falre nut
sealing ring
water outlet pipe
Fig.16
Loading ...
Loading ...
Loading ...