1. Overview
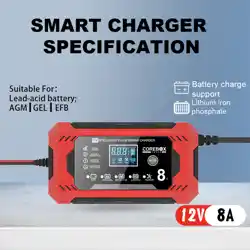
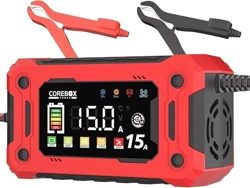
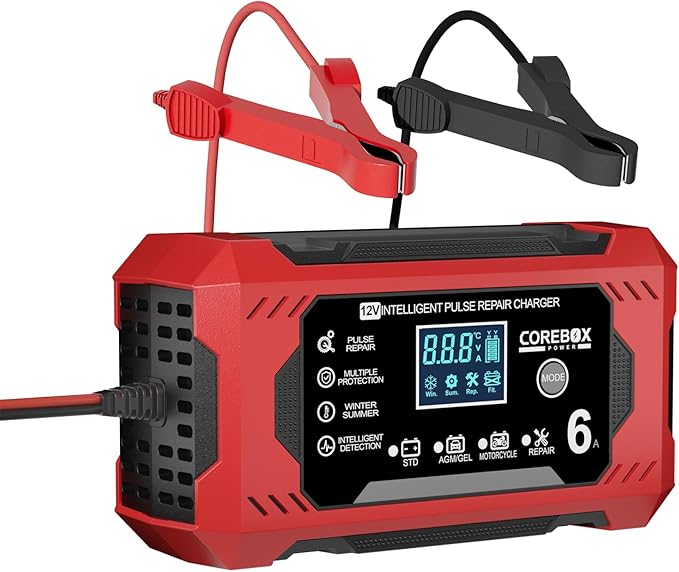
The Corebox Battery Charger is a 12V, 6-Amp automatic smart charger, maintainer, and desulfator. It is designed for charging and maintaining 12V lead-acid batteries, including AGM, GEL, SLA, and Flooded types, commonly found in cars, trucks, motorcycles, lawn mowers, and marine applications.
The device features a 7-stage intelligent charging process, temperature compensation, and multiple safety protections to optimize battery health and lifespan.
2. Specifications
- Brand: COREBOX
- Input Voltage: 12V
- Output Voltage: 12 Volts (DC)
- Charging Current: 6 Amps
- Product Dimensions: 8.4"D x 2.6"W x 4.3"H
- Compatible Batteries: 12V Lead-Acid (AGM, GEL, SLA, Flooded)
- Cable Length: 7 feet
- Warranty: 2-Year Manufacturer Warranty
3. Features and Functions
3.1 Charging Modes & Process
The charger uses an intelligent 7-stage charging process monitored by an MCU controller:
- Desulfation: Applies pulse to break down sulfate crystals on battery plates.
- Soft Start: Tests battery condition before applying full current.
- Bulk Charge: Delivers maximum current to charge the battery rapidly.
- Analysis: Checks if the battery can hold a charge.
- Recondition: Applies a slow charge to restore deeply discharged batteries.
- Float: Maintains the battery at full charge without overcharging.
- Pulse Maintenance: Periodically applies pulses to keep the battery at optimal charge.
3.2 Pulse Repair Function
The charger includes a high-efficiency pulse repair mode. It automatically detects battery sulfation and acid stratification to help restore performance in old or idle batteries. Note: This function cannot repair a completely dead (totally depleted) battery.
3.3 Safety Protections
The device incorporates eight key safety features:
- Temperature Compensation (adjusts charge based on ambient temperature)
- Reverse Connection Protection
- Cooling System
- Overcurrent Protection
- Fireproof Material Housing
- Overcharge Protection
- Short Circuit Protection
- Automatic Shutdown when fully charged
The charging cables use high-quality, heat-resistant, cold-resistant, and oxidation-resistant copper wire.
4. Use Guide
4.1 Before You Begin
- Ensure the charger is off and unplugged from AC power.
- Identify your battery type (e.g., AGM, GEL, Flooded) and ensure it is a 12V lead-acid battery.
- Work in a well-ventilated area. Keep sparks and flames away from the battery.
- For vehicles, consult your vehicle's manual for any specific charging instructions.
4.2 Connection Steps
- Connect to Battery:
- Attach the RED clamp to the POSITIVE (+) battery terminal.
- Attach the BLACK clamp to the NEGATIVE (-) battery terminal or a clean, unpainted metal part of the vehicle chassis (ground).

- Connect to Power: Plug the charger's AC power cord into a standard 110V wall outlet.
- Start Charging: The charger will automatically begin its diagnostic and charging sequence. The display or indicators will show the charging status.
4.3 During Charging
- The charger will automatically progress through its 7-stage cycle.
- You may hear a clicking sound when it changes stages; this is normal.
- The built-in cooling system may activate; this is normal operation.
4.4 After Charging
- Once the battery is fully charged, the charger will automatically switch to maintenance (float/pulse) mode.
- To disconnect, first unplug the charger from the AC wall outlet.
- Then remove the BLACK clamp, followed by the RED clamp from the battery.
4.5 Using the Repair Mode
If a battery is not accepting a charge, you can attempt to use the charger's repair function:
- Connect the charger to the battery as described in section 4.2.
- The charger will automatically detect sulfation and may enter a reconditioning stage.
- This process can take several hours. Allow the charger to complete its full cycle.
5. Safety Information
- Read all instructions before using the charger.
- Do not use the charger to charge non-rechargeable batteries.
- Do not disassemble the charger. Refer servicing to qualified personnel.
- Protect the charger from moisture and water.
- Ensure the AC power cord and output cables are not damaged before use.
- A loose battery connection may cause the charger to spark. Always connect clamps firmly.
- Reverse polarity connection is protected against, but correct connection (Red to +, Black to -) is essential for safe operation.
6. Troubleshooting
- Charger does not turn on: Check AC power connection. Ensure the wall outlet is live.
- Charger shows fault or error: Disconnect and reconnect the battery clamps, ensuring a clean, secure connection. Check for reverse polarity.
- Battery does not charge: The battery may be completely dead and unrecoverable. Verify battery type is 12V lead-acid. Try using the repair mode.
- Charger gets warm during use: This is normal. The unit has a cooling system and overheat protection.
- Clicking sounds during charging: This is normal and indicates the charger is switching between stages.
7. Warranty and Support
This product is backed by a 2-Year Manufacturer Warranty.
If you encounter any problems during use, contact the seller or manufacturer for support. Have your product details (e.g., ASIN: B0DNSWH1RS) ready when seeking assistance.