Congratulations on your purchase. This device provides professional-grade radon monitoring for your home or office.
⚠️ BEFORE FIRST USE: You MUST remove the transparent plastic spacer from the battery compartment. The device will not function with this spacer in place.
2. Device Overview & Key Specifications
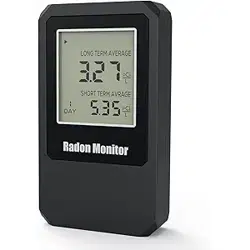
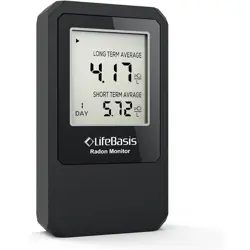
2.1. Front Display (E-Ink Screen)
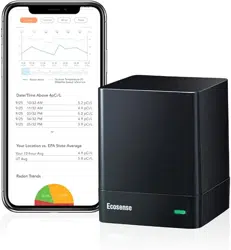
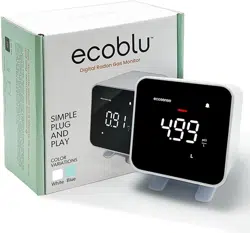
The screen provides clear, low-power information. Here is what each element means:
Main Large Number (e.g., 0.49): The primary radon reading.
Unit (pCi/L or Bq/m³): The unit of measurement for the reading.
Day X (e.g., Day 1): The number of days the current measurement has been running.
Color-Coded Bar: A visual indicator of the radon level (Green = Low, Yellow = Moderate, Red = High).
Battery Icon: Shows remaining battery power.
2.2. Rear Panel Controls
MODE Button:
Short Press: Cycles through different data views.
Long Press (>1 second): Used to enter the unit setting mode or confirm selections.
SET Button: Used in combination with the MODE button for certain settings (like resetting data).
RESET Button: Press to restart the instrument and clear all stored data before starting a completely new long-term measurement. (Use with caution).
2.3. Key Specifications Table
Feature
Specification
Model
RN-300C
Sensor
Alpha Spectrometry Sensor
Measurement Range
0 - 9999 Bq/m³ or 0 - 500 pCi/L
Battery
3 x AAA (Included, ~2 year life)
Accuracy
±10% after 7 days, ±5% after 2 months
3. Step-by-Step Operating Guide
3.1. Initial Setup & Placement
Install Batteries: Insert the 3 AAA batteries, ensuring to remove the plastic insulator spacer first.
Choose Location: Place the detector in the lowest regularly occupied area of your home (e.g., basement family room, ground-floor bedroom).
Keep it 20-50 inches (0.5-1.5m) above the floor.
Place it at least 3 feet (1m) from exterior doors/windows and away from drafts, heat, or humidity.
Do Not Move: Once placed, do not move the detector during the testing period for accurate results.
3.2. How to Change the Measurement Unit (Bq/m³ or pCi/L)
Follow these steps precisely:
Enter Setting Mode: Press and hold the MODE button for more than 1 second. The unit display (e.g., "pCi/L") will start to blink.
Select Unit: Briefly press the MODE button to toggle the blinking text between the two unit options: pCi/L and Bq/m³.
Confirm Selection: Once your desired unit is displayed, press and hold the MODE button again for more than 1 second to confirm and save the setting.
Exit: The display will stop blinking and return to the normal reading screen with the new unit applied.
3.3. Taking a Measurement
Start a Test: For a new measurement, press the RESET button to clear old data. The "Day" counter will restart at 1.
Wait for Accuracy: Allow the device to run for a minimum of 7 days for a reliable short-term reading. For the most accurate assessment of your home's annual average (Long Term Average), allow it to run for at least 3 months, preferably a full year.
View Data: Use short presses of the MODE button to cycle through viewing the main reading, Short Term Average (STA), and Long Term Average (LTA).
4. Interpreting Results & Taking Action
The following table uses the U.S. Environmental Protection Agency (EPA) guidelines. Recommendations may vary by country.
Radon Level
Risk Level & Color Code
Recommended Action
Below 2 pCi/L (< 74 Bq/m³)
Low (Likely Green)
Consider retesting every 2-5 years or after renovations.
2 to 4 pCi/L (74 - 148 Bq/m³)
Moderate (Likely Yellow)
The EPA recommends considering action to reduce levels.
4 pCi/L or above (≥ 148 Bq/m³)
High (Likely Red)
Take action. The EPA recommends installing a radon mitigation system. Contact a certified professional.
5. Troubleshooting & Support
Symptom
Possible Solution
Screen is blank/unresponsive.
1. Ensure the plastic battery spacer is removed. 2. Install fresh AAA batteries.
Readings are zero or seem incorrect.
1. Ensure the detector has been active for more than 24 hours. 2. Check placement (not in a draft). 3. Do not move it during a test.
An "Err" code appears.
1. Press the RESET button. 2. Remove and reinsert batteries. 3. If error persists, contact support.
Need to restart a measurement.
Press the RESET button. Warning: This deletes all data.
Warranty & Contact: This product comes with a limited warranty. For technical support or warranty claims, please visit the official LifeBasis website: https://lifebasis.com.