1. Overview
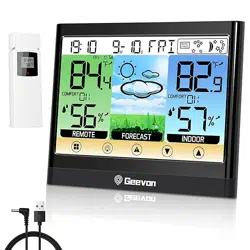
The Geevon Weather Station is a wireless indoor/outdoor monitoring device. It displays temperature, humidity, barometric pressure, and weather forecasts on a color screen. It also functions as an alarm clock with a calendar and includes a USB charging port.

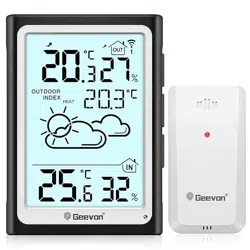
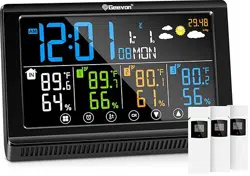
The system consists of a main display unit and one remote sensor. The main unit can connect to up to three sensors (one included).
2. What's in the Box
- Main Weather Station Display Unit
- Remote Sensor (Model TX16-3)
- AC Power Adapter
- User Manual
Note: Batteries are not included. The main unit requires 3 AAA batteries. The remote sensor is powered by its included batteries.
3. Features and Specifications
3.1 Display Information
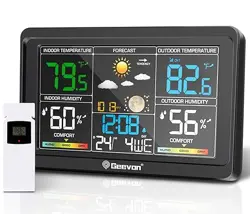
The 7.5-inch color VA display shows the following data:
- Indoor and outdoor temperature (°F/°C) and humidity (%)
- Temperature and humidity trend arrows
- Maximum and minimum recorded values
- Customizable high/low temperature and humidity alerts
- 12-24 hour weather forecast (icons: sunny, partly cloudy, cloudy, rainy)
- Comfort indicator
- Barometric pressure
- Moon phase
- Time and date (12/24 hour format)
- Alarm clock status with snooze function

3.2 Technical Specifications
- Power Source (Main Unit): AC Adapter (corded electric) OR 3 x AAA batteries (not included).
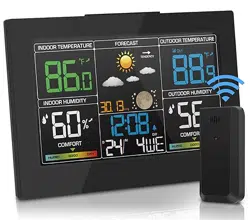
- Connectivity: Radio Frequency (RF).
- Transmission Range: Up to 200 ft / 60 m in open areas.
- Sensor Channels: Supports up to 3 remote sensors (1 included).
- Temperature Accuracy: +/-1°C / 1.8°F.
- Display Backlight: 3-level adjustable brightness.
- Additional Feature: USB charging port (5V/1A output).
- Dimensions (Main Unit): 7.8" W x 5" H x 1" D.
- Weight: 16 ounces.
- Sensor Protection: IPX44 water-resistant (do not submerge or place in direct rain).
4. Initial Setup and Installation
4.1 Powering the Main Unit
- Insert 3 AAA batteries into the battery compartment on the back of the main unit. Observe correct polarity (+/-).
- For permanent desk use and to enable the always-on backlight, connect the included AC power adapter to the DC port on the unit and plug it into a wall outlet.
- The display will activate. Initial time/date setup may be required.

4.2 Installing the Remote Sensor
- Install the required batteries into the remote sensor.
- Place the sensor in a desired outdoor location within 200 ft of the main unit. For best results:
- Place in a shaded, ventilated area.
- Avoid direct sunlight and sources of heat or moisture.
- Mount under an eave or in a sheltered spot. The sensor is water-resistant but should not be exposed to direct rainfall.
- The main unit should automatically search for and connect to the sensor. Allow a few minutes for the outdoor readings to appear.

4.3 Mounting the Main Unit
The main unit can be placed on a desk using the built-in stand or hung on a wall using the keyhole slot on the back.


5. Daily Use Guide
5.1 Understanding the Display
Familiarize yourself with the on-screen icons and data fields. Trend arrows next to temperature and humidity indicate if values are rising, falling, or steady.
5.2 Setting Time, Date, and Alarm
Use the buttons on the side or back of the unit (refer to manual diagrams) to enter the settings mode. Navigate to set:
- Time format (12/24 hour)
- Current time and date
- Alarm time
- Snooze duration (default is 5 minutes)
5.3 Adjusting Backlight Brightness
Press the 'LIGHT' or 'BRIGHTNESS' button to cycle through three brightness levels. Note: The backlight will stay on only when the AC adapter is connected. On battery power, it will turn off after 10 seconds to conserve energy.

5.4 Using the USB Charging Port
The USB port on the side of the unit can be used to charge smartphones, tablets, or other USB devices. It provides standard 5V/1A output. This function requires the AC adapter to be connected to the main unit.
5.5 Setting Temperature/Humidity Alerts
You can set custom high and low thresholds for indoor and outdoor temperature and humidity. Enter the settings menu, navigate to 'ALERT', and set your desired values. The unit will display a visual indicator when a threshold is exceeded.
5.6 Reading the Weather Forecast
The forecast icon is generated based on analysis of barometric pressure trends over time. The unit requires 7-10 days in a stable location to learn and calibrate for accurate personal forecasts.
6. Troubleshooting
- No outdoor sensor reading:
- Check that sensor batteries are installed correctly and are not depleted.
- Reduce distance between sensor and main unit, ensuring no major obstructions (walls, metal).
- Re-sync the sensor. Remove and reinsert the batteries in the main unit first, then in the sensor.
- Inaccurate forecast: The unit needs 7-10 days to calibrate after initial setup or after being moved to a new location.
- Backlight turns off on batteries: This is normal to save power. To keep the backlight on, connect the AC power adapter.
- Low Battery Indicator: A symbol will appear on the display when batteries in the main unit or sensor need replacement.
- Display is difficult to read: Adjust the brightness level using the 'LIGHT' button. Ensure the unit is not in direct sunlight.
7. Care and Maintenance
- Clean the display and casing with a soft, dry cloth. Do not use liquid or aerosol cleaners.
- Replace batteries promptly when the low battery indicator appears to prevent data loss.
- Protect the remote sensor from extreme weather and direct water exposure despite its water-resistant rating.
- Use the AC adapter for stationary, long-term use to preserve battery life.
8. Compliance and Warranty
Warranty: This product is covered by a 12-month limited warranty from the date of purchase.
Support: Geevon offers lifetime consulting service. For warranty claims or support, contact the seller through your Amazon purchase history or visit the Geevon Store on Amazon.
FCC Notice: This device complies with Part 15 of the FCC Rules. Operation is subject to the condition that it does not cause harmful interference.