1. Overview
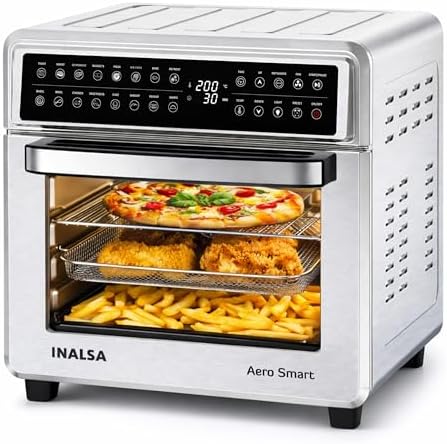
The INALSA Aero Smart23 is a 23-litre capacity air fryer oven with a 1700W heating element. It combines the functions of an air fryer, convection oven, rotisserie, and toaster into a single appliance. It features a digital touch control panel with 16 preset cooking programs.

2. Safety Information
WARNING
- This appliance is for household use only. Do not use outdoors.
- Place the oven on a stable, flat, heat-resistant surface. Ensure at least 10cm of clearance on all sides for ventilation.
- Do not place the oven near flammable materials, curtains, or under cabinets.
- The exterior surfaces, door, and viewing window become hot during use. Use the provided handle and allow the appliance to cool before cleaning or handling accessories.
- Do not cover the air vents on the top or rear of the unit.
- Use only the accessories provided with the appliance.
- Do not immerse the main unit, power cord, or plug in water or any other liquid.
- Unplug the appliance when not in use and before cleaning.
3. Product Specifications
| Specification | Detail |
|---|---|
| Model Name | Aero Smart Air Fryer Oven |
| Capacity | 23 Litres |
| Power Rating | 1700 Watts |
| Voltage | 230 Volts |
| Temperature Range | Up to 220°C / 230°C (Max) |
| Control Method | Digital Touch Control |
| Preset Programs | 16 |
| Exterior Material | Stainless Steel & Glass |
| Product Dimensions (D x W x H) | 37 x 40.7 x 40 cm |
| Net Weight | 9 kg |
4. Parts and Accessories
Before first use, verify all parts are present.
- 1 x Main Unit – The air fryer oven body with door and control panel.
- 1 x Crumb Tray – Slides into the bottom to collect food debris and drippings.
- 1 x Enamelled Baking Tray – For baking, roasting, and catching drips.
- 1 x Grill Tray – Perforated tray for air frying and grilling.
- 1 x Baking Tray/Grill Tray Handle – Tool for safely inserting and removing hot trays.
- 1 x Rotisserie Fork Set – For securing food on the rotisserie spit.
- 1 x Rotisserie Handle – For attaching and turning the rotisserie spit.
- 4 x Stainless Steel Skewer Rods – For kebabs and skewered foods.
- 1 x Crisper Basket – For air frying smaller items like fries or nuggets.
- 1 x Recipe Book
- 1 x Instruction Manual & Warranty Card
5. Control Panel and Display
The digital touch control panel is located on the front of the unit. The LED display shows settings and timers.
5.1. Primary Controls
- Power Button: Turns the appliance on and off.
- Function/Program Selector: Cycles through the 16 preset cooking programs (e.g., Air Fry, Bake, Grill, Roast, Pizza, Rotisserie, Reheat).
- Temperature Control (+/-): Adjusts the cooking temperature. Range is up to 220°C.
- Timer Control (+/-): Sets the cooking duration, up to 120 minutes.
- Start/Pause Button: Begins the selected cooking cycle or pauses it.
- Light Button: Turns the interior oven light on/off.
5.2. Preset Programs
The 16 preset programs are optimized for specific foods and cooking methods. When a program is selected, the oven automatically suggests a default time and temperature, which can be manually adjusted.
6. First-Time Use and Preheating
- Remove all packaging materials and stickers.
- Wash all removable accessories (trays, basket, skewers) with warm, soapy water. Dry thoroughly.
- Wipe the interior and exterior of the main unit with a damp cloth. Do not use abrasive cleaners.
- Place the oven on a suitable surface and plug it into a grounded power outlet.
- To remove any manufacturing residues, run the oven empty at 200°C for 10 minutes. Some smoke or odour is normal during this first use.
- Allow the oven to cool, then wipe the interior again with a damp cloth.
NOTE: Preheating
For best results with most cooking functions (especially baking and roasting), preheat the oven for 3-5 minutes before adding food. You can do this by setting your desired temperature and time, then starting the cycle. Add food once the preheat time is complete or the target temperature is reached.
7. Cooking Guide
7.1. General Instructions
- Place the crumb tray at the bottom of the oven cavity.
- Select the appropriate tray or accessory for your food (Baking Tray, Grill Tray, or Crisper Basket).
- Place food on the tray/basket in a single layer for even cooking. Do not overfill.
- Insert the tray into the desired rack position. The oven has multiple levels for multi-layer cooking.
- Close the glass door securely.
- Press the Power button.
- Select your desired Function/Program.
- Adjust the Temperature and Time if needed.
- Press Start to begin cooking.
- You can open the door during cooking to check food. The timer will pause automatically and resume when the door is closed.
- When cooking is complete, the oven will beep. Unplug the appliance and use oven mitts to remove food.
7.2. Using Specific Functions
Air Frying
Use the Grill Tray or Crisper Basket. For crispier results, shake or turn food halfway through the cooking time.
Baking & Roasting
Use the Enamelled Baking Tray. Preheat for better results.
Rotisserie
- Thread food (e.g., whole chicken) onto the rotisserie spit.
- Secure the food with the rotisserie forks at both ends.
- Insert the ends of the spit into the rotation slots on the side walls of the oven.
- Attach the rotisserie handle to the spit end outside the door.
- Select the 'Rotisserie' program and set time/temperature.
- Place the crumb tray at the bottom to catch drippings.
Using Skewers
Place the stainless steel skewers across the grooves on the side walls or on the grill tray. Ensure food is evenly spaced.
8. Cleaning and Maintenance
WARNING: Allow the appliance to cool completely before cleaning.
- Accessories (Trays, Basket, Skewers): Wash in warm, soapy water. Most are not dishwasher safe. Dry thoroughly.
- Interior Cavity & Door Glass: Wipe with a soft, damp cloth. For stubborn stains, use a mild, non-abrasive cleaner. Do not use steel wool or harsh scouring pads.
- Exterior: Wipe with a damp cloth and dry.
- Crumb Tray: Empty and clean after each use to prevent smoke or odour from accumulated debris.
- Control Panel: Wipe gently with a slightly damp cloth. Do not allow water to seep into the controls.
- Power Cord: Unplug and wipe clean. Check regularly for damage.
Never immerse the main unit, cord, or plug in water.
9. Troubleshooting
| Problem | Possible Cause | Solution |
|---|---|---|
| Oven does not turn on. | Not plugged in. Power outlet issue. | Check plug and power outlet. Ensure the door is fully closed. |
| Food is not cooking evenly. | Overloaded tray. Incorrect rack position. | Cook in smaller batches. Rearrange food midway. Use the recommended rack level. |
| Smoke is coming from the oven. | Excess oil or food debris in crumb tray. Greasy food. | Clean the crumb tray. Trim excess fat from meat. Ensure the oven is clean. |
| Display shows an error code. | Overheating. Malfunction. | Unplug the oven and let it cool for 60 minutes. Plug back in. If error persists, contact support. |
| Rotisserie is not turning. | Spit not properly seated. Motor issue. | Ensure spit ends are correctly placed in the rotation slots. Contact support if motor is faulty. |
10. Warranty and Support
This INALSA Aero Smart23 Air Fryer Oven is covered by a 2-year warranty from the date of purchase against manufacturing defects.
Manufacturer / Importer / Packer Contact Information:
Tuareg Marketing Pvt. Ltd.
Khasra No- 1189, Bhalswa, New Delhi-110033, IND.
Contact: 9773982065
NOTE
The warranty does not cover damage resulting from accident, misuse, commercial use, improper cleaning, or failure to follow instructions. Retain your proof of purchase (invoice) for warranty service.