1. Overview
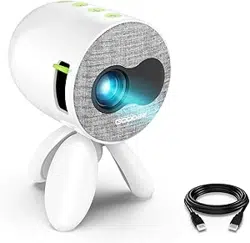
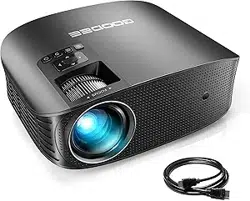
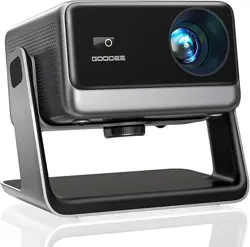
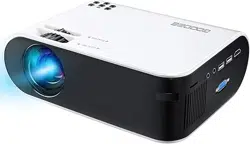
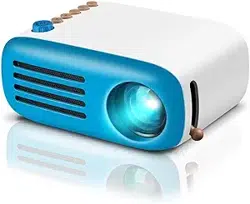
The GooDee GD500 is a portable smart video projector designed for home theater, office, and outdoor use. It features native 1080p resolution, WiFi and Bluetooth connectivity, and built-in speakers.

Key attributes of the projector include:
- Model: GD500
- Display Technology: LCD
- Form Factor: Portable
- Color: Snowy White
2. What's in the Box
- GD500 Projector unit
- Remote control
- Power cord
- HDMI cable
- AV cable
- Portable carrying bag
- Projector lens cover
- Cleaning kit
- User manual (this document)
Verify all items are present before proceeding. If any item is missing or damaged, contact the seller.
3. Product Features & Specifications
3.1. Display & Image
- Native Resolution: 1920 x 1080 (Full HD)
- Maximum Supported Resolution: 4K
- Brightness: 600 ANSI Lumens
- Contrast Ratio: 5000:1
- Projection Size: 44 inches to 200 inches diagonal
- Throw Distance: 5 feet to 15 feet
- Video Decoding: Supports H.264, H.265, and AV1 formats
- AI Image Optimization: Uses deep learning algorithms to enhance color, contrast, and sharpness in real-time.
3.2. Connectivity
- WiFi: WiFi 6 for stable wireless transmission.
- Bluetooth: Version 5.2 for connecting to speakers, headphones, and other audio devices.
- HDMI Port: For connecting devices like laptops, gaming consoles, and TV sticks.
- USB Ports: For playing media files directly or connecting peripherals like a mouse.
- AV Input: For legacy video devices.
- 3.5mm Audio Jack: For wired audio output.

3.3. Audio
- Built-in Speakers: Dolby Audio for immersive sound.
- Audio can be output via Bluetooth to external speakers or via the 3.5mm audio jack.
3.4. Adjustments & Corrections
- Focus: Electronic focus, adjustable via remote control.
- Keystone Correction: Automatic vertical and horizontal correction to maintain a rectangular image even when the projector is placed at an angle.
- Digital Zoom: 50% to 100%.
3.5. Physical Specifications
- Dimensions: 8" L x 5" W x 10" H
- Weight: 2.76 lbs (1.25 kg)
- Power Consumption: 60 Watts
- Operating Voltage: 240 Volts
- Light Source Life: Approximately 50,000 hours.
- Noise Level: Low noise operation, approximately 35dB.
4. Use Guide
4.1. Initial Setup and Placement
- Place the projector on a stable, flat surface or mount it using the 1/4-20 screw holes on the bottom. For ceiling or wall mounting, remove the four anti-slip pads first.
- Ensure there is adequate ventilation around the projector. Do not block the cooling vents.
- Connect the power cord to the projector and to a wall outlet.
- Power on the projector using the power button on the unit or the remote control.
- Point the projector towards your screen or a flat, white wall.

4.2. Connecting Video Sources
Choose one of the following methods to connect your content source:
- HDMI: Use the included HDMI cable to connect a laptop, gaming console (e.g., PlayStation, Xbox), or a Smart TV Stick (e.g., Amazon Fire Stick).
- USB: Insert a USB drive with video files (MKV, MP4, etc.) or office documents (PPT, Word, Excel) into the USB port. A mouse can also be connected for navigation.
- Wireless Screen Mirroring (Casting):
- For iOS (iPhone/iPad): On the projector, set up WiFi and select "iOS Cast". On your iOS device, open Control Center, tap "Screen Mirroring", and select the "GD500-xxxx" device.
- For Android: On the projector, set up WiFi and tap "Miracast". On your Android device, enable "Cast" or "Screen Mirroring" in settings (requires device support), search for the "GD500-xxxx" device, and select it.
- Streaming Apps: The projector works with Smart TV Sticks to access streaming services like YouTube, Prime Video, Tubi, and Pluto TV.
4.3. Connecting Audio
- The built-in Dolby Audio speakers will play sound automatically from the current video source.
- To use external audio:
- Bluetooth: Enable Bluetooth on the external speaker/headphones. On the projector, enter the Bluetooth settings menu to search for and pair with your device.
- Wired: Connect an audio cable from the projector's 3.5mm audio output jack to the input on your external sound system.
4.4. Image Adjustment
- Focus: Use the focus buttons on the remote control to make the image sharp and clear.
- Keystone Correction: The projector will automatically correct trapezoidal distortion. For manual adjustment, use the keystone correction option in the on-screen menu.
- Zoom: Adjust the image size digitally from 50% to 100% using the zoom function in the menu.
- Navigate the on-screen menu using the directional and OK buttons on the remote control to adjust settings like brightness, contrast, and color mode.
4.5. Using the Remote Control
The included remote control operates the projector's main functions:
- Power On/Off
- Menu Navigation (Directional arrows and OK)
- Volume Control
- Focus Adjustment
- Source/Input Selection
Point the remote directly at the projector's front infrared (IR) receiver. Ensure there are no obstructions.
4.6. Cooling and Maintenance
Important: The projector uses a cooling system with a fan and heat fins. Always allow the fan to stop running completely before disconnecting power or placing the projector in its bag.
- Keep the air vents clean and unobstructed.
- Use the provided cleaning kit to gently wipe the lens. Do not use abrasive materials or liquids.
- Store the projector in a cool, dry place when not in use.
5. Troubleshooting
| Problem | Possible Cause | Solution |
|---|---|---|
| No power / No image | Power cord not connected properly. Power outlet issue. | Check all power connections. Try a different outlet. |
| Blurry image | Projector is out of focus. Lens is dirty. | Use the remote control focus buttons. Clean the lens with the provided kit. |
| Image is trapezoidal | Projector is not aligned perpendicular to the screen. | Reposition the projector. Ensure Auto Keystone is enabled in the menu. |
| No sound from built-in speakers | Volume is muted. Audio output is set to external. | Press volume up on the remote. Check audio output settings in the menu. |
| WiFi or Bluetooth not connecting | Device is out of range. Incorrect settings. | Move devices closer. Re-enter WiFi password. Re-pair Bluetooth devices. |
| Projector overheats or fan is loud | Vents are blocked. Room temperature is too high. | Ensure vents are clear. Use in a cooler environment. Turn off and let it cool if necessary. |
6. Warranty and Support
This GooDee GD500 projector is covered by a 12-month limited warranty from the date of purchase.
Warranty Service: For warranty claims or product support, contact the seller or GooDee directly through your Amazon purchase history or the seller's store page.
Before requesting service, please attempt the troubleshooting steps listed in Section 5 of this manual.