Loading ...
Loading ...
Loading ...
English - 5 -
Auto discard: You can set the Discard type as
, Oldest, or Shortest. If it is not
set to , you can set the Unplayed option as
Included or Excluded. These options determine
the preferences for deleting the recordings in order
to obtain more storage space for ongoing records.
Hard disk information: You can view detailed
information about the USB storage device connected
to your TV. Highlight and press OK to see and press
to close.
If you want to delete all files on the
connected USB storage device and convert the disk
format to FAT32, you can use this option. Press OK
button while the option is highlighted.
A menu will appear on the screen, requiring you
to enter the PIN(*). After you enter the PIN, a
confirmation message will be displayed. Select Yes
and press OK to start formatting the USB storage
device. Select and press OK to cancel.
(*) Default PIN could have been set to 0000 or 1234. If you
have defined the PIN(is requested depending on the country
selection) during the First Time Installation use the PIN
that you have defined.
Settings
You can manage the settings of your TV using the op
-
tions of this menu. Refer to Settings Menu Contents
section for more information.
Apps
When your TV is connected to the Internet related
contents will also be available, including Apps related
contents. Using the Apps menu you can access and
manage your applications. You can add new apps from
the market or delete the existing ones. Refer to Apps
section for more information.
Source
You can manage your input source references using
the options of this menu. To change the current source
highlight one of the options and press OK.
Source Settings
Regular, Enhanced and
Regular
and Enhanced
of the selected HDMI source. To be able to watch 4K or
Enhanced
Regular
.
Inserting the Batteries into the Remote
Remove the back cover to reveal the battery
compartment. Insert two size AAA batteries. Make
sure the (+) and (-) signs match (observe correct
polarity). Do not mix old and new batteries. Replace
only with same or equivalent type. Place the cover back
on. A message will be displayed on the screen when
the batteries are low and must be replaced.
Note that when the batteries are low, the performance
of the remote control may be impaired.
Power Connection
: The TV set is designed to operate on a
supply. After unpacking, allow the
TV set to reach the ambient room temperature before
you connect the set to the mains. Plug the power cable
to the mains socket outlet.
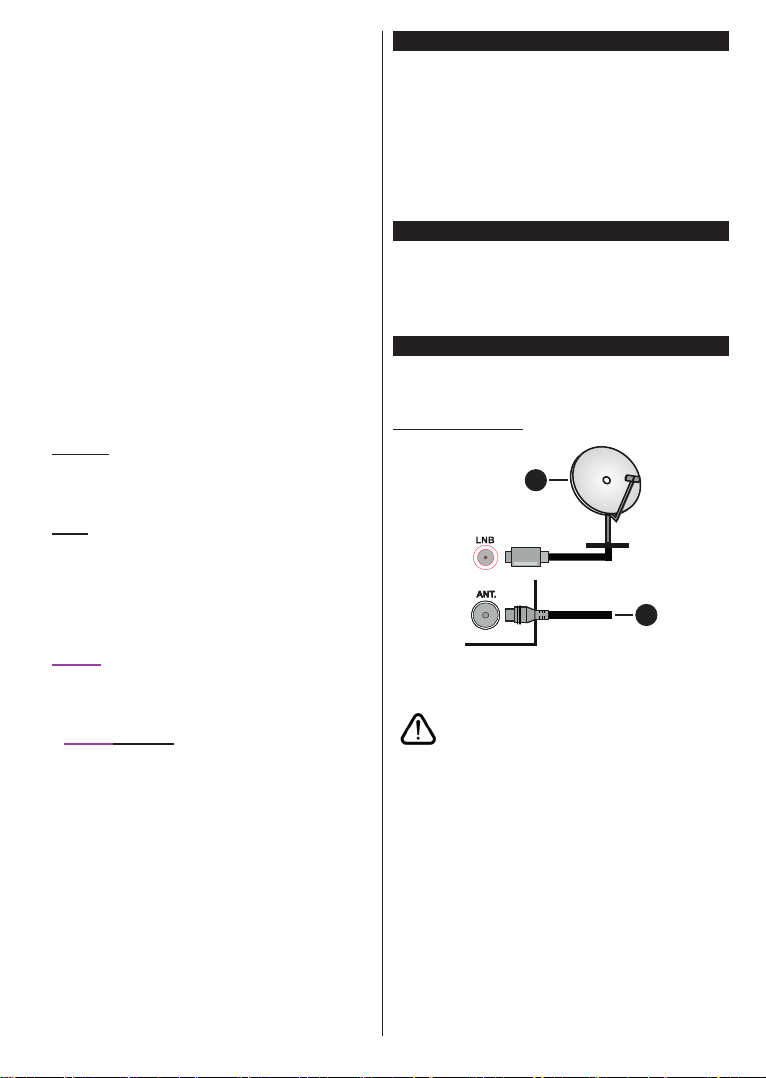
Antenna Connection
Connect the aerial or cable TV plug to the AERIAL
INPUT (ANT) socket or satellite plug to the SATELLITE
INPUT (LNB) socket located on the rear side of the TV.
1
2
Satellite
Aerial or cable
If you want to connect a device to the TV, make sure
that both the TV and the device are turned off before
making any connection. After the connection is done,
you can turn on the units and use them.
Loading ...
Loading ...
Loading ...