Loading ...
Loading ...
Loading ...
6
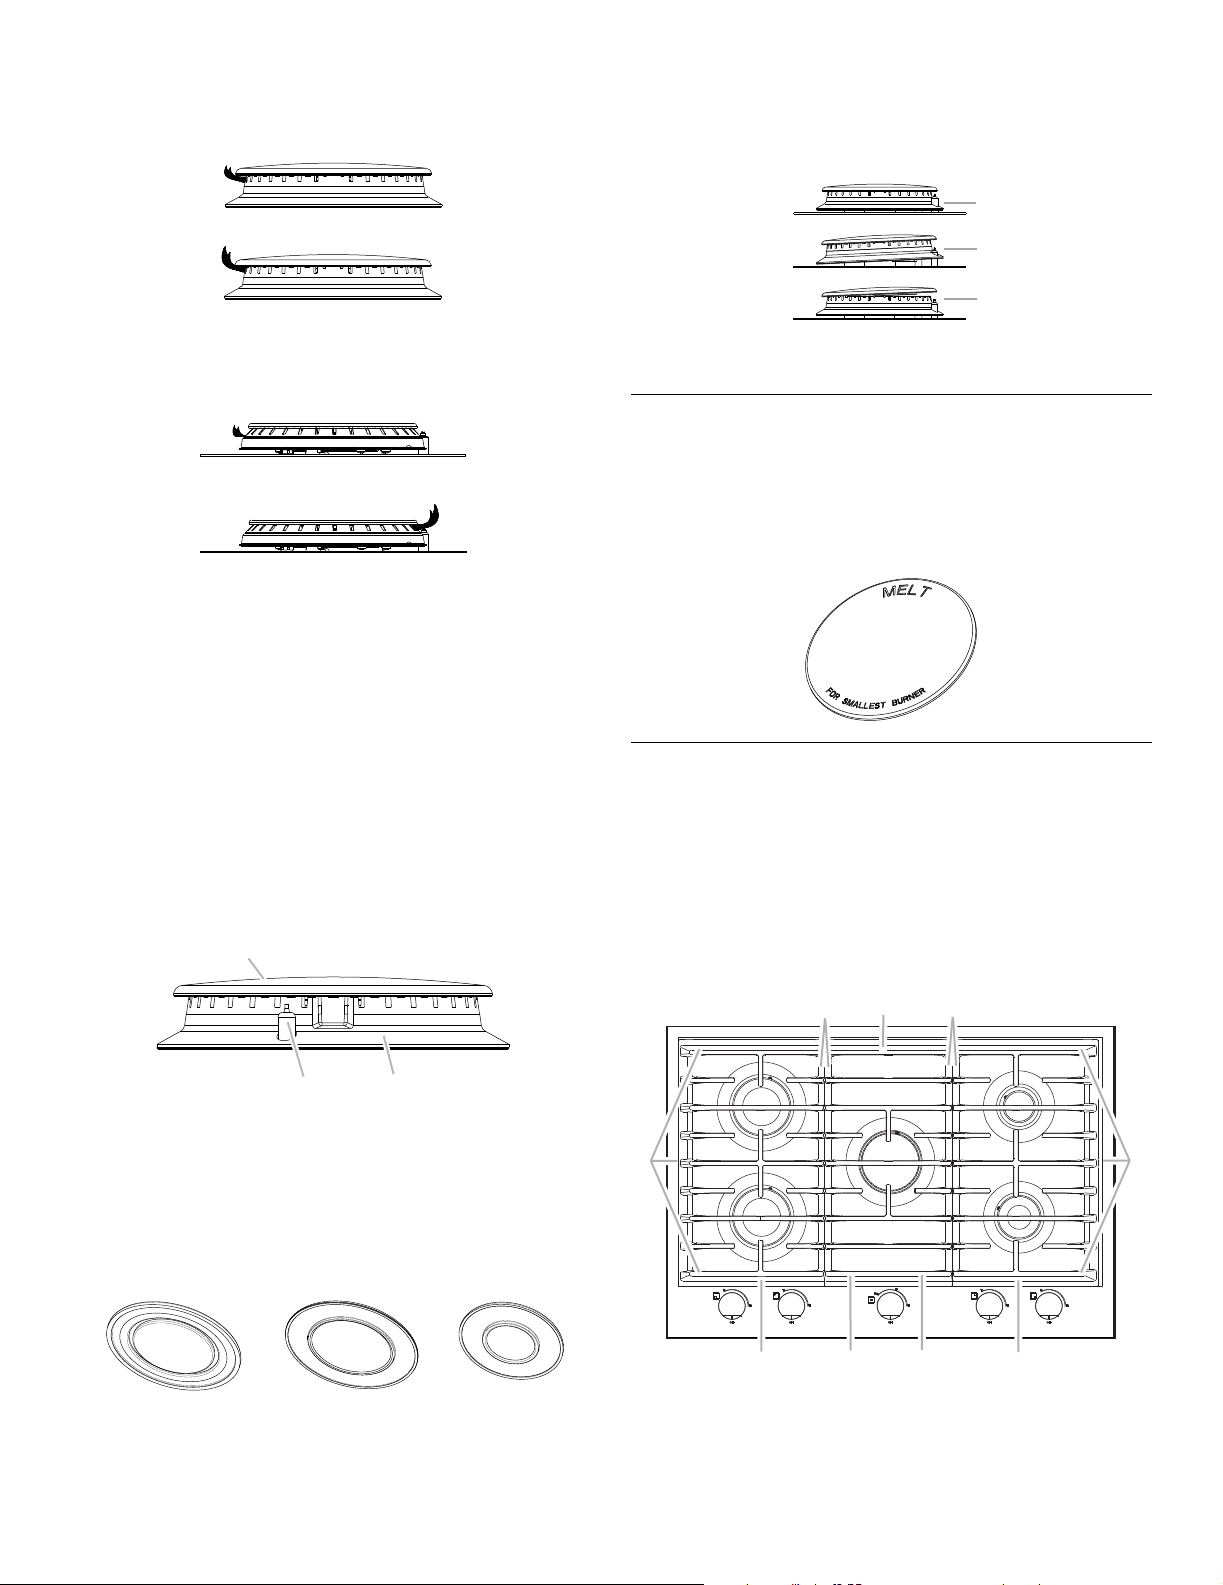
Burner ports: Check burner flames occasionally for proper size
and shape. A good flame is blue in color, not yellow. Keep this
area free of soil and do not allow spills, food, cleaning agents or
any other material to enter the burner ports.
To Clean:
IMPORTANT: Before cleaning, make sure all controls are off and
cooktop is cool. Do not use oven cleaners, bleach or rust
removers.
1. Remove the burner cap from the burner base and clean
according to “General Cleaning” section.
2. Clean the gas tube opening with a damp cloth.
3. Replace burner bases and burner caps.
IMPORTANT:
■ Be sure that the igniter electrode aligns with the slot or
notch in the burner base. The igniter electrode is ceramic
and could break during installation of the burner base.
■ Be sure that the cap is properly positioned on the burner
and that you have placed the cap on the correct burner.
The ring on the bottom of the cap will align with the tabs
on the burner. Do not interchange caps.
4. Turn on the burner. If the burner does not light, check burner
cap and base alignment. See “Burner installation” in the
“Sealed Surface Burners” section. If the burner still does not
light, do not service the burner yourself. Contact a trained
repair specialist.
Melt Cap
For melting chocolate or butter or an even more delicate simmer,
the melt cap can be used in place of the standard burner cap.
The melt cap should only be used on the small burner (right rear).
Remove the small burner cap and replace it with the larger melt
cap for delicate simmering. For less delicate simmering, use the
small cap.
Surface Grates
The surface grates are positioned correctly when the thick ribs
form a frame around the outer edge and the thin ribs are located
across the middle. All burners will be centered with the burner
openings in the grates. See the following illustration.
NOTE: The end grates are different than the center grate. Do not
use the end grate in the center grate position. End grates have a
tab that prevents interchanging the center and end grates. Install
the end grate first with the tab facing the center burner. Then
install the center grate.
Standard burner
A. Low flame
B. High flame
Dual flame burner
A. Simmer flame
B. High flame
A. Burner cap
B. Igniter electrode
C. Burner base
Dual flame burner cap Standard burner cap Small burner cap
A
B
A
B
A
B
C
A. Correct
B. Incorrect
A. Thick ribs
B. Thin ribs
C. End grates
D. Center grate
A
B
B
A
A
B
A
C
C
A
D
B
Loading ...
Loading ...
Loading ...