
2
ENG
ENGLISH
TABLE OF CONTENTS
CONTENTS
4 ASSEMBLING AND PREPARING
4 Unpacking
5 Partsandbuttons
6 LiftingandmovingtheMonitorset
6 SettinguptheMonitorset
6 - AttachingtheStandBase
6 - DetachingtheStandBaseandBody
7 - Mountingonatable
8 - Mountingonawall
9 - Tidyingcables
10 REMOTE CONTROL
12 USING THE MONITOR SET
12 ConnectingtoaPC
12 - HDMIconnection
13 - DVItoHDMIconnection
13 - RGBconnection
14 Adjustingthescreen
14 - Selectinganimagemode
14 - Customizingimageoptions
15 - CustomizingPCdisplayoptions
15 Adjustingthesound
15 - Selectingansoundmode
15 - Customizingsoundoptions
16 WATCHING TV
16 Connectinganantennaorcable
16 - Connectinganantennaorbasiccable
16 - Connectingwithacablebox
17 AccessingtheTVforthefirsttime
18 WatchingTV
18 Managingprogrammes
18 - Automaticallysettingupprogrammes
21 - Manuallysettingupprogrammes(In
digitalmode)
22 - Manuallysettingupprogrammes(In
analoguemode)
23 - CableDTVSetting(InCablemode
only)
23 - Editingyourprogrammelist
24 - InDTV/RADIOmode
24 - InTVmode
25 - SoftwareUpdate
26 - Diagnostics
26 - CI[Commoninterface]Information
27 - Selectingtheprogrammelist
27 - Favouriteprogrammesetup
28 Usingadditionaloptions
28 - Adjustingaspectratio
30 - Usingtheinputlist
30 - On-screenmenulanguage/Country
selection
31 - Languageselection(Indigitalmode
only)
32 UsingtheLockoptions
32 - LockingthebuttonsontheMonitorset.
33 - Parentalcontrol
(Indigitalmodeonly)
33 Usingthequickmenu
34 EPG (ELECTRONIC
PROGRAMME GUIDE)
(IN DIGITAL MODE)
34 UsingElectronicProgrammeGuide
34 - Switchon/offEPG
34 - Selectaprogramme
34 - ButtonFunctioninNOW/NEXTGuide
Mode
35 - ButtonFunctionin8DayGuideMode
35 - ButtonFunctioninDateChangeMode
35 - ButtonFunctioninExtendedDescrip-
tionBox
35 - ButtonFunctioninRecord/RemindSet-
tingMode
35 - ButtonFunctioninScheduleListMode

3
ENG
ENGLISH
TABLE OF CONTENTS
36 ENTERTAINMENT
36 Usingintegratedmediafeatures
36 - ConnectingUSBstoragedevices
37 - Browsingfiles
38 - ViewingPhotos
40 - ListeningtoMusic
42 - ViewingMovies
45 - DivXregistrationcode
45 - DeactivatingtheDivXfeature
46 CUSTOMIZING SETTINGS
46 Accessingmainmenus
47 Customizingsettings
47 - SETUPsettings
48 - PICTUREsettings
52 - AUDIOsettings
55 - TIMEsettings
56 - OPTIONsettings
57 - LOCKsettings
58 - INPUTsettings
58 - USBsettings
59 MAKING CONNECTIONS
59 Connectionoverview
61 ConnectingtoaHDreceiver,DVDor
VCRplayer
61 - HDMIconnection
61 - DVItoHDMIconnection
61 - Componentconnection
62 - EuroScartconnection
62 Connectingtoanaudiosystem
62 - Digitalopticalaudioconnection
63 - Headphoneconnection
63 ConnectingtoaUSB
64 TELETEXT
64 SwitchOn/Off
64 SimpleText
64 - Pageselection
64 TopText
64 - Block/Group/PageSelection
64 - DirectPageSelection
65 Fastext
65 - Pageselection
65 SpecialTeletextFunction
65 - TextOption
66 DIGITAL TELETEXT
66 Teletextwithindigitalservice
66 Teletextindigitalservice
67 MAINTENANCE
67 Screenandframe
67 Cabinetandstand
67 Powercord
68 TROUBLESHOOTING
68 General
69 PCmode
71 SPECIFICATIONS
78 IR CODES
79 EXTERNAL CONTROL DEVICE
SETUP
79 RS-232CSetup
79 Typeofconnector;D-Sub9-PinMale
80 RS-232Cconfigurations
81 CommunicationParameters
81 Commandreferencelist
82 Transmission/Receivingprotocol
4
ENG
ENGLISH
ASSEMBLING AND PREPARING
ASSEMBLING AND PREPARING
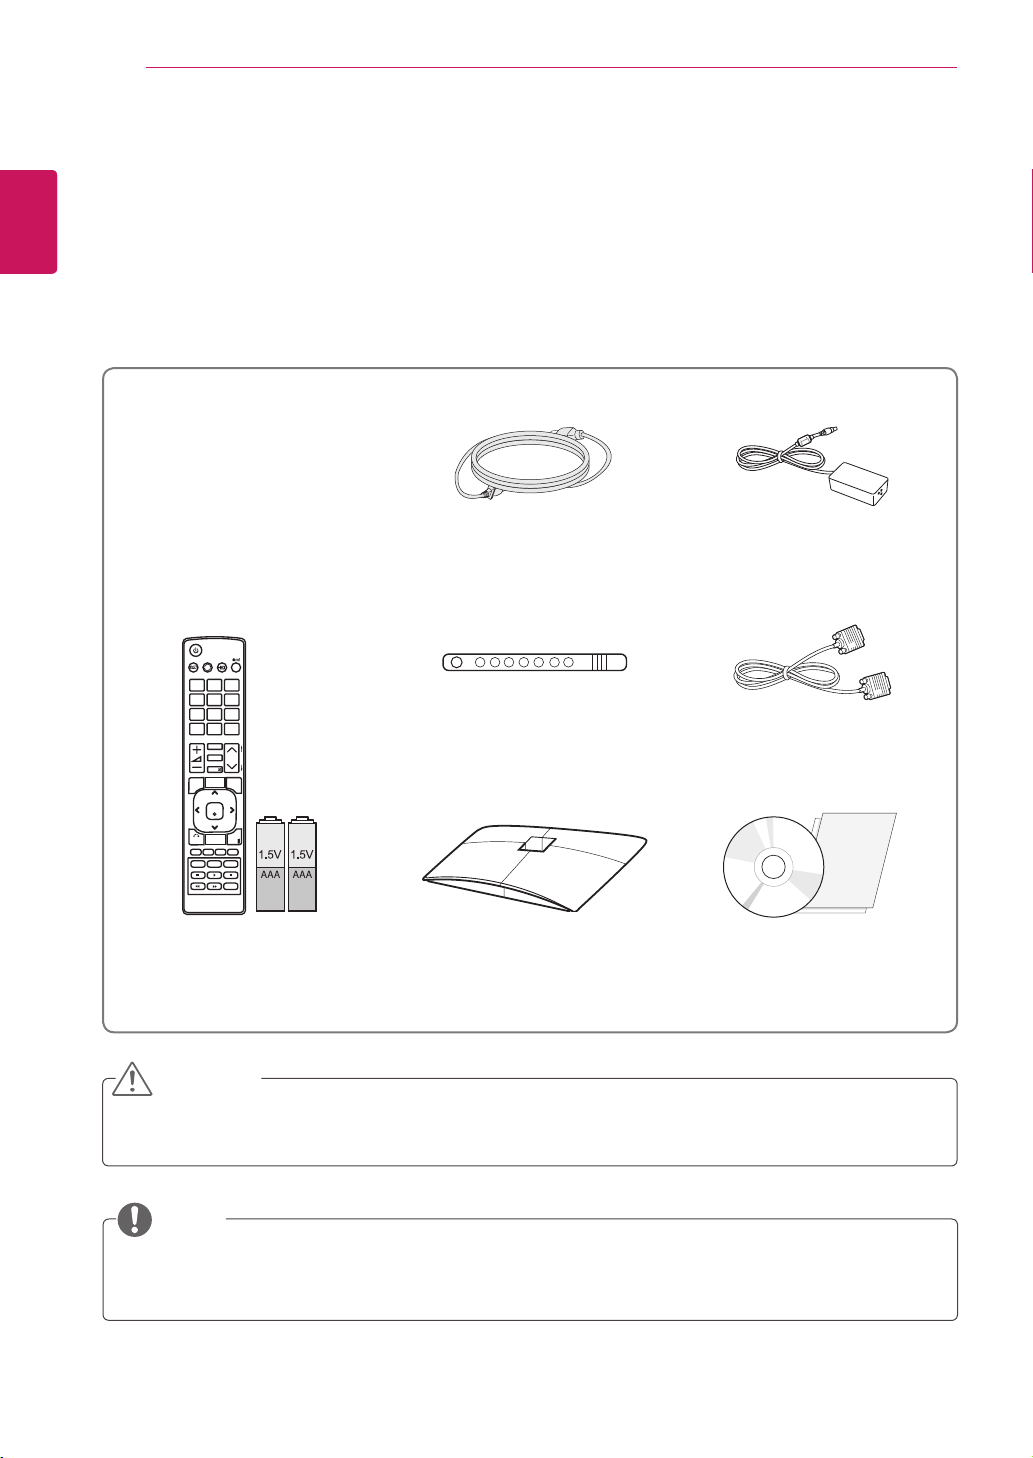
Unpacking
Checkyourproductboxforthefollowingitems.Ifthereareanymissingaccessories,contactthelocal
dealerwhereyoupurchasedyourproduct.Theillustrationsinthismanualmaydifferfromtheactualproduct
andaccessories.
Donotuseanypirateditemstoensurethesafetyandproductlifespan.
Anydamagesorinjuriesbyusingpirateditemsarenotcoveredbythewarranty.
Theaccessoriessuppliedwithyourproductmayvarydependingonthemodel.
Productspecificationsorcontentsinthismanualmaybechangedwithoutpriornoticeduetoupgrade
ofproductfunctions.
CAUTION
NOTE
Remote control and Batteries
Stand Base
Power Cord
Cable Tie
CD (Owner's Manual) /
Card
AC-DC Adapter
RGB Cable
5
ENG
ENGLISH
ASSEMBLING AND PREPARING
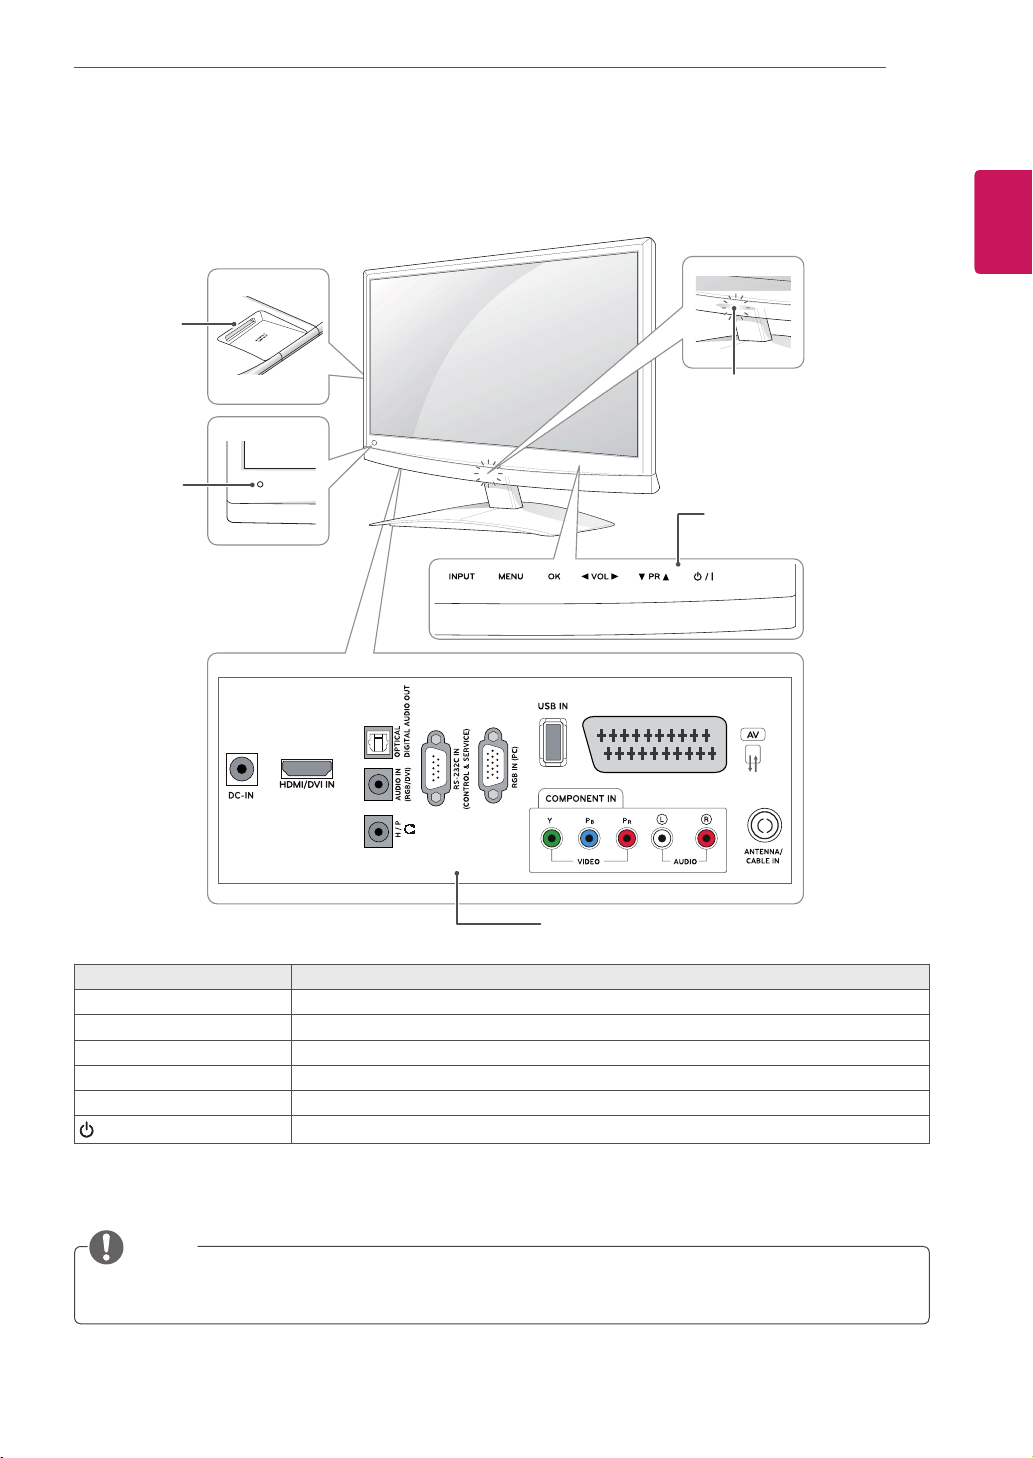
YoucansetthePowerindicatortoonoroffbyselectingOPTIONinthemainmenus.
NOTE
Parts and buttons
Touch button Description
INPUT Changestheinputsource.
MENU Accessesthemainmenus,orsavesyourinputandexitsthemenus.
OK Selectsthehighlightedmenuoptionorconfirmsaninput.
t
VOL
t
Adjuststhevolumelevel.
t
PR
s
Scrollsthroughthesavedprogrammes.
/I
Turnsthepoweronoroff.
Allofthebuttonsaretouchsensitiveandcanbeoperatedthroughsimpletouchwithyourfinger.
Remote
Control
Sensor
PCMCIA
Card Slot
Power Indicator
Lighting On: Turned on
Lighting Off: Turned off
Connection panel (See p.59)
Touch Buttons

6
ENG
ENGLISH
ASSEMBLING AND PREPARING
Lifting and moving the
Monitor set
WhenmovingorliftingtheMonitorset,readthe
followingtopreventtheMonitorsetfrombeing
scratchedordamagedandforsavetransportation
regardlessofitstypeandsize.
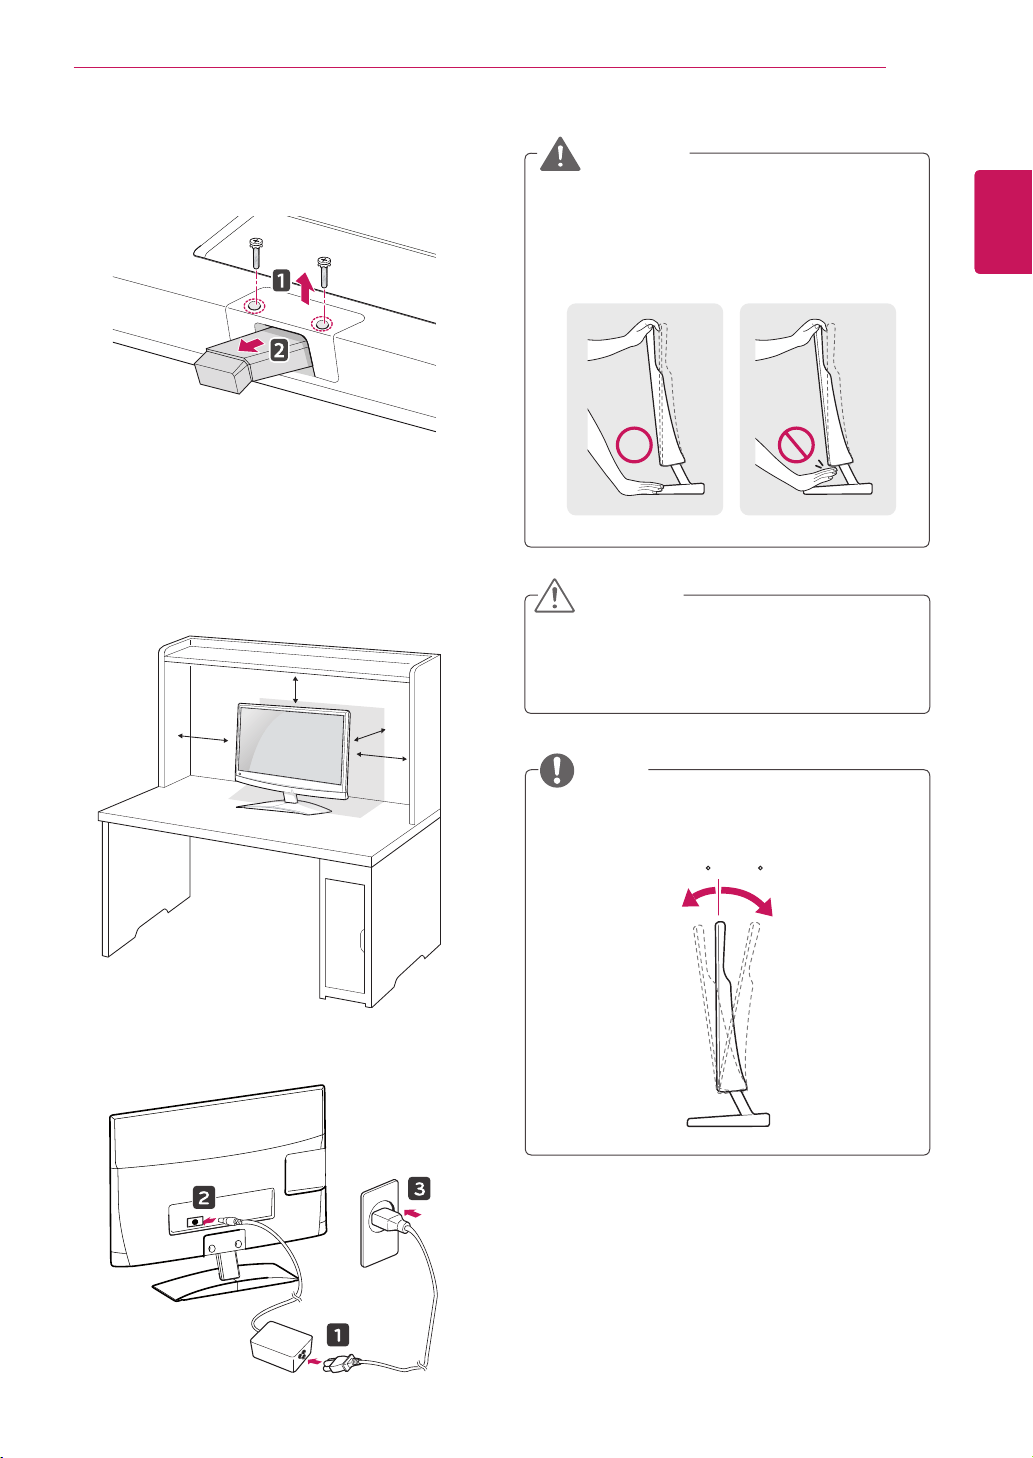
Setting up the Monitor set
Attaching the Stand Base
1
PlacetheMonitorsetwiththescreenside
downonaflatandcushionedsurface.
Avoidtouchingthescreenatalltimes,asthis
mayresultindamagetothescreenorsome
ofthepixelsusedtocreateimages.
Layafoammatorsoftprotectivecloth
onthesurfacetoprotectthescreenfrom
damage.
CAUTION
CAUTION
ItisrecommendedtomovetheMonitorsetin
theboxorpackingmaterialthattheMonitor
setoriginallycamein.
BeforemovingorliftingtheMonitorset,
disconnectthepowercordandallcables.
HoldthetopandbottomoftheMonitor
setframefirmly.Makesurenottoholdthe
transparentpart,speaker,orspeakergrill
area.
WhenholdingtheMonitorset,thescreen
shouldfaceawayfromyoutopreventthe
screenfromscratches.
WhentransportingtheMonitorset,donot
exposetheMonitorsettojoltsorexcessive
vibration.
WhentransportingtheMonitorset,keepthe
Monitorsetupright,neverturntheMonitor
setonitsside,ortilttowardstheleftorright.
Detaching the Stand Base and Body
1
PlacetheMonitorsetwiththescreenside
downonaflatandcushionedsurface.
2
Turnthescrewtotheleft,andthenpulloutthe
Stand BasefromtheStand Body.
2
AttachtheStand Basefromthesetbyturning
thescrewtotherightwithaCoin.
7
ENG
ENGLISH
ASSEMBLING AND PREPARING
Whenyouadjusttheangle,donotholdthe
buttomoftheMonitorsetframeasshownon
thefollowingillustration,asmayinjureyour
fingers.
WARNING
Mounting on a table
1
LiftandtilttheMonitorsetintoitsupright
positiononatable.
Leavea10cm(minimum)spacefromthewall
forproperventilation.
3
Remove2screwsandpullouttheStand Body
fromtheMonitorset.
2
ConnecttheAC-DC AdapterandPower Cord
toawalloutlet.
Disconnectthepowercordfirst,andthenmove
orinstalltheMonitorset.Otherwiseelectric
shockmayoccur.
Tiltfrom+10to-5degreesupordowntoadjust
theangleoftheMonitorsettosuityourview.
CAUTION
NOTE
Front Rear
10 cm
10 cm
10 cm
10 cm
10- 5
8
ENG
ENGLISH
ASSEMBLING AND PREPARING
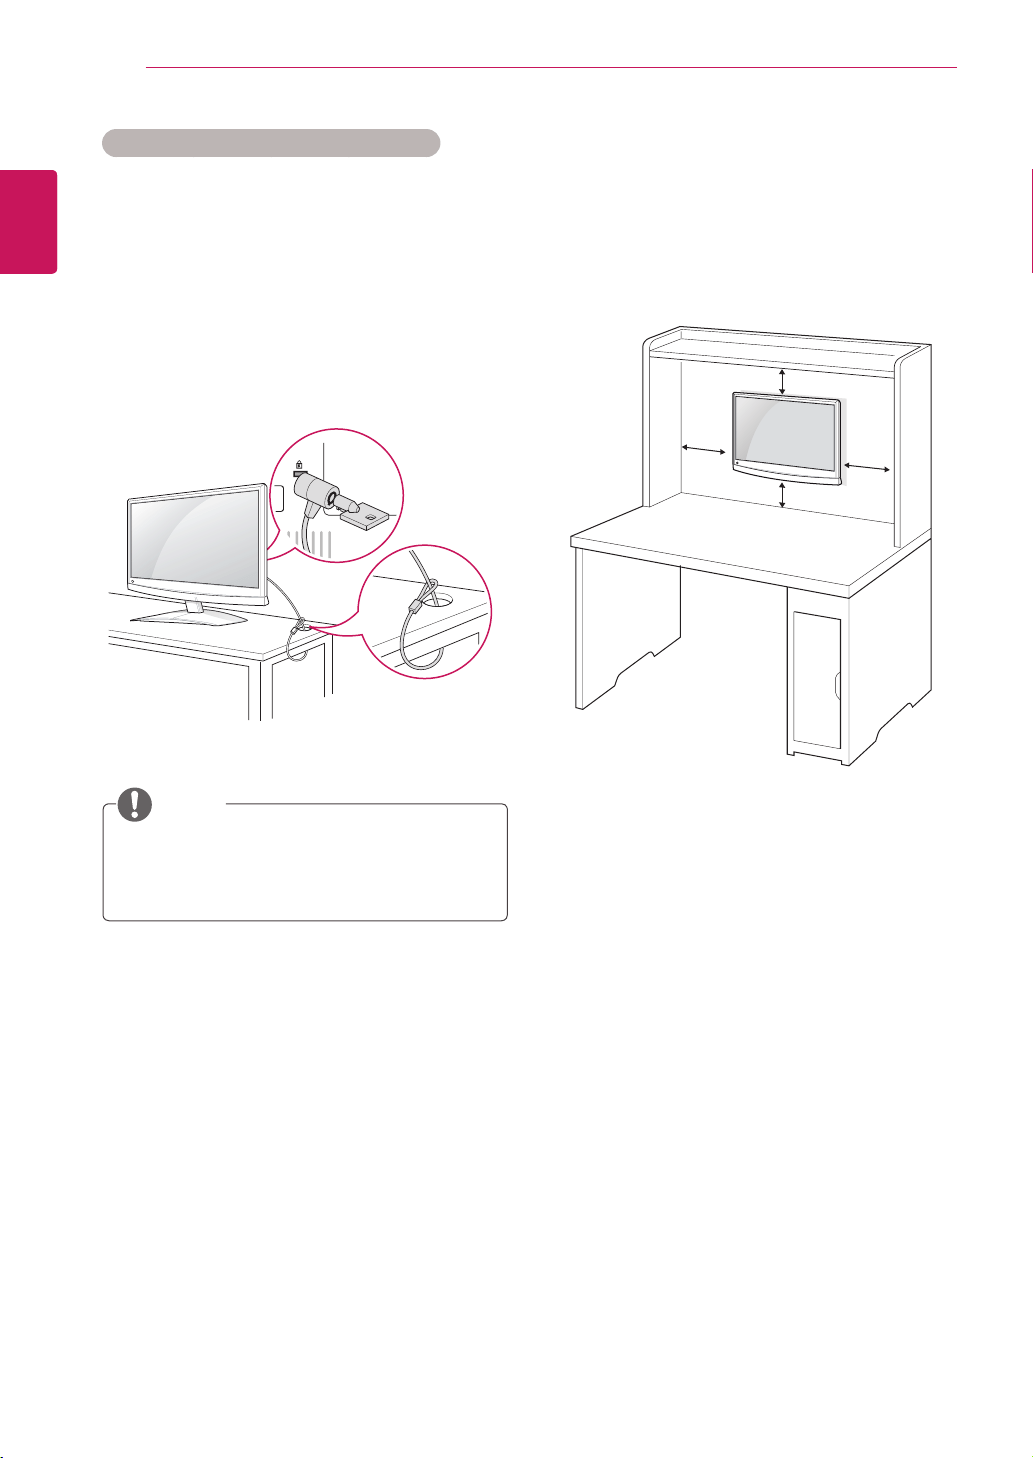
Using the Kensington security system
TheKensingtonsecuritysystemconnectoris
locatedatthebackoftheMonitorset.Formore
informationofinstallationandusing,refertothe
manualsuppliedwiththeKensingtonsecurity
systemorvisit
http://www.kensington.com
.
ConnecttheKensingtonsecuritysystemcable
betweentheMonitorsetandatable.
TheKensingtonsecuritysystemisoptional.
Youcanobtainadditionalaccessoriesfrom
mostelectronicsstores.
NOTE
Mounting on a wall
Forproperventilation,allowaclearanceof10
cmoneachsideandfromthewall.Detailed
installationinstructionsareavailablefromyour
dealer,seetheoptionalTiltWallMountingBracket
InstallationandSetupGuide.
IfyouintendtomounttheMonitorsettoawall,
attachWallmountinginterface(optionalparts)to
thebackoftheset.
WhenyouinstalltheMonitorsetusingthewall
mountinginterface(optionalparts),attachit
carefullysoitwillnotdrop.
PleaseuseVESAstandardasbelow.
784.8mm(30.9inch)andunder
*WallMountPadThickness:2.6mm
*Screw:
Φ
4.0mmxPitch0.7mmx
Length10mm
787.4mm(31.0inch)andabove
*PleaseuseVESAstandardwallmountpad
andscrews.
10 cm
10 cm
10 cm
10 cm
9
ENG
ENGLISH
ASSEMBLING AND PREPARING
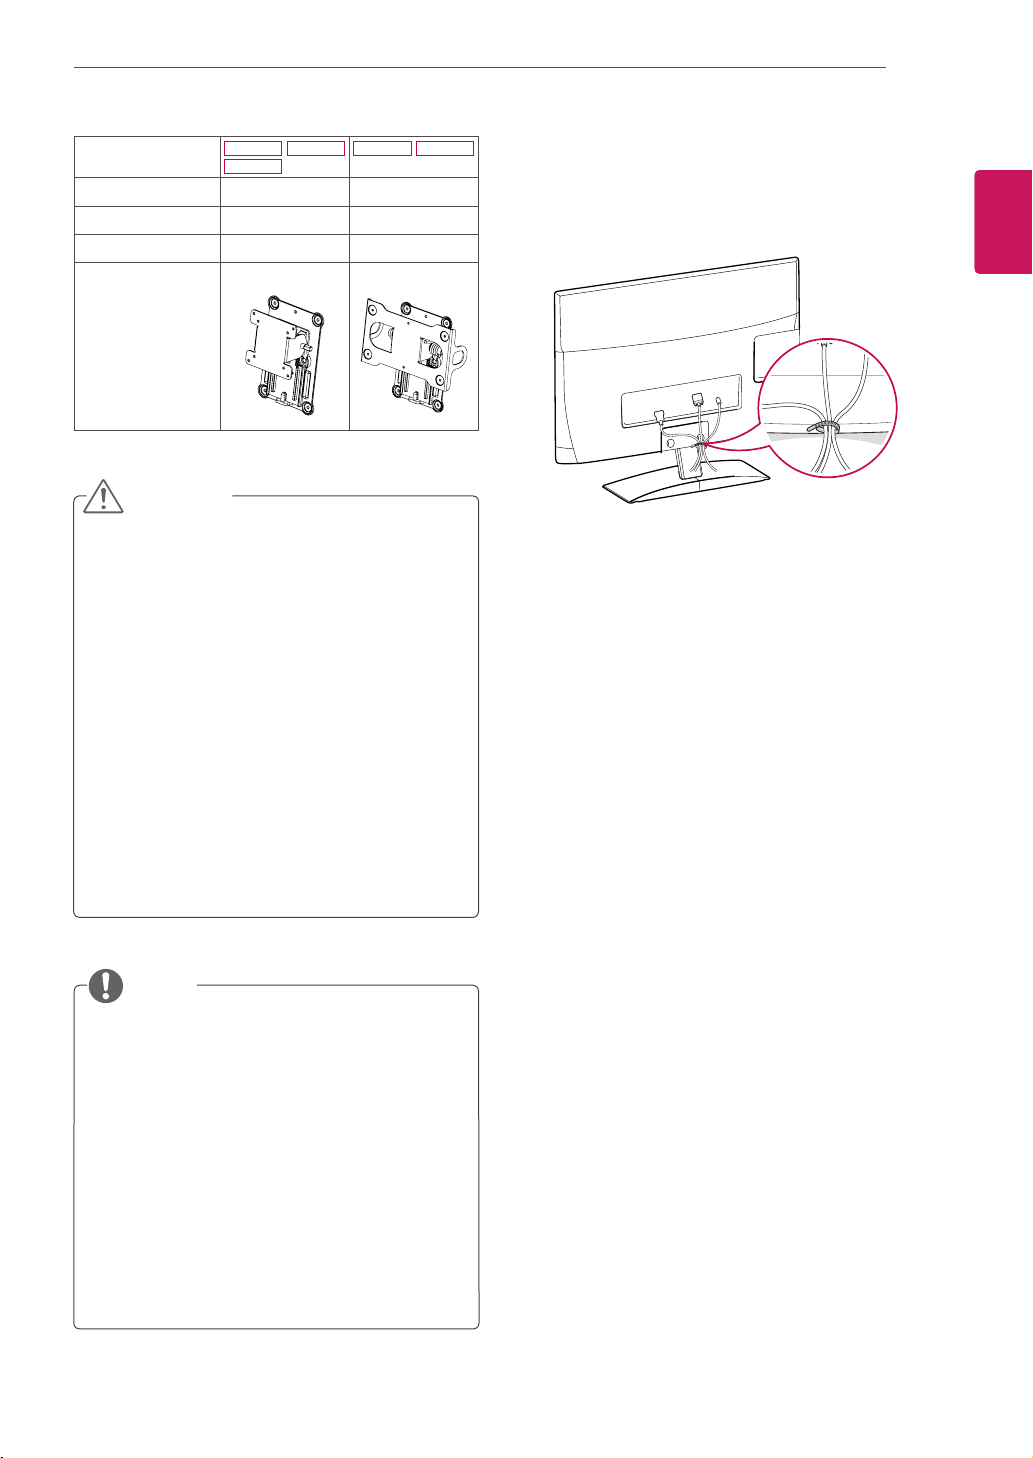
Tidying cables
Gatherandbindthecableswiththesupplied
cabletie.
Disconnectthepowercordfirst,andthen
moveorinstalltheMonitorset.Otherwise
electricshockmayoccur.
IfyouinstalltheMonitorsetonaceilingor
slantedwall,itmayfallandresultinsevere
injury.UseanauthorizedLGwallmount
andcontactthelocaldealerorqualified
personnel.
Donotovertightenthescrewsasthismay
causedamagetotheMonitorsetandvoid
yourwarranty.
Usethescrewsandwallmountsthat
meettheVESAstandard.Anydamages
orinjuriesbymisuseorusinganimproper
accessoryarenotcoveredbythewarranty.
UsethescrewsthatarelistedontheVESA
standardscrewspecifications.
Thewallmountkitincludesaninstallation
manualandnecessaryparts.
Thewallmountbracketisoptional.Youcan
obtainadditionalaccessoriesfromyourlocal
dealer.
Thelengthofscrewsmaydifferdepending
onthewallmount.Besuretousetheproper
length.
Formoreinformation,refertothe
instructionssuppliedwiththewallmount.
CAUTION
NOTE
Model
M1950D
M2250D
M2350D
M2450D
M2550D
VESA (A x B) 75x75 200x100
Standard screw M4 M4
Number of screws 4 4
Wall mount
bracket (optional)
RW120 RW240
10
ENG
ENGLISH
REMOTE CONTROL
REMOTE CONTROL
Thedescriptionsinthismanualarebasedonthebuttonsoftheremotecontrol.
PleasereadthismanualcarefullyandusetheMonitorsetcorrectly.
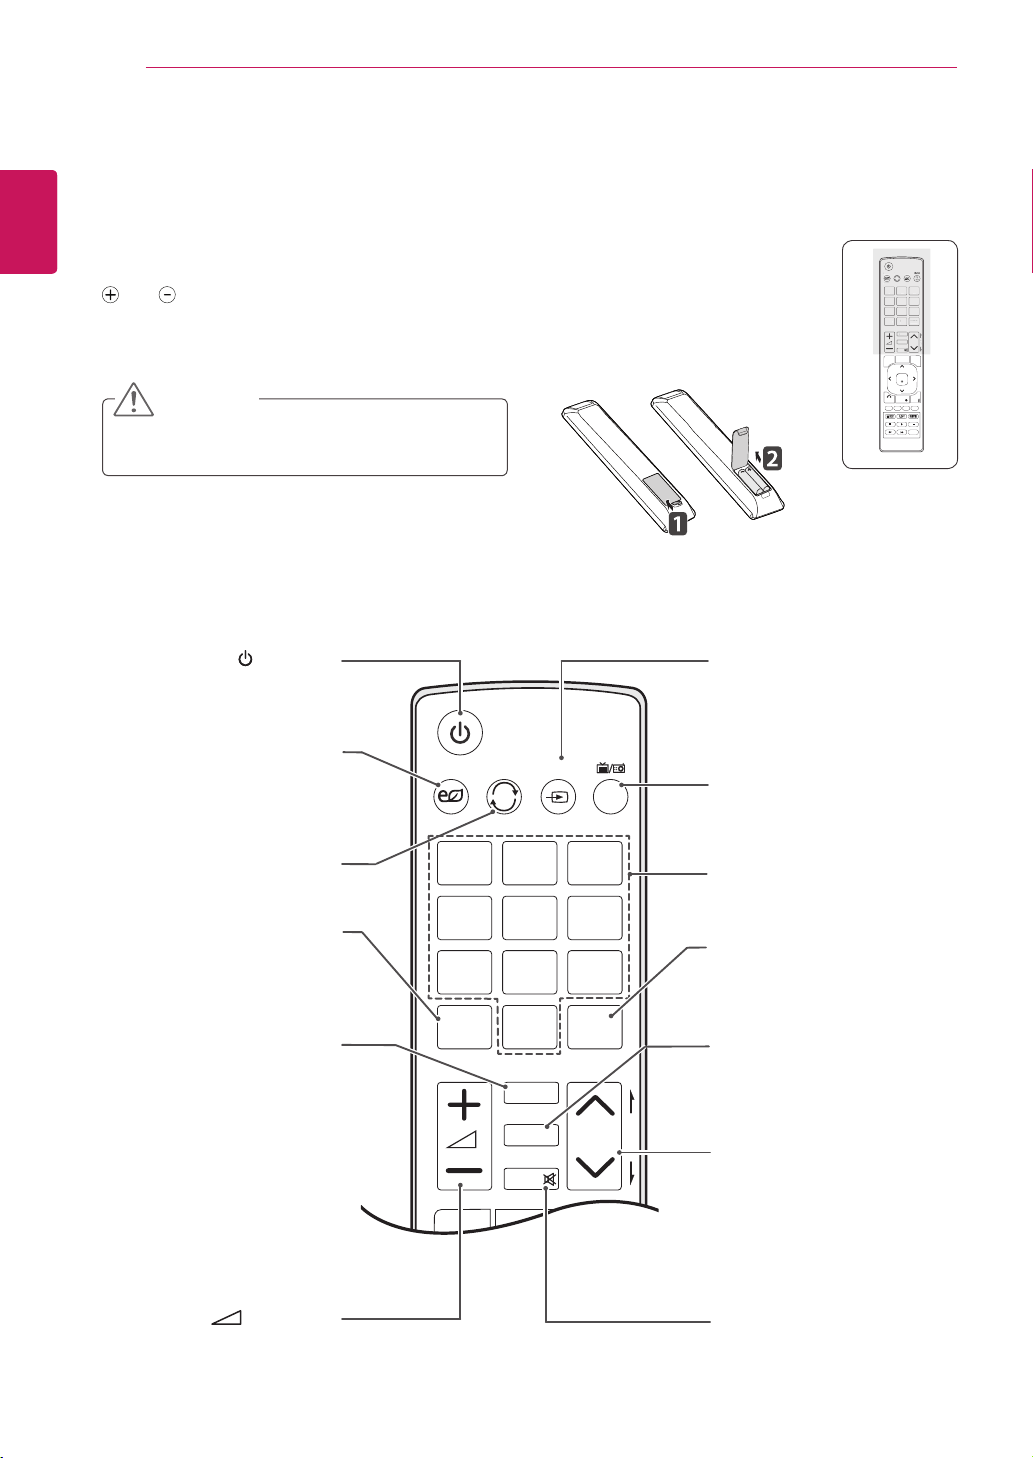
Toreplacebatteries,openthebatterycover,replacebatteries(1.5VAAA)matching
and endstothelabelinsidethecompartment,andclosethebatterycover.
Toremovethebatteries,performtheinstallationactionsinreverse.
MakesuretopointtheremotecontroltotheremotecontrolsensorontheMonitorset.
CAUTION
Donotmixoldandnewbatteries,asthismay
damagetheremotecontrol.
P
A
G
E
P
1 2 3
4 5
0
6
7 8 9
LIST
Q.VIEW
TV / PC INPUT
TV/
RAD
ENERGY
SAVING
MARK
FAV
RATIO
MUTE
OK
MENU
GUIDE
Q.MENU
BACK
INFO
Auto Config.
EXIT
(POWER)
TurnstheMonitorsetonoroff.
ENERGY SAVING(Seep.48)
Adjuststhebrightnessof
thescreentoreduceenergy
consumption.
TV/PC
SelectsTVorPCmode.
LIST(Seep.27)
Displaystheprogramme
table.
INPUT(Seep.30)
Selectstheinputmode.
TV/RAD(Seep.24)
SelectsRadio,TVandDTV
programme.
Number buttons
Entersnumbers.
Q.VIEW
Returnstothepreviously
viewedprogramme.
P
A
G
E
P
1 2 3
4 5
0
6
7 8 9
LIST
Q.VIEW
TV / PC INPUTENERGY
SAVING
MARK
FAV
3D
MUTE
OK
MENU
GUIDE
Q.MENU
BACK
INFO
Auto Config.
EXIT
P
A
G
E
P
1
2
3
4
5
0
6
7
8
9
L
I
S
T
Q.VIEW
TV
/
P
C
IN
P
UT
ENER
G
Y
S
AVIN
G
MARK
FAV
3D
MUT
E
MARK
Selecttheinputtoapplythe
PictureWizardsettings.
Checkandun-check
programmesintheUSB
menu.
FAV
Displaystheselected
favouriteprogramme.
(
VOLUME)
Adjuststhevolumelevel.
RATIO(Seep.28)
Resizesanimage.
Programme
Selectsaprogramme.
PAGE
Movestothepreviousornext
screen.
MUTE
Mutesallsounds.
11
ENG
ENGLISH
REMOTE CONTROL
P
A
G
E
P
1 2 3
4 5
0
6
7 8 9
LIST
Q.VIEW
TV / PC INPUT
TV/
RAD
ENERGY
SAVING
MARK
FAV
RATIO
MUTE
OK
MENU
GUIDE
Q.MENU
BACK
INFO
Auto Config.
EXIT
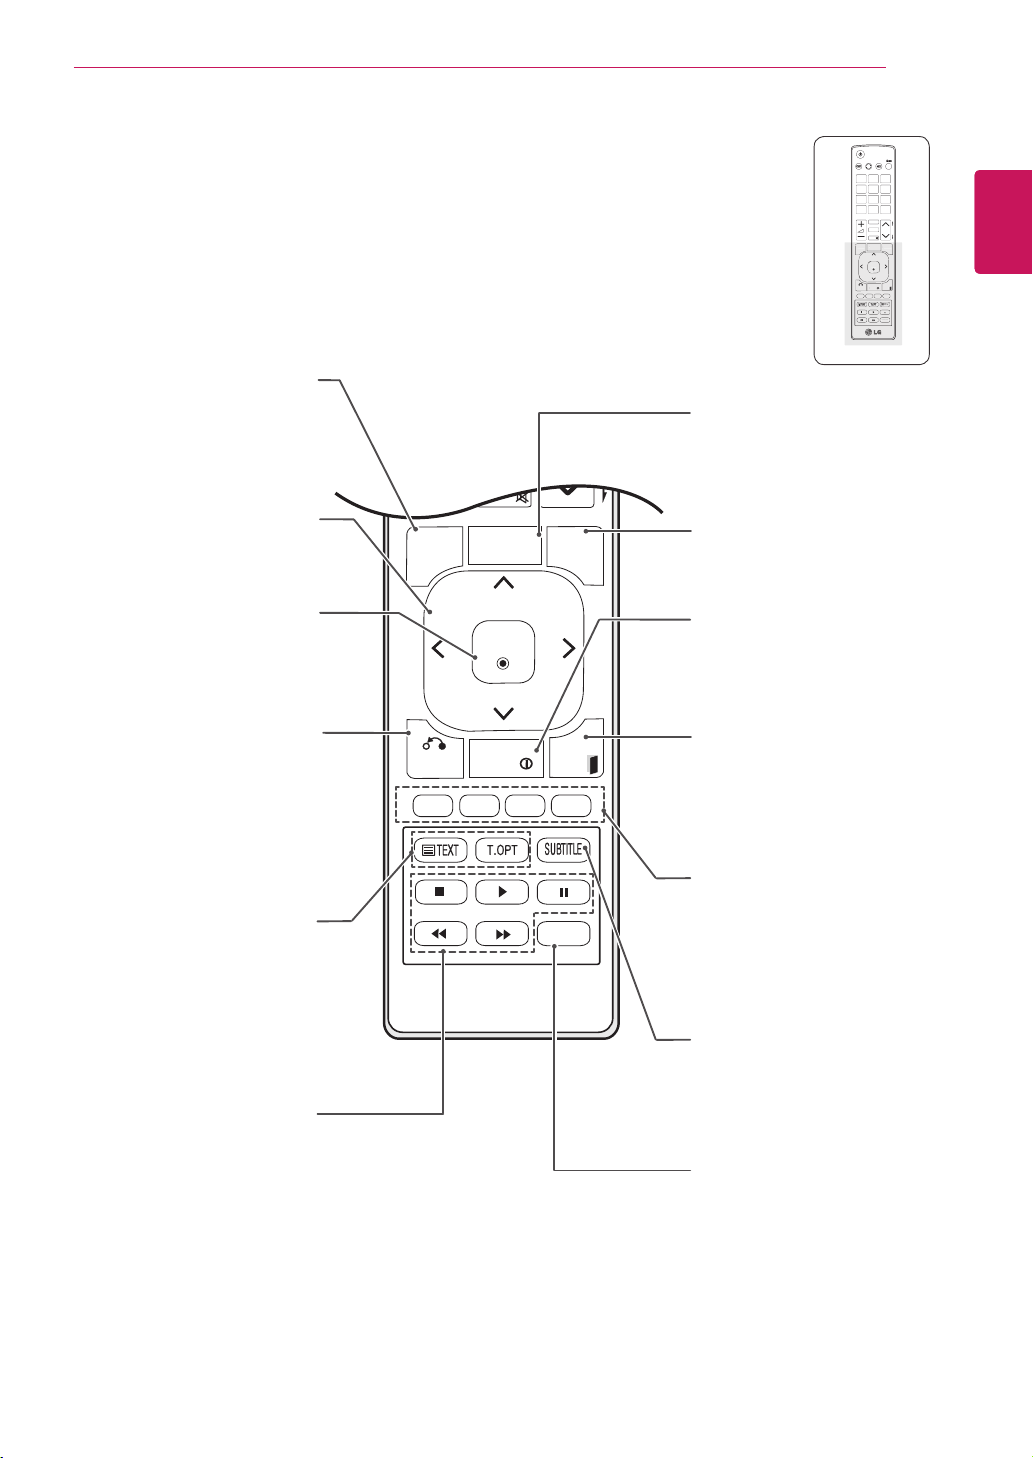
Q.MENU (Seep.33)
Accessesthequickmenus.
INFO
ⓘ
Viewstheinformationofthe
currentlyprogramandthe
screen.
EXIT
Clearsallon-screendisplays
andreturnstoMonitorset
viewingfromanymenu.
Coloured buttons
Thesebuttonsareusedfor
teletext(onTELETEXT
modelsonly),Programme
edit.
SUBTITLE
Recallsyourpreferredsubtitle
indigitalmode.
Auto Config.
Automaticallyadjustspicture
positionandminimizes
imageinstability.
MENU(Seep.46)
Accessesthemainmenus
orsavesyourinputandexit
menus.
Navigation buttons
Scrollsthroughmenusor
options.
OK
Selectsmenusoroptionsand
confirmsyourinput.
BACK
Allowstheusertomovereturn
onestepinaninteractive
application,EPGorotheruser
interactionfunction.
Teletext buttons (Seep.64)
Thesebuttonsareusedfor
teletext.Forfurtherdetails,
seethe‘Teletext’section.
USB Menu control
buttons (Seep.36)
USBmenu(PhotoListand
MusicListorMovieList).
P
A
G
E
P
1 2 3
4 5
0
6
7 8 9
LIST
Q.VIEW
TV / PC INPUT
TV/
RAD
ENERGY
SAVING
MARK
FAV
RATIO
MUTE
OK
MENU
GUIDE
Q.MENU
BACK
INFO
Auto Config.
EXIT
OK
M
ENU
GUIDE
Q.MENU
BAC
K
INF
O
E
XIT
Auto Config.
GUIDE (Seep.34)
Showsprogrammeguide.
12
ENG
ENGLISH
USING THE MONITOR SET
USING THE MONITOR SET
Connecting to a PC
YourMonitorsetsupportsthePlug&Play*feature
andhasthebuilt-inspeakerswithSurroundXthat
reproducessoundclearlywitharichbass.
*Plug&Play:ThefunctionwhenaPCrecognizes
aconnecteddevicethatusersconnecttoaPC
andturnon,withoutdeviceconfigurationoruser
intervention.
ItisrecommendedtousetheMonitorset
withtheHDMIconnectionforthebestimage
quality.
Ifyouwanttouseanoptionalexternal
speakerinsteadofthebuilt-inspeaker,set
theMonitorsetspeakerfeaturetooff
(Seep.52).
UseaHighSpeedHDMI™Cable.
PleasecheckthePCenvironmentifyou
cannothearthesoundinHDMImode.
IfyouwanttouseHDMI-PCmode,youmust
settheinputlabeltoPCmode.
NOTE
NOTE
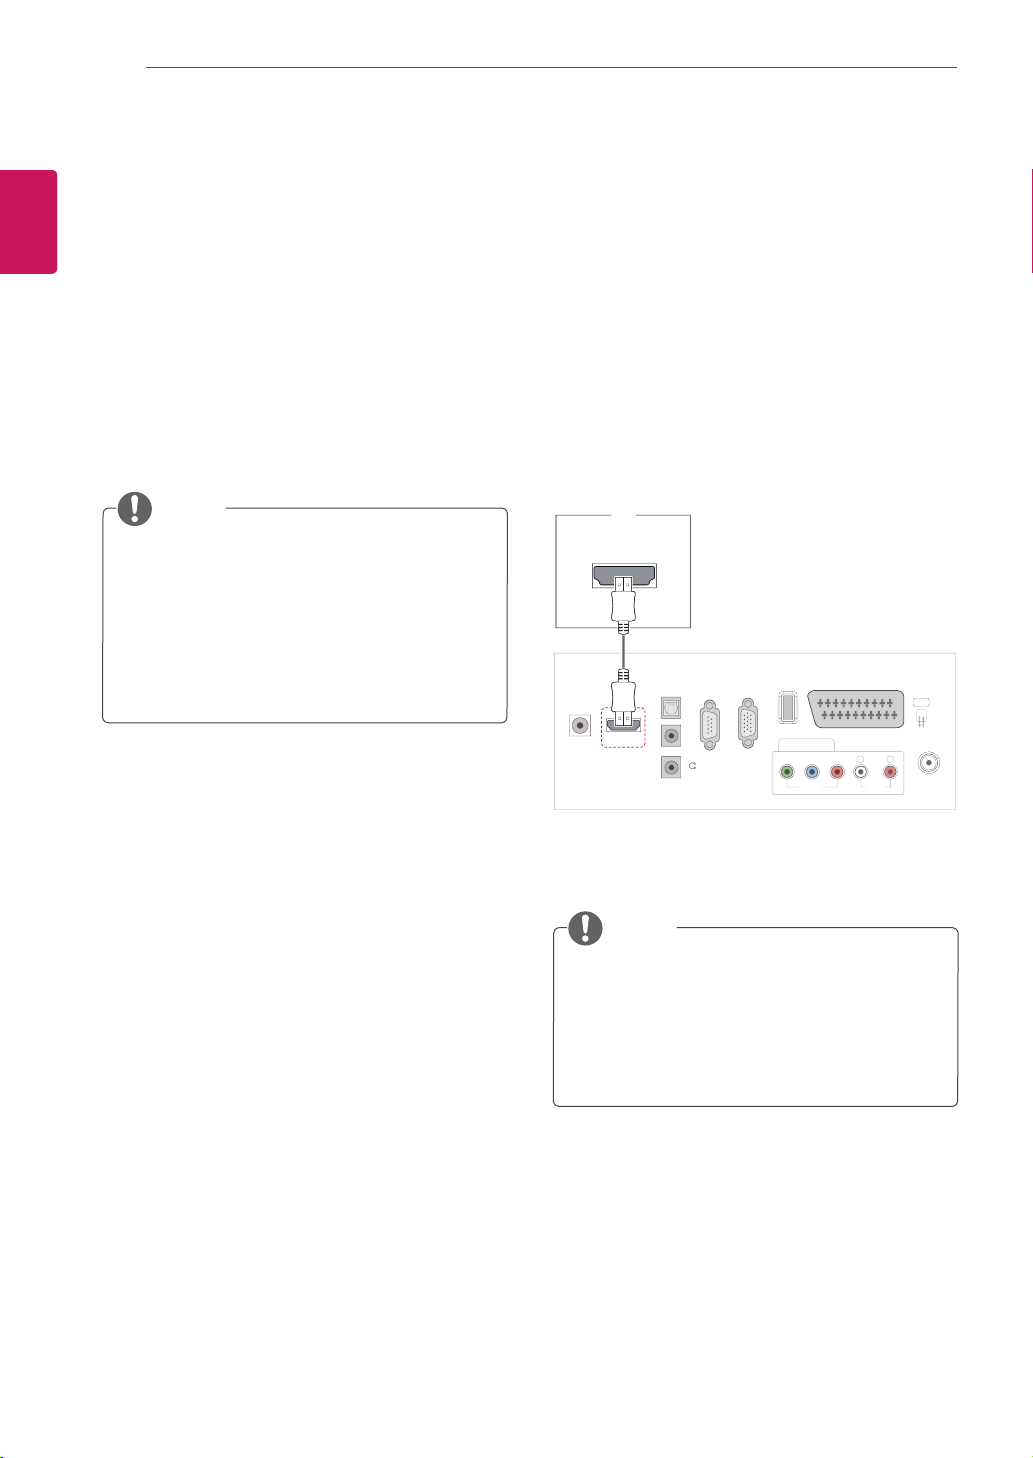
HDMI connection
Transmitsthedigitalvideoandaudiosignalsfrom
yourPCtotheMonitorset.ConnectthePCand
theMonitorsetwiththeHDMIcableasshownin
thefollowingillustrations.YoushouldsetPCas
aninputlabeltoconnectthePCtotheMonitorset
withanHDMIconnection.Toaddaninputlabel,
seeAddinganInputlabelonSeep.30.
HDMI OUT
PC
V
IDE
O
COMPONENT IN
U
SB IN
AV
A
UDI
O
Y
P
B
P
R
L
R
S
-2
3
2
C
I
N
(CONTROL & SERVICE)
RGB IN
(
PC
)
O
PTI
C
AL
D
I
G
ITAL A
U
DI
O
OU
T
AUDI
O
IN
(RGB/DVI
)
H
/
P
ANTENNA/
C
ABLE IN
HDMI/DVI IN
D
C
-IN
R
13
ENG
ENGLISH
USING THE MONITOR SET
Ifyoudonotuseanoptionalexternal
speaker,connectthePCtotheMonitorset
withthesuppliedaudiocable.
Useashieldedsignalinterfacecable,such
asD-sub15pinsignalcableandDVIto
HDMIcable,withaferritecoretomaintain
standardcompliancefortheproduct.
IfyouwanttouseHDMI-PCmode,youmust
settheinputlabeltoPCmode.
Connectthesignal
inputcableandtighten
itbyturningthescrews
clockwise.
NOTE
Ifyoudonotuseanoptionalexternal
speaker,connectthePCtotheMonitorset
withthesuppliedaudiocable.
IfyouturntheMonitorsetonwhentheset
becomescold,thescreenmayflicker.This
isnormal.
Somered,green,orbluespotsmayappear
onthescreen.Thisisnormal.
NOTE
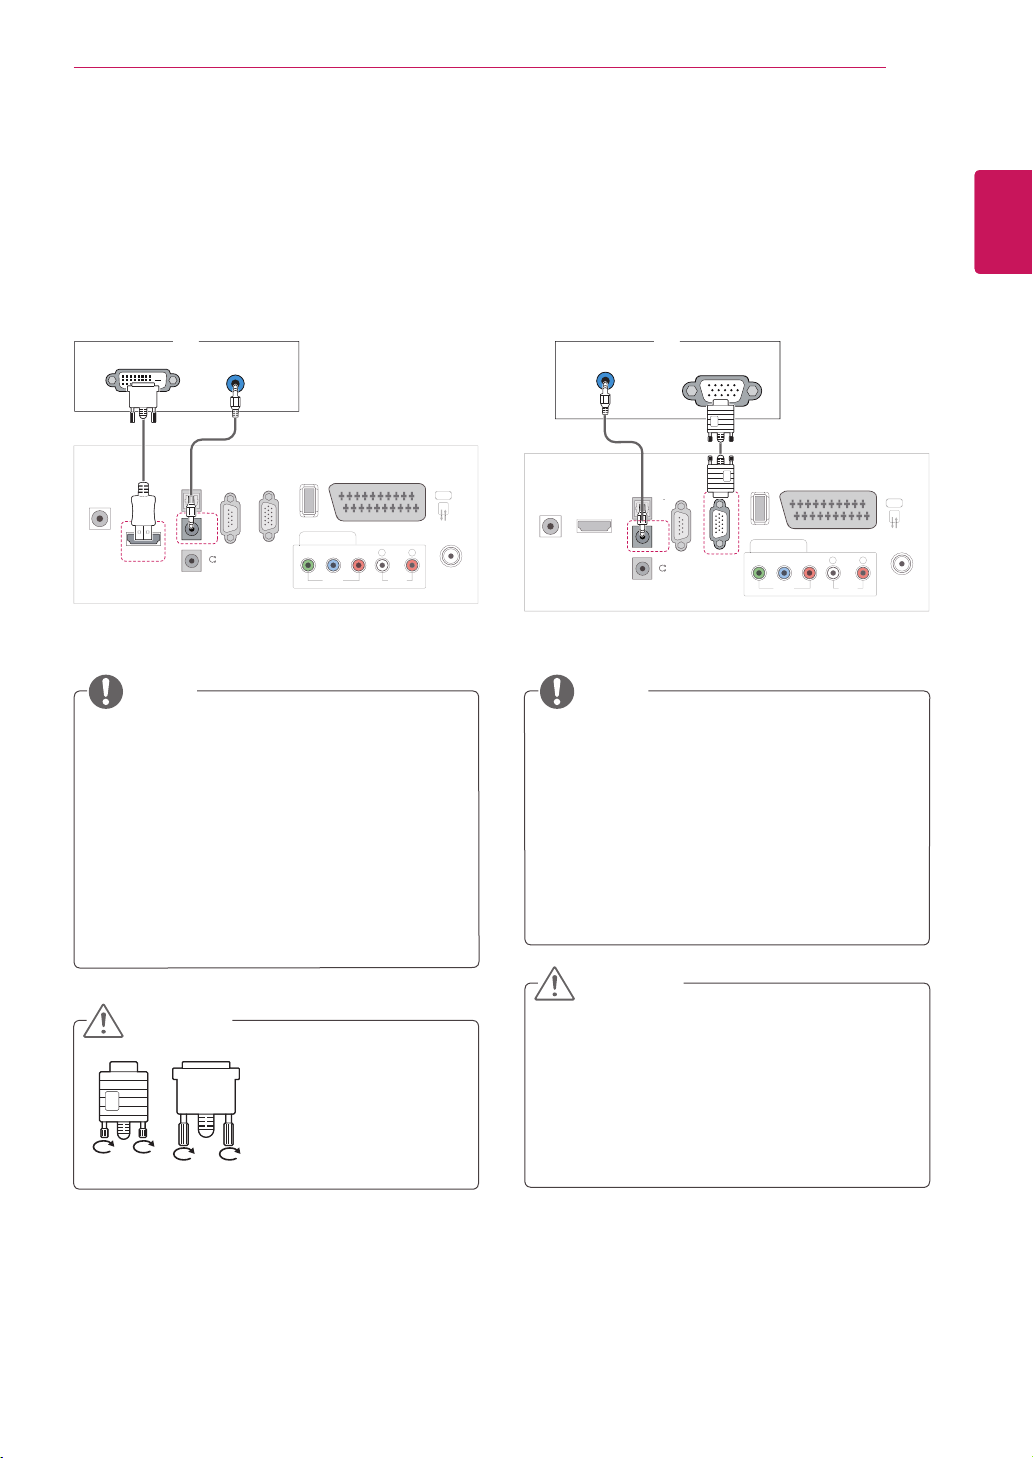
DVI to HDMI connection
TransmitsthedigitalvideosignalfromyourPCto
theMonitorset.ConnectthePCandtheMonitor
setwiththeDVItoHDMIcableasshownthe
followingillustrations.
RGB connection
TransmitstheanalogvideosignalfromyourPCto
theMonitorset.ConnectthePCandtheMonitor
setwiththeD-sub15pincableasshownthe
followingillustrations.
Donotpressthescreenwithyourfingerfor
alongtimeasthismayresultintemporary
distortiononthescreen.
Avoiddisplayingafixedimageonthe
screenforalongperiodoftimetoprevent
imageburn.Useascreensaverifpossible.
CAUTION
CAUTION
PC
RGB OUT (PC) AUDIO OUT
V
IDE
O
CO
MP
O
NENT I
N
US
B IN
AV
AU
DI
O
Y
P
B
P
R
L
RS
-2
3
2
C
IN
(CONTROL & SERVICE)
)
RGB IN (PC)
O
PTI
C
AL
AUDIO IN
(RGB/DVI)
H
/
P
DIGITAL
AUDIO OUT
L
L
A
NTENNA
/
C
ABLE IN
HDMI/DVI IN
D
C
-IN
R
PC
V
IDE
O
CO
MP
O
NENT IN
US
B IN
AV
A
UDI
O
Y
P
B
P
R
L
R
S
-2
3
2
C
I
N
(CONTROL & SERVICE)
RGB IN
(
PC
)
O
PTI
C
AL
D
I
G
ITAL A
U
DI
O
OU
T
AUDIO IN
(RGB/DVI)
H
/
P
A
NTENNA
/
C
ABLE IN
D
C
-IN
R
AUDIO OUT
DVI OUT
HDMI/DVI IN

14
ENG
ENGLISH
USING THE MONITOR SET
Adjusting the screen
Selecting an image mode
Displayimagesinitsoptimizedsettingsby
selectingoneofthepresetimagemodes.
1
PressMENUtoaccessthemainmenus.
2
PresstheNavigationbuttonstoscrollto
PICTUREandpressOK.
3
PresstheNavigationbuttonstoscrollto
Picture ModeandpressOK.
4
PresstheNavigationbuttonstoscrolltoan
imagemodeyouwantandpressOK.
Mode Description
Vivid Adjuststhevideoimageforthe
retailenvironmentbyenhancingthe
Contrast, Brightness, Colour,and
Sharpness.
Standard Adjuststheimageforthenormal
environment.
Cinema Optimizesthevideoimageforthe
cinematiclookandenjoymoviesasif
youareinamovietheater.
Sport Optimizesthevideoimageforhigh
anddynamicactionsbyemphasizing
primaryColourssuchaswhite,grass,
orskyblue.
Game Optimizesthevideoimagefora
fastgamingscreensuchasPCsor
games.
Expert1/2 Adjuststhedetailedvideoimage
settingsforvideoexpertsaswellas
generalviewers.
5
Whenyouarefinished,pressEXIT.
Whenyoureturntothepreviousmenu,press
BACK.
Customizing image options
Customizebasicandadvancedoptionsofeach
imagemodeforthebestscreenperformance.
1
PressMENUtoaccessthemainmenus.
2
PresstheNavigationbuttonstoscrollto
PICTUREandpressOK.
3
PresstheNavigationbuttonstoscrollto
Picture ModeandpressOK.
4
PresstheNavigationbuttonstoscrolltoan
imagemodeyouwantandpressOK.
5
Selectandadjustfollowingoptions,andthen
pressOK.
Option Description
Backlight Adjuststhebrightnessofthe
screenbycontrollingtheLCD
backlight.Ifyoudecreasethe
brightnesslevel,thescreen
becomesdarkerandthepower
consumptionwillbereduced
withoutanyvideosignalloss.
Contrast Increasesordecreasesthe
gradientofthevideosignal.
YoumayuseContrastwhen
thebrightpartoftheimageis
saturated.
Brightness Adjuststhebaselevelofthe
signalintheimage.Youmayuse
Brightnesswhenthedarkpartof
theimageissaturated.
Sharpness Adjuststhelevelofcrispnessin
theedgesbetweenthelightand
darkareasofthepicture.The
lowerthelevel,thesofterthe
image.
Colour AdjustsintensityofallColours.
Tint AdjuststhebalancebetweenRed
andGreenlevels.
Color
Temperature
Settowarmtoenhancehotter
colourssuchasred,orsettocool
tomakepicturebluish.
Advanced
Control
Customizestheadvanced
options.Seemoreinformation
aboutadvancedoptionsSeep.50.
Picture
Reset
Restorestheoptionstothe
defaultsetting.
6
Whenyouarefinished,pressEXIT.
Whenyoureturntothepreviousmenu,press
BACK.
15
ENG
ENGLISH
USING THE MONITOR SET
Customizing PC display options
Customizeoptionsofeachimagemodeforthe
bestimagequality.
Thisfunctionworksinthefollowingmode:
RGB[PC]mode.
1
PressMENUtoaccessthemainmenus.
2
PresstheNavigationbuttonstoscrollto
PICTUREandpressOK.
3
PresstheNavigationbuttonstoscrollto
ScreenandpressOK.
4
Selectandadjustfollowingoptions,andthen
pressOK.
Option Description
Resolution SelectsaproperResolution.
Auto
Configure
SetstoadjustthescreenPosition,
SizeandPhaseautomatically.The
displayedimagemaybeunstablefor
afewsecondswhiletheconfiguration
isinprogress.
Position/
Size/Phase
Adjuststheoptionswhenthe
imageisnotclear,especiallywhen
charactersareshaky,aftertheauto
configuration.
Reset Restorestheoptionstothedefault
setting.
5
Whenyouarefinished,pressEXIT.
Whenyoureturntothepreviousmenu,press
BACK.
Adjusting the sound
Selecting an sound mode
Playthesoundinitsoptimizedsettingsby
selectingoneofthepresetsoundmodes.
1
PressMENUtoaccessthemainmenus.
2
PresstheNavigationbuttonstoscrollto
AUDIOandpressOK.
3
PresstheNavigationbuttonstoscrolltoSound
ModeandpressOK.
4
PresstheNavigationbuttonstoscrolltoa
soundmodeyouwantandpressOK.
Mode Description
Standard Selectswhenyouwantstandard-
qualitysound.
Music Selectswhenyoulistentomusic.
Mode Description
Cinema Selectswhenyouwatchmovies.
Sport Selectswhenyouwatchsports
events.
Game Selectswhenyouplaygames.
5
Whenyouarefinished,pressEXIT.
Whenyoureturntothepreviousmenu,press
BACK.
Customizing sound options
Customizeoptionsofeachsoundmodeforthe
bestsoundquality.
1
PressMENUtoaccessthemainmenus.
2
PresstheNavigationbuttonstoscrollto
AUDIOandpressOK.
3
PresstheNavigationbuttonstoscrolltoSound
ModeandpressOK.
4
PresstheNavigationbuttonstoscrolltoa
soundmodeyouwantandpressOK.
5
Selectandadjustfollowingoptions,andthen
pressOK.
Option Description
Surround X Thisoptionenhancessounddepth
andclaritybymaximizingthe
Surroundeffect.
Treble Controlsthedominantsoundsinthe
output.Whenyouturnupthetreble,
itwillincreasetheoutputtothe
higherfrequencyrange.
Bass Controlsthesoftersoundsinthe
output.Whenyouturnupthebass,
itwillincreasetheoutputtothe
lowerfrequencyrange.
Reset Resetsthesoundmodetothe
defaultsetting.
6
Whenyouarefinished,pressEXIT.
Whenyoureturntothepreviousmenu,press
BACK.
YoucannotadjustTrebleandBassinthe
RGB-PC/HDMI-PCmode.
NOTE

16
ENG
ENGLISH
WATCHING TV
WATCHING TV
Connecting an antenna or
cable
Connectanantenna,cable,orcableboxtowatch
TVreferringtothefollowing.Theillustrationsmay
differfromtheactualaccessoriesandanRFcable
isoptional.
Connecting an antenna or basic
cable
ConnecttheMonitorsettoawallantennasocket
withanRFcable(75ohm).
Connecting with a cable box
ConnecttheMonitorsettoacableboxandthe
cableboxtoawallantennasocketwith2RF
cables(75ohm).
Useasignalsplittertousemorethan2TVs.
Iftheimagequalityispoor,installasignal
amplifierproperlytoimprovetheimage
quality.
Iftheimagequalityispoorwithanantenna
connected,aimtheantennatotheproper
direction.
Visit
http://AntennaWeb.org
formore
informationabouttheantennaandcable
connection.
NOTE
Makesurenottobendthecopperwireofthe
RFcable.
Completeallconnectionsinstructions
betweendevices,andthenconnectthe
powercordtothepoweroutlettoprevent
damagestoyourMonitorset.
CAUTION
Copper wire
Wall Antenna
Socket
Outdoor
Antenna

17
ENG
ENGLISH
WATCHING TV
Accessing the TV for the
first time
WhenyouaccesstheMonitorsetforthefirst
time,theinitialsettingscreenappears.Selecta
languageandcustomizethebasicsettings.
1
Connectthepowercordtoapoweroutlet.
2
Press ontheMonitorsettoturnthe
Monitorseton.
ThePowerindicatorlightingisturnedon.
YoucanalsoswitchtheMonitorsetfrom
PCmodetoTVmode,pressTV/PC.
YoucanalsoaccessInitial Settingby
accessingOPTION inthemainmenus.
IfyoudonotoperatetheMonitorset
within40secondswhenthesettingmenu
screenappears,thesettingmenuswill
disappear.
NOTE
NOTE
NOTE
NOTE
WhentheMonitorsetisinPowersaving
mode,thePowerindicatorlightingblinks.
Todisplayimagesinthebestqualityfor
yourhomeenvironment,selectHome
Use mode.
StoreDemomodeissuitablefortheretail
environment.
IfyouselectStore Demo mode,the
previouslycustomizedsettingswillswitch
tothedefaultsettingsofStore Demo
modein2minutes.
Ifyoudonotcompletetheinitialsetting,it
willappearwheneveryouaccesstheTV.
3
Theinitialsettingscreenappearsifyouaccess
theTVforthefirsttime.
4
Followtheon-screeninstructionstocustomize
yourMonitorsetaccordingtoyourpreferences.
Language
Mode Setting
Country
Auto Tuning
SelectsHome Usefor
thehomeenvironment.
Selectsacountryto
display.
Selectsalanguagefor
thedisplay.
Scansandsaves
availableprogrammes
automatically.
5
Whenthebasicsettingsarecomplete,press
OK.
6
ToturntheMonitorsetoff,press onthe
Monitorset.
ThePowerIndicatorturnsoff.
Disconnectthepowercordfromthepower
outletwhenyoudonotusetheMonitorset
foralongperiodoftime.
CAUTION
18
ENG
ENGLISH
WATCHING TV
Watching TV
1
Press ontheRemotecontrolor onthe
MonitorsettoturntheMonitorseton.
2
PressINPUTandselectAntenna.
3
ControltheMonitorsetusingthefollowing
buttonsandmenuswhileyouarewatchingTV.
Button / Menu Description
P( ) or
PR (
,
)
Scrollsthroughthesaved
programmes
Numbers Selectsaprogrammebyentering
numbers
(+ , -)or
VOL (
,
)
Adjuststhevolumelevel
MUTE Mutesallsounds
PICTURE Selectsoneofthepresetimage
modes(Seep.48)
AUDIO Selectsoneofthepresetaudio
modes.(Seep.52)
RATIO Resizesanimage(Seep.28)
4
ToturntheMonitorsetoff,Press onthe
Remotecontrolor ontheMonitorset.
Managing programmes
Automatically setting up
programmes
For countries other than Finland, Sweden,
Denmark and Norway)
Usethistoautomaticallyfindandstoreallavailable
programmes.
1
PressMENUtoaccessthemainmenus.
2
PresstheNavigationbuttonstoscrollto
SETUPandpressOK.
3
PresstheNavigationbuttonstoscrollto
Auto TuningandpressOK.
4
SelectStarttostartautomatictuning.
TheTVscansandsavesavailableprogrammes
automatically.
5
Whenyouarefinished,pressEXIT.
Whenyoureturntothepreviousmenu,press
BACK.
NOTE
UseNUMBERbuttonstoinputa4-digit
passwordinLock System ‘On’.
AutomaticNumbering:Decidewhetherto
usetheprogrammenumbersassentby
broadcastingstationsfortuning.
WhenselectItalyintheCountrymenu,if
thepopupisdisplayedwhentheconflicted
ProgrammeafterAutoTuning,selecta
broadcasterforconflictingprogramme
numbertosolve.

19
ENG
ENGLISH
WATCHING TV
Only for Finland, Sweden, Denmark and Norway
DVB-CAutoTuningisamenuforusersin
countriesthatsupportDVBcable.
IfyouwanttoselecttheAntenna
1
PressMENUtoaccessthemainmenus.
2
PresstheNavigationbuttonstoscrollto
SETUPandpressOK.
3
PresstheNavigationbuttonstoscrollto
Auto TuningandpressOK.
4
PresstheNavigationbuttonstoscrollto
AntennaandpressOK.
5
SelectStarttostartautomatictuning.
TheTVscansandsavesavailableprogrammes
automatically.
6
Whenyouarefinished,pressEXIT.
Whenyoureturntothepreviousmenu,press
BACK.
NOTE
UseNUMBERbuttonstoinputa4-digit
passwordinLock System ‘On’.
AutomaticNumbering:Decidewhetherto
usetheprogrammenumbersassentby
broadcastingstationsfortuning.
NOTE
UseNUMBERbuttonstoinputa4-digit
passwordinLock System ‘On’.
AutomaticNumbering:Decidewhetherto
usetheprogrammenumbersassentby
broadcastingstationsfortuning.
IfyouwanttoselecttheCable
1
PressMENUtoaccessthemainmenus.
2
PresstheNavigationbuttonstoscrollto
SETUPandpressOK.
3
PresstheNavigationbuttonstoscrollto
Auto TuningandpressOK.
4
PresstheNavigationbuttonstoscrollto
CableandpressOK.
5
PresstheNavigationbuttonstoscrollto
Comhem or Other OperatorsandpressOK.
6
PresstheNavigationbuttonstoscrollto
Default, Full or UserandpressOK.
7
PresstheNavigationbuttonsorNumber
buttonstoscrollmakeappropriateadjustments
(ExceptforFullmode)andpressOK.
8
PresstheNavigationbuttonstoscrollto
Close andpressOK.
9
SelectStarttostartautomatictuning.
TheTVscansandsavesavailableprogrammes
automatically.
10
Whenyouarefinished,pressEXIT.
Whenyoureturntothepreviousmenu,press
BACK.
WhenyouselecttheCable,theCable
Service Operatorselectionscreencandiffer
ornotexistbytheCablesituationofthe
applicablecountry.
ThepopupwindowtoselectbetweenService
Operatorisonlyshowninitiallyforthe3cases
whenyouaccessingtheInitial Settingmenu,
whenyouchangefromAntennatoCableor
whenyouaccessthemenuafterchangingthe
Country.
WhenyouwanttoselectbetweenService
Operatorasidefromtheabove3cases,you
candosobyselectingSETUP
→
Cable DTV
Setting
→
Service Operator.

20
ENG
ENGLISH
WATCHING TV
TowatchDVB-Cinthecountriesexcluding
Finland,Sweden,DenmarkandNorwayselect'--'
astheCountryinOPTION.
YoucanselectUsermodeorFullmodeinAuto
Tuning.
Thecorrespondinghomefrequencyinformation
mayneedtobechangedwhentuningtheUser
mode,andthecorrespondinginformationdepends
ontheCableServiceOperator(SO)inservice.
DuringFullmodetuning,somechannelmaybe
restrictedforsomeCableServiceOperator(SO),
anditmaytakealongtimefortuning.
If you select the “- -” of Country Setting,
(Except for Finland, Sweden, Denmark and
Norway)
NOTE
Yourcableprovidermaychargefortheir
services,orrequireyoutoagreetoitsitems
andconditionsofbusiness.
DVB-CCablemaynotoperatecorrectlywith
somecableproviders.
CompatibilitywithDVB-Cdigitalcable
broadcastsisnotguaranteed.
AcquiredcertificationSO:Sweden(Comhem),
Denmark(YouSee,Stofa).
IftherearenotanyServiceOperatorthatyou
want,selectOther Operators.
Ifyouselect"OtherOperators",ortheselected
countrysupports"OtherOperators"only,itmay
takesometimetosearchallthechannels,orit
maynotsearchsomeofthechannels.
Ifsomeofthechannelsdonotappear,follow
thestepsbelow.
1.SETUP
→
Auto Tuning
→
Cable
2.Inputadditionalvaluessuchasthe
frequency,symbolrate,modulation,and
networkID(Youcanaskyourcableservice
providerfortheaboveinformation).
Thefollowingvaluesareneededinorderto
searchallavailableprogrammesquicklyand
correctly.Thecommonlyusedvaluesare
providedas"default".However,forcorrect
settings,pleaseinquireofthecableservice
provider.WhenrunningAutoTuningin
DVBcablemode,selectingFullwillsearch
throughallfrequenciestofindavailable
channels.Inthecasewhentheprogramme
isnotsearchedbyselectingtheDefault,
performthesearchingbyselectingtheFull.
However,inthecasewhentheprogramme
issearchedbyselectingtheFull,theAuto
Tuningtimecanbetakentoomuch.
»
Frequency:Enterauser-definedfrequency
range.
»
Symbolrate:Enterauser-definedsymbol
rate(Symbolrate:Speedatwhichadevice
suchasmodemsendssymbolstoa
channel).
»
Modulation:Enterauser-definedmodulation.
(Modulation:Loadingofaudioorvideo
signalsontocarrier).
»
NetworkID:Uniqueidentifierallocatedfor
eachuser.

21
ENG
ENGLISH
WATCHING TV
(When selecting Cable (DVB cable mode) if
Finland, Sweden, Denmark, Norway or “--”
country is chosen)
NOTE
NOTE
UseNUMBERbuttonstoinputa4-digit
passwordinLockSystem‘On’.
Symbolrate:Enterauser-definedsymbol
rate.(symbolrate:Speedatwhicha
devicesuchasmodemsendssymbolstoa
channel.)
Modulation:Enterauser-defiendmodulation.
(Modulation:Loadingofaudioorvideo
signalsontocarrier)
Frequency,Symbolrate,andModulation
modeareneededinordertoadda
programmecorrectlyinDVBcablemode.
Pleaseinquireofthecableserviceprovider
aboutthecorrectvalues.
UseNUMBERbuttonstoinputa4-digit
passwordinLockSystem‘On’.
Manually setting up programmes
(In digital mode)
ManualTuningletsyoumanuallyaddaprogramme
toyourprogrammelist.
(For countries other than Finland, Sweden,
Denmark and Norway & When selecting
Antenna if Finland, Sweden, Denmark, Norway
or “--”country is chosen)
1
PressMENUtoaccesstheMainmenus.
2
PresstheNavigationbuttonstoscrollto
SETUPandpressOK.
3
PresstheNavigationbuttonstoscrollto
Manual TuningandpressOK.
4
PresstheNavigationbuttonstoscrolltoDTV.
5
PresstheNavigationbuttonsorNumber
buttonstoscrollSelectthedesiredchannel
number,andthenaddprogrammes.
6
Whenyouarefinished,pressEXIT.
Whenyoureturntothepreviousmenu,press
BACK.
1
PressMENUtoaccesstheMainmenus.
2
PresstheNavigationbuttonstoscrollto
SETUPandpressOK.
3
PresstheNavigationbuttonstoscrollto
Manual TuningandpressOK.
4
PresstheNavigationbuttonstoscrolltoDTV.
5
PresstheNavigationbuttonsorNumber
buttonstoscrollSelectthedesiredFrequency,
SymbolrateandModulation,andthenadd
programmes.
6
Whenyouarefinished,pressEXIT.
Whenyoureturntothepreviousmenu,press
BACK.

22
ENG
ENGLISH
WATCHING TV
NOTE
UseNUMBERbuttonstoinputa4-digit
passwordinLockSystem‘On’.
L:SECAML/L(France)
BG:PALB/G,SECAMB/G(Europe/East
Europe/Asia/NewZealand/M.East/Africa
/Australia)
I:PALI/II(U.K./Ireland/HongKong/South
Africa)
DK:PALD/K,SECAMD/K(EastEurope/
China/Africa/CIS)
Tostoreanotherchannel,repeatsteps4to9.
Manually setting up programmes
(In analogue mode)
ManualTuningletsyoumanuallytuneandarrange
thestationsinwhateverorderyoudesire.
1
PressMENUtoaccessthemainmenus.
2
PresstheNavigationbuttonstoscrollto
SETUPandpressOK.
3
PresstheNavigationbuttonstoscrollto
Manual TuningandpressOK.
4
PresstheNavigationbuttonstoscrollto
TVandpressOK.
5
PresstheNavigationbuttonstoscrollto
System.
6
PresstheNavigationbuttonstoscrollto
V/UHF or Cable.
7
PresstheNavigationbuttonsorNumber
buttonstoscrollSelectthedesiredchannel
number.
8
PresstheNavigationbuttonstoscrollto
Commencesearching.
9
PresstheNavigationbuttonstoscrollto
StoreandpressOK
10
Whenyouarefinished,pressEXIT.
Whenyoureturntothepreviousmenu,press
BACK.
Assigning a station name
Youcanassignastationnamewithfivecharacters
toeachprogrammenumber.
1
PressMENUtoaccessthemainmenus.
2
PresstheNavigationbuttonstoscrollto
SETUPandpressOK.
3
PresstheNavigationbuttonstoscrollto
Manual TuningandpressOK.
4
PresstheNavigationbuttonstoscrolltoTV.
5
PresstheNavigationbuttonstoscrolltoName
andpressOK.
6
PresstheNavigationbuttonstoscrolltoTV
System.
7
PresstheNavigationbuttonstoscrolltoV/UHF
or Cable.
8
PresstheNavigationbuttonstoscrollSelect
thepositionandmakeyourchoiceofthe
secondcharacter,andsoon.Youcanusean
thealphabetAtoZ,thenumber0to9,+/-,and
blankandpressOK
9
PresstheNavigationbuttonstoscrolltoClose
andpressOK.
10
PresstheNavigationbuttonstoscrolltoStore
andpressOK
11
Whenyouarefinished,pressEXIT.
Whenyoureturntothepreviousmenu,press
BACK.
23
ENG
ENGLISH
WATCHING TV
Editing your programme list
1
PressMENUtoaccessthemainmenus.
2
PresstheNavigationbuttonstoscrollto
SETUPandpressOK.
3
PresstheNavigationbuttonstoscrollto
Programme EditandpressOK.
4
Editprogrammesusingthefollowingbuttons.
Button Description
Highlightstheprogrammetype
Navigation Scrollsthroughprogrammetypes
orprogrammes
OK Selectsaprogrammetoview
P ( )
Movestothepreviousornext
page
NOTE
UseNUMBERbuttonstoinputa4-digit
passwordinLockSystem‘On’.
NOTE
IfyouselectCable,youcanseeCableDTV
Settingmenu.
WhenChannelAutoUpdateisOn,the
channelinformationwillbeautomatically
updatedwheneverthenetworkinformation
changes.
WhenChannelAutoUpdateisOff,the
channelinformationwillnotbeupdated.
Cable DTV Setting (In Cable
mode only)
TherangethatausercanselectfromtheService
Operatormenudiffersdependingonnumberof
ServiceOperatorsupportedbyeachcountry,and
ifnumberofsupportedServiceOperatorforeach
countryis1,correspondingfunctionbecomesnon-
activation.
AfterchangingServiceOperator,awarning
windowsayingthatchannelmapwillbedeleted
whenOKbuttonispressedorCloseisselected,
andaAuto-tuningpop-upwindowappearswhen
'YES'isselected.
SETUP
Move
OK
Auto Tuning
Manual Tuning
Programme Edit
Software Update : On
Diagnostics
CI Information
Cable DTV Setting ꔉ
1
PressMENUtoaccesstheMainmenus.
2
PresstheNavigationbuttonstoscrollto
SETUPandpressOK.
3
PresstheNavigationbuttonstoscrolltoCable
DTV SettingandpressOK.
4
PresstheNavigationbuttonstoscrollto
Service Operator or Channel Auto update
andpressOK.
5
Whenyouarefinished,pressEXIT.
Whenyoureturntothepreviousmenu,press
BACK.

24
ENG
ENGLISH
WATCHING TV
In TV mode
1
Pressthenavigationbuttons,scrolltothe
programmenumberyouwishtodelete.
2
PresstheRedbuttontodeletetheselected
programmenumber.
3
PresstheBluebuttontorelease.
1
Pressthenavigationbuttons,scrolltothe
programmenumberyouwishtomove.
2
PresstheGreenbuttonwiththeprogramme
numberselected,youwishtomove.
3
Pressthenavigationbuttons,movetowhere
youwishtoplacetheprogrammenumber,and
thenpresstheGreenbuttonagain.
1
PresstheYellowbuttontostartAutoSort.
NOTE
NOTE
Theselectedprogrammeisdeleted,allthe
followingprogrammesareshiftedupone.
AfteractivatingAutoSortonce,youcanno
longereditprogrammes.
Deleting a programme
Moving a programme
Auto Sort
1
Pressthenavigationbuttons,scrolltothe
programmenumberyouwishtoskip.
2
PresstheBluebuttontoskiptheselected
programmenumber.
3
PresstheBluebuttonagaintorelease.
Skipping a programme number
NOTE
Youwillbeunabletoselectaskipped
programmeusingP (
) buttonsduring
watchingTV.
Ifyouwishtowatchaskippedprogramme,
directlyentertheprogrammenumber
usingnumberbuttonsorreleaseitinthe
ProgrammeEditmenuorEPG.
In DTV/RADIO mode
1
Pressthenavigationbuttons,scrolltothe
programmenumberyouwishtoskip.
2
PresstheBluebuttontoskiptheselected
programmenumber.
3
PresstheBluebuttonagaintorelease.
NOTE
Theskippedprogrammesareshownin
blueontheprogrammelistandthese
programmeswillnotappearonthescreen
whenchangingprogrammesusingP( )
buttonsduringwatchingTV.
Ifyouwishtowatchaskippedprogramme,
directlyentertheprogrammenumber
usingnumberbuttonsorreleaseitinthe
ProgrammeEditmenuorEPG.
Skipping a programme number
25
ENG
ENGLISH
WATCHING TV
Software Update
SoftwareUpdatemeanssoftwarecanbe
downloadedthroughthedigitalterrestrial
broadcastingsystem.
1
PressMENUtoaccessthemainmenus.
2
PresstheNavigationbuttonstoscrollto
SETUPandpressOK.
3
PresstheNavigationbuttonstoscrollto
Software UpdateandpressOK.
4
SelectOnorOff.
IfyouselectOn,auserconfirmmessagebox
willbedisplayedtonotifythatnewsoftwareis
found.
5
Whenyouarefinished,pressEXIT.
Whenyoureturntothepreviousmenu,press
BACK.
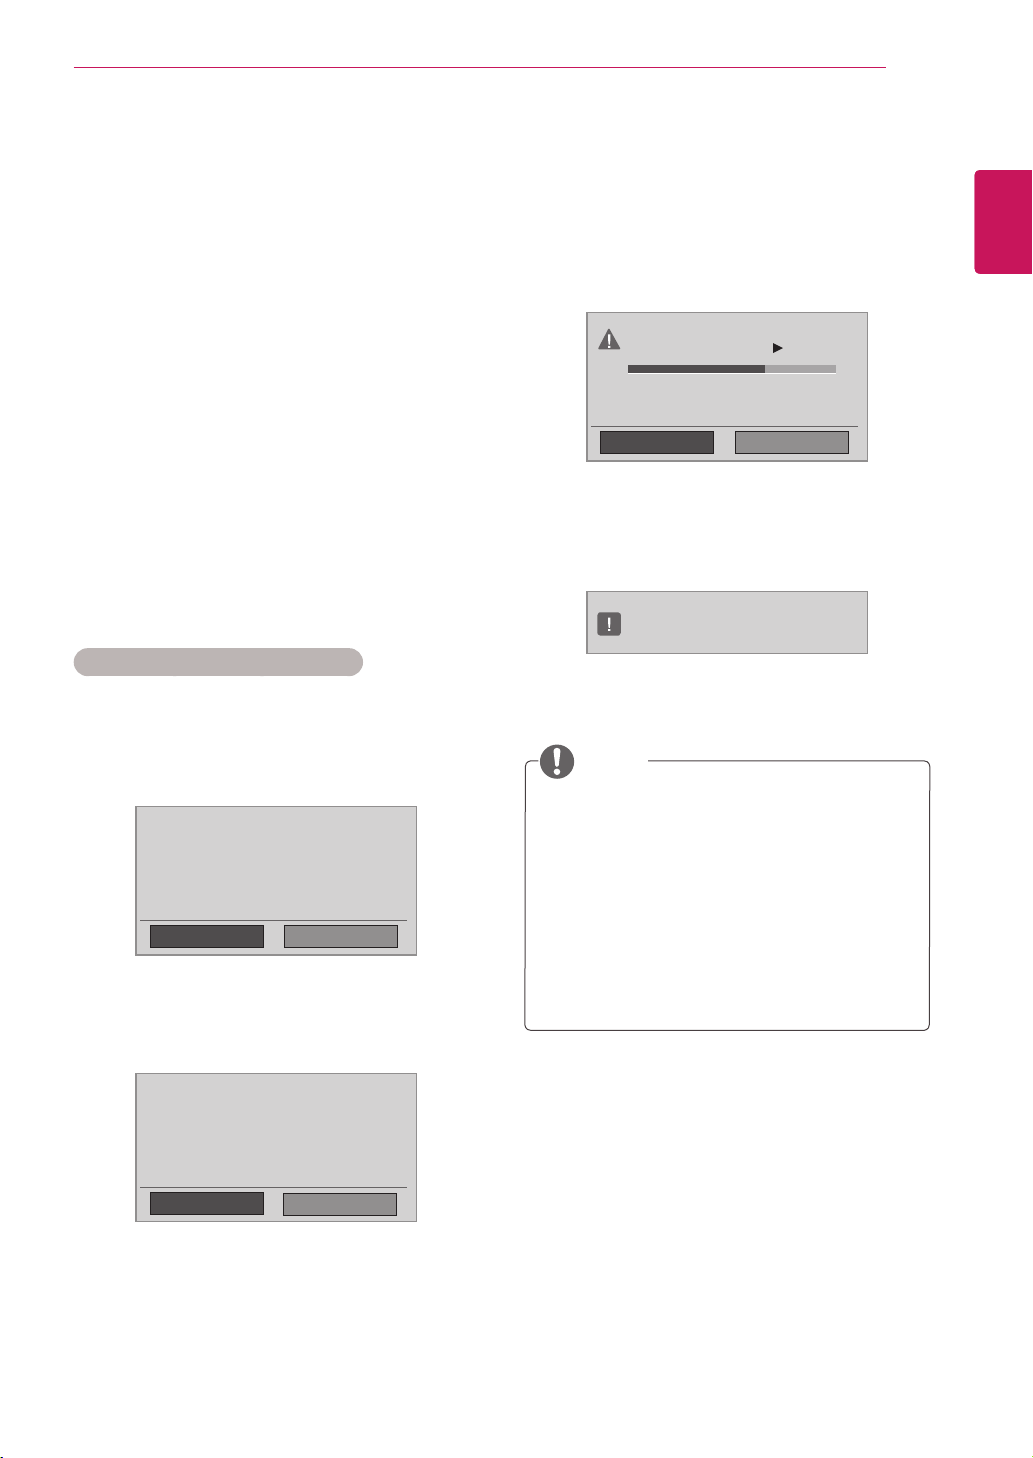
When setting “Software Update”
Occasionally,atransmissionofupdated
digitalsoftwareinformationwillresultinthe
followingmenuontheMonitorsetscreen.
SimpleUpdate:forcurrentupdatestream.
ScheduleUpdate:forscheduledupdate
streamWhentheSoftwareUpdatemenu
is"Off",themessagetochangeitto"On"
appears.
Whenthepoweristurnedoff,downloading
starts.Whenthepoweristurnedonwhile
updating,theprogressstatusisdisplayed.
SelecttheYesusingthe < >buttonandyou
willseethefollowingpicture.
AftertheSoftwareUpdateiscomplete,the
Systemrestarts.
Yes
Close
Software update is available.
Would you like to download now?
(approximately 30 Min ~ 2 hours)
Your TV software is updated when you turn off the TV
using the remote control or local key.
Do not unplug!
Yes
Close
A new software update is available at 00/00/0 00:00.
Do you want to update the software when available?
Hide
Stop
Software downloading progress.
Ver. 03.01.00 Ver. 03.02.00
65 %
New Software is successfully installed.
DuringProgressofaSoftwareUpdate,please
notethefollowing
▪ TheMonitorSetmustnotbeswitchedoff.
▪ Theantennamustnotbedisconnected.
▪ AfterSoftwareUpdate,youcanconfirmthe
updatedsoftwareversioninDiagnostics
menu.
▪ Itmaytakehourstodownloadthesoftware,
somakesurethatthepowerstaysonduring
thedownload.
NOTE

26
ENG
ENGLISH
WATCHING TV
Diagnostics
Thisfunctionenablesyoutoviewinformationon
theManufacturer,Model/Type,SerialNumberand
SoftwareVersion.
Thisdisplaystheinformationandsignal
strengthofthetuned*MUX.
Thisdisplaysthesignalinformationand
servicenameoftheselectedMUX.
(*MUX:Ahigherdirectoryofchannelsin
digitalbroadcasting(asingleMUXcontains
multiplechannels.))
1
PressMENUtoaccessthemainmenus.
2
PresstheNavigationbuttonstoscrollto
SETUPandpressOK.
3
PresstheNavigationbuttonstoscrollto
DiagnosticsandpressOK.
4
DisplayManufacturer,Model/Type,Serial
NumberandSoftwareVersion.
5
Whenyouarefinished,pressEXIT.
Whenyoureturntothepreviousmenu,press
BACK.
CI [Common interface]
Information
Thisfunctionenablesyoutowatchsomeencrypted
services(payservices).IfyouremovetheCI
Module,youcannotwatchpayservices.
WhenthemoduleisinsertedintotheCIslot,you
canaccessthemodulemenu.Topurchasea
moduleandsmartcard,contactyourdealer.Donot
repeatedlyinsertorremoveaCImodule
fromtheMonitorset.Thismaycauseamalfunction.
WhentheMonitorsetisturnedonafterinsertinga
CIModule,youmaynothaveanysoundoutput.
ThismaybeincompatiblewiththeCImoduleand
smartcard.
CI(CommonInterface)functionsmaynotbe
possibledependinguponthecountrybroadcasting
circumstances.
WhenusingaCAM(ConditionalAccessModule),
pleasemakesureitmeetsfullytherequirementsof
eitherDVBCIorCIplus.
1
PressMENUtoaccessthemainmenus.
2
PresstheNavigationbuttonstoscrolltoSETUP
andpressOK.
3
PresstheNavigationbuttonstoscrolltoCI
Information.andpressOK.
4
Selectthedesireditem:Moduleinformation,
smartcardinformation,language,orsoftware
downloadetcandpressOK.
5
Whenyouarefinished,pressEXIT.
Whenyoureturntothepreviousmenu,press
BACK.
ThisOSDisonlyforillustrationandthemenu
optionsandscreenformatwillvaryaccording
totheDigitalpayservicesprovider.
ItispossibleforyoutochangeCI(Common
Interface)menuscreenandserviceby
consultingyourdealer.
NOTE

27
ENG
ENGLISH
WATCHING TV
Selecting the programme list
Youcancheckwhichprogrammesarestoredin
thememorybydisplayingtheprogrammelist.
Displaying programme LIST
1
PressLISTtoaccesstheProgrammeList.
2
Whenyouarefinished,pressMENU or EXIT.
NOTE
Youmayfindsomeblueprogrammes.
Thesehavebeensetuptobeskippedby
autoprogrammingorintheprogramme
editmode.
Someprogrammeswiththechannel
numbershownintheprogramme
LISTindicatethereisnostationname
assigned.
Selecting a programme in the programme list
1
PresstheNavigationbuttonstoprogramme.
2
Switchtothechosenprogrammenumberand
pressOK.
NOTE
PressTV/RAD in Digital TV. (Themode
willbeswitchedbetweenTV,DTVand
Radiofromtheprogramyouarecurrently
watching.)
Paging through a programme list
1
PresstheNavigationbuttonstoturnthepages.
2
ReturntonormalTVviewingandPressLIST.
Favourite programme setup
Selecting favourite programme
Favouriteprogrammeisaconvenientfeaturethat
letsyouquiklyscanuptoprogrammesofyour
choicewithouthavingtowaitfortheTVtoscan
throughallthein-betweenprogrammes.
1
Selectyourdesiredprogramme.
2
PressQ.MENUtoaccesstheFavouritemenu.
3
PresstheNavigationbuttons
toscrollto
Favourite.
4
Whenyouarefinished,pressOK or Q.MENU.
NOTE
Thiswillautomaticallyincludethe
selectedprogrammeintoyourfavourite
programmelist.
Displaying the favourite programme list
1
PressFAVtoaccesstheFavouriteProgramme
List.
2
Whenyouarefinished,pressEXIT.
28
ENG
ENGLISH
WATCHING TV
Using additional options
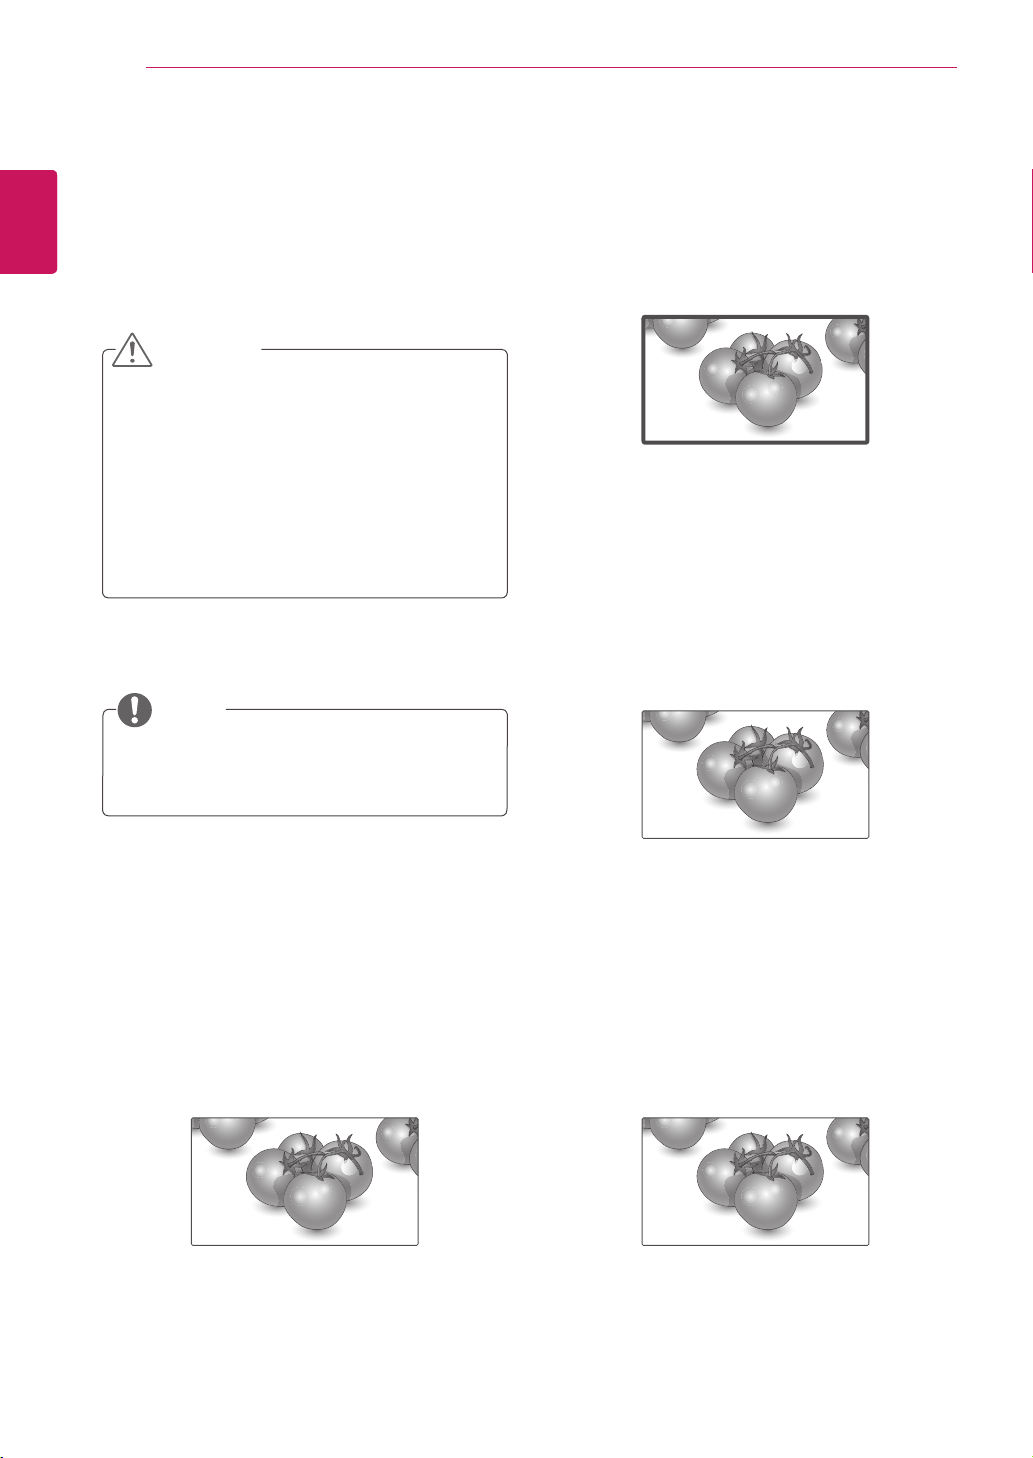
Adjusting aspect ratio
Resizetheimagetoviewtheimageatitsoptimal
sizebypressingRATIO whileyouarewatching
Monitorset.
Ifafixedimagedisplaysonthescreenfora
longperiodoftime,itwillbeimprintedand
becomeapermanentdisfigurementonthe
screen.Thisis“imageburn”or“burn-in”and
notcoveredbythewarranty.
Iftheaspectratioissetto4:3foralong
periodoftime,imageburnmayoccuron
theletterboxedareaofthescreen.
CAUTION
Youcanalsochangetheimagesizeby
accessingthequickmenusorthemainmenus.
NOTE
-16:9:Thefollowingselectionwillallowyou
toadjustthepicturehorizontally,inlinear
proportion,tofilltheentirescreen(usefulfor
viewing4:3formattedDVDs).
Just Scan
-Just Scan:FollowingSelectionwillleadtoyou
viewthepictureofbestqualitywithoutlossof
originalpictureinhighresolutionimage.
Note:IfthereisnoiseinoriginalPicture,You
canseethenoiseattheedge.
-Original:WhenyourMonitorsetreceivesawide
screensignalitwillautomaticallychangetothe
pictureformatbroadcast.
-Full Wide:WhenMonitorsetreceivesthewide
screensignal,itwillleadyoutoadjustthepicture
horizontallyorvertically,inalinearproportion,to
filltheentirescreenfully.
Original
Full Wide
29
ENG
ENGLISH
WATCHING TV
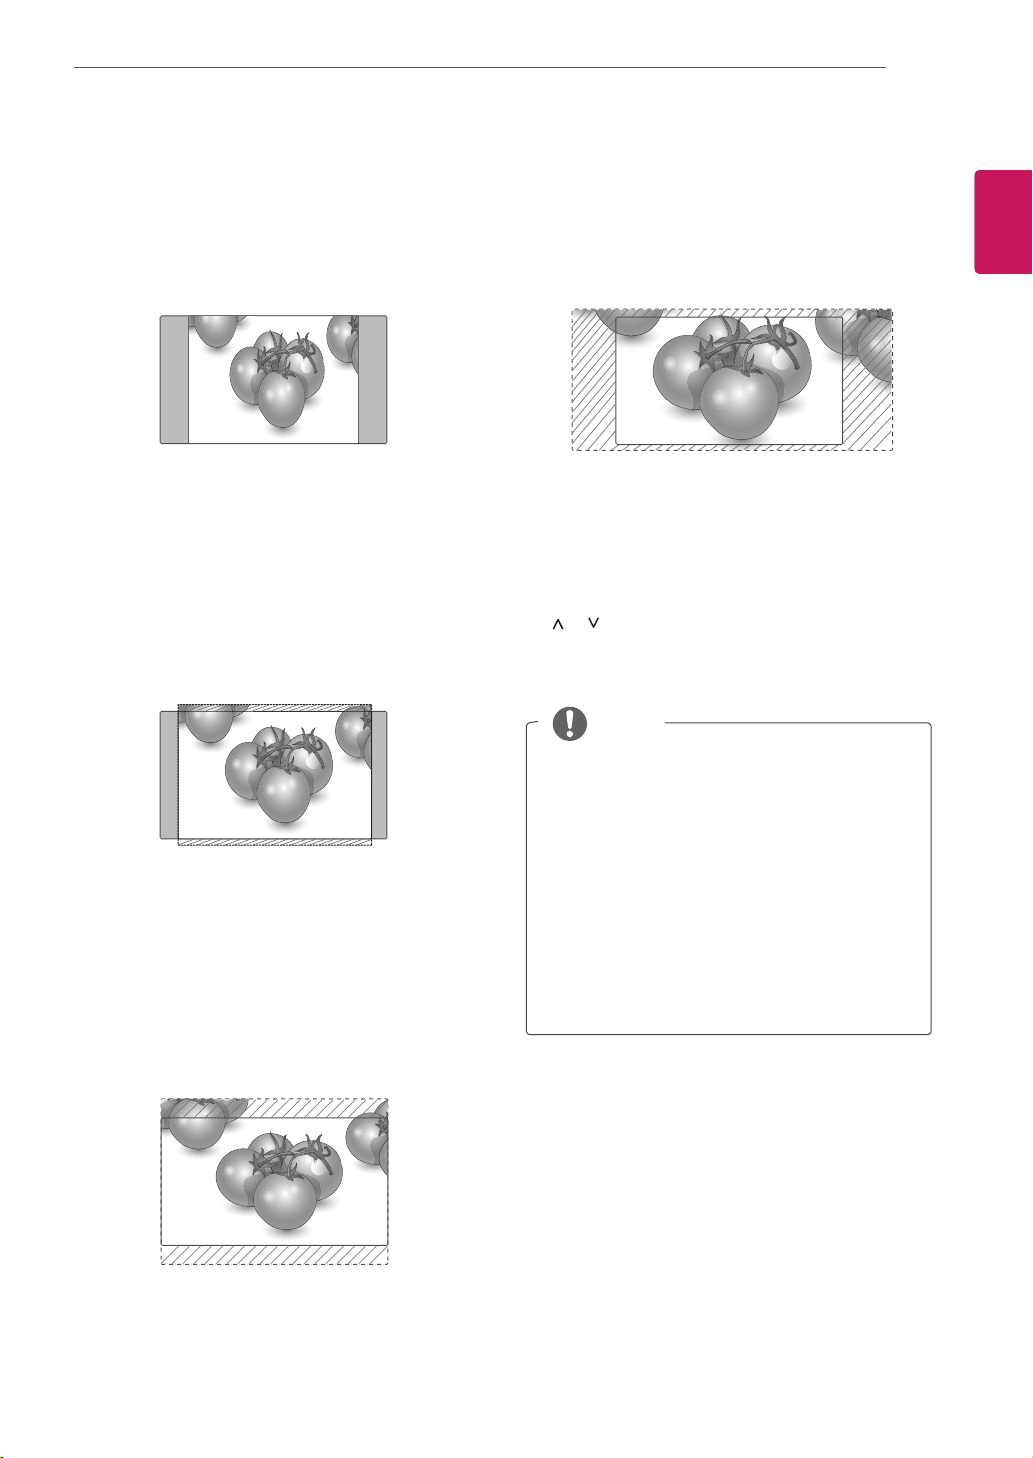
-4:3:Thefollowingselectionwillallowyoutoview
apicturewithanoriginal4:3aspectratio,gray
barswillappearonboththeleftandrightofthe
screen.
-14:9:Youcanviewapictureformatof14:9or
ageneralMonitorsetprogrammeinthe14:9
mode.The14:9screenisviewedinthesame
wayasin4:3,butismagnifiedtotheleftand
right.
-Zoom:Thefollowingselectionwillallowyouto
viewthepicturewithoutanyalteration,while
fillingtheentirescreen.However,thetopand
bottomofthepicturewillbecropped.
Youcanonlyselect4:3, 16:9 (Wide), 14:9,
Zoom/Cinema ZoominComponentmode.
Youcanonlyselect4:3, Original, 16:9
(Wide), 14:9, Zoom/Cinema ZoominHDMI
mode.
Youcanonlyselect4:3, 16:9 (Wide) in
RGB-PC, HDMI-PCmodeonly.
InDTV/HDMI/Component(over720p)mode,
JustScanisavailable.
InAnalogue/AVmode,FullWideisavailable.
NOTE
-Cinema Zoom:ChooseCinemaZoomwhenyou
wanttoenlargethepictureincorrectproportion.
Note:Whenenlargingorreducingthepicture,
theimagemaybecomedistorted.
< or >
button:Adjustenlargeproportionof
CinemaZoom.Theadjustmentrangeis1to
16.
or
button:Movethescreen.

30
ENG
ENGLISH
WATCHING TV
IfyouwanttouseHDMI-PCmode,you
mustsettheinputlabeltoPCmode.
NOTE
Using the input list
Selecting an input source
1
PressINPUTtoaccesstheinputsourcelist.
-Theconnecteddevicedisplaysoneachinput
source.
2
PresstheNavigationbuttonstoscrolltooneof
theinputsourcesandpressOK.
Input source Description
Antenna or
Cable
WatchTVovertheair,cable,and
digitalcablebroadcast
RGB ViewaPCdisplayonthescreen
AV WatchthecontentsinaVCRor
otherexternaldevices
Component WatchthecontentsinaDVDor
otherexternaldevices,orthrough
adigitalset-topbox
HDMI WatchcontentsinaPC,DVD
orDigitalsettopboxotherhigh
definitiondevices
Theconnectedinputsourcesdisplayinblack
andthedisconnectedinputsourcesingrey.
-Ifyouaddaninputlabeltoeachinput
sources,youcaneasilyidentifyadevice
connectedtoeachinputsource.
Adding an Input label
1
PressMENUtoaccessthemainmenus.
2
PresstheNavigationbuttonstoscrollto
OPTION andpressOK.
3
PresstheNavigationbuttonstoscrollto
Input LabelandpressOK.
4
PresstheNavigationbuttonstoscrolltooneof
theinputsources.
5
PresstheNavigationbuttonstoscrolltooneof
theinputlabelandpressOK.
6
Whenyouarefinished,press EXIT.
Whenyoureturntothepreviousmenu,press
BACK.
On-screen menu language /
Country selection
Theinstallationguidemenuappearsonthe
Monitorsetscreenwhenitisswitchedonforthe
firsttime.
1
PresstheNavigationbuttonstoscrollto
Desired Language andpressOK.
2
PresstheNavigationbuttonstoscrollto
Country andpressOK.
1
PressMENUtoaccessthemainmenus.
2
PresstheNavigationbuttonstoscrollto
OPTION andpressOK.
3
PresstheNavigationbuttonstoscrollto
Menu Language orCountry andpressOK.
4
PresstheNavigationbuttonstoscrollto
Desired Language orCountry optionyou
wantandpressOK.
5
Whenyouarefinished,pressEXIT.
Whenyoureturntothepreviousmenu,press
BACK.
WhenFranceisselectedforCountry,
passwordisnot'0','0','0','0'but'1','2','3',
'4'.
If you want to change Language /
Country selection

31
ENG
ENGLISH
WATCHING TV
Ifyoudonotfinishtheset-up Installation
GuidebypressingBACKorifyoutime
outontheOSD(OnScreenDisplay)the
installationmenuwillcontinuouslyappear
untilthesetupiscompletedwheneverthe
Monitorsetisswitchedon.
Ifyouselectthewronglocalcountry,teletext
maynotappearcorrectlyonthescreenand
someproblemsmayoccurduringteletext
operation.
TheCI(CommonInterface)functionmaynot
beappliedbasedoncountrybroadcasting
circumstances.
DTVmodecontrolbuttonsmaynot
functionbasedoncountrybroadcasting
circumstances.
IncountrythatDigitalbroadcastingregulation
isn’tfixed,someDTVfunctionmaynot
workdependingondigitalbroadcasting
circumstances.
TheCountrySetting"UK"shouldonlybe
activatedinUK.
Ifthecountrysettingissetto"--",European
terrestrial/cabledigitalstandardbroadcasting
programmesareavailable,butsomeDTV
functionsmaynotworkproperly.
NOTE
Language selection (In digital
mode only)
TheAudiofunctionallowsselectionofapreferred
language.
Ifaudiodatainaselectedlanguageisnot
broadcast,thedefaultlanguageaudiowillbe
played.
UsetheSubtitlefunctionwhentwoormoresubtitle
languagesarebroadcast.Ifsubtitledataina
selectedlanguageisnotbroadcast,thedefault
languagesubtitlewillbedisplayed.
Whenthelanguagesyouselectedastheprimary
forAudioLanguageandSubtitleLanguagearenot
supported,youcanselectlanguageinsecondary
category.
1
PressMENUtoaccessthemainmenus.
2
PresstheNavigationbuttonstoscrollto
OPTION andpressOK.
3
PresstheNavigationbuttonstoscrollto
Audio Language orSubtitle Language and
pressOK.
4
PresstheNavigationbuttonstoscrollto
Desired Language optionyouwantandpress
OK.
5
Whenyouarefinished,pressEXIT.
Whenyoureturntothepreviousmenu,press
BACK.
Audio Language Selection
Whentwoormoreaudiolanguagesarebroadcast,
youcanselecttheaudiolanguage.
1
PressQ.MENUtoaccessthequickmenu.
2
PresstheNavigationbuttonstoscrolltoAudio.
3
PresstheNavigationbuttonstoscrollto
Audio Language optionyouwantandpress
OK.
4
Whenyouarefinished,pressQ.MENU or
EXIT.
32
ENG
ENGLISH
WATCHING TV
Audio Language OSD Information
Display Status
NotAvailable
MPEGAudio
DolbyDigitalAudio
Audiofor“VisualImpaired”
Audiofor“HearingImpaired”
DolbyDigitalPlusAudio
AACAudio
Subtitle Language Selection
Whentwoormoresubtitlelanguagesare
broadcast,youcanselectthesubtitlelanguage
withtheSUBTITLEbuttonontheremotecontrol.
PresstheNavigationbuttonstoselectasubtitle
language.
Subtitle Language OSD Information
Display Status
NotAvailable
TeletextSubtitle
Subtitlefor“HardofHearing”
Theaudio/subtitlescanbedisplayedina
simplerformwith1to3charactersbroadcast
bytheserviceprovider.
WhenyouselectsupplementaryAudio(Audio
for“Visual/HearingImpaired”)theTVmay
outputapartoftheMainaudio.
Using the Lock options
Locking the buttons on the
Monitor set.
Enterthepassword,press‘0’,‘0’,‘0’,‘0’onthe
remotecontrolhandset.
WhenFranceisselectedforCountry,passwordis
not‘0’,‘0’,‘0’,‘0’but‘1’,’2’,’3’,’4’.
LockthebuttonsontheMonitorsettopreventany
unwantedoperationsoraccidentsbychildren.
1
PressMENUtoaccessthemainmenus.
2
PresstheNavigationbuttonstoscrolltoLOCK
andpressOK.
3
PresstheNavigationbuttonstoscrollto
Key LockandpressOK.
4
PresstheNavigationbuttons
toscrolltoOn
andpressOKtoactivatetheKeylockfeature.
-TodeactivatetheKeylockfeature,selectOff.
5
Whenyouarefinished,pressEXIT.
Whenyoureturntothepreviousmenu,press
BACK.
TheMonitorsetisprogrammedtoremember
thelastsettingafteryouturntheMonitorset
off.
Ifyouturnthemonitorsetoffwhilethekey
lockfeatureisactivatedandwishtoturnit
backon,pressthe onthemonitorset.
Youcanalsoswitchthedeviceonusingthe
remotecontrolbypressingthe , INPUT ,P
orNumberbuttons.
IfyoupressanybuttonontheMonitorset
withtheKeylockfeatureactivated, Key
Lock Onappearsonthescreen.
NOTE
33
ENG
ENGLISH
WATCHING TV
Parental control
(In digital mode only)
Thisfunctionoperatesaccordingtoinformation
fromthebroadcastingstation.Thereforeifthe
signalhasincorrectinformation,thisfunctiondoes
notoperate.
Apasswordisrequiredtogainaccesstothis
menu.
Thissetisprogrammedtorememberwhichoption
itwaslastsettoevenifyouswitchthesetoff.
Preventschildrenfromwatchingcertainadult’sTV
programmes,accordingtotheratingslimitset.
Enterapasswordtowatchablockedprogramme.
Using the quick menu
Customizethefrequentlyusingmenus.
1
PressQ.MENUtoaccessthequickmenu.
2
PresstheNavigationbuttonstoscrollthrough
thefollowingmenus.
Menu Description
Aspect Ratio
Resizesanimage.(16:9,Just
Scan,Original, Full Wide, 4:3,
14:9, Zoom,CinemaZoom1)
Clear Voice ll
Bydifferentiatingthehuman
soundrangefromothers,it
helpsuserslistentohuman
voicesbetter.
Picture Mode
Selectsoneofthepresetimage
modes(Vivid,Standard,
Cinema,Sport,Game)
Sound Mode
Selectsoneofthesoundmodes
(Standard,Music,Cinema,
Sport,Game)
Audio
Selectsthesoundoutput.
Sleep Timer
Setsthelengthoftimeuntilthe
Monitorsettoturnsoff
Favourite
Selectsthefavourite
programme.
USB Device
Selects“Eject”inordertoeject
USBdevice.
Aspect Ratio
16:9
Theavailablemenusandoptionsmaydiffer
fromtheinputsourcethatyouareusing.
NOTE
3
PresstheNavigationbuttonstoscrolltoan
optionyouwantandpressOK.
1
PressMENUtoaccessthemainmenus.
2
PresstheNavigationbuttonstoscrolltoLOCK
andpressOK.
3
PresstheNavigationbuttonstoscrollto
Parental Guidance andpressOK.
4
PresstheNavigationbuttonstoscrollto
MakeappropriateadjustmentsandpressOK.
5
Whenyouarefinished,pressEXIT.
Whenyoureturntothepreviousmenu,press
BACK.
(ExceptforFrance)
(OnlyFrance)
Blocking Off ꔓ
10 and above
11 and above
12 and above
13 and above
14 and above
15 and above
16 and above
17 and above
18 and above
Blocking Off : Permits all
programmes
10 and above
11 and above
12 and above
13 and above
14 and above
15 and above
16 and above
17 and above
18 and above
Blocking Off : Permits all
programmes
Blocking Off ꔓ
34
ENG
ENGLISH
EPG (ELECTRONIC PROGRAMME GUIDE) (IN DIGITAL MODE)
EPG (ELECTRONIC PROGRAMME GUIDE)
(IN DIGITAL MODE)
Using Electronic
Programme Guide
ThissystemhasanElectronicProgrammeGuide
(EPG)tohelpyournavigationthroughallthe
possibleviewingoptions.
TheEPGsuppliesinformationsuchasprogramme
listings,startandendtimesforallavailable
services.Inaddition,detailedinformationabout
theprogrammeisoftenavailableintheEPG(the
availabilityandamountoftheseprogrammedetails
willvary,dependingontheparticularbroadcaster).
ThisfunctioncanbeusedonlywhentheEPG
informationisbroadcastbybroadcasting
companies.
TheEPGdisplaystheprogrammedetailsfornext
8days.
1
PressINFO toshowsthepresentscreen
information.
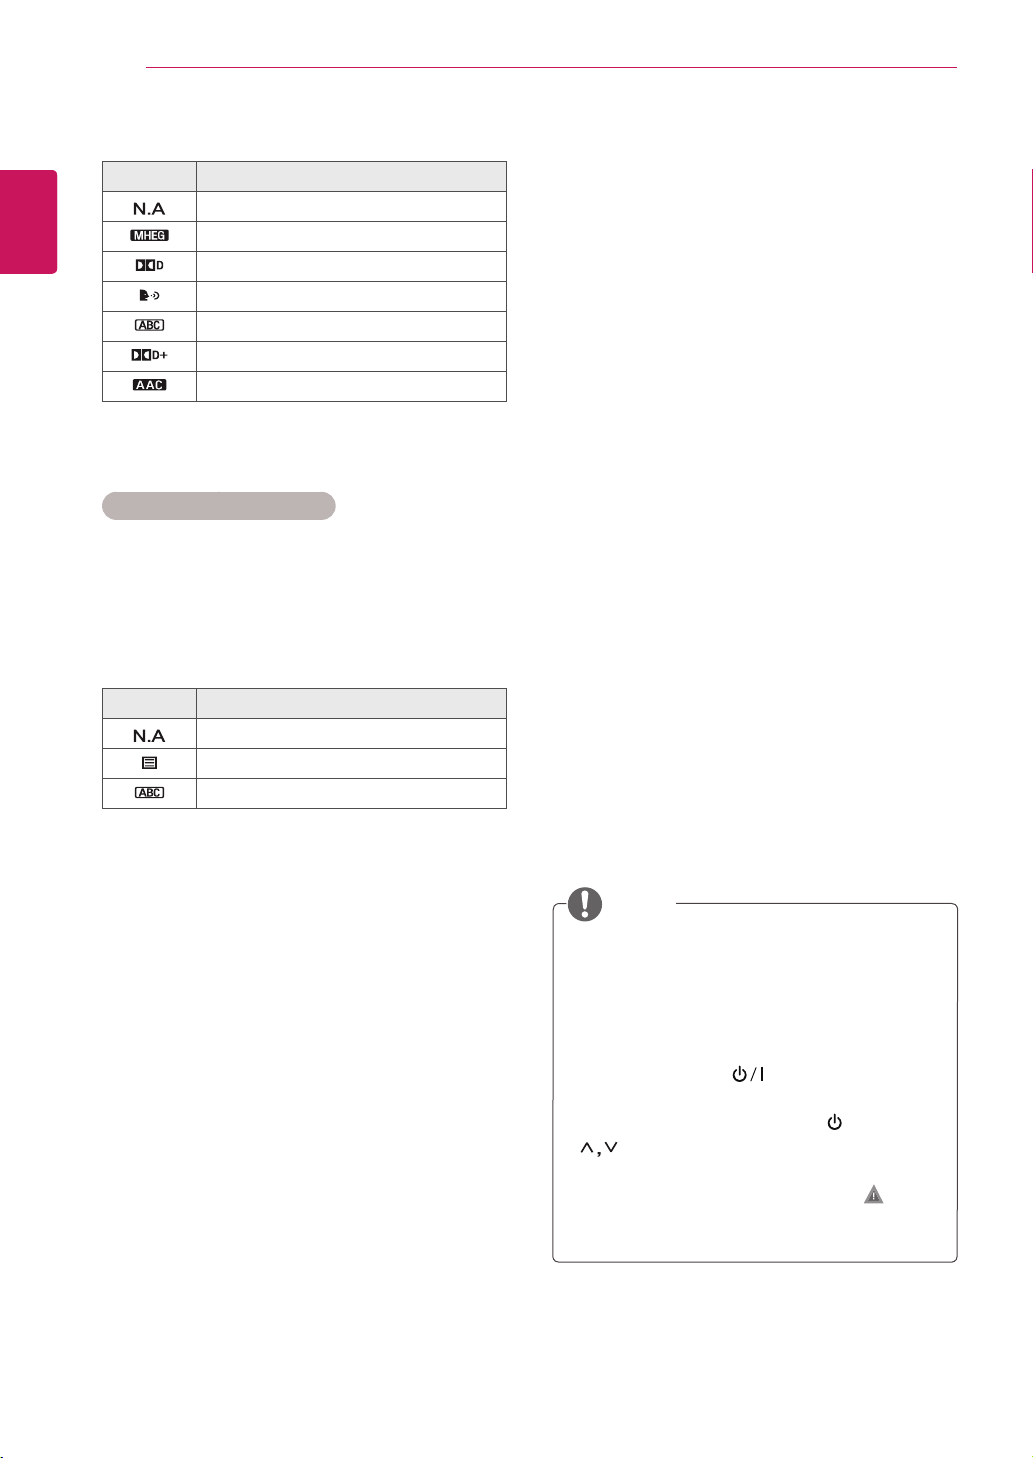
Icon Description
DisplayedwithaDTVProgramme.
DisplayedwithaRadioProgramme.
DisplayedwithaMHEGProgramme.
DisplayedwithaAACProgramme.
Aspectratioofbroadcastingprogramme.
DisplayedwithaTeletextProgramme.
DisplayedwithaSubtitleProgramme.
DisplayedwithaScrambleProgramme.
DisplayedwithaDolbyProgramme.
DisplayedwithaDolbyDigitalPLUS
Programme.
Broadcastedprogrammewiththeicon
maynotbedisplayedinMonitorOut
dependingontheinformationofthe
programme.
576i/p,720p,1080i/p:Resolutionof
broadcastingprogramme
NOTE
Switch on/off EPG
1
PressGUIDEtoswitchonoroffEPG.
Select a programme
1
PresstheNavigationbuttonsorPAGE buttons
toselectdesiredprogramme.
2
TheEPGwilldisappearaftermovingtoa
selectedprogram,pressOK.
Programme Guide
ALL
NOW
NEXT
1 YLE TV1
Keno
World Business
2 YLE TV2
4 TV..
Your World Today
Fantomen
Legenen om Den....
Kritiskt
Naturtimmen
ABC
Lyssna
Tänään otsikoissa
Glamour
5 YLE FST
6 CNN
8 YLE24
RADIOPr. Change
▲
Favourite
Mode Schedule Schedule List
Information
That ’70s show
1 YLE TV1
6 Apr. 2007 15:09
▲
Button Function in NOW/NEXT
Guide Mode
Youcanviewaprogrambeingbroadcastedand
onescheduledtofollow.
Button Description
RED Button ChangeEPGmode.
YELLOW
Button
EnterTimerRecord/Remindsetting
mode.
BLUE Button EnterTimerRecord/Remindlistmode.
OK TheEPGwilldisappearaftermovingto
aselectedprogram.
or
SelectNOWorNEXTProgramme.
or
SelecttheBroadcastProgramme.
PAGE ( , )
PageUp/Down.
GUIDE SwitchoffEPG.
BACK
EXIT
TV/RAD SelectTVorRADIOProgramme.
INFO Detailinformationonoroff
FAV Thisdisplaysthenow/nextmodeforthe
programmeintheFavouriteList.
35
ENG
ENGLISH
EPG (ELECTRONIC PROGRAMME GUIDE) (IN DIGITAL MODE)
Button Description
GREEN
Button
SwitchoffDatesettingmode.
OK Changetotheselecteddate.
or
Selectadate.
SwitchoffDatesettingmode.
GUIDE SwitchoffEPG.
BACK
EXIT
Button Description
or
TextUp/Down.
YELLOW
Button
EnterTimerRecord/Remindsetting
mode.
INFO Thedetailinformationonoroff.
BACK
GUIDE SwitchoffEPG.
Button Function in Date Change
Mode
Button Function in Extended
Description Box
Button Description
RED Button ChangeEPGmode.
GREEN
Button
EnterDatesettingmode.
YELLOW
Button
EnterTimerRecord/Remindsetting
mode.
BLUE Button EnterTimerRecord/Remindlistmode.
OK TheEPGwilldisappearaftermovingto
aselectedprogram.
or
SelectNOWorNEXTProgramme.
or
SelecttheBroadcastProgramme.
PAGE ( , )
PageUp/Down.
GUIDE SwitchoffEPG.
BACK
EXIT
TV/RAD SelectTVorRADIOProgramme.
INFO Detailinformationonoroff
FAV Thisdisplaysthe8DayGuidemodefor
theprogrammeintheFavouriteList.
Button Function in 8 Day Guide
Mode
Button Description
BACK ChangetoGuideorSchedulemode.
or
SelectRecordorRemind.
Functionsetting.
or
SelectDate,Start/Endtimeor
Programme.
OK SaveTimerRecord/Remind.
Button Function in Record/
Remind Setting Mode
Setsastartorendtimeforrecording,andsets
onlyastarttimeforthereminder.
Thisfunctionisavailableonlywhenrecording
equipmentthatusepin8recordingsignalinghas
beenconnectedtotheAVterminal,usingaSCART
cable.
Button Description
RED Button AddnewManualRecordingsetting
mode.
GREEN
Button
AddnewTimerWatchingsettingmode.
BLUE Button ChangetoGuidemode.
GUIDE
BACK SwitchoffEPG.
EXIT
OK SelectyourdesiredOption(Modify/
Delete/DeleteAll).
or
SelectScheduleList.
PAGE ( , )
PageUp/Down.
Button Function in Schedule List
Mode
Ifyou’vecreatedaschedulelist,ascheduled
programisdisplayedatthescheduledtimeeven
whenyouarewatchingadifferentprogramatthe
time.
OnlytheUp/Down/OK/BACKkeyswillworkwhen
apopupwindowisopen.
36
ENG
ENGLISH
ENTERTAINMENT
V
IDE
O
C
OMPONENT I
N
USB IN
AV
A
UDI
O
Y
P
B
P
R
L
RS
-2
3
2
C
IN
(CONTROL & SERVICE
)
RGB IN (PC)
O
PTI
C
AL
AUDI
O
IN
(RGB/DVI)
H
/
P
DI
G
ITAL
AU
DI
O
OUT
A
NTENNA
/
C
ABLE IN
HDMI/DVI IN
D
C
-IN
R
ENTERTAINMENT
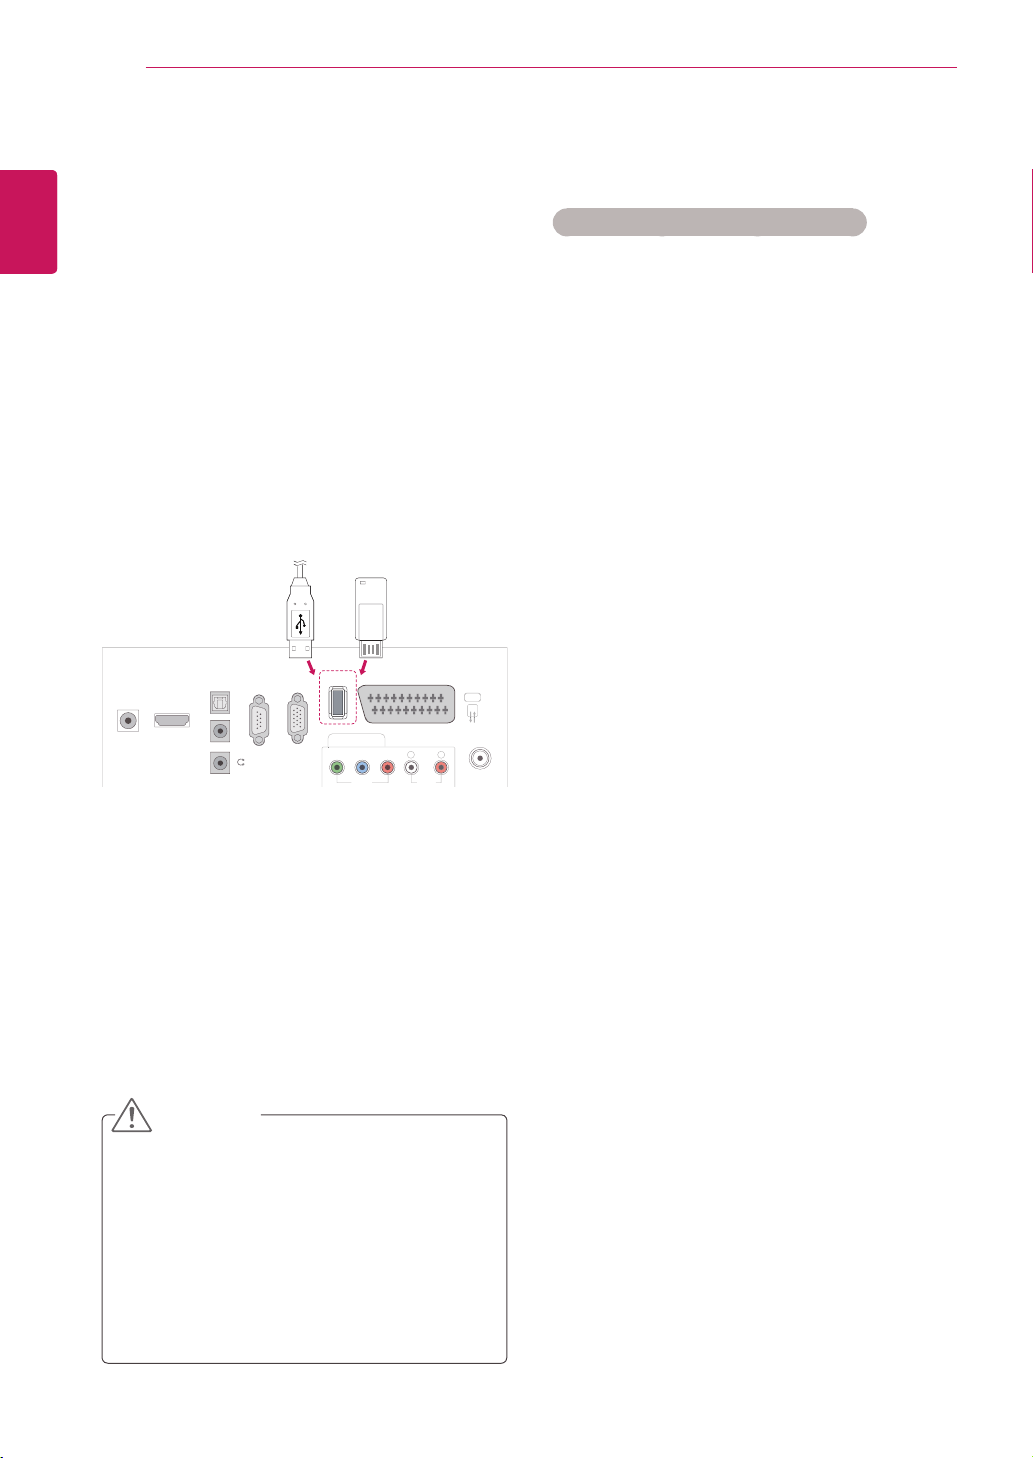
Using integrated media
features
Connecting USB storage devices
ConnectUSBstoragedevicessuchasaUSB
flashmemory,externalharddrive,orMP3player
totheMonitorsetandusemultimediafeatures
(“Browsing files”Seep.37).
ConnectaUSBflashmemoryorUSBmemory
cardreadertotheMonitorsetasshownonthe
followingillustration.TheUSBscreenappears.
TodisconnectaUSBstoragedevice,
makesuretoendtheconnectionproperlyto
preventdamagestotheMonitorsetorfiles.
or
1
PressQ.MENUtoaccessthequickmenus.
2
PresstheNavigationbuttonstoscrolltoUSB
DeviceandpressOK.
3
DisconnecttheUSBstoragedeviceonlywhen
themessagesaysthatitissafetoremove.
DonotturntheMonitorsetofforremovea
USBstoragedevicewhiletheUSBstorage
deviceisconnectedtotheMonitorset,as
thiscouldresultinlossoffilesordamageto
theUSBstoragedevice.
BackupyourfilessavedonaUSBstorage
devicefrequently,asyoumayloseor
damagethefilesandthismaybenot
coveredbythewarranty.
CAUTION
Tips for using USB storage devices
OnlyaUSBstoragedeviceisrecognizable.
IftheUSBstoragedeviceisconnected
throughaUSBhub,thedeviceisnot
recognizable.
AUSBstoragedeviceusinganautomatic
recognitionprogrammemaynotbe
recognized.
AUSBstoragedevicewhichusesitsown
drivermaynotberecognized.
TherecognitionspeedofaUSBstorage
devicemaydependoneachdevice.
PleasedonotturnofftheMonitorsetor
unplugtheUSBdevicewhentheconnected
USBstoragedeviceisworking.Whensuch
deviceissuddenlyseparatedorunplugged,
thestoredfilesortheUSBstoragedevice
maybedamaged.
PleasedonotconnecttheUSBstorage
devicewhichwasartificiallymaneuveredon
thePC.Thedevicemaycausetheproductto
malfunctionorfailtobeplayed.Neverforget
touseonlyaUSBstoragedevicewhichhas
normalmusicfiles,imagefilesormoviefiles.
PleaseuseonlyaUSBstoragedevicewhich
wasformattedasaFAT,FAT16,FAT32,
NTFSfilesystemprovidedwiththewindows
operatingsystem.Incaseofastoragedevice
formattedasadifferentutilityprogramme
whichisnotsupportedbyWindows,itmay
notberecognized.
PleaseconnectpowertoaUSBstorage
device(over0.5A)whichrequiresanexternal
powersupply.Ifnot,thedevicemaynotbe
recognized.
PleaseconnectaUSBstoragedevicewith
thecableofferedbythedevicemaker.
SomeUSBstoragedevicesmaynotbe
supportedoroperatedsmoothly.
FilealignmentmethodofUSBstoragedevice
issimilartoWindowXPandfilenamecan
recognizeupto100Englishcharacters.
Besuretobackupimportantfilessincedata
storedinaUSBmemorydevicemaybe
damaged.Wewillnotberesponsibleforany
dataloss.
37
ENG
ENGLISH
ENTERTAINMENT
IftheUSBHDDdoesnothaveanexternal
powersource,theUSBdevicemaynotbe
detected.Sobesuretoconnecttheexternal
powersource.
-Pleaseuseapoweradaptorforanexternal
powersource.WedonotguaranteeanUSB
cableforanexternalpowersource.
DatainaUSBstoragedevicecannotbe
deletedintheNTFSfilesystem.
IfyourUSBmemorydevicehasmultiple
partitionsorifyouuseaUSBmulti-card
reader,youcanuseupto4partitionsorUSB
memorydevices.
OnlytheFAT,FAT16,FAT32filesystem
supportsthedeletefunction.
IfaUSBmemorydeviceisconnectedtoa
USBmulti-cardreader,itsvolumedatamay
notbedetected.
IftheUSBmemorydevicedoesnotwork
properly,disconnectandreconnectit.
HowfastaUSBmemorydeviceisdetected
differsfromdevicetodevice.
IftheUSBisconnectedinStandbyMode,
specificharddiskwillautomaticallybeloaded
whentheMonitorsetisturnedon.
Therecommendedcapacityis1TBorless
foraUSBexternalharddiskand32GBor
lessforUSBmemory.
Anydevicewithmorethantherecommended
capacitymaynotworkproperly.
IfaUSBexternalharddiskwitha“Energy
Saving”functiondoesnotwork,turnthe
harddiskoffandonagaintomakeitwork
properly.
USBstoragedevicesbelowUSB2.0are
supportedaswell.Buttheymaynotwork
properlyinthemovielist.
WhenabrokenfileisplayedintheUSB
storage,theMonitorsetmayturnofforwork
abnormally.
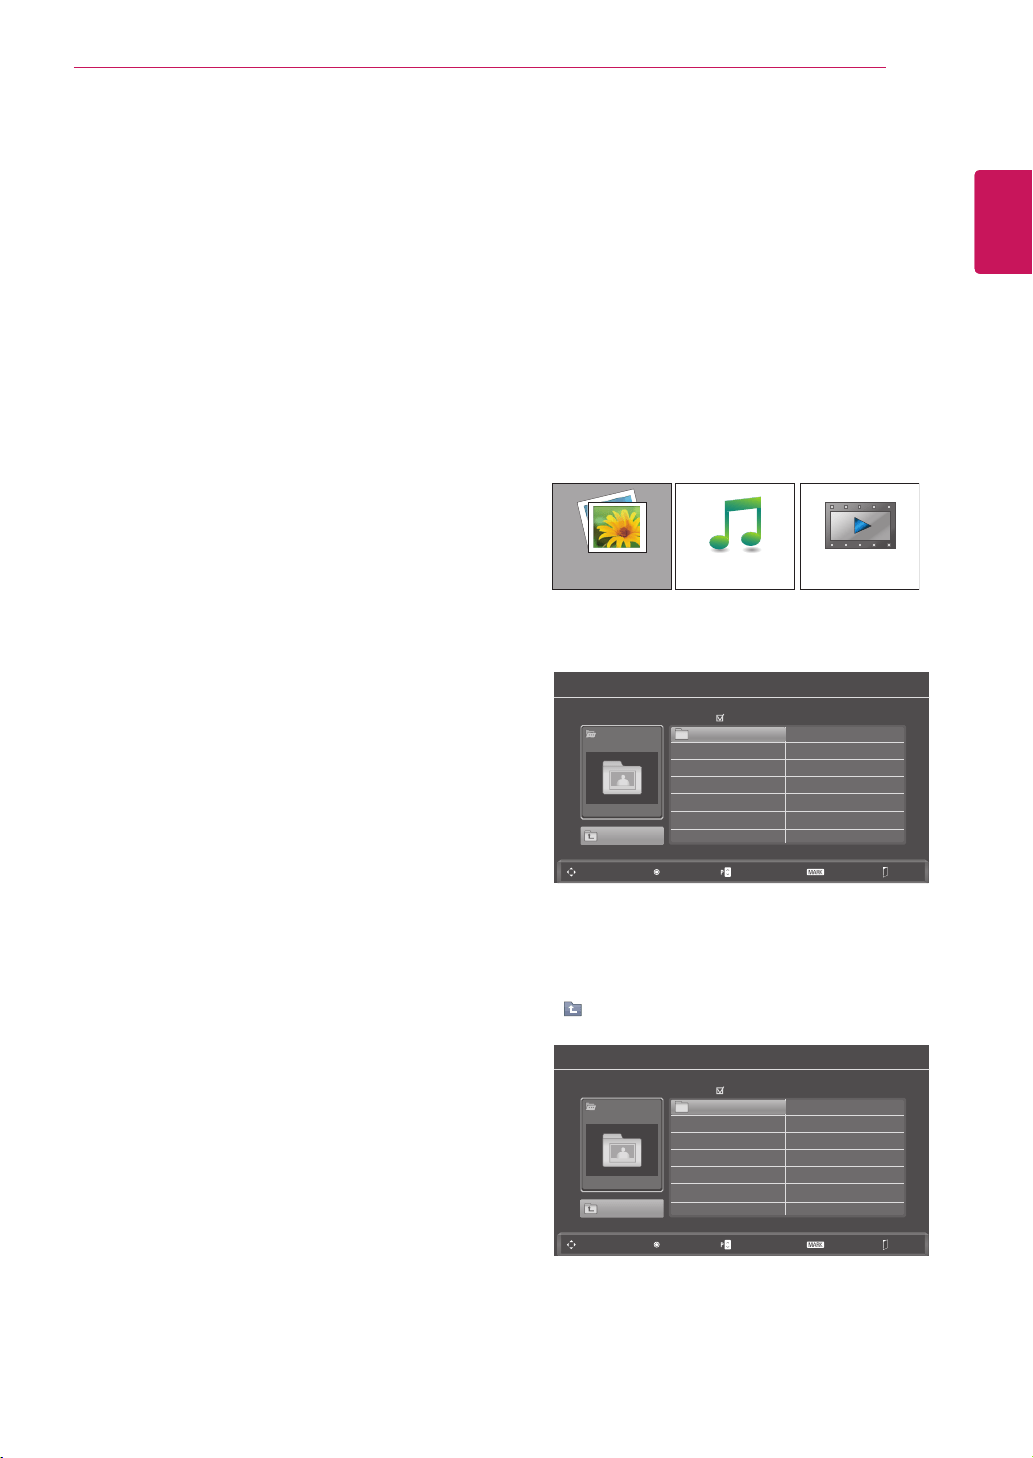
Browsing files
AccessthePhoto,MusicorMovielistsand
browsefiles.
1
ConnectaUSBstoragedevice.
2
PressMENUtoaccessthemainmenus.
3
PresstheNavigationbuttonstoscrolltoUSB
andpressOK.
4
PresstheNavigationbuttonstoscrollto
PHOTO LIST,MUSIC LISTorMOVIE LIST
andpressOK.
5
SelectDrive1toaccesstheconnectedUSB
storagedevice
6
Selectafolderyouwant.
-Toreturntothepreviouslevel,select
Up Folder.
PHOTO LIST
Photo List
Photo List
USB
USB
Up Folder
Up Folder
Drive 1
Drive 1
Drive 1
SG 001 SG 003
SG 002 SG 004
Page 1/1
Page 1/1
No Marked
No Marked
Navigation
Navigation
Popup Menu
Popup Menu
Page Change
Page Change
Mark
Mark
Exit
Exit
0 folder(s), 0 file(s)
0 folder(s), 0 file(s)
MOVIE LISTMUSIC LIST
38
ENG
ENGLISH
ENTERTAINMENT
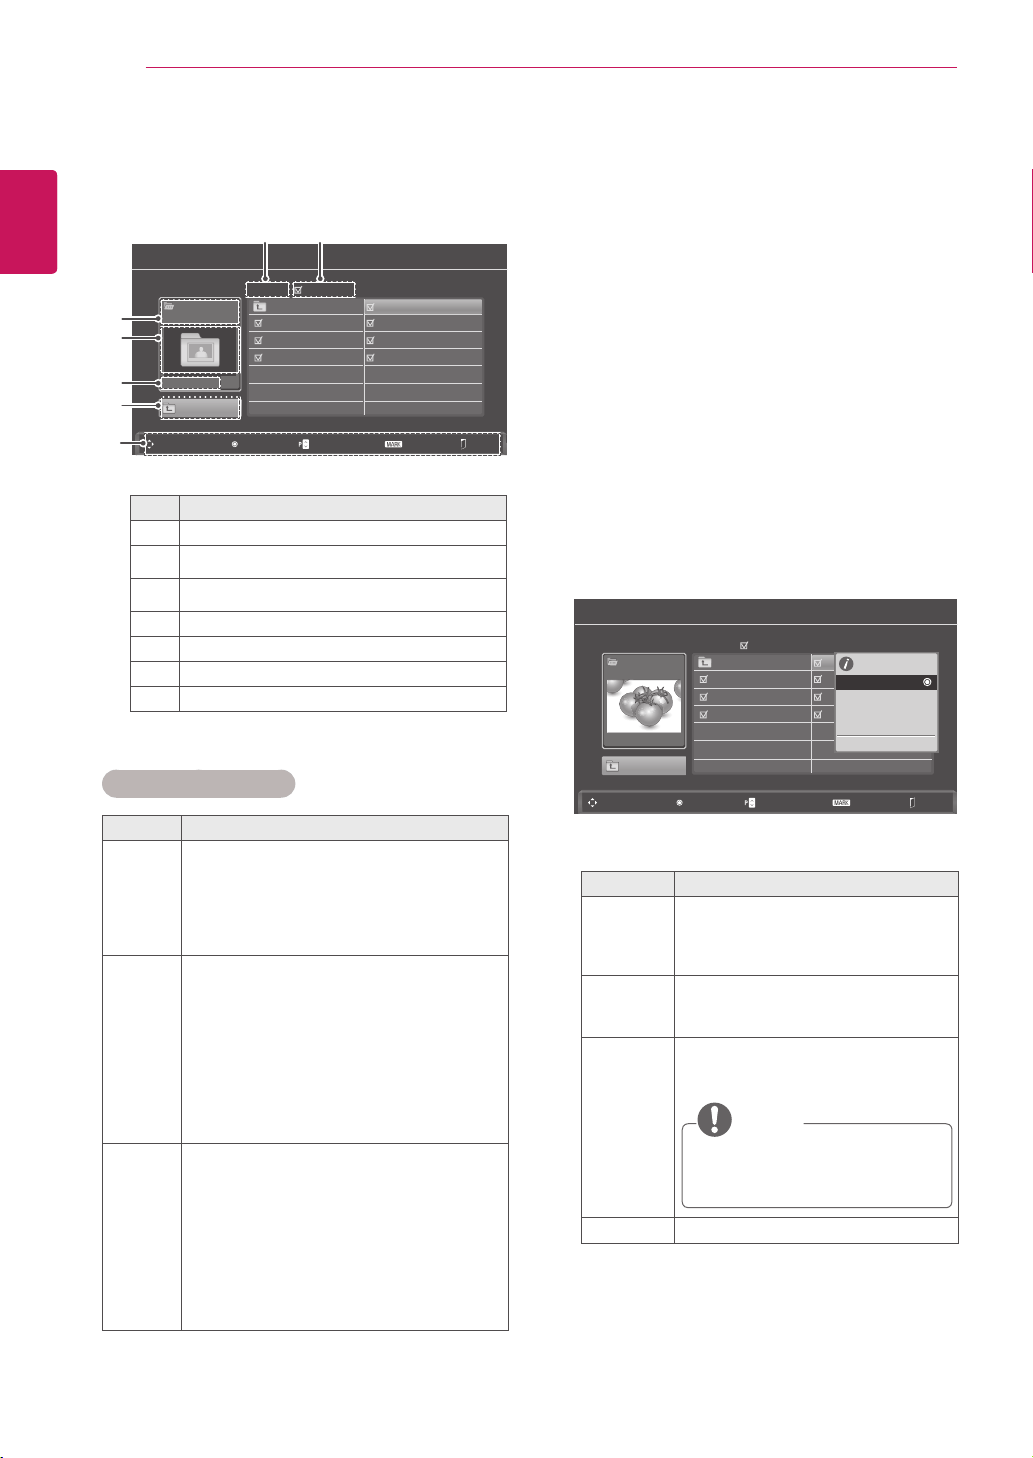
7
PresstheNavigationbuttonstobrowsefiles.
Thehighlightedfilewilldisplayinthepreview
window.
No. Description
1
Currentpagenumber/totalnumberofpages
2
Thenumberofselectedfiles
3
FileandFoldername
4
Previewwindow
5
Filesize,information.
6
Returntothepreviouslevel
7
Availablebuttonsontheremotecontrol
Supported file format
Type Supported file format
Photo
JPG
Availablesize
Baseline:64pixel(W)x64pixel(H)-
15360pixel(W)x8640pixel(H)
Progressive:64pixel(W)x64pixel(H)-
1920pixel(W)x1440pixel(H)
Music
MP3
Bitraterange32Kbps-320Kbps
Samplingrate(SamplingFrequency)
MPEG1layer3:32kHz,44.1kHz,
48kHz
MPEG2layer3:16kHz,22.05kHz,
24kHz
MPEG2.5layer3:8kHz,11.025kHz,
12kHz
* Acopy-protectedfilewillnotplay.
Video
dat,mpg,mpeg,ts,trp,tp,vob,mp4,mkv,
avi,divx
Maxbitrateofplayablemoviefile:
20Mbps(Megabitpersecond)
Bitrateofaudioformat:within32-
320kbps(MP3)
Supportedsubtitleformat:*.smi,*.srt,
*.sub(MicroDVD,SubViewer1.0/2.0),
*.ass,*.ssa,*.txt(TMPlayer),
*.psb(PowerDivx)
Viewing Photos
ViewimagefilessavedinaUSBstoragedevice.
Thedisplaysonthescreenmaydifferfromthe
model.
1
PresstheNavigationbuttonstoscrolltoUSB
andpressOK.
2
PresstheNavigationbuttonstoscrolltoPhoto
ListandpressOK.
3
PresstheNavigationbuttonstoselectDrive1
toaccesstheconnectedUSBstoragedevice.
4
PresstheNavigationbuttonstoscrolltoa
folderyouwantandpressOK.
5
PresstheNavigationbuttonstoscrolltoafile
youwantandpressOK.
Apop-upwindowwillappears.
6
Viewphotosbyusingthefollowingmenus.
Menu Description
View Displaystheselectedphotoinafull-
screenview.
Drive:Viewsphotossavedina
USBstoragedrive.
Mark All
or Unmark
All
Selectsallfilesorclearsallofyour
selections
Delete DeletesafilesavedinaUSBstorage
device.
NOTE
Youcannotdeletethefilessaved
inasharedfolderofaPC.
Close Closesthepop-upmenu.
Photo List
Photo List
USB
Drive 1
Up Folder
Up Folder
Drive 1
SG 001
Up Folder
Up Folder
SG kim 002 10/01/2010
SG 002
10/01/2010
SG kim 003 10/01/2010
SG 003
10/01/2010
SG kim 001 10/01/2010
SG 001
10/01/2010
SG kim 004 10/01/2010
SG 004
10/01/2010
SG kim 005 10/01/2010
SG 005
10/01/2010
SG kim 006 10/01/2010
SG 006
10/01/2010
SG kim 007 10/01/2010
SG 007
10/01/2010
Page 1/1
Page 2/3
No Marked
No Marked
Navigation
Navigation
Popup Menu
Popup Menu
Page Change
Page Change
Mark
Mark
Exit
Exit
0 folder(s), 0 file(s)
1 folder(s),7 file(s)
1 2
1366x768, 125KB
View
Mark All
Delete
Close
3
4
5
6
7
39
ENG
ENGLISH
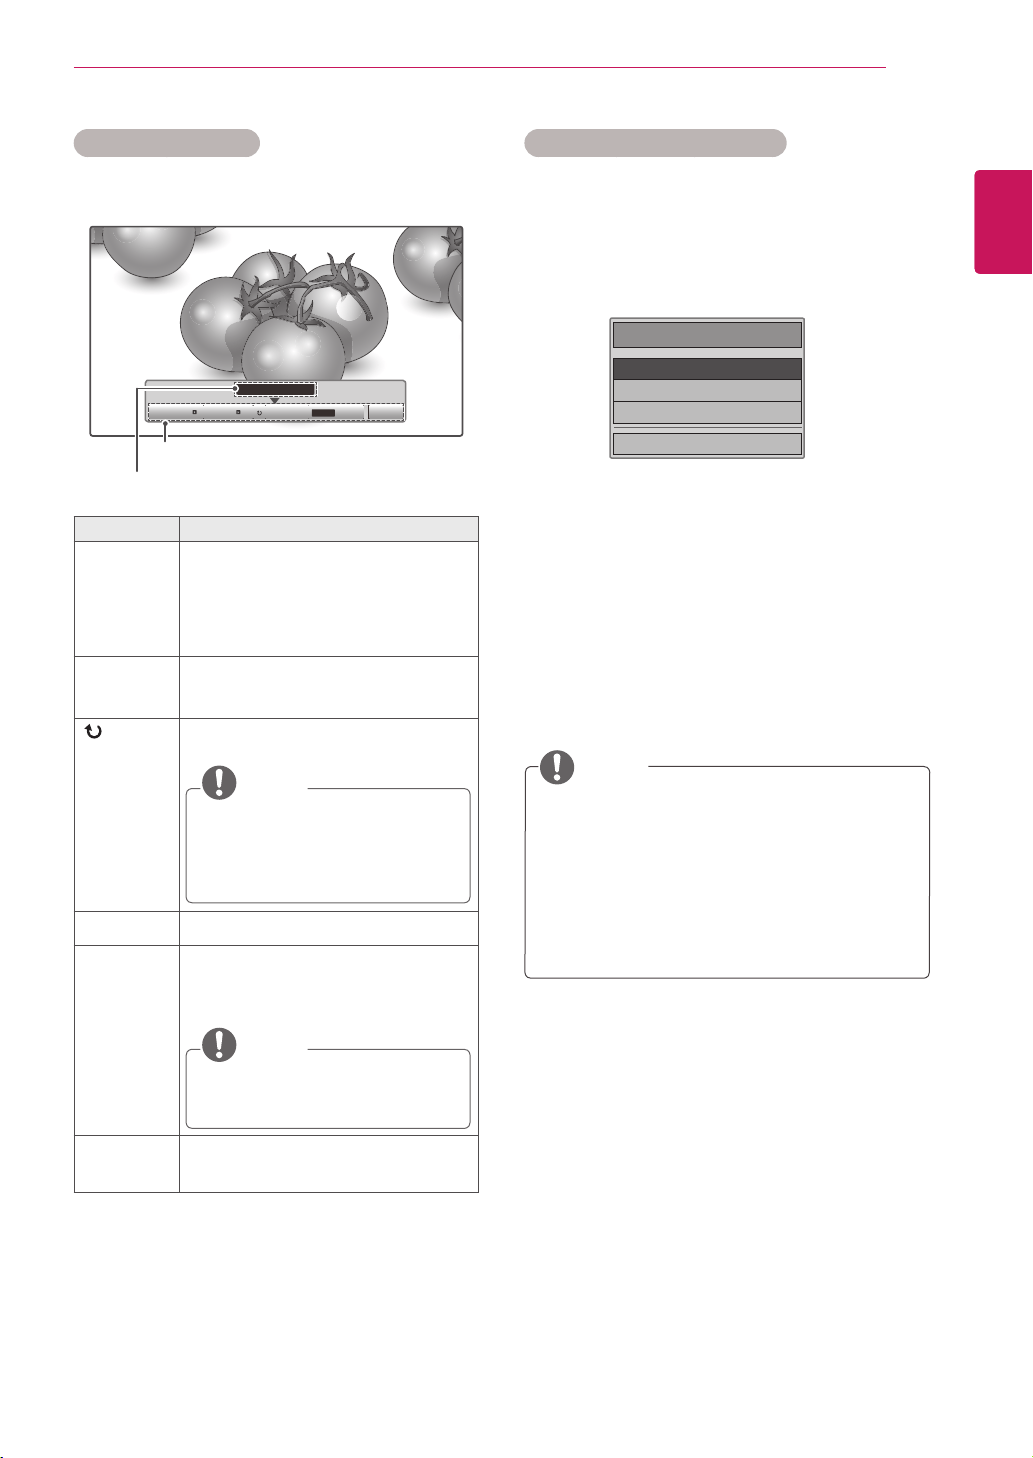
ENTERTAINMENT
ꔗ 1/17 ꔃ
Slideshow BGM
Delete
Q.MENU
Option Hide
Using photo options
Usethefollowingoptionswhileviewingphotos.
Number of selected photos
Options
Option Description
Slideshow Startsorstopsaslideshowwithselected
photos.
Iftherearenoselectedphotos,all
photossavedinthecurrentfolder
displayduringaslideshow.
Tosetaslideshowspeed,selectOption.
BGM Turnsthebackgroundmusiconoroff.
Tosetthebackgroundmusicfolder,
selectOption.
(Rotate)
Rotatesphotosclockwise(90°,180°,
270°,360°).
NOTE
Thesupportedphotosizeislimited.
Youcannotrotateaphotoifthe
resolutionoftherotatedwidthis
largerthanthesupportedresolution
size.
Delete Deletesaphoto.
Option
Slide Speed:Selectsaslideshow
speed(Fast, Medium, Slow).
Music Album:Selectsamusicfolder
forthebackgroundmusic.
NOTE
Youcannotchangethemusicfolder
whilethebackgroundmusicis
playing.
Hide Hidestheoptionwindow.
Todisplaytheoptions,press
OK
.
Using the Photo List function
WhenyouselecttheSet Photo View.
1
PressQ. MENUtoaccessthePop-Upmenus.
2
PresstheNavigationbuttonstoscrolltoSlide
Speed or Music Folder.
3
PresstheNavigationbuttons tomake
appropriateadjustmentsandpressOK.
WhenyouselecttheSet Video.
1
PresstheNavigationbuttons tomake
appropriateadjustments.(Seep.50)
WhenyouselecttheSet Audio.
1
PresstheNavigationbuttons
toshowthe
Sound Mode, Auto Volume, Clear Voice II,
Balance.
2
PresstheNavigationbuttons tomake
appropriateadjustments.(Seep.52)
When“Off”isselectedinRepeatmenu,
replaywillstoponcethelastfileinthelist
finishesplaying.But,when“
ꕙ
”buttonis
pressedwhilethelastfileinthelistisinthe
middleofreplayand“Repeat”isin“Off”
position,thefirstfileinthelistwillbeplay.
NOTE
Choose Options.
Set Photo View.
Set Video.
Set Audio.
ꕉ Previous
1
PressQ. MENUtoaccessthePop-Upmenus.
2
PresstheNavigationbuttons toscrolltoSet
Photo View or Set Video, Set Audioand
PressOK
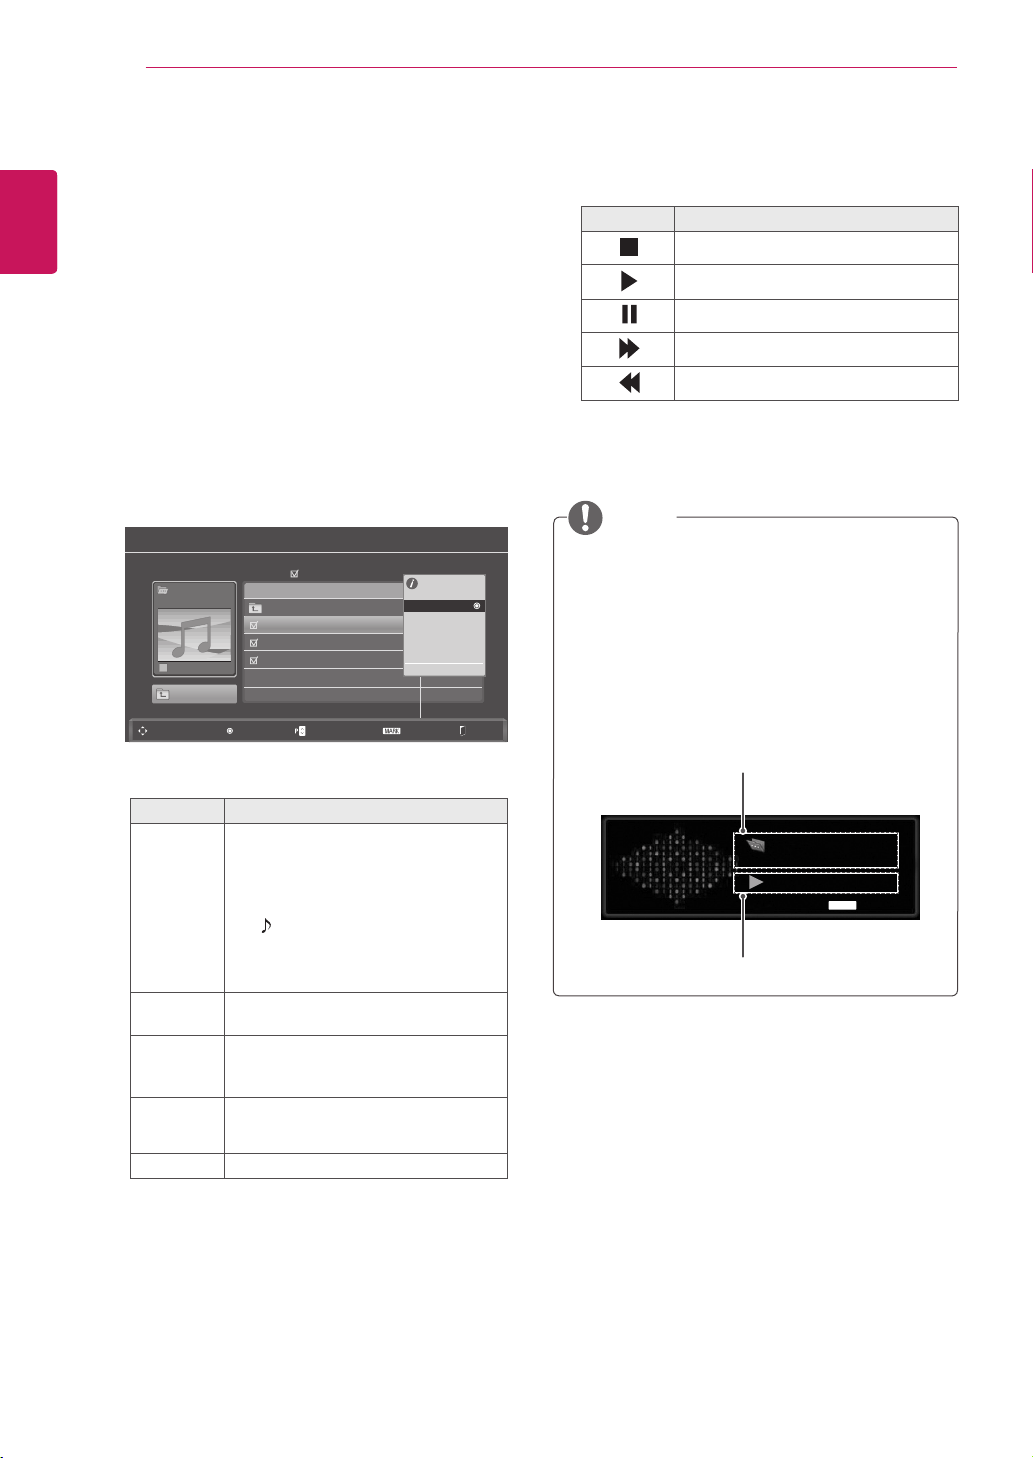
40
ENG
ENGLISH
ENTERTAINMENT
Music
S003
0:27 / 3:67
Option
Listening to Music
1
PresstheNavigationbuttonstoscrolltoUSB
andpressOK.
2
PresstheNavigationbuttonstoscrolltoMusic
ListandpressOK.
3
SelectDrive1toaccesstheconnectedUSB
storagedevice.
4
PresstheNavigationbuttonstoscrolltoa
folderyouwantandpressOK.
5
PresstheNavigationbuttonstoscrolltoafile
youwantandpressOK.
Apop-upwindowwillappears.
6
Playmusicbyusingthefollowingmenus.
Menu Description
Play, Stop
Play, or
Play
Marked
Playsmusic,stopsplayback,orplays
theselectedmusicfile.Ifyouplay
musicwithoutselectingmusicfiles,all
ofthemusicfilessavedinthecurrent
folderwillplay.
The iconwillappearinfrontofthe
durationonthecurrentlyplayingfile.
Drive:Listentomusicfilessavedin
aUSBstoragedrive.
Play with
Photo
Displaysphotosduringplayback.
Mark All
or Unmark
All
Selectsallfilesorclearsallofyour
selections
Delete DeletesafilesavedinaUSBstorage
device.
Close Closesthepop-upmenu.
Adamagedorcorruptedfilewillnotplayand
thedurationofthefiledisplayas00:00.
Acopy-protectedfilewillnotplay.
IftheMonitorsetisnotinuseforsometime
duringplayback,theinformationboxasa
screensaverwillappeartopreventimage
burn.
ToreturntotheMusiclistscreen,pressOK
orBACK.
NOTE
7
Controlplaybackbyusingthefollowing
buttons.
Button Description
Stopsplayback
Playsamusicfile
Pausesorresumesplayback
Skipstothenextfile
Skipstothepreviousfile
Time elapsed /Duration
Folder name/file name
Music List
Music
SG 001
Page 2/3
Title
No Marked
Navigation Popup Menu Page Change
Mark
1 folder(s), 3 file(s)
Up Folder
Up Folder
SG 001.mp3
03:50
SG 002.mp3
03:55
SG 003.mp3
03:35
3945 KB
128 Kbps
Play
Play with Photo
Mark All
Delete
Close
Exit
Q.MENU

41
ENG
ENGLISH
ENTERTAINMENT
Using the Music List function, play
1
PressQ. MENUtoaccessthePop-Upmenus.
2
PresstheNavigationbuttonstoscrolltoSet
Audio Play or Set AudioandPressOK.
WhenyouselecttheSet Audio Play.
1
PresstheNavigationbuttonstoshowtheSet
Audio Play.
2
PresstheNavigationbuttonstomake
appropriateadjustments.
WhenyouselecttheSet Audio.
1
PresstheNavigationbuttonsto
toshowthe
Sound Mode, Auto Volume, Clear Voice II,
Balance.
2
PresstheNavigationbuttonsto tomake
appropriateadjustments.(Seep.52)
When“Off”isselectedinRepeatmenu,
replaywillstoponcethelastfileinthelist
finishesplaying.But,when“
ꕙ
”buttonis
pressedwhilethelastfineinthelistisin
themiddleofreplayand“Repeat”isin“Off”
position,thefirstfileinthelistwillbeplay.
NOTE
Choose Options.
Set Audio Play.
Set Audio.
ꕉ Previous

42
ENG
ENGLISH
ENTERTAINMENT
Viewing Movies
PlayvideofilesontheMonitorset.YourMonitor
setdisplaysallofthevideofilessavedinaUSB
storagedevice.
Movie(*.dat/*.mpg/*.mpeg/*.ts/*.trp
/*.tp/*.vob/*.mp4/*.mkv/*.avi/*.divx)
supportingfile.
Videoformat:DivX3.11,DivX4.12,DivX5.
x,DivX6,Xvid1.00,Xvid1.01,Xvid1.02,
Xvid1.03,Xvid1.10-beta-1/beta-2,Mpeg-1,
Mpeg-2,Mpeg-4,H.264/AVC
Audioformat:DolbyDigital,AAC,Mpeg,
MP3,LPCM,HE-AAC
Bitrate:within32kbpsto320kbps(MP3)
Subtitleformat:*.smi/*.srt/*.sub(Micro
DVD,SubViewer1.0/2.0)/*.ass/*.ssa/*.txt
(TMPlayer)/*.psb(PowerDivx).
Someuser-createdsubtitlesmaynotwork
properly.
Somespecialcharactersarenotsupported
insubtitles.
HTMLtagsarenotsupportedinsubtitles.
Subtitlesinlanguagesotherthanthe
supportedlanguagesarenotavailable.
Timeinformationinanexternalsubtitlefile
shouldbearrangedinascendingordertobe
played.
Thescreenmaysuffertemporary
interruptions(imagestoppage,faster
playback,etc.)whentheaudiolanguageis
changed.
Adamagedmoviefilemaynotbeplayed
correctly,orsomeplayerfunctionsmaynot
beusable.
Moviefilesproducedwithsomeencoders
maynotbeplayedcorrectly.
Ifthevideoandaudiostructureofrecorded
fileisnotinterleaved,eithervideooraudiois
outputted.
HDvideoswithamaximumof1920x1080
@25/30Por1280x720@50/60Pare
supported,dependingontheframe.
Videoswithresolutionshigherthan1920x
1080@25/30Por1280x720@50/60P
maynotworkproperlydependingonthe
frame.
Moviefilesotherthanthespecifiedtypesand
formatsmaynotworkproperly.
Max bit rate of playable movie file is 20
Mbps.
Wedonotguaranteesmoothplaybackof
profilesencodedlevel4.1orhigherinH.264
/AVC.
DTSAudiocodecisnotsupported.
Amoviefilemorethan30GBinfilesizeisnot
supportedforplayback.
ADivXmoviefileanditssubtitlefilemustbe
locatedinthesamefolder.
Avideofilenameanditssubtitlefilename
mustbeidenticalforittobedisplayed.
PlayingavideoviaaUSBconnectionthat
doesn’tsupporthighspeedmaynotwork
properly.
FilesencodedwithGMC(GlobalMotion
Compensation)maynotbeplayed.
WhenyouarewatchingthemoviebyMovie
Listfunction,youcanadjustanimageby
Energy Savingkeyontheremotecontrol.
Usersetupforeachimagemodedoesnot
operate.
Video Decoder
mpeg, vob:MPEG1,MPEG2
dat:MPEG1
ts,trp,tp:MPEG2,H.264/AVC
mp4:MPEG4SP,MPEG4ASP,Divx3.11,
Dvix4.12,Dvix5.x,Dvix6,Xvid1.00,Xvid
1.01,Xvid1.02,Xvid1.03,Xvid1.10–beta1,
Xvid1.10-beta2,H.264/AVC
avi:MPEG2,MPEG4SP,MPEG4ASP,
Divx3.11,Divx4,Divx5,Divx6,Xvid1.00,
Xvid1.01,Xvid1.02,Xvid1.03,Xvid1.10–
beta1,Xvid1.10–beta2,H.264/AVC
mkv:H.264/AVC,MPEG1,MPEG2,
MPEG4SP,MPEG4ASP
divx:MPEG2,MPEG4SP,MPEG4ASP,
Divx3.11,Divx4,Divx5,Divx6,Xvid1.00,
Xvid1.01,Xvid1.02,Xvid1.03,Xvid1.10–
beta1,Xvid1.10–beta2,H.264/AVC
Audio Codec
mpeg, vob:DolbyDigital,MPEG,MP3,
LPCM
dat:DolbyDigital,MPEG,MP3,LPCM
ts,trp,tp:DolbyDigital,AAC,MPEG
mp4:DolbyDigital,HE-AAC,AAC,MPEG,
MP3,LPCM
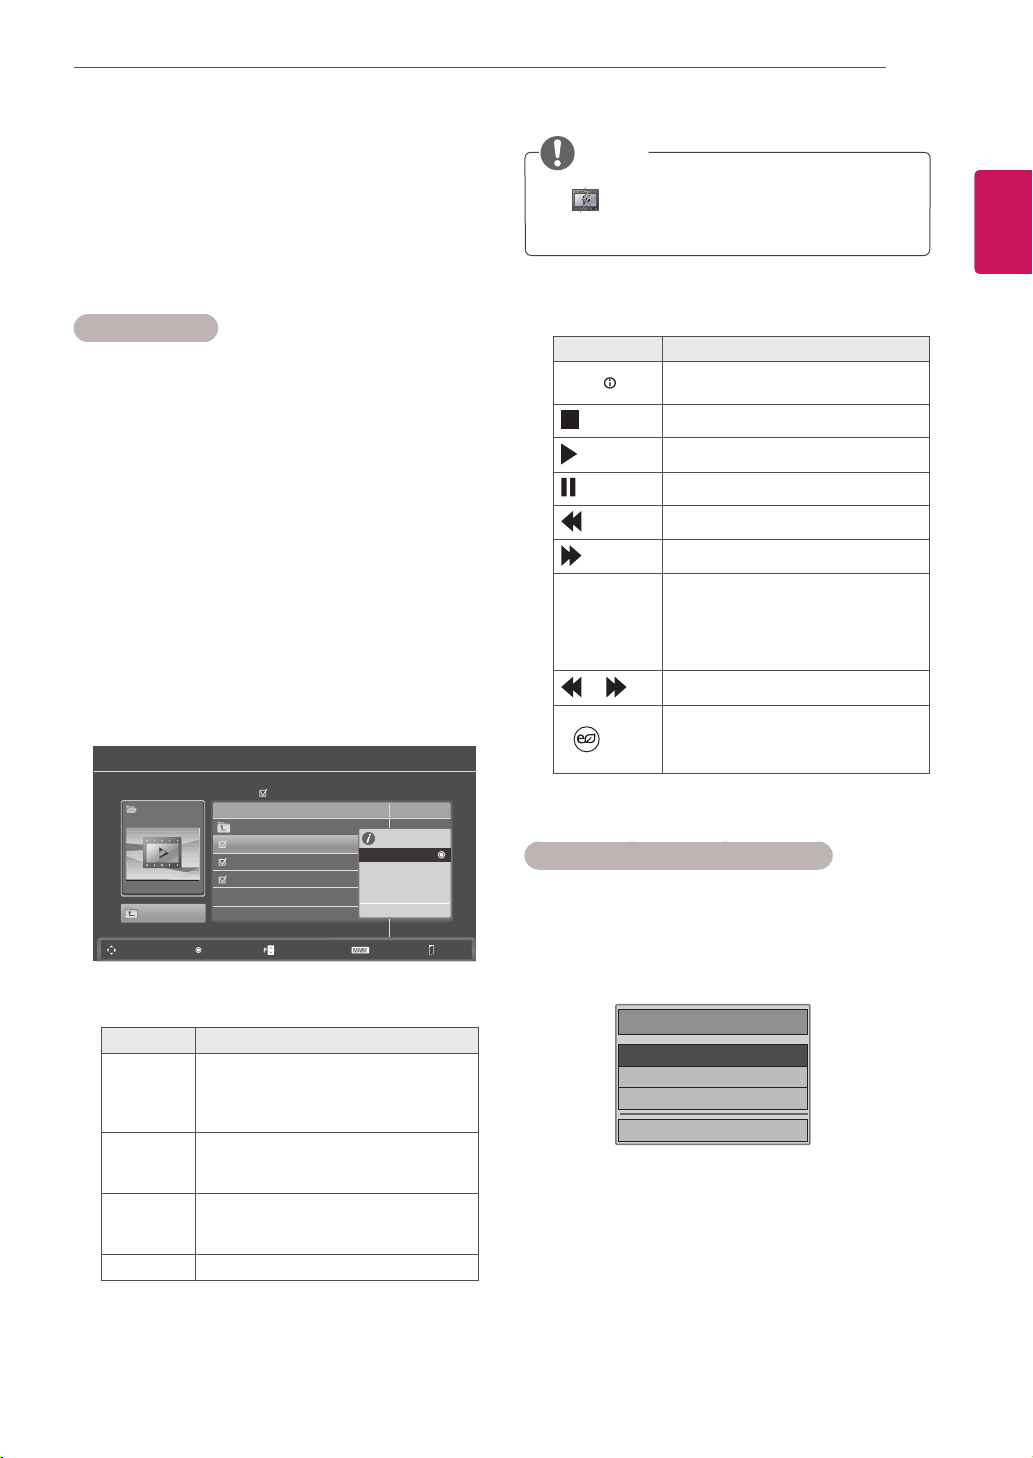
43
ENG
ENGLISH
ENTERTAINMENT
avi:DolbyDigital,HE-AAC,AAC,MPEG,
MP3,LPCM
mkv:DolbyDigital,HE-AAC,AAC,MPEG,
MP3,LPCM
divx:DolbyDigital,HE-AAC,AAC,MPEG,
MP3,LPCM
Max Resolution
1920 x 1080 @ 30p
1
PresstheNavigationbuttonstoscrolltoUSB
andpressOK.
2
PresstheNavigationbuttonstoscrolltoMovie
ListandpressOK.
3
SelectDrive1toaccesstheconnectedUSB
storagedevice.
4
PresstheNavigationbuttonstoscrolltoa
folderyouwantandpressOK.
5
PresstheNavigationbuttonstoscrolltoafile
youwantandpressOK.
Apop-upwindowwillappears.
6
Playvideobyusingthefollowingmenus.
Menu Description
Play or
Play
Marked
Playsamovieorplaystheselected
movie.
Drive:ViewsvideossavedinaUSB
storagedrive.
Mark All
or Unmark
All
Selectsallfilesorclearsallofyour
selections.
Delete or
Delete
marked
DeletesafileformattedontheFAT32
filesystemandsavedinaUSB
storagedevice.
Close Closesthepop-upmenu.
The imageunderthepreviewwindowwill
appearifyouselectanon-supportedfile.
NOTE
Movie List
Moive
SG 001.avi
Page 2/3
Title Duration
No Marked
Navigation Popup Menu Page Change Mark Exit
640x480, 720KB
Up Folder
Up Folder
SG 001.avi
03:50
SG 002.avi
03:55
SG 003.avi
03:35
640x480, 720KB
Play
Mark All
Delete
Close
7
Controlplaybackbyusingthefollowing
buttons.
Button Description
INFO
Viewstheinformationofthe
currentlyplayingvideo
Stopstheplayback
Playsavideo
Pausesorresumestheplayback
Scansbackwardinafile
Scansforwardinafile
< or > Skipstospecificpointsinafile
duringplayback.Thetimeofa
specificpointwillappearonthe
statusbar.Insomefiles,this
functionmaynotworkproperly.
or
Playsvideosinslowmotion
ENERGY
SAVING
PresstheENERGY SAVING
buttonrepeatedlytoincreasethe
brightnessofyourscreen.
Using the Movie List function, play
1
PressQ. MENUtoaccessthePop-Upmenus.
2
PresstheNavigationbuttonandOKtoscroll
toSet Video Play, Set Video or Set Audio.
Choose Options.
Set Video Play.
Set Video.
Set Audio.
ꕉ Previous
44
ENG
ENGLISH
ENTERTAINMENT
OnlythefilessavedinASCIICODEis
supportedfortheexternalsubtitlesofthe
movie.
Only500alphabetsand500numbersare
supportedforeachlineofthesubtitle.
Only10,000ofsyncblockscanbe
supportedwithinthesubtitlefile.
NOTE
WhenyouselecttheSet Video.
1
PresstheNavigationbutton tomake
appropriateadjustments.(Seep.50)
WhenyouselecttheSet Audio,
1
PresstheNavigationbutton toshowthe
Sound Mode, Auto Volume, Clear Voice II,
Balance.
2
PresstheNavigationbutton tomake
appropriateadjustments.(Seep.52)
Usingtheremotecontrol.
Button Description
ꕚ ꕙ
Whenplaying,
repeatedly,presstheREW(
ꔊꔊ
)button
tospeedup
ꔊꔊ
(x2)
ꔊꔊꔊ
(x4)
ꔊꔊꔊꔊ
(x8)
ꔊꔊꔊꔊꔊ
(x16)
ꔊꔊꔊꔊꔊꔊ
(x32).
repeatedly,presstheFF(
ꔋꔋ
)button
tospeedup
ꔋꔋ
(x2)
ꔋꔋꔋ
(x4)
ꔋꔋꔋꔋ
(x8)
ꔋꔋꔋꔋꔋ
(x16)
ꔋꔋꔋꔋꔋꔋ
(x32).
Pressingthesebuttonsrepeatedly
increasesthefastforward/reverse
speed.
Pause(
ꕘ
) Duringplayback,pressthePause(
ꕘ
)
button.
Stillscreenisdisplayed.
Ifnobuttonsarepressedonthe
remotecontrolfor10minutesafter
pausing,theMonitorsetreturnsto
theplaybackstate.
PressthePause(
ꕘ
)buttonand
thenusetheFF(
ꔋꔋ
)buttonforslow
motion.
< or > Whenusingthe< or>buttonduring
playbackacursorindicatingthe
positioncanbeviewedonthescreen.
Play
(ꕖ)
PressthePlay
(ꕖ)
buttontoreturnto
normalplayback.
ENERGY
SAVING
PresstheENERGY SAVINGbutton
repeatedlytoincreasethebrightness
ofyourscreen.(Seep.48)
WhenyouselecttheSet Video Play.
Menu Description
Picture
Size
Selectsyourdesiredpictureformatduring
movieplay
Audio
Language
or Subtitle
Language
ChangestheLanguageGroupofthe
audio/subtitleduringmovieplay.
Sync Adjuststhetimesynchronisationofthe
subtitlefrom-10secsto+10secsby
stepsof0.5secsduring
movieplay.
Position Changesthepositionofthesubtitleeither
upordownduringmovieplay.
Size SelectsyourdesiredSubtitlesizeduring
movieplay.
1
PresstheNavigationbutton toshowthe
Picture Size, Audio LanguageorSubtitle
Language.
2
PresstheNavigationbutton tomake
appropriateadjustments.
Subtitle
Language
Support Language
Latin1 English,Spanish,French,German,
Italian,Swedish,Finnish,Dutch,
Portuguese,Danish,Romanian,
Norwegian,Albanian,Gaelic,Welsh,
Irish,Catalan,Valencian
Latin2 Bosnian,Polish,Croatian,Czech,
Slovak,Slovenian,Serbian,Hungarian
Latin4 Estonian,Latvian,Lithuanian
Cyrillic Bulgarian,Macedonian,Russian,
Ukrainian,Kazakh
Greek Greek
Turkish Turkish
45
ENG
ENGLISH
ENTERTAINMENT
DivX registration code
CheckandregistertheDivXregistrationcodeof
yourMonitorsetsothatyoucanrentorpurchase
thelatestmoviesat
www.divx.com/vod
.Toplaya
rentedorpurchasedDivXfile,thefile’sregistration
codeshouldbesamewithyourMonitorset’sDivX
registrationcode.
1
PressMENUtoaccesstheUSBmenus.
2
PresstheNavigationbuttontoscrolltoDivX
Reg. CodeandpressOK.
3
ViewtheregistrationcodeofyourMonitorset.
ABOUTDIVXVIDEO:DivX®isadigitalvideo
formatcreatedbyDivX,Inc.Thisisanofficial
DivXCertifieddevicethatplaysDivXvideo.
Visitwww.divx.comformoreinformationand
softwaretoolstoconvertyourfilesintoDivX
video.
ABOUTDIVXVIDEO-ON-DEMAND:ThisDivX
Certified®devicemustberegisteredinorderto
playDivXVideo-on-Demand(VOD)content.To
generatetheregistrationcode,locatetheDivX
VODsectioninthedevicesetupmenu.Goto
vod.divx.comwiththiscodetocompletethe
registrationprocessandlearnmoreaboutDivX
VOD.
“DivXCertified®toplayDivX®videouptoHD
1080p,includingpremiumcontent.”
“DivX®,DivXCertified®andassociatedlogos
aretrademarksofDivX,Inc.andareused
underlicense.”
“Pat.7,295,673;7,460,668;7,515,710;
7,519,274”
Whileyouarecheckingtheregistrationcode,
somebuttonsmaynotwork.
IfyouusetheDivXregistrationcodeof
anotherdevice,youcannotplaytherented
orpurchasedDivXfile.Makesuretouse
theDivXregistrationcodeassignedtoyour
Monitorset.
Thevideooraudiofilesthatarenot
convertedbythestandardDivXcodecmay
becorruptedornotbeplayed.
TheDivXVODcodeallowsyoutoactivate
upto6devicesunderoneaccount.
NOTE
Deactivating the DivX feature
Deactivateallofthedevicesthroughtheweb
serverandblockdevicesfromactivating.
Deletetheexistingauthenticationinformationto
receiveanewDivXuserauthenticationforthe
Monitorset.Oncethisfunctionisexecuted,aDivX
userauthenticationisrequiredagaintoseeDivX
DRMfiles.
1
PressMENUtoaccesstheUSBmenus.
2
PresstheNavigationbuttontoscrollto
DeactivationandpressOK.
3
SelectYestoconfirm.
4
SelectClose.
5
Whenyouarefinished,pressEXIT.
Whenyoureturntothepreviousmenu,press
BACK.
DivX(R) Video On Demand
Your registration Code is: xxxxxxxxxx
To learn more visit www.divx.com/vod.
DivX(R) Video On Demand
Do you want to deactivate your device?
DivX(R) Video On Demand
This device is deactivated.
Your deactivation code is: xxxxxxxx
To learn more visit www.divx.com/vod.
Close
Close
NoYes
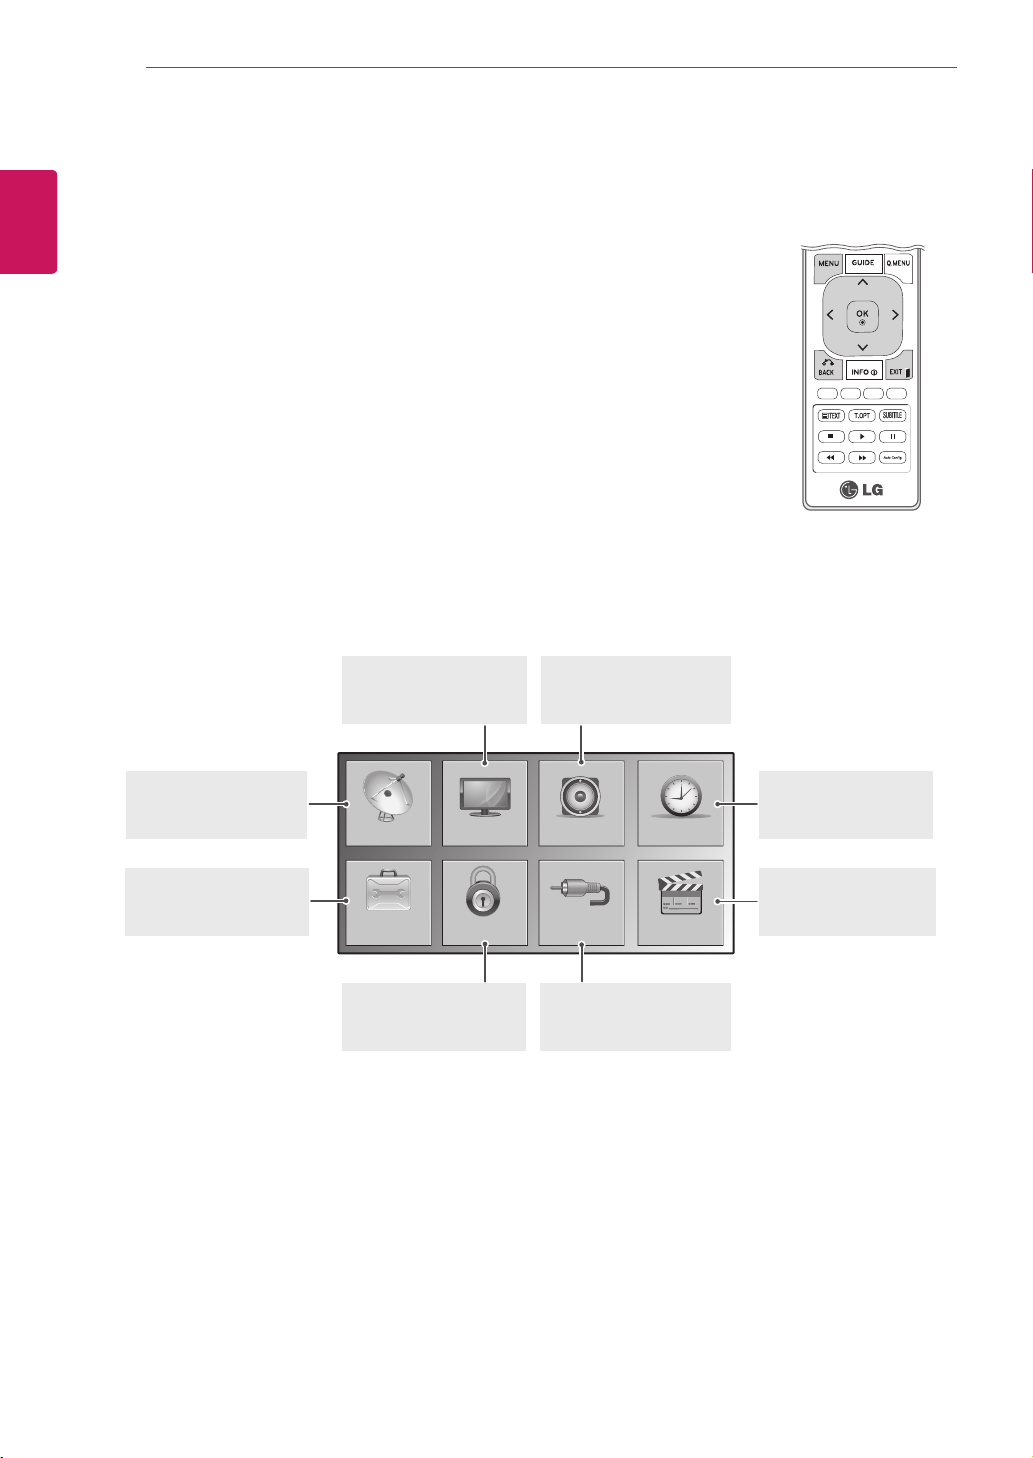
46
ENG
ENGLISH
CUSTOMIZING SETTINGS
CUSTOMIZING SETTINGS
Accessing main menus
1
PressMENUtoaccessthemainmenus.
2
PresstheNavigationbuttonstoscrolltooneofthefollowingmenusand
pressOK.
3
PresstheNavigationbuttonstoscrolltothesettingoroptionyouwant
andpressOK.
4
Whenyouarefinished,pressEXIT.
Whenyoureturntothepreviousmenu,pressBACK.
SETUP
OPTION
PICTURE
LOCK
AUDIO
INPUT
TIME
USB
AUDIO(Seep.52)
Adjuststhesoundquality,
effect,orvolumelevel
PICTURE (See p.48)
Adjuststheimagesize,
quality,oreffect
TIME(Seep.55)
Setsthetime,date,
orTimerfeature
SETUP(Seep.47)
Setsupandedit
programmes
USB(Seep.58)
Usingintegratedmedia
features
LOCK(Seep.57)
Locksorunlocks
channelsandprograms
INPUT(Seep.58)
Viewstheinputsources
withtheirlabels
OPTION (See p.56)
Customizesthegeneral
settings
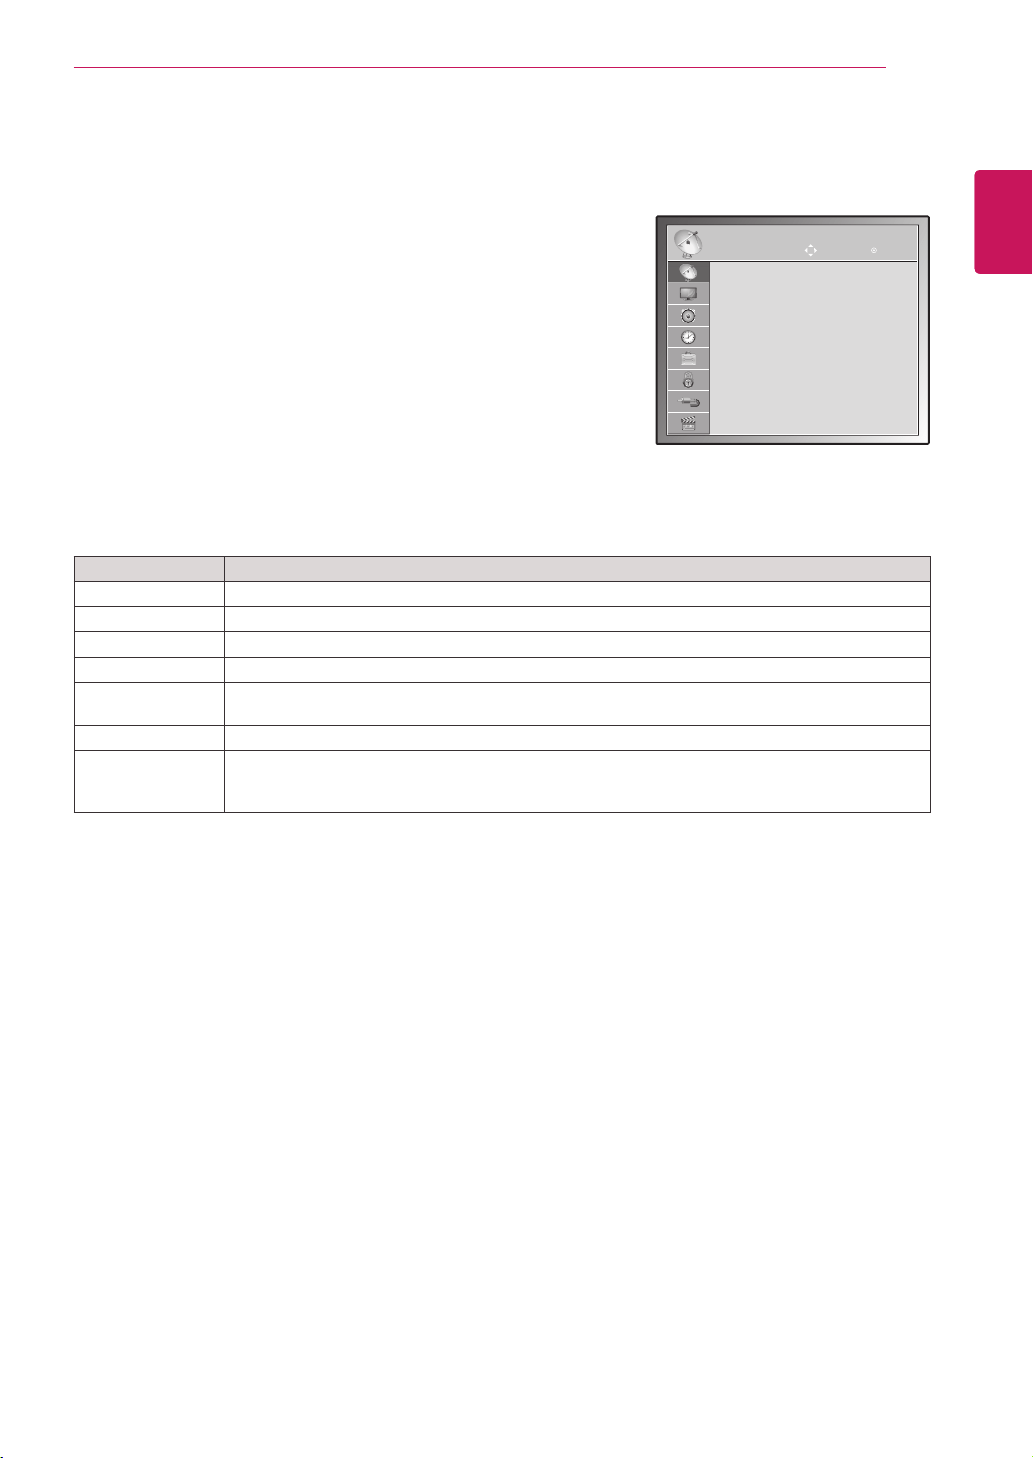
47
ENG
ENGLISH
CUSTOMIZING SETTINGS
Customizing settings
SETUP settings
1
PressMENUtoaccessthemainmenus.
2
PresstheNavigationbuttonstoscrolltoSETUPandpressOK.
3
PresstheNavigationbuttonstoscrolltothesettingoroption
youwantandpressOK.
-Toreturntothepreviouslevel,pressBACK.
4
Whenyouarefinished,pressEXIT.
Whenyoureturntothepreviousmenu,pressBACK.
TheavailableProgrammesettingsaredescribedinthefollowing:
Setting Description
Auto Tuning Tunesandstoresallavailableprogrammesthroughantennasorcableinputs(Seep.18).
Manual Tuning Tunesandstorestheprogrammesyouwantmanually(Seep.21to22).
Programme Edit Addsordeletespregrammesontheprogramme(Seep.23).
Software Update Thisautomaticallyupdatesyourmonitor'ssoftware.(Seep.25).
Diagnostics Thisshowsyouthemanufacturer,modelortypenumber,serialnumberandsoftwareinformation.
(Seep.26).
CI information Enablesyoutowatchsomeencryptedservices(payservices)(Seep.26).
Cable DTV Setting
(In Cable Mode
Only)
Youcanruntheserviceoperatorortheprogrammeautoupdate.(OnlyincountrieswhereDBV-C
issupported).(Seep.23).
SETUP
Move OK
Auto Tuning
Manual Tuning
Programme Edit
Software Update : On
Diagnostics
CI Information
Cable DTV Setting
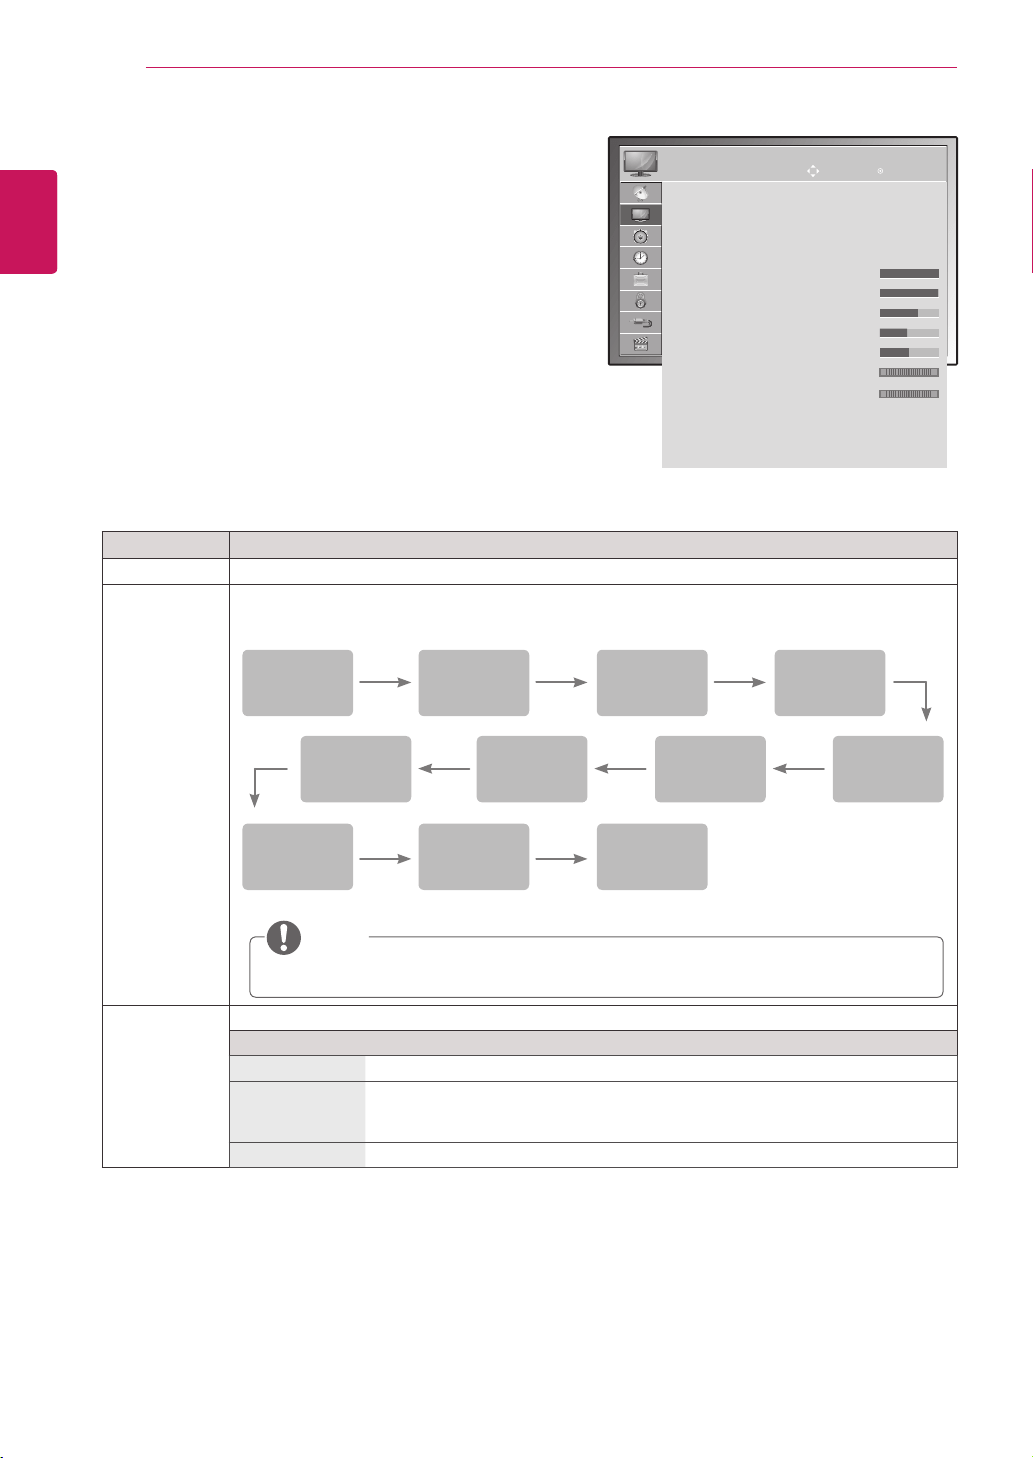
48
ENG
ENGLISH
CUSTOMIZING SETTINGS
PICTURE settings
1
PressMENUtoaccessthemainmenus.
2
PresstheNavigationbuttonstoscrolltoPICTUREand
pressOK.
3
PresstheNavigationbuttonstoscrolltothesettingor
optionyouwantandpressOK.
-Toreturntothepreviouslevel,pressBACK.
4
Whenyouarefinished,pressEXIT.
Whenyoureturntothepreviousmenu,press
BACK.
Theavailablepicturesettingsaredescribedinthefollowing:
Setting Description
Aspect Ratio Changestheimagesizetoviewimagesatitsoptimalsize(Seep.28).
Picture Wizard Adjuststheimagequalityandcalibratesthescreenbyfollowingtheon-screeninstructions.
ThecustomizedoptionswillbesavedasExpert1inthepicturemodes.
Energy Saving Setstoautomaticallyadjustthescreenbrightnesscorrespondingtothesurroundings.
Option
Off Thebacklightisoff.
Minimum/
Medium/
Maximum
Selectsthebrightnesslevelofthebacklight.
Screenoff Thescreenturnsoffin3seconds.
Colour
Tint
PictureWizard
Dynamic
Contrast
ColourGain
BlackLevel
Backlight
Colour
Temperature
WhiteLevel
Complete
Horizontal/
Vertical
Sharpness
IfyouusePicture wizard,theEnergysavingfeaturewillturnoffautomatically.
NOTE
PICTURE
Aspect Ratio : 16:9
Picture Wizard
ꕊ Energy Saving : Off
Picture Mode : Vivid
ꔈBacklight 100
ꔈContrast 100
ꔈBrightness 70
ꔈSharpness 50
ꔈColour 45
ꔈTint 0
ꔈColour Temperature 0
ꔈAdvanced Control
ꔈPicture Reset
Screen
Move OK
R
G
W
C
49
ENG
ENGLISH
CUSTOMIZING SETTINGS
Setting Description
Picture Mode SelectsoneofthepresetimageorcustomizesoptionsineachmodeforthebestMonitorsetscreen
performance.Youarealsoabletocustomizeadvancedoptionsofeachmode.
TheavailablepresetpicturemodesvarydependingontheMonitorset.
Mode
Vivid Adjuststhevideoimagefortheretailenvironmentbyenhancingthecontrast,
brightness,Colour,andsharpness.
Standard Adjuststheimageforthenormalenvironment.
Cinema Optimizesthevideoimageforacinematiclooktoenjoymoviesasifyouareina
movietheater.
Sport Optimizesthevideoimageforhighanddynamicactionsbyemphasizingprimary
Colourssuchaswhite,grass,orskyblue.
Game OptimizesthevideoimageforafastgamingscreensuchasPCsorgames.
Expert1/2 Adjuststhedetailedvideoimagesettingsforvideoexpertsaswellasgeneral
viewers.
SCREEN
(In RGB-PC
Mode Only)
CustomizesthePCdisplayoptionsinRGBmode.
Option
Resolution Selectsaproperresolution.See"Specification"Seep.71fortherecommended
resolutionforeachmodel.
AutoConfigure Setstoadjustthescreenposition,clock,andphaseautomatically.
Thedisplayedimagemaybeunstableforafewsecondswhiletheconfigurationis
inprogress.
Position/Size/
Phase
Adjuststheoptionswhenthepictureisnotclear,especiallywhencharactersare
shaky,aftertheautoconfiguration.
Reset Restorestheoptionstothedefaultsetting.

50
ENG
ENGLISH
CUSTOMIZING SETTINGS
Basic image options
Setting Description
Backlight AdjuststhebrightnessofthescreenbycontrollingtheLCDbacklight.Ifyoudecreasethe
brightnesslevel,thescreenbecomesdarkerandthepowerconsumptionwillbereduced
withoutanyvideosignalloss.
Contrast Increasesordecreasesthegradientofthevideosignal.YoumayuseContrastwhenthe
brightpartofthepictureissaturated.
Brightness Adjuststhebaselevelofthesignalinthepicture.YoumayuseBrightnesswhenthedark
partofthepictureissaturated.
Sharpness Adjuststhelevelofcrispnessintheedgesbetweenthelightanddarkareasofthepicture.
Thelowerthelevel,thesoftertheimage.
Colour AdjustsintensityofallColours.
Tint Adjuststhebalancebetweenredandgreenlevels.
Colour Temperature Settowarmtoenhancehottercolourssuchasred,orsettocooltomakepicturebluish.
Advanced Control Customizestheadvancedoptions.
Reset Restorestheoptionstothedefaultsetting.
Advanced image options
Setting Description
Dynamic Contrast
(Off/Low/High)
Adjuststhecontrasttokeepitatthebestlevelaccordingtothebrightnessofthescreen.The
pictureisimprovedbymakingbrightpartsbrighteranddarkpartsdarker.
Dynamic Colour
(Off/Low/High )
Adjustsscreencolourssothattheylooklivelier,richerandclearer.Thisfeatureenhances
hue,saturationandluminancesothatred,blue,greenandwhitelookmorevivid.
Noise Reduction
(Off/Low/Medium/
High)
Reducesscreennoisewithoutcompromisingvideoquality.
Gamma
(Low/Medium/High)
Youcanadjustbrightnessofdarkareaandmiddlegraylevelareaofthepicture.
»
Low:Makedarkandmiddlegraylevelareaofthepicturebrighter.
»
Medium:Expressoriginalpicturelevels.
»
High:Makedarkandmiddlegraylevelareaofthepicturedarker.
Black Level
(Low/High/Auto)
»
Low:Thepictureofthescreengetsdarker.
»
High:Thepictureofthescreengetsbrighter.
»
Auto:RealizingtheblacklevelofthescreenandsetittoHighorLowautomatically.
Setblacklevelofthescreentoproperlevel.
Thisfunctionenablestoselect'Low'or'High'inthefollowingmode:AV(NTSC-M),HDMIor
Component.Otherwise,'Blacklevel'issetto'Auto'.
Film Mode
(On/Off)
Youcanwatchacinema-likevideobyeliminatingjuddereffect.
Usethisfunctionwhenyouwatchmovies.
Colour Standard
(SD/HD)
ConvertsthecolourofadifferentvideotoHDcolour.ThisfunctionissetforSDvideo(BT-601)
andHDvideo(BT-709)colourformat.
Expert Pattern
(Off/Expert 1/Expert 2)
Thisisthepatternnecessaryforexpertadjustment.
Thisfunctionisenabledin"PictureMode-Expert"whenyouwatchDTV.
Colour Filter
(Off/Red/Green/Blue)
Thisisthefunctiontofilterthespecificcoloursofthevideo.
YoucanusetheRGBfiltertosetcoloursaturationandhueaccurately.
NOTE
YoucannotadjustcolourandtintintheRGB-PC/HDMI-PCmode.
WhentheExpert1/2isselected,youcanselectBacklight, Contrast, Brightness, H Sharpness,
V Sharpness, ColourorTint.

51
ENG
ENGLISH
CUSTOMIZING SETTINGS
Setting Description
Colour Temperature
(Medium/Warm/Cool)
Thisisthefunctiontoadjusttheoverallcolourofthescreentothefeelingyouwant.
A
»
Method:2Points
»
Pattern:Inner,Outer
»
Red/Green/BlueContrast,Red/Green/BlueBrightness:
»
Theadjustmentrangeis-50to+50.
B
»
Method:10pointIRE
»
Pattern:Inner/Outer
»
IRE(InstituteofRadioEngineers)istheunittodisplaythesizeofthevideosignaland
canbesetamong10,20,30to100.YoucanadjustRed,GreenorBlueaccordingto
eachsetting.
»
Red/Green/Blue:Theadjustmentrangeis-50to+50.
Colour Management
System
Asthetoolusedbytheexpertstomakeadjustmentsbyusingthetestpatterns,thisdoesnot
affectothercoloursbutcanbeusedtoselectivelyadjustthe6colourareas(Red/Green/Blue/
Cyan/Magenta/Yellow).Colourdifferencemaynotbedistinctiveevenwhenyoumakethe
adjustmentsforthegeneralvideo.
AdjustsRed/Green/Blue/Yellow/Cyan/Magenta.
»
Red/Green/Blue/Yellow/Cyan/MagentaColour:Theadjustmentrangeis-30to+30.
»
Red/Green/Blue/Yellow/Cyan/MagentaTint:Theadjustmentrangeis-30to+30.
ThisfeatureisdisableinRGB-PCandHDMI(PC)mode.
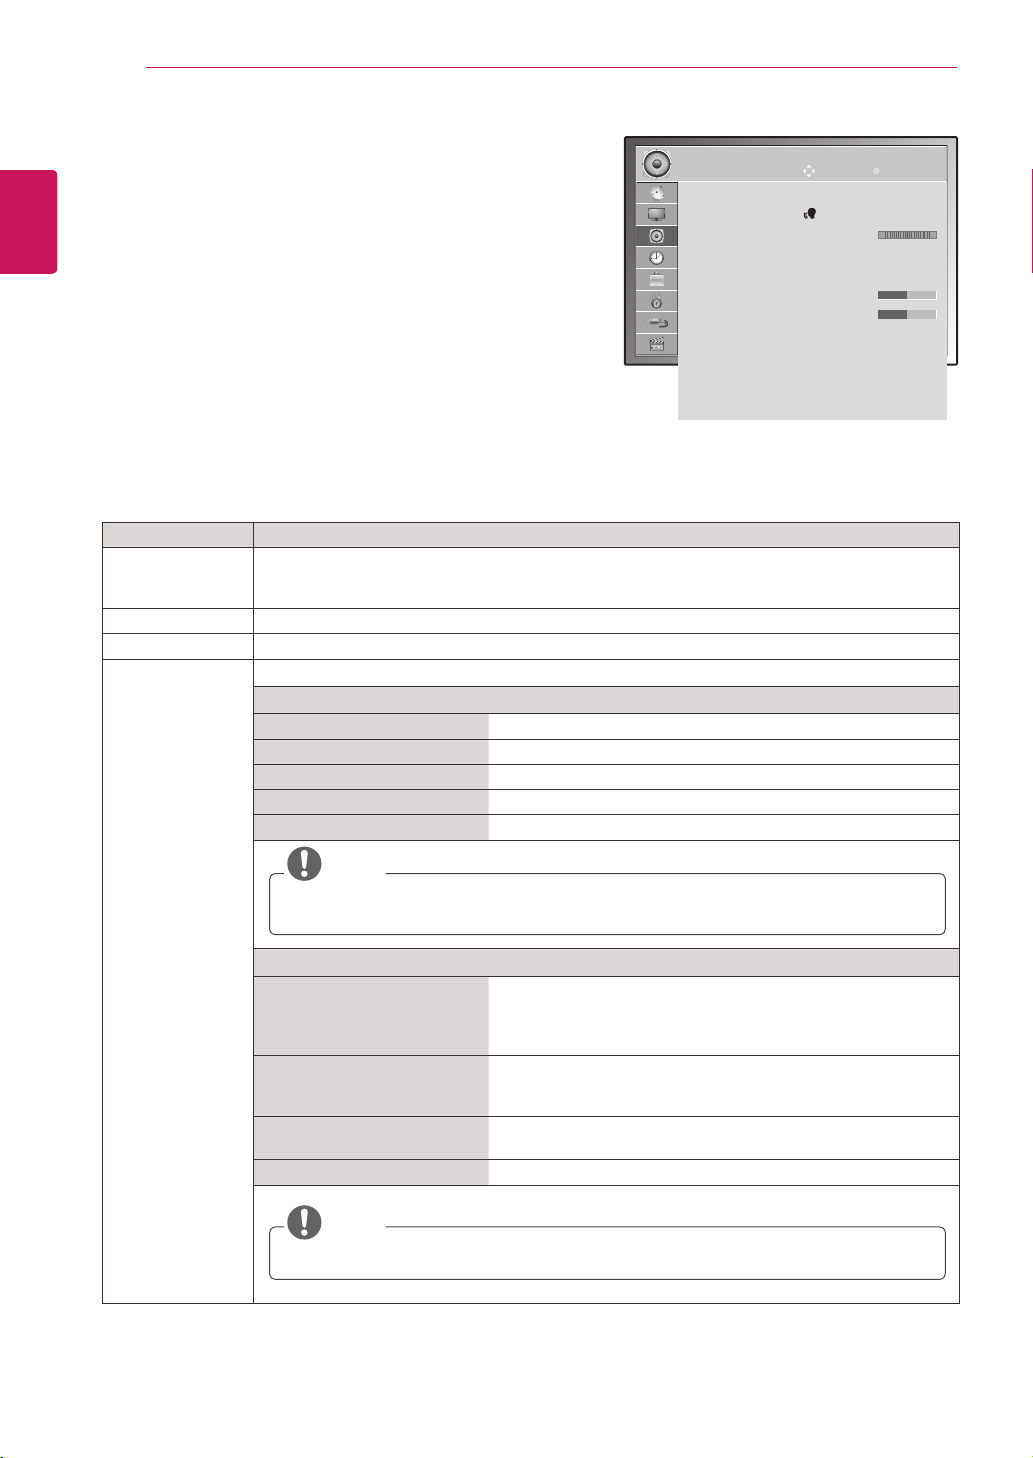
52
ENG
ENGLISH
CUSTOMIZING SETTINGS
AUDIO settings
1
PressMENUtoaccessthemainmenus.
2
PresstheNavigationbuttonstoscrolltoAUDIOandpress
OK.
3
PresstheNavigationbuttonstoscrolltothesettingor
optionyouwantandpressOK.
-Toreturntothepreviouslevel,pressBACK.
4
Whenyouarefinished,pressEXIT.
Whenyoureturntothepreviousmenu,press
BACK.
Theavailableaudiooptionsaredescribedinthefollowing:
Setting Description
Auto Volume ActivatestheAutoVolumefeaturetokeepthevolumelevelconsistentwheneveryouchange
programmes.Thevolumelevelmaynotbeconsistentduetodifferentsignalconditionsof
broadcastingstations.
Clear Voice ll Bydifferentiatingthehumansoundrangefromothers,ithelpsuserslistentohumanvoicesbetter.
Balance Adjustsbalancebetweentheleftandrightspeakersaccordingtoyourroomenvironment.
Sound Mode Selectsoneofthepresetsoundmodesorcustomizeeachoptionineachmode.
Mode
Standard Selectwhenyouwantstandard-qualitysound.
Music Selectwhenyoulistentomusic.
Cinema Selectwhenyouwatchmovies.
Sport Selectwhenyouwatchsportsevents.
Game Selectwhenyouplaygames.
NOTE
Ifsoundqualityorvolumeisnotatthelevelyouwant,itisrecommendedtouseaseparate
hometheatersystemoramplifiertocopewithdifferentuserenvironments.
Option
SurroundX Providesanenvelopingsurroundsoundwithcleardialogand
bassusingjusttwospeakers.SurroundXisapatentedSurround
technologythatsolvestheproblemofplaying5.1multichannel
contentsovertwospeakers.
Treble Controlsthedominantsoundsintheoutput.Whenyouturnup
thetreble,itwillincreasetheoutputtothehigherfrequency
range.
Bass Controlsthesoftersoundsintheoutput.Whenyouturnupthe
bass,itwillincreasetheoutputtothelowerfrequencyrange.
Reset Resetsthesoundmodetothedefaultsetting.
NOTE
YoucannotadjustTrebleandBassintheRGB-PC/HDMI-PCmode.
AUDIO
Auto Volume : Off
Clear Voice ll : Off 3
Balance 0
Sound Mode : Music
ꔈSurround X : Off
ꔈTreble 50
ꔈBass 50
ꔈReset
Digital Audio Out : PCM
TV Speaker : On
DTV Audio Setting : Auto
Move OK
L
R
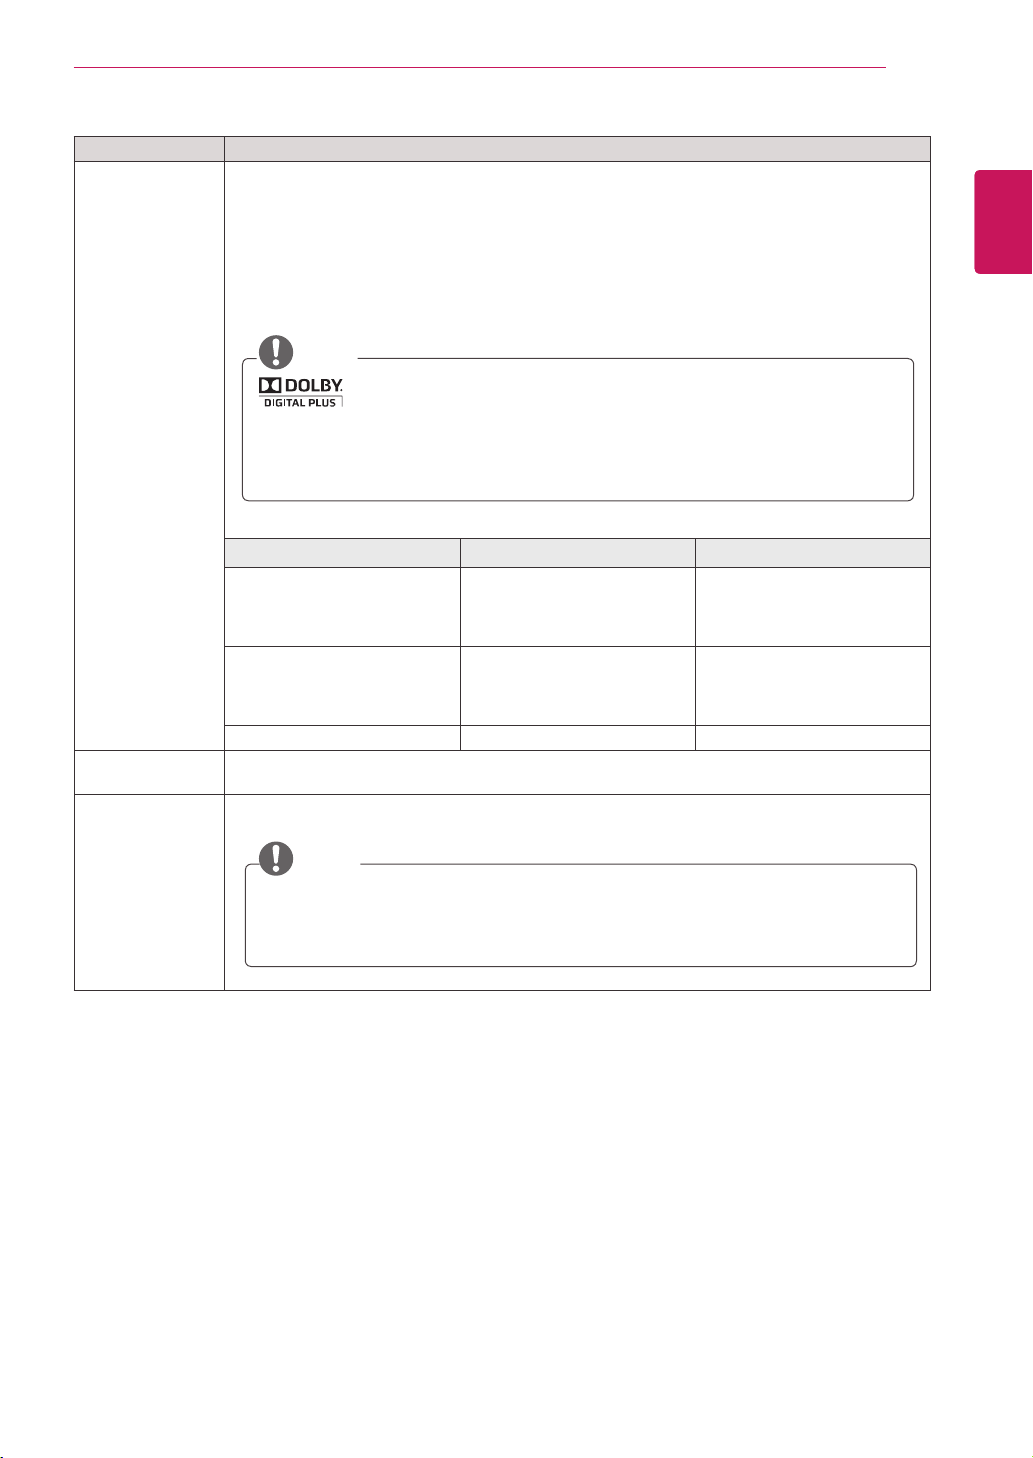
53
ENG
ENGLISH
CUSTOMIZING SETTINGS
Setting Description
Digital Audio Out ThisfunctionallowsyoutoselectyourpreferredDigitalAudioOutput.
WhenDolbyDigitalisavailable,selectingAutointheDigitalAudioOutmenuwillsetSPDIF(Sony
PhilipsDigitalInterFace)outputtoDolbyDigital.
IfAutoisselectedinthedigitalaudiooutmenuwhenDolbyDigitalisnotavailable,SPDIFoutput
willbePCM(Pulse-codemodulation).
EvenifbothDolbyDigitalandAudiolanguagehavebeensetinachannelwhichbroadcastDolby
DigitalAudio,onlyDolbyDigitalwillbeplayed.
NOTE
ManufacturedunderlicensefromDolbyLaboratories.“Dolby“andthe
double-DsymbolaretrademarksofDolbyLaboratories.
ThereisapossibilitythatwhenHDMImode,someDVDplayersdonotmakeSPDIFsound.
Atthattime,settheoutputofthedigitalaudiooftheDVDplayertoPCM.(InHDMI,Dolby
DigitalPlusisnotsupported).
Mode Audio Input Digital Audio output
Auto(SpeakerOn) MPEG
DolbyDigital
DolbyDigitalPlus
HE-AAC
PCM
DolbyDigital
DolbyDigital
PCM
Auto(SpeakerOff) MPEG
DolbyDigital
DolbyDigitalPlus
HE-AAC
PCM
DolbyDigital
DolbyDigital
DolbyDigital
PCM PCM PCM
TV Speaker TurnsontheinternalspeakeroftheMonitorsetwhenusinganexternalHi-FiorSRSsystem.You
canusetheTVspeakerasanaudiooutputdeviceevenifthereisnovideoinput.
DTV Audio Setting
(In Digital Mode
Only)
Whendifferentaudiotypesexistinaninputsignal,thisfunctionallowsyoutoselecttheaudiotype
youwant.
NOTE
Auto:AutomaticallyoutputsintheorderHE-AAC
ꔃ
DolbyDigital
ꔃ
MPEG.
HE-AAC,DolbyDigital,MPEG:Allowsuserstoselecttheaudiotypetheywant.
»
IfMPEGisselected,MPEGisalwaysoutputted.
»
IfMPEGisnotsupported,HE-AACandDolbyDigitalareselectedinthatorder.

54
ENG
ENGLISH
CUSTOMIZING SETTINGS
Stereo/Dual Reception (In Analogue Mode Only)
Whenaprogrammeisselected,thesoundinformationforthestationappearswiththeprogrammenumber
andstationname.
1
PressQ. MENUandpresstheNavigationtoaccesstheAUDIOandpressOK.
2
PresstheNavigationbuttontoscrolltosoundoutput andpressOK.
Broadcast On Screen Display
Mono
Stereo
Dual
MONO
STEREO
DUALI,DUALII,DUALI+II
Mono sound selection
Ifthestereosignalisweakinstereoreception,youcanswitchtomono.Inmonoreception,theclarityof
soundisimproved.
Language selection for dual language broadcast
aprogrammecanbereceivedintwolanguages(duallanguage),youcanswitchtoDUALI,DUALIIor
DUALI+II.
DUAL I Sendstheprimarybroadcastlanguagetotheloudspeakers.
DUAL I I Sendsthesecondarybroadcastlanguagetotheloudspeakers.
DUAL I+I I Sendsaseparatelanguagetoeachloudspeaker.
Stereo/Dual Reception (In Analogue Mode Only)
IftheMonitorSetisequippedwithareceiverforNICAMreception,highqualityNICAM(NearInstantaneous
CompandingAudioMultiplex)digitalsoundcanbereceived.
Soundoutputcanbeselectedaccordingtothetypeofbroadcastreceived.
1
WhenNICAMmonoisreceived,youcanselectNICAMMONOorMONO.
2
WhenNICAMstereoisreceived,youcanselectNICAMSTEREOorMONO.
Ifthestereosignalisweak,switchtoMONO.
3
WhenNICAMdualisreceived,youcanselectNICAMDUALI, NICAM DUAL II orNICAM DUAL I+IIor
MONO.
Speaker Sound Output Selection
InAV,Component,RGBandHDMImode,youcanselectoutputsoundfortheleftandrightloudspeakers.
Selectthesoundoutput.
L+R: AudiosignalfromaudioLinputissenttotheleftloudspeakerandaudiosignalfromaudioRinputis
senttotherightloudspeaker.
L+L:AudiosignalfromaudioLinputissenttoleftandrightloudspeakers.
R+R: AudiosignalfromaudioRinputissenttoleftandrightloudspeakers.
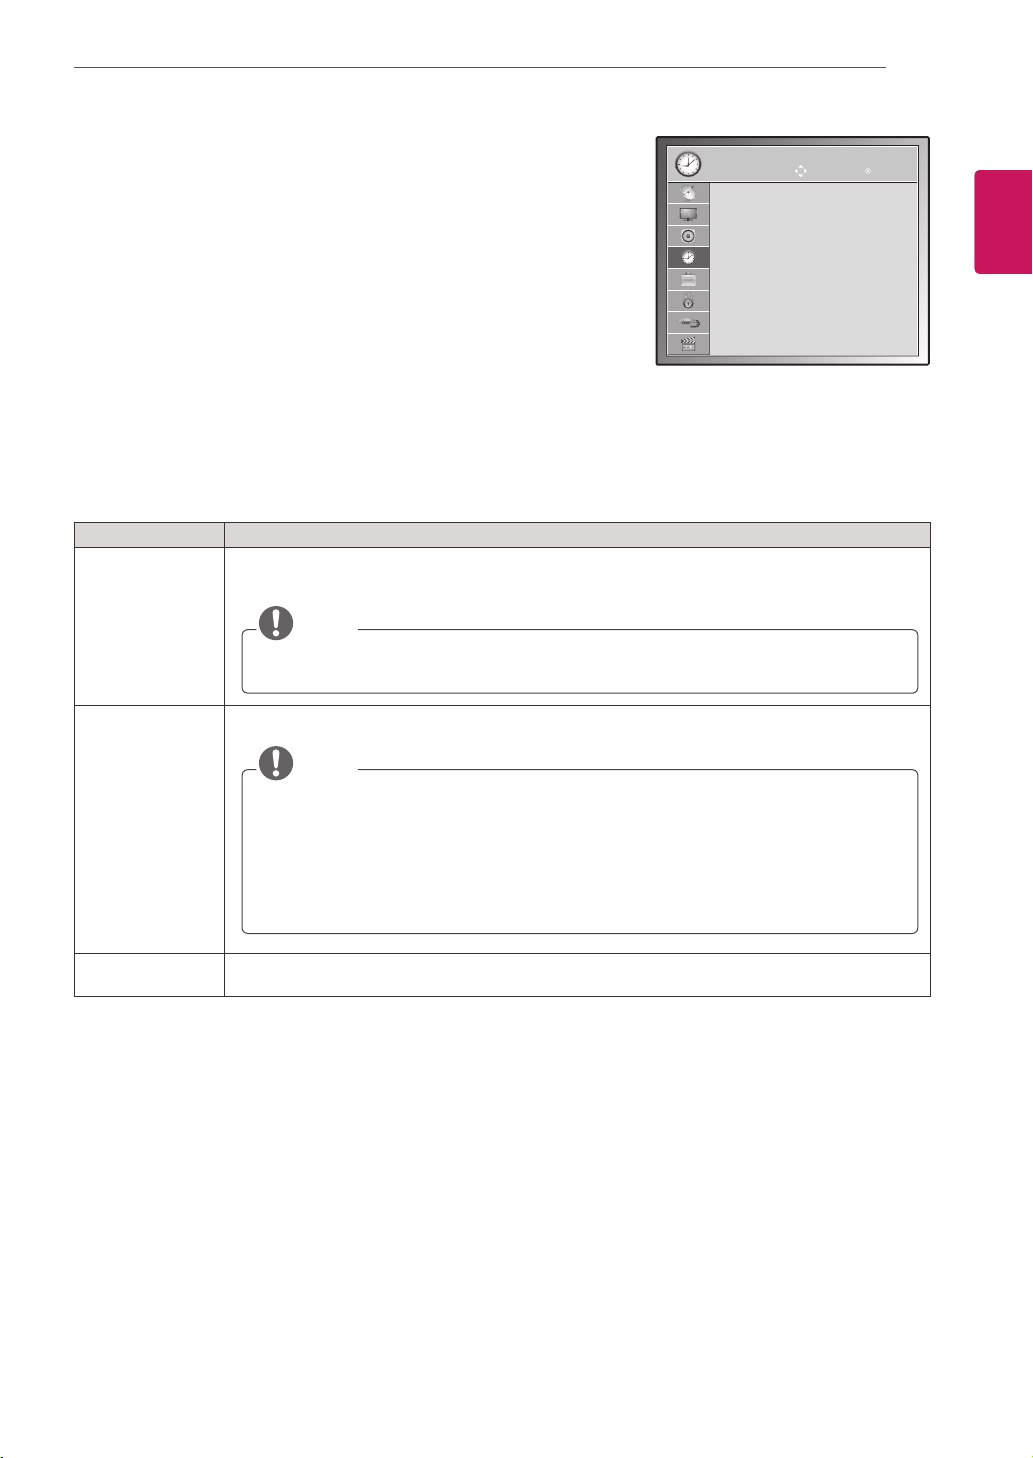
55
ENG
ENGLISH
CUSTOMIZING SETTINGS
TIME settings
1
PressMENUtoaccessthemainmenus.
2
PresstheNavigationbuttonstoscrolltoTIMEandpressOK.
3
PresstheNavigationbuttonstoscrolltothesettingoroptionyou
wantandpressOK.
-Toreturntothepreviouslevel,pressBACK.
4
Whenyouarefinished,pressEXIT.
Whenyoureturntothepreviousmenu,pressBACK.
Theavailabletimesettingsaredescribedinthefollowing:
Setting Description
Clock Setsthetime,date,timezone,anddaylight-savingtimefeature.Thetimewillbesetautomatically
accordingtoadigitalchannelsignalwhichincludestimeinformationprovidedbythebroadcasting
station.Ifnot,setthetimeanddatemanually.
NOTE
Ifyouturnthepoweroffbydisconnectingthepowercord,thecurrenttimesettingwillbe
reset.
Off Time/On Time SetsthetimetoturnonorofftheMonitorsetautomatically.Tousethisfunction,youshouldset
thecurrenttimeanddateintheClockmenu.
NOTE
Ifyoudonotpressanybuttonwithin2hoursaftertheMonitorsetturnsonbytheOn
Timefeature,theMonitorsetenterstheStandbymodeautomatically.
IfyousettheOnTimefeatureandturntheMonitorsetoffbypressingMainpower
switch,theOnTimefeaturewillnotwork.ToactivatetheOnTimefeature,theMonitor
setmustbeinStandbymode.
IfyousetbothOffTimeandOnTimefeaturestothesametime,theOffTimefunction
overridestheOnTimefeature,whentheMonitorsetison.
Sleep Timer SetsthelengthoftimeuntiltheMonitorsettoturnsoff.WhenyouturntheMonitorsetoffandturn
itonagain,theSleepTimerwillbesettooff.
TIME
Clock
Off Time : Off
On Time : Off
Sleep Timer : Off
Move OK
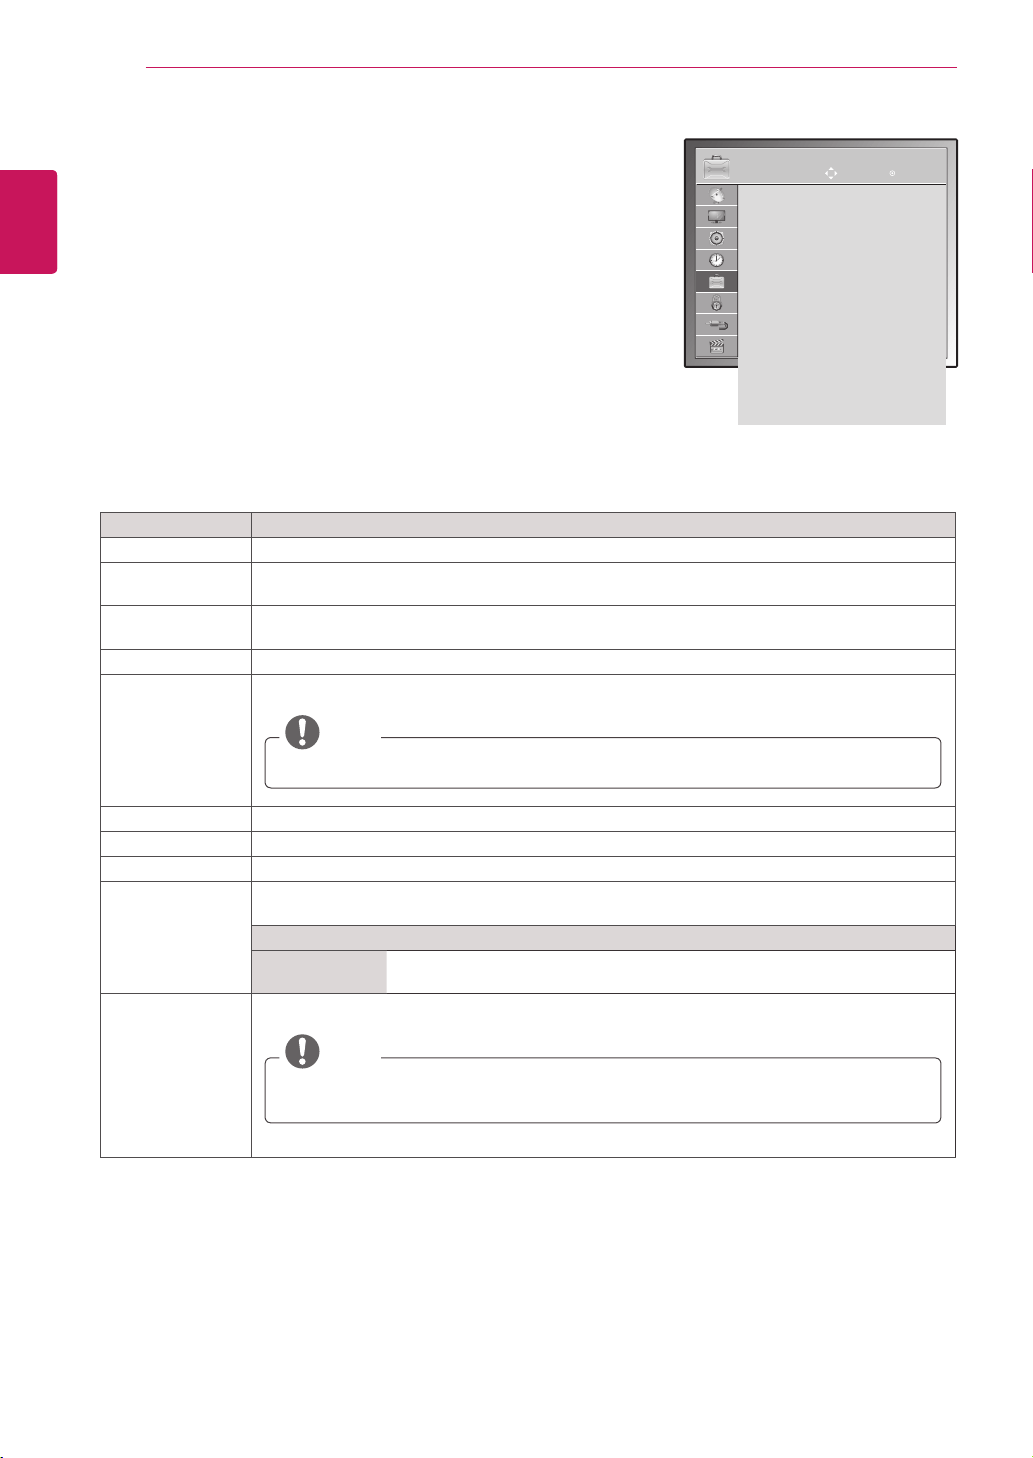
56
ENG
ENGLISH
CUSTOMIZING SETTINGS
Setting Description
Language Selectsalanguageforthedisplayoraudio(Seep.31).
Disabled
Assistance
Thisfunctionisfortheblind,andprovidesexplanatoryaudiodescribingthecurrentsituationina
TVprogrammeinadditiontothebasicaudio.
Data Service
(only in Ireland.)
ThisfunctionallowuserstochoosebetweenMHEG(DigitalTeletext)andTeletextifbothexistat
thesametime.(Seep.64to66)
Country Selectsadesiredcountry.(Seep.30)
Input Label Selectsalabelforaninputsourcetoidentifyadeviceconnectedtoeachinputsource.
NOTE
IfyouwanttouseHDMI-PCmode,youmustsettheinputlabeltoPCmode.
Set ID AddsanIDtotheconnecteddevices.(Seep.80)
Power Indicator SetstoturnonoroffthePowerindicatorontheMonitorset.
Demo Mode DisplaytheslideshowtoexplainthevariouslogoofthisMonitorset.
Mode Setting CustomizestheMonitorsetsettingstosuityourpreference.Theinitialsetupscreenwillappear
whenyouturnontheMonitorsetforthefirsttime.
Setting
ModeSetting SelectsHome Use modeforthehomeenvironment.
Selects Store Demomodefortheretailenvironment.
Factory Reset Thisfunctioninitializesallsettings.
NOTE
InLock System "On",ifyouforgetyourpassword,press'0','3','2','5'ontheremote
controlhandset.
OPTION settings
1
PressMENUtoaccessthemainmenus.
2
PresstheNavigationbuttonstoscrolltoOPTIONandpressOK.
3
PresstheNavigationbuttonstoscrolltothesettingoroptionyou
wantandpressOK.
-Toreturntothepreviouslevel,pressBACK.
4
Whenyouarefinished,pressEXIT.
Whenyoureturntothepreviousmenu,pressBACK.
Theavailableoptionsettingsaredescribedinthefollowing:
OPTION
Menu Language : English
Audio Language : English
Subtitle Language : English
Disabled Assistance
Data Service : MHEG
Country : UK
Input Label
Set ID : 1
Power Indacator : On
Demo Mode : Off
Mode Setting : Home Use
Factory Reset
Move OK
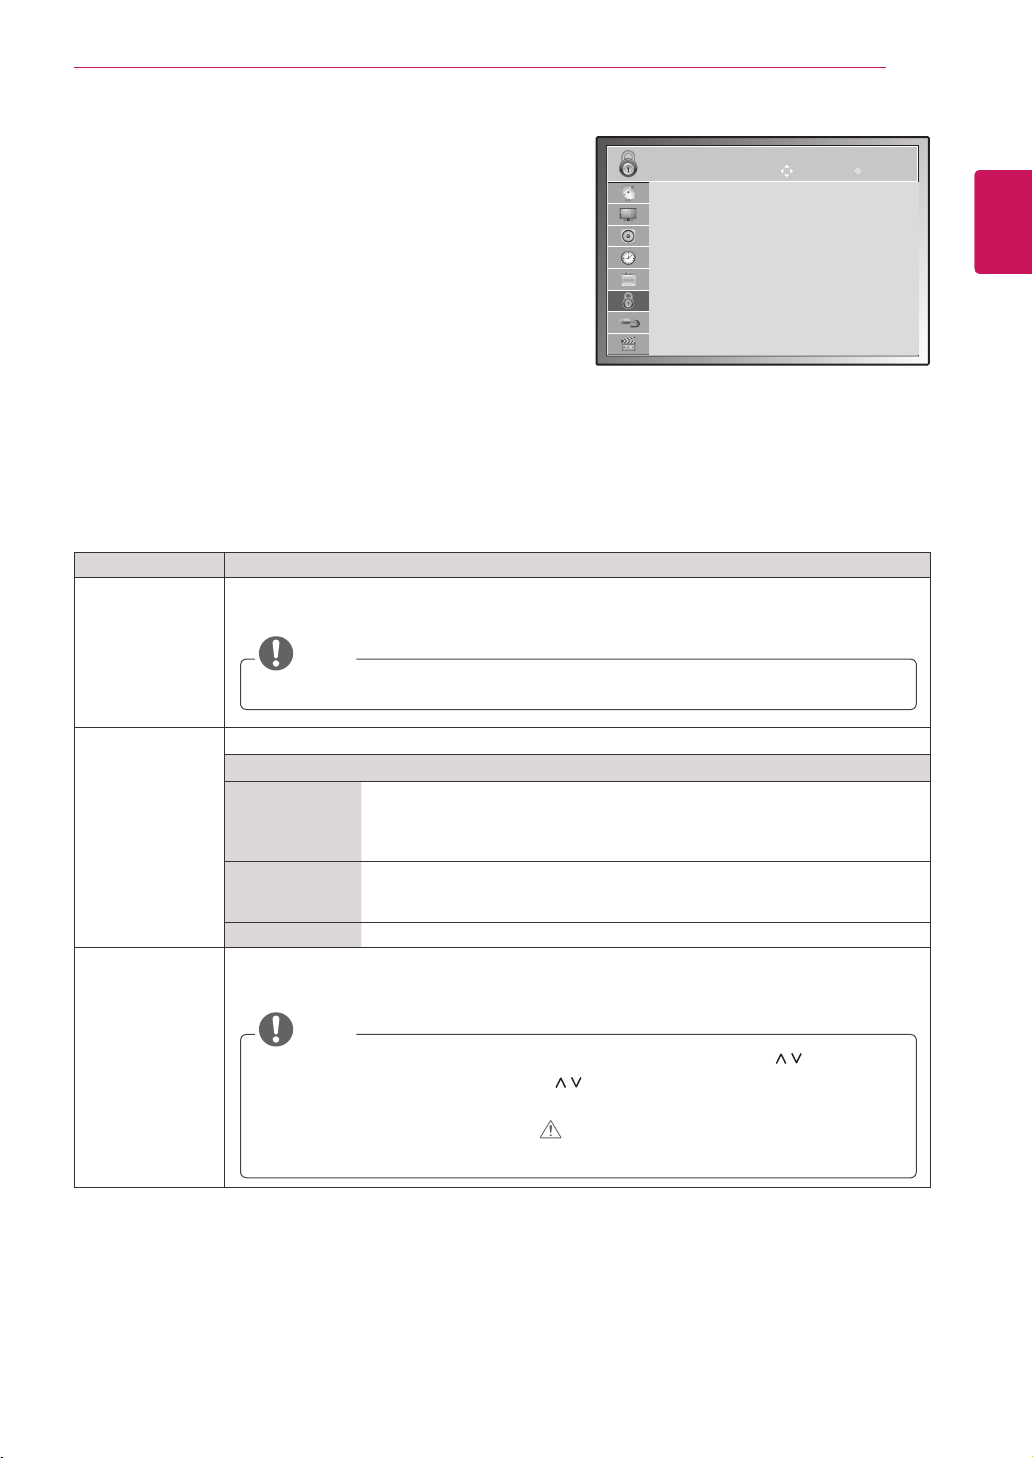
57
ENG
ENGLISH
CUSTOMIZING SETTINGS
LOCK settings
1
PressMENUtoaccessthemainmenus.
2
PresstheNavigationbuttonstoscrolltoLOCKandpress
OK.
3
PresstheNavigationbuttonstoscrolltothesettingor
optionyouwantandpressOK.
-Toreturntothepreviouslevel,pressBACK.
4
Whenyouarefinished,pressEXIT.
Whenyoureturntothepreviousmenu,press
BACK.
Theavailablelocksettingsaredescribedinthefollowing:
Setting Description
Set Password Changesthe4-digitpassword.Thedefaultpasswordis‘0’, ‘0’, ‘0’, ‘0’.
WhenFranceisselectedforCountry,thedefaultpasswordisnot‘0’,‘0’,‘0’,‘0’but‘1’,’2’,’3’,’4’.
NOTE
Ifyouforgetthepassword,press'0' '3' '2' '5'andsetthenewpassword.
Lock System Activatesordeactivatesthelocksystem
Rating
Block
Programme
Blocksanyprogrammesthatyoudonotwanttowatchorthatyoudonotwant
yourchildrentowatch.
ThisfunctionisavailableinLock System “On”.
Enterapasswordtowatchablockedprogramme.
Parental
Guidance
Thisfunctionoperatesaccordingtoinformationfromthebroadcastingstation.
Thereforeifthesignalhasincorrectinformation,thisfunctiondoesnotoperate.
(Seep.33)
InputBlock Blockstheinputsources
Key Lock TheMonitorsetcanbesetsothattheremotecontrolisrequiredtocontrolit.Thisfeaturecanbe
usedtopreventunauthorizedviewing.
NOTE
InKey Lock ‘On’,iftheMonitorsetisturnedoff,presstheINPUT, P buttonon
theMonitorsetorPOWER, INPUT, P , TV/PCorNUMBERbuttonsontheremote
controlthenthesetwillbeturnedon.
WiththeKeyLockOn,thedisplay‘ Key Lock On’appearsonthescreenifany
buttononthefrontpanelispressedwhileviewingtheMonitorset.
LOCK
Set Password
Lock System : Off
ꔈBlock Programme
ꔈParental Guidance
ꔈInput Block
key Lock : On
Move OK

58
ENG
ENGLISH
CUSTOMIZING SETTINGS
INPUT settings
1
PressMENUtoaccessthemainmenus.
2
PresstheNavigationbuttonstoscrolltoINPUTandpressOK.
3
PresstheNavigationbuttonstoscrolltothesettingoroptionyou
wantandpressOK.
-Toreturntothepreviouslevel,pressBACK.
4
Whenyouarefinished,pressEXIT.
Whenyoureturntothepreviousmenu,pressBACK.
Theavailableinputsettingsaredescribedinthefollowing:
Setting Description
Antenna SelectitwhenwatchingtheDTV/TV.(Seep.16).
AV SelectitwhenwatchingtheVCRorexternalequipment.(Seep.62).
Component SelectitwhenusingtheDVDortheDigitalset-topboxdependsonconnector.(Seep.61).
RGB SelectitwhenusingPCdependsonconnector.(Seep.12).
HDMI SelectitwhenusingDVD,PCorDigitalset-topboxdependonconnector.(Seep.12or61).
INPUT
Antenna
AV
Component
RGB
HDMI
Move OK
USB settings
1
PressMENUtoaccessthemainmenus.
2
PresstheNavigationbuttonstoscrolltoUSBandpressOK.
3
PresstheNavigationbuttonstoscrolltothesettingoroptionyou
wantandpressOK.
-Toreturntothepreviouslevel,pressBACK.
4
Whenyouarefinished,pressEXIT.
Whenyoureturntothepreviousmenu,pressBACK.
Theavailableusbsettingsaredescribedinthefollowing:
Setting Description
Photo List YoucanviewphotofilesonUSBstoragedevice.(Seep.38)
Music List YoucanplaymusicfilesonUSBstoragedevice.(Seep.40)
Movie List YoucanplaymoviefilesonaUSBstoragedevice.(Seep.42)
Divx Reg. Code CheckandregistertheDivXregistrationcodeofyourMonitorSetsothatyoucanrentorpurchase
thelatestmoviesat
www.divx.com/vod
.(Seep.45).
Deactivation Thepurposeofdeactivationistoallowdeactivationofdevicesforuserswhohaveactivatedallthe
availabledevicesthroughthewebserverandareblockedfromactivatingmoredevices.(Seep.45)
USB
Photo List
Music List
Movie List
Divx Reg. Code
Deactivation
Move OK
59
ENG
ENGLISH
MAKING CONNECTIONS
ConnectvariousexternaldevicestotheMonitorsetandswitchinputmodestoselectanexternaldevice.
Formoreinformationaboutanexternaldevice’sconnection,refertothemanualsuppliedwitheachdevice.
Availableexternaldevicesare:HDreceivers,DVDplayers,VCRs,audiosystems,USBstoragedevices,
PC,camcordersorcameras,gamingdevices,andotherexternaldevices.
NOTE
IfyourecordaTVprogramonaDVDrecorderorVCR,makesuretoconnecttheMonitorsetsignal
inputcabletotheMonitorsetthroughaDVDrecorderorVCR.Formoreinformationaboutrecording,
refertothemanualsuppliedwiththeconnecteddevice.
Theexternaldeviceconnectionmaydifferfromthemodel.
ConnectexternaldevicestotheMonitorsetbyreferringtothefollowingtable.
Connection overview
Connection type
Video Audio
Digital Analog Digital Analog
HDMI (highly recommended) O - O -
Component - O - -
RGB - O - -
Optical audio - - O -
Analog audio - - - O
MAKING CONNECTIONS
60
ENG
ENGLISH
MAKING CONNECTIONS
HD Receiver
Speaker
PC Gaming device
USB
Camcorder/Camera
DVD
VCR
ConnectvariousexternaldevicestotheportsontheMonitorset’sbackpanel.
1
FindanexternaldeviceyouwanttoconnecttoyourMonitorsetshownonthefollowingillustration.
2
Checktheconnectiontypeoftheexternaldevice.
3
Gototheappropriateillustrationandchecktheconnectiondetails.
NOTE
IfyouconnectagamingdevicetotheMonitorset,usethecablesuppliedwiththegamingdevice.
HDMI – See p.61
DVI – See p.61
Component – See p.61
Digital optical audio
– See p.62
Headphone
– See p.63
HDMI – See p.12
DVI – See p.13
RGB – See p.13
HDMI – See p.61
DVI – See p.61
Component – See p.61
Euro Scart – See p.62
HDMI – See p.61
DVI – See p.61
Component – See p.61
Component – See p.61
Euro Scart – See p.62
Memory storage
– See p.63
Memory card reader
– See p.63
HDMI – See p.61
Component – See p.61
61
ENG
ENGLISH
MAKING CONNECTIONS
Connecting to a HD receiver,
DVD or VCR player
ConnectaHDreceiver,DVD,orVCRplayertothe
Monitorsetandselectanappropriateinputmode.
NOTE
AUDIO OUT
DVI OUT
VIDE
O
COMPONENT IN
U
SB IN
AV
AUDIO
O
Y
P
B
P
R
L
RS
-2
3
2
C
IN
(
CONTROL & SERVICE)
RGB IN
(
PC
)
O
PTI
C
AL
AUDIO IN
(RGB/DVI)
H
/
P
D
I
G
ITAL
AU
DI
O
OU
T
ANTENNA/
C
ABLE I
N
D
C
-IN
HDMI/DVI IN
R
HDMI connection
Transmitsthedigitalvideoandaudiosignalsfrom
anexternaldevicetotheMonitorset.Connectthe
externaldeviceandtheMonitorsetwiththeHDMI
cableasshownonthefollowingillustration.
HDMI OUT
V
IDE
O
CO
MP
O
NENT I
N
US
B IN
AV
AU
DI
O
Y
P
B
P
R
L
RS
-2
3
2
C
IN
(CONTROL & SERVICE)
RGB IN
(
PC
)
O
PTI
C
AL
AUDI
O
I
N
(RGB/DVI
)
H
/
P
DI
G
ITAL
AU
DI
O
OU
T
A
NTENNA
/
C
ABLE IN
HDMI/DVI IN
DC-IN
R
DVI to HDMI connection
Transmitsthedigitalvideosignalfromanexternal
devicetotheMonitorset.Connecttheexternal
deviceandtheMonitorsetwiththeDVI-HDMI
cableasshowninthefollowingillustration.To
transmitanaudiosignal,connectanoptionalaudio
cable.
UseaHighSpeedHDMI™Cable.
HighSpeedHDMI™Cablesaretestedto
carryanHDsignalupto1080pandhigher.
VIDEO AUDIO
Y P
B
P
R
L R
VIDEO
COMPONENT IN
AUDIO
Y P
B
P
R
L
R
AV
RS
-2
3
2
C
IN
(
CONTROL & SERVICE)
R
GB IN
(
PC
)
O
PTI
C
AL
D
I
G
ITAL A
U
DI
O
OU
T
AUDI
O
IN
(RGB/DVI
)
H
/
P
A
NTENNA
/
C
ABLE IN
HDMI
/
DVI IN
D
C
-IN
Component connection
Transmitstheanalogvideoandaudiosignalsfrom
anexternaldevicetotheMonitorset.Connect
theexternaldeviceandtheMonitorsetwiththe
componentcableasshownonthefollowing
illustration.Todisplayimagesbyusingprogressive
scan,makesuretousethecomponentcable.
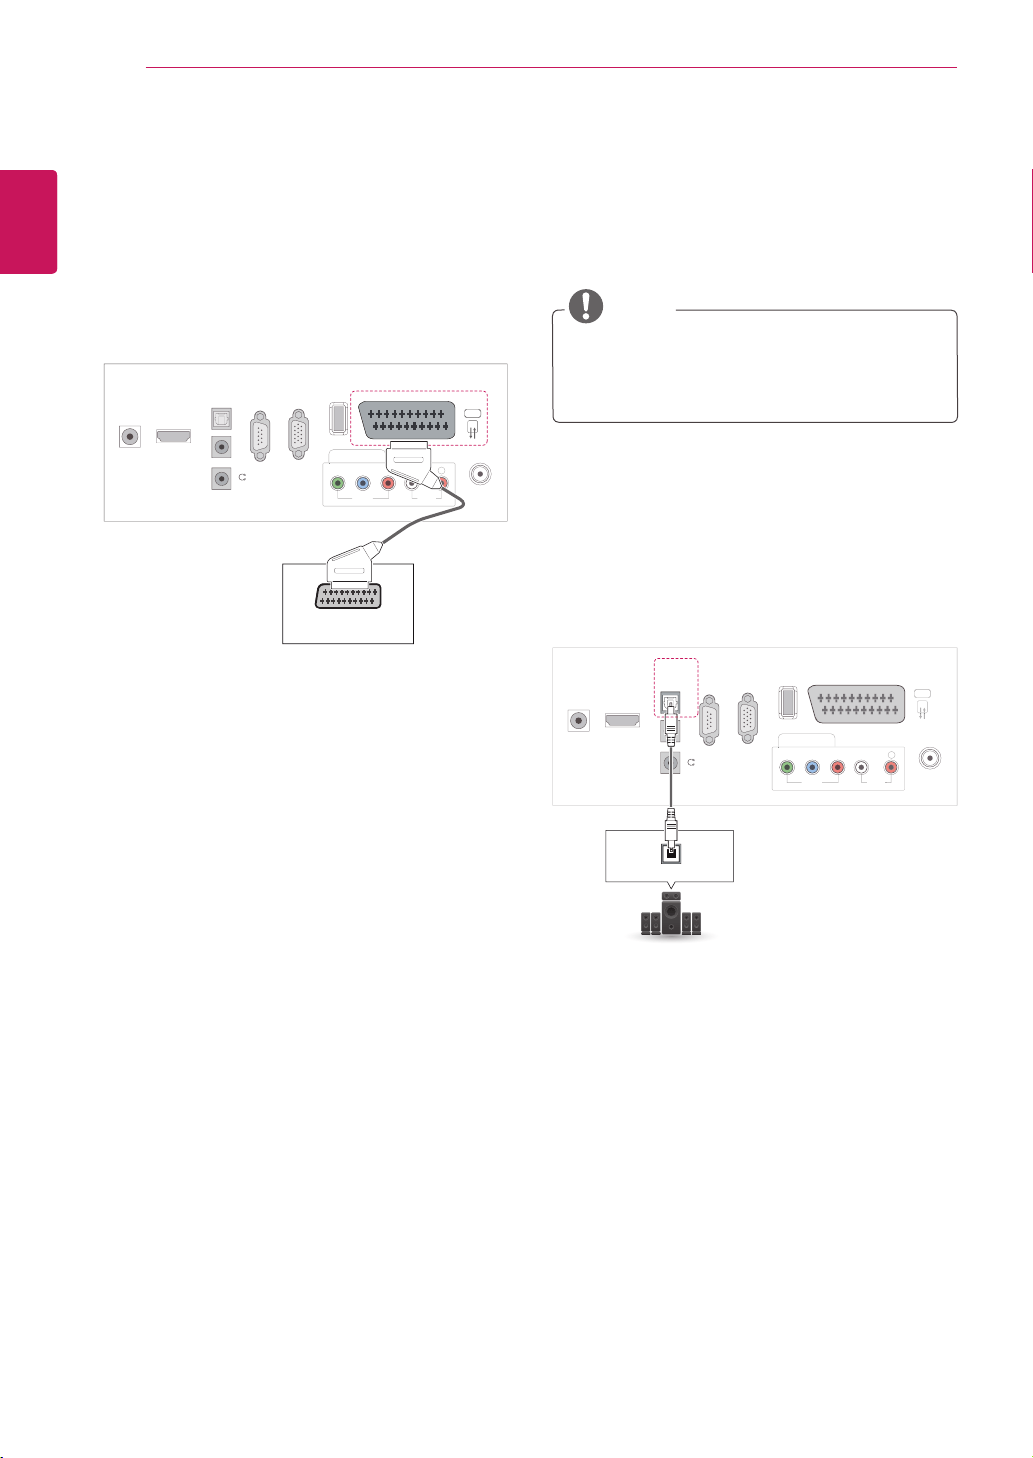
62
ENG
ENGLISH
MAKING CONNECTIONS
V
IDE
O
CO
MP
O
NENT I
N
US
B IN
AV
AU
DI
O
Y
P
B
P
R
L
R
S
-2
3
2
C
I
N
(CONTROL & SERVICE
)
RGB IN
(
PC
)
O
PTI
C
ALAUDI
O
I
N
(RGB/DVI
)
H
/
P
D
I
G
ITAL
AU
DI
O
OU
T
A
NTENNA
/
C
ABLE IN
HDMI/DVI IN
D
C
-IN
R
AUDIO/ VIDEO
Euro Scart connection
Transmitsthevideoandaudiosignalsfroman
externaldevicetotheMonitorset.Connectthe
externaldeviceandtheMonitorsetwiththeEuro
Scartcableasshownonthefollowingillustration.
Todisplayimagesbyusingprogressivescan,
makesuretousetheEuroScartcable.
Connecting to an audio
system
Useanoptionalexternalaudiosysteminsteadof
thebuilt-inspeaker.
NOTE
Ifyouuseanexternalaudiodeviceinstead
ofthebuilt-inspeaker,settheTVspeaker
featuretooff(Seep.52).
Digital optical audio connection
TransmitsthedigitalaudiosignalfromtheMonitor
settoanexternaldevice.Connecttheexternal
deviceandtheMonitorsetwiththeopticalaudio
cableasshownonthefollowingillustration
VIDE
O
CO
MP
O
NENT IN
US
B IN
AV
AUDIO
O
Y
P
B
P
R
L
RS
-2
3
2
C
IN
(CONTROL & SERVICE)
RGB IN
(
PC
)
OPTICAL
OPTICAL AUDIO IN
AUDI
O
IN
(RGB/DVI
)
H / P
DIGITAL AUDIO OUT
A
NTENNA
/
C
ABLE I
N
D
C
-IN
HDMI
/
DVI I
N
R
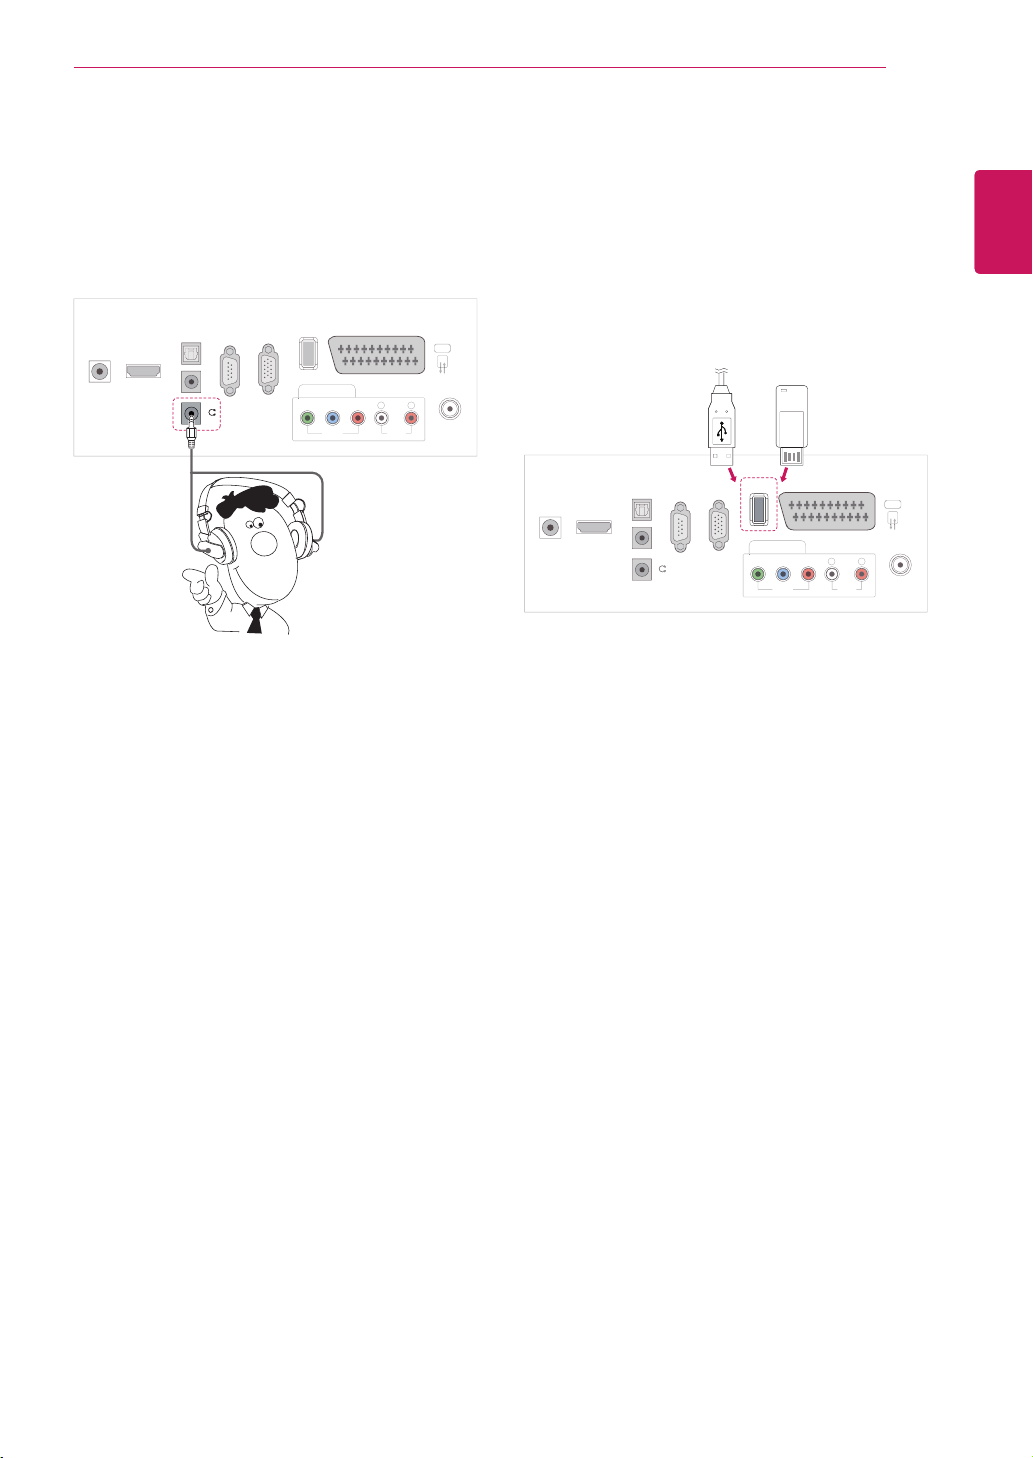
63
ENG
ENGLISH
MAKING CONNECTIONS
V
IDE
O
CO
MP
O
NENT I
N
US
B IN
AV
AU
DI
O
Y
P
B
P
R
L
RS
-2
3
2
C
IN
(CONTROL & SERVICE)
R
GB IN
(
PC
)
O
PTI
C
AL
AUDI
O
IN
(
RGB/DVI)
H / P
D
I
G
ITAL
AU
DI
O
OU
T
A
NTENNA
/
C
ABLE IN
D
C
-IN
HDMI
/
DVI IN
R
Headphone connection
TransmitstheheadphonesignalfromtheMonitor
settoanexternaldevice.Connecttheexternal
deviceandtheMonitorsetwiththeheadphoneas
shownonthefollowingillustration.
Connecting to a USB
ConnectaUSBstoragedevicesuchassUSB
flashmemory,externalharddrive,MP3playeror
aUSBmemorycardreadertotheMonitorsetand
accesstheUSBmenutousevariousmultimedia
files."Connecting USB storage devices"onSee
p.36and“Browsing files”onSeep.37
V
IDE
O
C
OMPONENT I
N
USB IN
AV
A
UDI
O
Y
P
B
P
R
L
RS
-2
3
2
C
IN
(CONTROL & SERVICE
)
RGB IN
(
PC
)
O
PTI
C
AL
AUDI
O
IN
(RGB/DVI
)
H
/
P
DI
G
ITAL
AU
DI
O
OUT
ANTENNA/
C
ABLE IN
HDMI/DVI IN
D
C
-IN
R
or
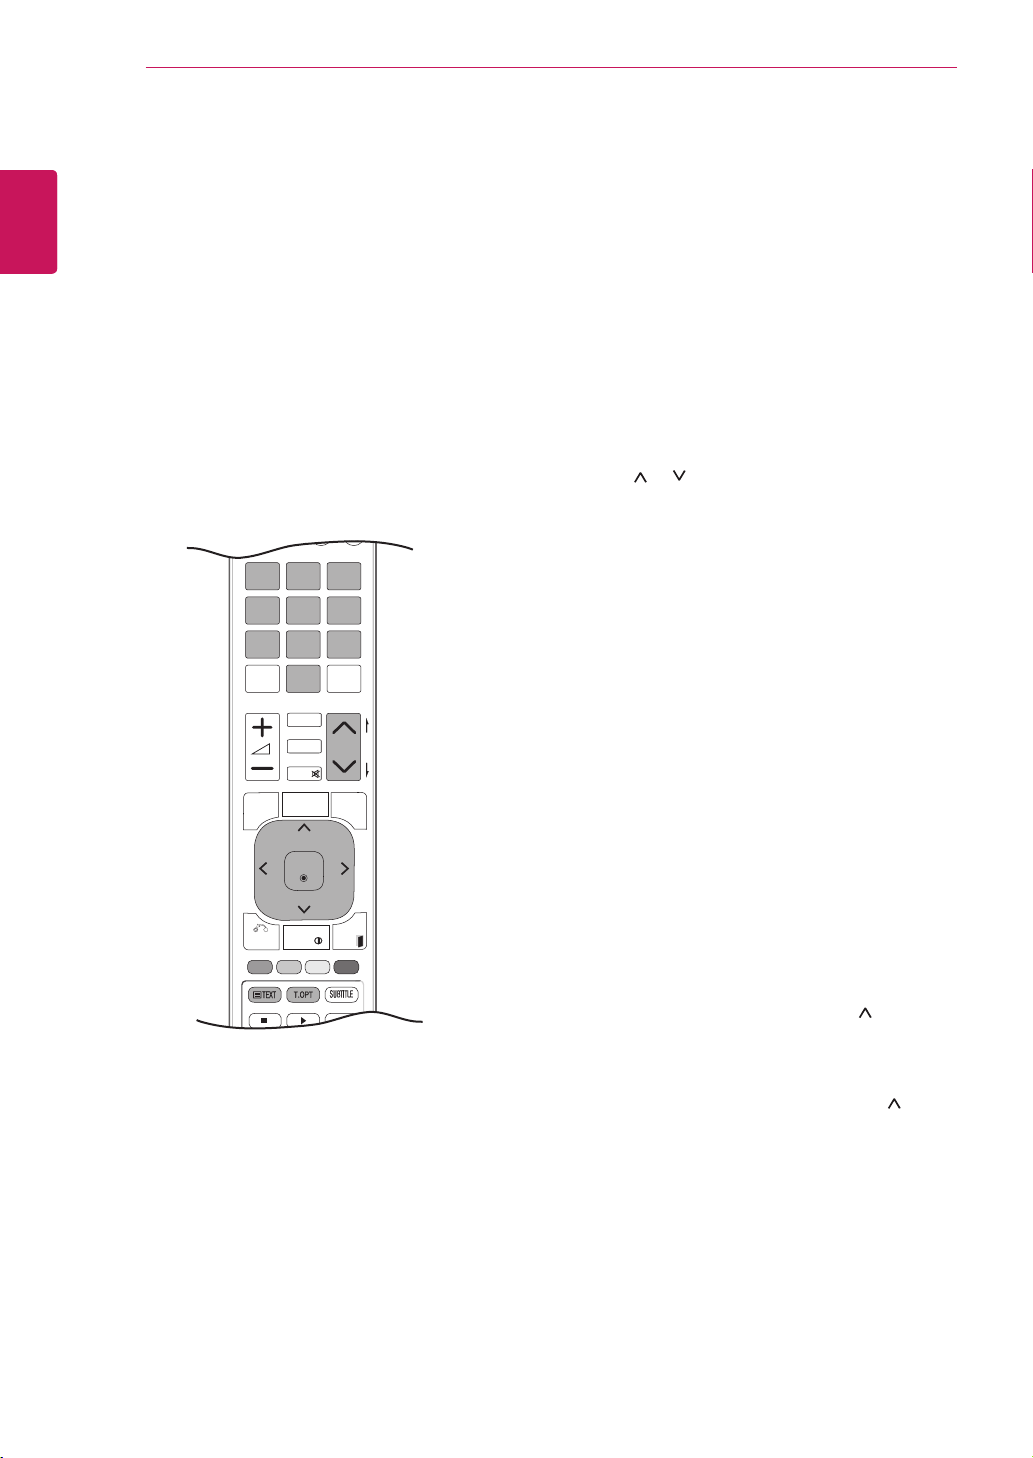
64
ENG
ENGLISH
TELETEXT
P
A
G
E
P
1 2 3
4 5
0
6
7 8 9
LIST
Q.VIEW
TV / PC INPUT
TV/
RAD
ENERGY
SAVING
MARK
FAV
RATIO
MUTE
OK
MENU
GUIDE
Q.MENU
INFO
Auto Config.
EXIT
TELETEXT
Thisfeatureisnotavailableinallcountries.
TeletextisafreeservicebroadcastbymostTV
stationswhichgivesup-to-the-minuteinformation
onnews,weather,televisionprogrammes,share
pricesandmanyothertopics.Theteletextdecoder
ofthisTVcansupporttheSIMPLE,TOPand
FASTEXTsystems.SIMPLE(standardteletext)
consistsofanumberofpageswhichareselected
bydirectlyenteringthecorrespondingpage
number.TOPandFASTEXTaremoremodern
methodsallowingquickandeasyselectionof
teletextinformation.
Switch On/Off
Simple Text
Page selection
1
Enterthedesiredpagenumberasathree-digit
numberwiththeNUMBERbuttons.Ifduring
selectionyoupressawrongnumber,youmust
completethethree-digitnumberandthenre-
enterthecorrectpagenumber.
2
TheP
or buttoncanbeusedtoselectthe
previousornextpage.
Top Text
Theuserguidedisplaysfourfields-red,green,
yellowandblueatthebottomofthescreen.The
yellowfielddenotesthenextgroupandtheblue
fieldindicatesthenextblock.
PresstheTEXTbuttontoswitchtoteletext.The
initialpageorlastpageappearsonthescreen.
Twopagenumbers,TVstationname,dateand
timearedisplayedonthescreenheadline.The
firstpagenumberindicatesyourselection,while
thesecondshowsthecurrentpagedisplayed.
PresstheTEXTorEXITbuttontoswitchoff
teletext.Thepreviousmodereappears.
Block / Group / Page Selection
1
WiththeBluebuttonyoucanprogressfrom
blocktoblock.
2
UsetheYellowbuttontoproceedtothenext
groupwithautomaticoverflowtothenextblock.
3
WiththeGreenbuttonyoucanproceedtothe
nextexistingpagewithautomaticoverflowto
thenextgroup.Alternatively,theP button
canbeused.
4
TheRedbuttonpermitsyoutoreturnto
previousselection.Alternatively,theP button
canbeused.
Direct Page Selection
AswithSIMPLEteletextmode,youcanselecta
pagebyenteringitasathreedigitnumberusing
theNUMBERbuttonsinTOPmode.
65
ENG
ENGLISH
TELETEXT
Fastext
Theteletextpagesarecolourcodedalongthe
bottomofthescreenandareselectedbypressing
thecorrespondingcolouredbutton.
Page selection
1
PresstheT.OPTbuttonandthenusethe
Navigationbuttontoselect menu.Display
theindexpage.
2
Youcanselectthepageswhicharecolour
codedalongthebottomlinewithcorresponding
colouredbuttons.
3
ASwithSIMPLEteletextmode,youcanselect
apagebyenteringitsthreedigitpagenumber
withtheNUMBERbuttonsinFASTEXTmode.
4
TheP
^
or
v
buttoncanbeusedtoselectthe
precedingorfollowingpage.
Special Teletext Function
Selecttheeachindexpage.
Index
Time
WhenviewingaTVprogramme,selectthis
menutodisplaythetimeatthetoprighthand
cornerofthescreen.
Intheteletextmode,pressthisbuttontoselect
asubpagenumber.Thesubpagenumber
isdisplayedatthebottomofthescreen.To
holdorchangethesubpage,presstheRED
buttons/GREENbuttons,<>orNUMBER
buttons.
Hold
Stopstheautomaticpagechangewhichwill
occurifateletextpageconsistsof2ormore
subpages.
Thenumberofsubpagesandthesubpage
displayedis,usually,shownonthescreen
belowthetime.Whenthismenuisselectedthe
stopsymbolisdisplayedatthetopleft-hand
cornerofthescreenandtheautomaticpage
changeisinactive.
Reveal
Selectthismenutodisplayconcealed
information,suchassolutionstoriddlesor
puzzles.
Update
DisplaystheTVpictureonthescreenwhile
waitingforanewteletextpage.Thedisplay
willappearatthetoplefthandcornerofthe
screen.Whentheupdatedpageisavailable
thendisplaywillchangetothepagenumber.
Selectthismenuagaintoviewtheupdated
teletextpage.
Index
Time
Hold
Reveal
Update
Close
Text Option

66
ENG
ENGLISH
DIGITAL TELETEXT
DIGITAL TELETEXT
ThisfunctionworksinUK,Irelandonly.
TheTVgivesyouaccesstodigitalteletextwhichis
greatlyimprovedinvariousaspectssuchastext,
graphicsetc.Thisdigitalteletextcanaccess
specialdigitalteletextservicesandspecific
serviceswhichbroadcastdigitalteletext.
Youshouldselectoffinthesubtitlelanguagemenu
todisplayteletextbypressingtheSUBTITLE
button.
Teletext within digital
service
Teletext in digital service
1
PressthenumericorP
or buttontoselect
adigitalservicewhichbroadcastsdigital
teletext.
2
Followtheindicationsondigitalteletextand
moveontothenextstepbypressingTEXT,
OK, Navigation button, Red button, Green
button, Yellow button, Blue button or
Number buttonsandetc.
3
Tochangedigitalteletextservice,selecta
differentservicebythenumericorP
or
button.
1
PressthenumericorP
or buttontoselect
acertainservicewhichbroadcastsdigital
teletext.
2
PresstheTEXTorcolouredbuttontoswitchon
teletext.
3
Followtheindicationsondigitalteletextand
moveontothenextstepbypressingOK,
Navigation button, Red button, Green
button, Yellow button, Blue button or
Number buttonsandsoon.
4
PresstheTEXTorcolourbuttontoswitchoff
digitalteletextandreturntoTVviewing.
Someservicesmayallowyoutoaccesstext
servicesbypressingtheREDbutton.

67
ENG
ENGLISH
MAINTENANCE
MAINTENANCE
CleanyourMonitorsetregularlytokeepthebest
performanceandtoextendtheproductlifespan.
CAUTION
Makesuretoturnthepoweroffand
disconnectthepowercordandallother
cablesfirst.
WhentheMonitorsetisleftunattendedand
unusedforalongtime,disconnectthepower
cordfromthewalloutlettopreventpossible
damagefromlightningorpowersurges.
Screen and frame
Toremovedust,wipethesurfacewithadryand
softcloth.
Toremovemajordirt,wipethesurfacewithasoft
clothdampenedincleanwateroradilutedmild
detergent.Thenwipeimmediatelywithacleanand
drycloth.
CAUTION
Donotpush,rub,orhitthesurfacewith
yourfingernailorasharpobject,asthismay
resultinscratchesonthescreenandimage
distortions.
Donotuseanychemicals,suchaswaxes,
benzene,alcohol,thinners,insecticides,
airfresheners,lubricants,asthesemay
damagethescreen’sfinishandcause
discolorations.
Cabinet and stand
Toremovedust,wipethecabinetwithadryand
softcloth.
Toremovemajordirt,wipethecabinetwitha
softclothdampenedinacleanwaterorwater
containingasmallamountofmilddetergent.
CAUTION
Donotsprayliquidontothesurface.Ifwater
enterstheMonitorset,itmayresultinfire,
electricshock,ormalfunction.
Donotuseanychemicalsasthismay
deterioratethesurface.
Power cord
Removetheaccumulateddustordirtonthepower
cordregularly.

68
ENG
ENGLISH
TROUBLESHOOTING
TROUBLESHOOTING
General
The operation does not work normally.
Problem Resolution
Theremotecontroldoesn’twork
Checktoseeifthereisanyobjectbetweentheproductandthe
remotecontrolcausingobstruction.Ensureyouarepointingthe
remotecontrol
Ensurethatthebatteriesareinstalledwithcorrectpolarity( to ,
to ).
Ensurethatthecorrectremoteoperatingmodeisset:TV,VCR,etc.
Installnewbatteries.
Powerissuddenlyturnedoff
Isthesleeptimerset?
Checkthepowercontrolsettings.Powerinterrupted.
IftheMonitorSetisswitchedonandthereisnoinputsignal,it
willswitchoffautomaticallyafter15minutestosavethepower
consumption.
WhenabrokenfilewasplayedintheUSBmode,theMonitorsetmay
turnoff.Pleasecheckthefileinyourusbstorage.
Exceptthescreenoffmodeoftheenergysavingmenu.
The video function does not work.
Problem Resolution
Nopicture&Nosound
Checkwhethertheproductisturnedon.
Tryanotherchannel.Theproblemmaybewiththebroadcast.
Isthepowercordinsertedintowallpoweroutlet?
Checkyourantennadirectionand/orlocation.
Testthewallpoweroutlet,pluganotherproduct’spowercordintothe
outletwheretheproduct’spowercordwaspluggedin.
Pictureappearsslowlyafter
switchingon
Thisisnormal,theimageismutedduringtheproductstartupprocess.
Pleasecontactyourservicecentre,ifthepicturehasnotappeared
afterfiveminutes.
NoColour,poorcolour,orpoor
picture
AdjustColourinmenuoption.
KeepasufficientdistancebetweentheproductandtheVCR.
Tryanotherchannel.Theproblemmaybewiththebroadcast.
Arethevideocablesinstalledproperly?
Activateanyfunctiontorestorethebrightnessofthepicture.
Horizontal/verticalbarsorpicture
shaking
Checkforlocalinterferencesuchasanelectricalapplianceorpower
tool.
Poorreceptiononsomechannels
Stationorcableproductexperiencingproblems,tunetoanother
station.
Stationsignalisweak,reorientantennatoreceiveweakerstation.
Checkforsourcesofpossibleinterference.
Linesorstreaksinpictures
Checkantenna(Changethedirectionoftheantenna).

69
ENG
ENGLISH
TROUBLESHOOTING
The audio function does not work.
Problem Resolution
PictureOK&Nosound
Pressthe
(+ , -)
button
or VOL (
,
)
button.
Soundmuted?PressMUTEbutton.
Tryanotherchannel.Theproblemmaybewiththebroadcast.
Aretheaudiocablesinstalledproperly?
Nooutputfromoneofthespeakers
AdjustBalanceinmenuoption.
Unusualsoundfrominsidethe
product
Achangeinambienthumidityortemperaturemayresultinanunusual
noisewhentheproductisturnedonoroffanddoesnotindicatea
problemwiththeproduct.
NosoundwhenconnectingHDMI
orUSB
CheckHDMIcableisHighSpeedHDMICable.
CheckUSBcableoverversion2.0.
IfthesoundisabnormalintheHDMI,checktheaudioformatinyour
externalequipments.
»
AudioSupportedformat:DolbyDigital,PCM
There is a problem with PICTURE settings.
Problem Resolution
Whentheuserchangesthe
picturesettings,the
Monitorset
automaticallyconvertsbacktothe
initialsettingsafteracertainperiod
oftime.
ItmeansthattheMonitorsetiscurrentlysettoStore Demomode.
ToswitchtoHomeusemodeyoushoulddothefollowings:From
theMonitorsetMenu,chooseOPTION
→
ChooseMode Setting
→
ChooseHomeuse.Now,youhavecompletedswitchingtotheHome
usemode.
PC mode
No image is displayed.
Problem Resolution
Powerison,powerindictorisblue
butthescreenappearsextremely
dark.
Adjustbrightnessandcontrastagain.
Doesthe‘Invalidformat’
messageappear?
ThesignalfromthePC(Videocard)isoutoftheverticalorhorizontal
frequencyrangeoftheproduct.Adjustthefrequencyrangeby
referringtotheSpecificationsinthisuser’sguide.
Doesthe‘Checksignalcable’
messageappear?
ThesignalcablebetweenPCandproductisnotconnected.Check
thesignalcable.
Pressthe‘INPUT’buttonintheremotecontroltochecktheinput
signal.
Problem Resolution
NopicturewhenconnectingHDMI
CheckthatyourHDMIcableisHighSpeedHDMICable.
IftheHDMIcablesarenotHighSpeedHDMICable,flickeringorno
screendisplaycanresult.PleaseusetheHighSpeedHDMICable.

70
ENG
ENGLISH
TROUBLESHOOTING
‘Unknown Product’ message appears when the product is connected.
Problem Resolution
Didyouinstallthedriver?
Installtheproductdriver,whichisprovidedwiththeproduct,or
downloaditfromthewebsite.(http://www.lg.com)
Seeiftheplug&playfunctionissupportedbyreferringtothevideo
carduser’sguide.
After-image appears on the product.
Problem Resolution
After-imageappearswhen
theproductisturnedoff.
Ifyouuseafixedimageforalongtime,thepixelsmaybedamaged
quickly.Usethescreensaverfunction.
Screen Colour is abnormal.
Problem Resolution
ScreenhaspoorColourresoluion
(16_Colours).
SetscreenColourresolutiontomorethan24bits(trueColour)Select
controlPane
→
Display
→
Settings
→
ColourTablemenuinWindows.
ScreenColourisunstableormono
Colour.
Checktheconnectionstatusofthesignalcable.
Dobackspotsappearonthe
screen?
Severalpixels(red,green,whiteorblackColour)mayappearonthe
screen,whichcanbeattributabletotheuniquecharacteristicsofthe
LCDpanel.ItisnotamalfunctionoftheLCD.
The screen image looks abnormal.
Problem Resolution
Isthescreenpositionwrong?
AdjustthePositionmenuinOSD.
ASeeifthevideocardresolutionandfrequencyaresupportedby
theproduct.Ifthefrequencyisoutofrange,settotherecommended
resolutionintheControlPanel
→
Display
→
Settingmenu.
Dothinlinesappearonthe
backgroundscreen?
AdjusttheClockmenuinOSD.
Horizontalnoiseappearsorthe
characterslookblurred.
AdjustthePhasemenuinOSD.
71
ENG
ENGLISH
SPECIFICATIONS
SPECIFICATIONS
LCDPanel ScreenType 470.1mmWide(18.51inch)TFT(ThinFilmTransistor)
LCD(LiquidCrystalDisplay)Panel.
Visiblediagonalsize:470.1mm
PixelPitch 0.3mm(H)x0.3mm(V)
VideoSignal Max.Resolution 1360x768@60Hz
RecommendedResolution 1360x768@60Hz
HorizontalFrequency 30kHzto61kHz
VerticalFrequency 56Hzto75Hz
SynchronizationType SeparateSync,Digital
InputConnector TV,D-SubAnalog,SCART,PCAudioIn,Component,
HDMI
Power RatedVoltage 19V
2.0A
PowerConsumption OnMode:30W(typ.)
OffMode 0.5W
AC/DCAdapter Manufacturer:LITE-ON,ModelPA-1650-68
Tilt TiltRange -5°to10°
Dimensions(WidthxHeightxDepth)
Weight
443.9mmx365mmx164mm
2.96kg
Environmental
conditions
OperatingTemperature
OperatingHumidity
10°Cto35°C
20%to80%
StorageTemperature
StorageHumidity
-10°Cto60°C
5%to90%
Productspecificationsshownabovemaybechangedwithoutpriornoticeduetoupgradeofproduct
functions.
M1950D
72
ENG
ENGLISH
SPECIFICATIONS
LCDPanel ScreenType 546.86mmWide(21.53inch)TFT(ThinFilmTransistor)
LCD(LiquidCrystalDisplay)Panel.
Visiblediagonalsize:546.86mm
PixelPitch 0.248mm(H)x0.248mm(V)
VideoSignal Max.Resolution 1920×1080@60Hz
RecommendedResolution 1920×1080@60Hz
HorizontalFrequency 30kHzto83kHz
VerticalFrequency 56Hzto75Hz
SynchronizationType SeparateSync,Digital
InputConnector TV,D-SubAnalog,SCART,PCAudioIn,Component,
HDMI
Power RatedVoltage 19V
2.2A
PowerConsumption OnMode:35W(typ.)
OffMode 0.5W
AC/DCAdapter Manufacturer:LITE-ON,ModelPA-1650-68
Tilt TiltRange -5°to10°
Dimensions(WidthxHeightxDepth)
Weight
509.1mmx404.2mmx164mm
3.37kg
Environmental
conditions
OperatingTemperature
OperatingHumidity
10°Cto35°C
20%to80%
StorageTemperature
StorageHumidity
-10°Cto60°C
5%to90%
Productspecificationsshownabovemaybechangedwithoutpriornoticeduetoupgradeofproduct
functions.
M2250D
73
ENG
ENGLISH
SPECIFICATIONS
M2350D
LCDPanel ScreenType 584.2mmWide(23inch)TFT(ThinFilmTransistor)
LCD(LiquidCrystalDisplay)Panel.
Visiblediagonalsize:584.2mm
PixelPitch 0.265mm(H)x0.265mm(V)
VideoSignal Max.Resolution 1920×1080@60Hz
RecommendedResolution 1920×1080@60Hz
HorizontalFrequency 30kHzto83kHz
VerticalFrequency 56Hzto75Hz
SynchronizationType SeparateSync,Digital
InputConnector TV,D-SubAnalog,SCART,PCAudioIn,Component,
HDMI
Power RatedVoltage 19V
2.4A
PowerConsumption OnMode:40W(typ.)
OffMode 0.5W
AC/DCAdapter Manufacturer:LITE-ON,ModelPA-1650-68
Tilt TiltRange -5°to10°
Dimensions(WidthxHeightxDepth)
Weight
546.7mmx423.8mmx180mm
3.86kg
Environmental
conditions
OperatingTemperature
OperatingHumidity
10°Cto35°C
20%to80%
StorageTemperature
StorageHumidity
-10°Cto60°C
5%to90%
Productspecificationsshownabovemaybechangedwithoutpriornoticeduetoupgradeofproduct
functions.

74
ENG
ENGLISH
SPECIFICATIONS
M2450D
LCDPanel ScreenType 609.7mmWide(24inch)TFT(ThinFilmTransistor)
LCD(LiquidCrystalDisplay)Panel.
Visiblediagonalsize:609.7mm
PixelPitch 0.276mm(H)x0.276mm(V)
VideoSignal Max.Resolution 1920×1080@60Hz
RecommendedResolution 1920×1080@60Hz
HorizontalFrequency 30kHzto83kHz
VerticalFrequency 56Hzto75Hz
SynchronizationType SeparateSync,Digital
InputConnector TV,D-SubAnalog,SCART,PCAudioIn,Component,
HDMI
Power RatedVoltage 19V
2.4A
PowerConsumption OnMode:40W(typ.)
OffMode 0.5W
AC/DCAdapter Manufacturer:LITE-ON,ModelPA-1650-68
Tilt TiltRange -5°to10°
Dimensions(WidthxHeightxDepth)
Weight
569.9mmx435.8mmx180mm
4.43kg
Environmental
conditions
OperatingTemperature
OperatingHumidity
10°Cto35°C
20%to80%
StorageTemperature
StorageHumidity
-10°Cto60°C
5%to90%
Productspecificationsshownabovemaybechangedwithoutpriornoticeduetoupgradeofproduct
functions.

SPECIFICATIONS
75
ENG
ENGLISH
M2550D
LCDPanel ScreenType 634.4mmWide(25inch)TFT(ThinFilmTransistor)
LCD(LiquidCrystalDisplay)Panel.
Visiblediagonalsize:634.4mm
PixelPitch 0.288mm(H)x0.288mm(V)
VideoSignal Max.Resolution 1920×1080@60Hz
RecommendedResolution 1920×1080@60Hz
HorizontalFrequency 30kHzto83kHz
VerticalFrequency 56Hzto75Hz
SynchronizationType SeparateSync,Digital
InputConnector TV,D-SubAnalog,SCART,PCAudioIn,Component,
HDMI
Power RatedVoltage 19V
2.8A
PowerConsumption OnMode:50W(typ.)
OffMode 0.5W
AC/DCAdapter Manufacturer:LITE-ON,ModelPA-1650-68
Tilt TiltRange -5°to10°
Dimensions(WidthxHeightxDepth)
Weight
594.9mmx451mmx180mm
4.85kg
Environmental
conditions
OperatingTemperature
OperatingHumidity
10°Cto35°C
20%to80%
StorageTemperature
StorageHumidity
-10°Cto60°C
5%to90%
Productspecificationsshownabovemaybechangedwithoutpriornoticeduetoupgradeofproduct
functions.
SPECIFICATIONS
76
ENG
ENGLISH
RGB (PC) supported mode
M1950D
Resolution Horizontal
Frequency(kHz)
Vertical
Frequency(Hz)
640x480 31.469 59.940
640x480 37.500 75.000
800x600 37.879 60.317
800x600 46.875 75.000
1024x768 48.363 60.004
1024x768 60.023 75.029
1280x768 47.776 59.870
1280x800 49.306 59.910
1360x768 47.712 60.015
M2250D
M2350D
M2450D
M2550D
Resolution
Horizontal
Frequency(kHz)
Vertical
Frequency(Hz)
720x400 31.468 70.080
640x480 31.469 59.940
640x480 37.500 75.000
800x600 37.879 60.317
800x600 46.875 75.000
1024x768 48.363 60.004
1024x768 60.023 75.029
1152x864 67.500 75.000
1280x720 45.000 60.000
1280x800 49.702 59.810
1280x1024 63.981 60.020
1280x1024 79.976 75.025
1400x1050 65.317 59.978
1440x900 55.935 59.887
1600x900 60.000 60.000
1680x1050 64.674 59.883
1680x1050 65.290 59.954
1920x1080 67.500 60.000
HDMI (PC) supported mode
M1950D
Resolution
Horizontal
Frequency(kHz)
Vertical
Frequency(Hz)
720x400 31.468 70.080
640x480 31.469 59.940
640x480 37.500 75.000
800x600 37.879 60.317
800x600 46.875 75.000
1024x768 48.363 60.004
1024x768 60.023 75.029
1152x864 67.500 75.000
1280x960 60.000 60.000
1280x1024 63.981 60.020
1280x1024 79.976 75.025
1440x900 55.935 59.887
1680x1050 64.674 59.883
1680x1050 65.290 59.954
1920x1080 67.500 60.000
M2250D
M2350D
M2450D
M2550D
Resolution
Horizontal
Frequency(kHz)
Vertical
Frequency(Hz)
720x400 31.468 70.080
640x480 31.469 59.940
640x480 37.500 75.000
800x600 37.879 60.317
800x600 46.875 75.000
1024x768 48.363 60.004
1024x768 60.023 75.029
1152x864 67.500 75.000
1280x720 45.000 60.000
1280x800 49.702 59.810
1280x1024 63.981 60.020
1280x1024 79.976 75.025
1400x1050 65.317 59.978
1440x900 55.935 59.887
1600x900 60.000 60.000
1680x1050 64.674 59.883
1680x1050 65.290 59.954
1920x1080 67.500 60.000
SPECIFICATIONS
77
ENG
ENGLISH
NOTE
Avoidkeepingafixedimageontheset’s
screenforprolongedperiodsoftime.The
fixedimagemaybecomepermanently
imprintedonthescreen.Useascreensaver
whenpossible.
Theremaybeinterferencerelatingto
resolution,verticalpattern,contrastor
brightnessinPCmode.ChangethePC
modetoanotherresolutionorchangethe
refreshratetoanotherrateoradjustthe
brightnessandcontrastonthemenuuntilthe
pictureisclear.IftherefreshrateofthePC
graphiccardcannotbechanged,changethe
PCgraphiccardorconsultthemanufacturer
ofthePCgraphiccard.
Thesynchronizationinputwaveformfor
HorizontalandVerticalfrequenciesare
separate.
Connectthesignalcablefromthemonitor
outputportofthePCtotheRGB(PC)portof
theMonitorsetorthesignalcablefromthe
HDMIoutputportofthePCtotheHDMI/DVI
INportontheMonitorset.
ConnecttheaudiocablefromthePCtothe
AudioinputontheMonitorset.(Audiocables
arenotincludedwiththeMonitorset).
Ifusingasoundcard,adjustPCsoundas
required.
IfthegraphiccardonthePCdoesnotoutput
analogueanddigitalRGBsimultaneously,
connectonlyoneofeitherRGBorHDMI/DVI
INtodisplaythePCoutputontheMonitor
set.
IfthegraphiccardonthePCdoesoutput
analogueanddigitalRGBsimultaneously,
MonitorsettheMonitorsettoeitherRGBor
HDMI.(TheothermodeissettoPlugand
PlayautomaticallybytheMonitorset.)
DOSmodemaynotworkdependingonthe
videocardifyouuseanHDMItoDVIcable.
IfyouusetoolonganRGB-PCcablethatis
toolong,theremaybeinterferenceonthe
screen.Werecommendusingunder5mof
cable.Thisprovidesthebestpicturequality.
HDMI (DTV) supported mode
Resolution
Horizontal
Frequency(kHz)
Vertical
Frequency(Hz)
720x480 31.469
31.500
59.940
60.000
720x576 31.250 50.000
1280x720 37.500 50.000
1280x720 44.960
45.000
59.940
60.000
1920x1080 33.720
33.750
59.940
60.000
1920x1080 28.125 50.000
1920x1080 27.000 24.000
1920x1080 33.750 30.000
1920x1080 56.250 50.000
1920x1080 67.430
67.500
59.940
60.000
Component supported mode
Resolution
Horizontal
Frequency(kHz)
Vertical
Frequency(Hz)
720x480 15.730 59.940
720x480 15.750 60.000
720x576 15.625 50.000
720x480 31.470 59.940
720x480 31.500 60.000
720x576 31.250 50.000
1280x720 44.960 59.940
1280x720 45.000 60.000
1280x720 37.500 50.000
1920x1080 33.720 59.940
1920x1080 33.750 60.000
1920x1080 28.125 50.000
1920x1080 56.250 50.000
1920x1080 67.432 59.940
1920x1080 67.500 60.000
Component port connecting informatio
Componentportsonthe
Monitorset
Y P
B
P
R
Videooutputports
onDVDplayer
Y P
B
P
R
Y B-Y R-Y
Y Cb Cr
Y Pb Pr
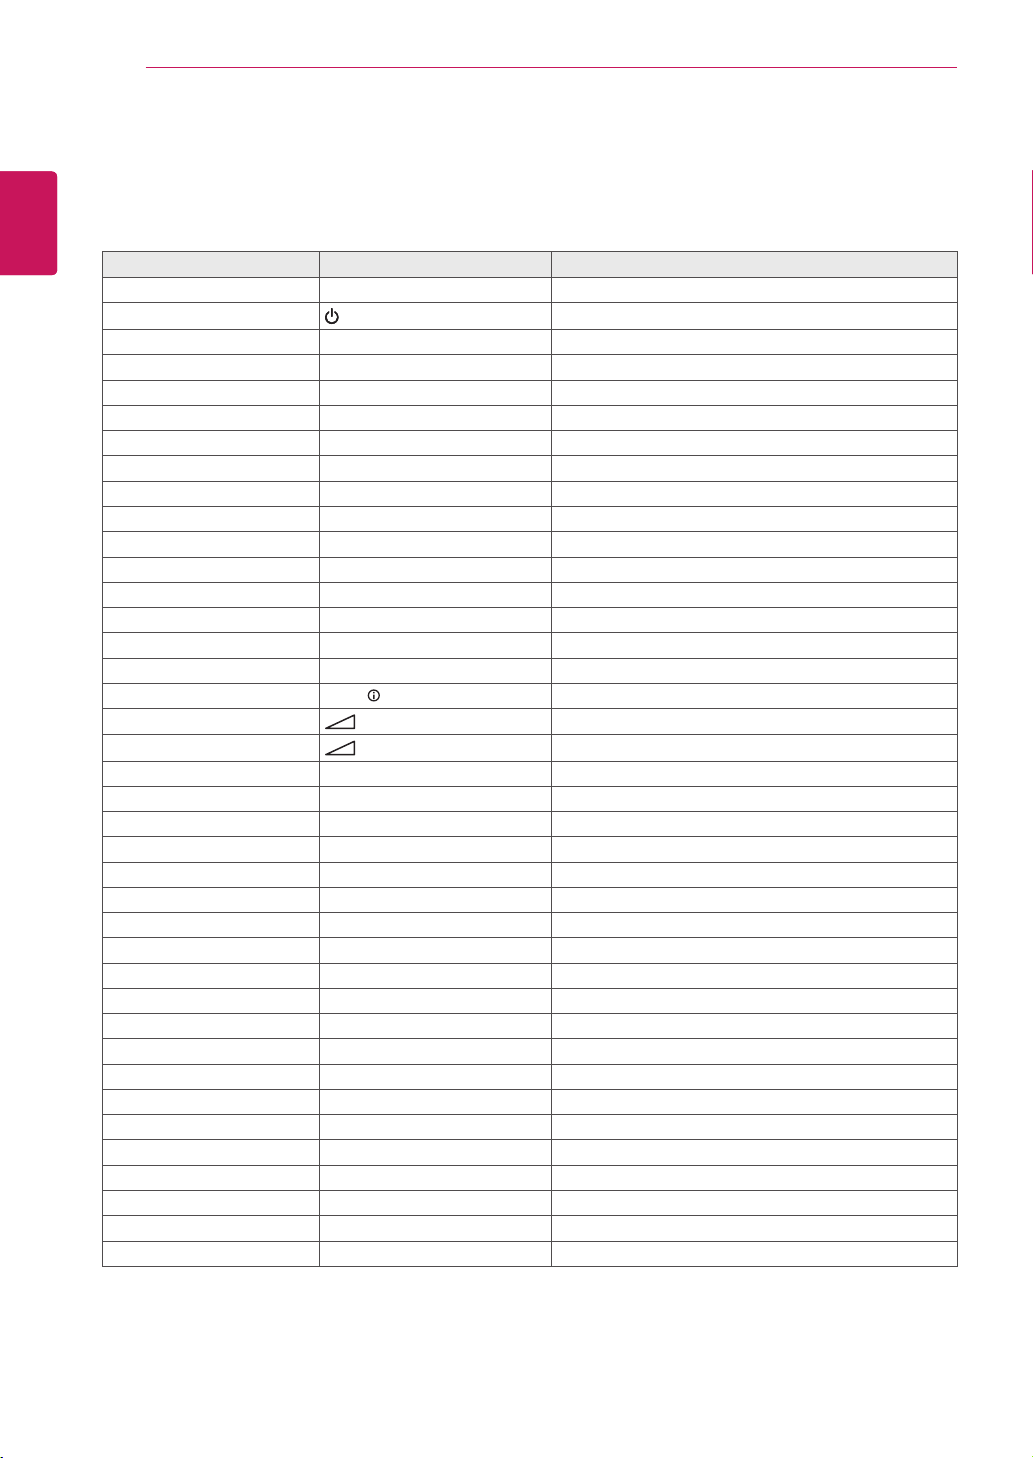
78
ENG
ENGLISH
IR CODES
IR CODES
Thisfeatureisnotavailableforallmodels.
Code (Hexa) Function Note
95 EnergySaving(
ꕊ
) R/CBUTTON
08
(POWER)
R/CBUTTON(POWERON/OFF)
50 TV/PC R/CBUTTON
0B INPUT R/CBUTTON
79 RATIO R/CBUTTON
F0 TV/RAD R/CBUTTON
45 Q.MENU R/CBUTTON
43 MENU R/CBUTTON
AB GUIDE R/CBUTTON
40 Up(
ꕌ
) R/CBUTTON
41 Down(
ꕍ
) R/CBUTTON
07 Left(<) R/CBUTTON
06 Right(>) R/CBUTTON
44 OK(
ꔉ
) R/CBUTTON
28 BACK(
ꕉ
) R/CBUTTON
5B EXIT R/CBUTTON
AA INFO R/CBUTTON
02
(+)
R/CBUTTON
03
(-)
R/CBUTTON
1E FAV(MARK) R/CBUTTON
09 MUTE R/CBUTTON
00 P(
ꕌ
) R/CBUTTON
01 P(
ꕍ
) R/CBUTTON
10to19 NumberKey0to9 R/CBUTTON
53 LIST R/CBUTTON
1A Q.VIEW R/CBUTTON
72 RedKey R/CBUTTON
71 GreenKey R/CBUTTON
63 YellowKey R/CBUTTON
61 BlueKey R/CBUTTON
20 TEXT R/CBUTTON
21 T.OPT(T.Option) R/CBUTTON
39 SUBTITLE R/CBUTTON
99 AutoConfig. R/CBUTTON
B1
ꕗ
R/CBUTTON
B0
ꕖ
R/CBUTTON
BA
ꕘ
R/CBUTTON
8F
ꕚ
R/CBUTTON
8E
ꕙ
R/CBUTTON

79
ENG
ENGLISH
EXTERNAL CONTROL DEVICE SETUP
EXTERNAL CONTROL DEVICE SETUP
RS-232C Setup
ConnecttheRS-232C(serialport)inputjackto
anexternalcontroldevice(suchasacomputer
oranA/Vcontrolsystem)tocontroltheproduct’s
functionsexternally.
Connecttheserialportofthecontroldevicetothe
RS-232Cjackontheproductbackpanel.
Type of connector; D-Sub
9-Pin Male
NOTE
RS-232Conthisunitisintendedtobeused
withthirdpartyRS-232Ccontrolhardwareand
software.Theinstructionsbelowareprovided
tohelpwithprogrammingsoftwareortotest
functionalityusingtelenetsoftware.RS-232C
connectioncablesarenotsuppliedwiththe
product.
1 5
6 9
RS-232C IN
(CONTROL & SERVICE)
No. Pin name
1 Noconnection
2 RXD(Receivedata)
3 TXD(Transmitdata)
4 DTR(DTEsideready)
5 GND
6 DSR(DCEsideready)
7 RTS(Readytosend)
8 CTS(Cleartosend)
9 NoConnection
RS-232C IN
(CONTROL & SERVICE)
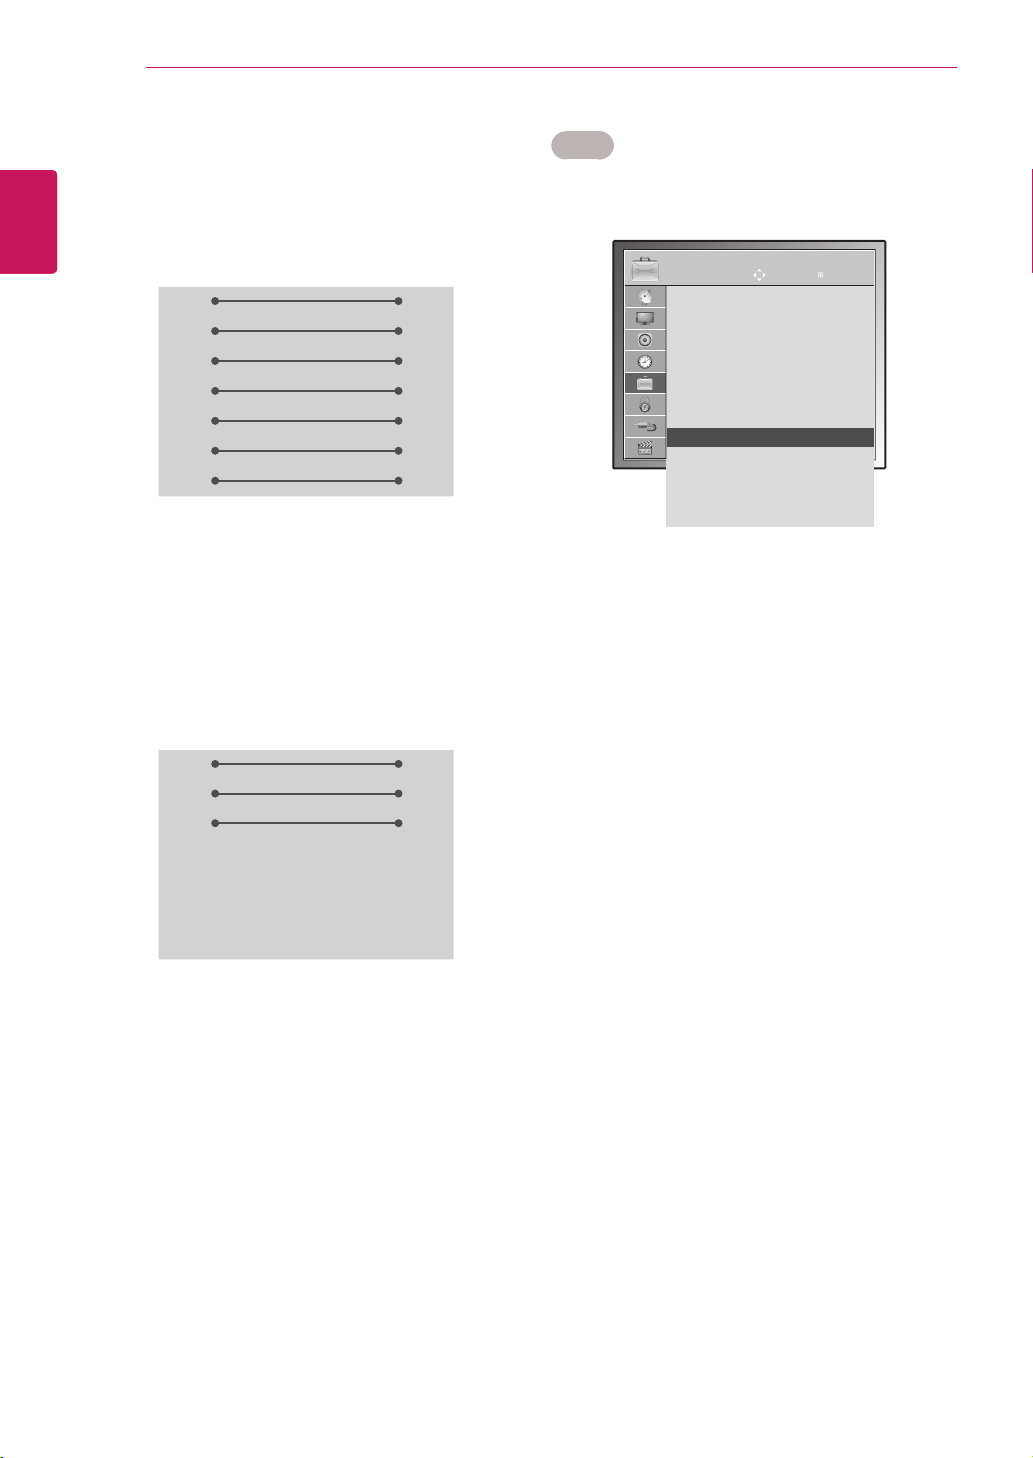
80
ENG
ENGLISH
EXTERNAL CONTROL DEVICE SETUP
Set ID
SetIDnumber."Real Data Mapping"onSeep.84
1
PressMENUtoaccessthemainmenus.
2
PresstheNavigationbuttonstoscrollto
OPTIONandpressOK.
3
PresstheNavigationbuttonstoscrolltoSet ID
andpressOK.
4
ScrollleftorrighttoselectasetIDnumberand
selectCLOSE.Theadjustmentrangeis1-99.
5
Whenyouarefinished,pressEXIT.
Whenyoureturntothepreviousmenu,press
BACK.
RS-232C configurations
7-WireConfiguration
(Serialfemale-femaleNULLmodemcable)
3-WireConfigurations(Notstandard)
PC TV
RXD 2 3 TXD
TXD 3 2 RXD
GND 5 5 GND
DTR 4 6 DSR
DSR 6 4 DTR
RTS 7 8 CTS
CTS 8 7 RTS
D-Sub 9 D-Sub 9
PC TV
RXD 2 3 TXD
TXD 3 2 RXD
GND 5 5 GND
DTR 4 6 DSR
DSR 6 4 DTR
RTS 7 8 CTS
CTS 8 7 RTS
D-Sub 9 D-Sub 9
OPTION
Move OK
Menu Language : English
Audio Language : English
Subtitle Language : English
Disabled Assistance
Data Service : MHEG
Country : UK
Input Label
Set ID : 1 ꔉ
Power Indacator : On
Demo Mode : Off
Mode Setting : Home Use
Factory Reset

81
ENG
ENGLISH
EXTERNAL CONTROL DEVICE SETUP
Command reference list
Communication Parameters
Baudrate:9600bps(UART)
Datalength:8bits
Parity:None
Stopbit:1bit
Communicationcode:ASCIIcode
Useacrossed(reverse)cable.
COMMAND1 COMMAND2
DATA
(Hexadecimal)
01.Power k a 00to01
02.Aspect
Ratio
x c (Seep.82)
03.Screen
Mute
k d 00to01
04.Volume
Mute
k e 00to01
05.Volume
Control
k f 00to64
06.Contrast k g 00to64
07.Brightness k h 00to64
08.Colour k i 00to64
09.Tint k j 00to64
10.Sharpness k k 00to64
11.OSDSelect k l 00to01
12.Remote
controllock
mode
k m 00to01
13.Treble k r 00to64
14.Bass k s 00to64
15.Balance k t 00to64
16.Colour
Temperature
x u 00to64
17.Energy
Saving
j q 00to05
18.Auto
Configuration
j u 01
19.Tune
Command
m a (Seep.84)
20.Programme
Add/Skip
m b 00to01
21.Key m c KeyCode
COMMAND1 COMMAND2
DATA
(Hexadecimal)
22.BackLight m g 00to64
23.Input
select(Main)
x b (Seep.85)
Note:DuringUSBoperationssuchasDvix
orEMF,allcommandsexceptPower(ka)and
Key(mc)arenotexecutedandtreatedas
NG.

82
ENG
ENGLISH
EXTERNAL CONTROL DEVICE SETUP
Transmission
[Command1][Command2][ ][Set ID][ ][Data][Cr]
[Command1]:Firstcommandtocontroltheset.(j,
k,morx)
[Command2]:Secondcommandtocontrolthe
set.
[SetID]:YoucanadjustthesetIDtochoose
desiredmonitorIDnumberinoption
menu.Adjustmentrangeis1to99.When
selectingSetID‘0’,everyconnected
setiscontrolled.SetIDisindicatedas
decimal(1to99)onmenuandasHexa
decimal(0x0to0x63)ontransmission/
receivingprotocol.
*[DATA]:Totransmitcommanddata.
Transmit‘FF’datatoreadstatusof
command.
*[Cr]:CarriageReturn
ASCIIcode‘0x0D’
*[]:ASCIIcode‘space(0x20)’
OK Acknowledgement
[Command2][ ][Set ID][ ][OK][Data][x]
ThesettransmitsACK(acknowledgement)based
onthisformatwhenreceivingnormaldata.Atthis
time,ifthedataisdatareadmode,itindicates
presentstatusdata.Ifthedataisdatawritemode,
itreturnsthedataofthePCcomputer.
Error Acknowledgement
[Command2][ ][Set ID][ ][NG][Data][x]
*ThesettransmitsACK(acknowledgement)based
onthisformatwhenreceivingabnormaldatafrom
non-viablefunctionsorcommunicationerrors.Data
00:IllegalCode
Transmission / Receiving
protocol
01. Power (Command: k a)
TocontrolPowerOn/Offoftheset.
Transmission[k][a][][SetID][][Data][Cr]
Data00:PowerOff Data01:PowerOn
Ack[a][][SetID][][OK/NG][Data][x]
ToshowPowerOn/Off.
Transmission[k][a][][SetID][][FF][Cr]
Ack[a][][SetID][][OK/NG][Data][x]
*Similarly,ifotherfunctionstransmit‘0xFF’data
basedonthisformat,Acknowledgementdatafeed
backpresentsstatusabouteachfunction.
*OKAck.,ErrorAck.andothermessagemaydisplay
onthescreenwhenMonitorSetispowerOn.
02. Aspect Ratio (Command: k c) (Main Picture Size)
Toadjustthescreenformat.(Mainpictureformat)
Youcanalsoadjustthescreenformatusingthe
AspectRatiointheQ.MENU.orPICTUREmenu.
Transmission[k][c][][SetID][][Data][Cr]
Data01:Normalscreen(4:3)
02:Widescreen(16:9)
04:Zoom
06:Original
07:14:9
09:JustScan
0B:FullWide
10to1F:CinemaZoom1to16
Acknowledgement[c][][SetID][][OK/NG][Data][x]
*UsingthePCinput,youselecteither16:9or4:3
screenaspectratio.
*InDTV/HDMI(1080i50Hz/60Hz,720p50Hz
/60Hz,1080p24Hz/30Hz/50Hz/60Hz),
Component(720p,1080i,1080p50Hz/60Hz)
mode,JustScanisavailable.
*FullWideissupportedonlyforAnalogue,AV.
03. Screen Mute (Command: k d)
Toselectscreenmuteon/off.
Transmission[k][d][][SetID][][Data][Cr]
Data00:Screenmuteoff(Pictureon)
Videomuteoff
01:Screenmuteon(Pictureoff)
10:Videomuteon
Acknowledgement[d][][SetID][][OK/NG][Data][x]
*Incaseofvideomuteononly,MonitorSetwill
displayOnScreenDisplay(OSD).But,incaseof
Screenmuteon,MonitorSetwillnotdisplayOSD.

83
ENG
ENGLISH
EXTERNAL CONTROL DEVICE SETUP
04. Volume Mute (Command: k e)
Tocontrolvolumemuteon/off.
YoucanalsoadjustmuteusingtheMUTEbuttonon
remotecontrol.
Transmission[k][e][][SetID][][Data][Cr]
Data00:Volumemuteon(Volumeoff)
01:Volumemuteoff(Volumeon)
Ack[e][][SetID][][OK/NG][Data][x]
05. Volume Control (Command: k f)
Toadjustvolume.
YoucanalsoadjustvolumewiththeVOLUME
buttonsonremotecontrol.
Transmission[k][f][][SetID][][Data][Cr]
DataMin:00toMax:64
*Referto‘Realdatamapping’.Seep.84
Acknowledgement[f][][SetID][][OK/NG][Data][x]
06. Contrast (Command: k g)
Toadjustscreencontrast.
YoucanalsoadjustcontrastinthePICTUREmenu.
Transmission[k][g][][SetID][][Data][Cr]
DataMin:00toMax:64
*Referto‘Realdatamapping’.Seep.84
Acknowledgement[g][][SetID][][OK/NG][Data][x]
07. Brightness (Command: k h)
Toadjustscreenbrightness.
YoucanalsoadjustbrightnessinthePICTURE
menu.
Transmission[k][h][][SetID][][Data][Cr]
DataMin:00toMax:64
*Referto‘Realdatamapping’.Seep.84
Acknowledgement[h][][SetID][][OK/NG][Data][x]
08. Colour (Command: k i)
Toadjustthescreencolour.(ExceptPCmode)
YoucanalsoadjustcolourinthePICTUREmenu.
Transmission[k][i][][SetID][][Data][Cr]
DataMin:00toMax:64
*Referto‘Realdatamapping’.Seep.84
Acknowledgement[i][][SetID][][OK/NG][Data][x]
09. Tint (Command: k j)
Toadjustthescreentint.(ExceptPCmode)
YoucanalsoadjusttintinthePICTUREmenu.
Transmission[k][j][][SetID][][Data][Cr]
DataMin:00toMax:64
*Referto‘Realdatamapping’.Seep.84
Acknowledgement[j][][SetID][][OK/NG][Data][x]
10. Sharpness (Command: k k)
Toadjustthescreensharpness.
YoucanalsoadjustsharpnessinthePICTURE
menu.
Transmission[k][k][][SetID][][Data][Cr]
DataMin:00toMax:64
*Referto‘Realdatamapping’.Seep.84
Acknowledgement[k][][SetID][][OK/NG][Data][x]
11. OSD Select (Command: k l)
ToselectOSD(OnScreenDisplay)on/offwhen
controllingremotely.
Transmission[k][l][][SetID][][Data][Cr]
Data00:OSDoff 01:OSDon
Acknowledgement[l][][SetID][][OK/NG][Data][x]
12. Remote control lock mode (Command: k m)
Tolockthefrontpanelcontrolsonthemonitorand
remotecontrol.
Transmission[k][m][][SetID][][Data][Cr]
Data00:Lockoff 01:Lockon
Acknowledgement[m][][SetID][][OK/NG][Data][x]
*Ifyouarenotusingtheremotecontrol,usethis
mode.Whenmainpowerison/off,externalcontrol
lockisreleased.
*LocalPowerKeywillworkproperly.
13. Treble (Command: k r)
Toadjusttreble.
YoucanalsoadjusttrebleintheAUDIOmenu.
Transmission[k][r][][SetID][][Data][Cr]
DataMin:00toMax:64
*Referto‘Realdatamapping’.Seep.84
Acknowledgement[r][][SetID][][OK/NG][Data][x]
84
ENG
ENGLISH
EXTERNAL CONTROL DEVICE SETUP
14. Bass (Command: k s)
Toadjustbass.
YoucanalsoadjustbassintheAUDIOmenu.
Transmission[k][s][][SetID][][Data][Cr]
DataMin:00toMax:64
*Referto‘Realdatamapping’.Seep.84
Acknowledgement[s][][SetID][][OK/NG][Data][x]
15. Balance (Command: k t)
Toadjustbalance.
YoucanalsoadjustbalanceintheAUDIOmenu.
Transmission[k][t][][SetID][][Data][Cr]
DataMin:00toMax:64
*Referto‘Realdatamapping’.Seep.84
Acknowledgement[t][][SetID][][OK/NG][Data][x]
16. Colour Temperature (Command: x u)
Toadjustcolourtemperature.Youcanalsoadjust
Colour.
TemperatureinthePICTUREmenu.
Transmission[x][u][][SetID][][Data][Cr]
DataMin:00toMax:64
*Referto‘Realdatamapping’.Seep.84
Acknowledgement[u][][SetID][][OK/NG][Data][x]
17. Energy Saving (Command: j q)
ToreducethepowerconsumptionoftheMonitorSet.
You
canalsoadjustEnergySavinginOPTIONmenu.
Transmission[j][q][][SetID][][Data][Cr]
Power
Saving
Function
Level
Description
7 6 5 4 3 2 1 0
0 0 0 0 LowPower 0 0 0 0 Off
0 0 0 0 LowPower 0 0 0 1 Minimum
0 0 0 0 LowPower 0 0 1 0 Medium
0 0 0 0 LowPower 0 0 1 1 Maximum
0 0 0 0 LowPower 0 1 0 1 ScreenOff
Acknowledgement[q][][SetID][][OK/NG][Data][x]
18. Auto Configure(Command: j u)
Toadjustpicturepositionandminimizeimage
shaking
automatically.ItworksonlyinRGB(PC)mode.
Transmission[j][u][][SetID][][Data][Cr]
Data01:Toset
Acknowledgement[u][][SetID][][OK/NG][Data][x]
19.Tune Command (Command: m a)
Selectchanneltofollowingphysicalnumber.
Transmission
[m][a][][SetID][][Data0][][Data1][][Data2][Cr]
Data00:Highchanneldata
Data01:Lowchanneldata
ex.No.47->002F(2FH)
No.394->018A(18AH),
DTVNo.0->Don’tcare
Data02:0x00:AnalogueMain
0x10:DTVMain
0x20:Radio
Channeldatarange
Analogue-Min:00toMax:63(0to99)
Digital-Min:00toMax:3E7(0to999)
(ExceptForSweden,Finland,Norway,Denmark,
Ireland)
Digital-Min:00toMax:270F(0to9999)
(OnlySweden,Finland,Norway,Denmark,Ireland)
Acknowledgement[a][][SetID][][OK/NG][Data][x]
DataMin:00toMax:7DH
20. Programme Add/Skip(Command: m b)
TosetskipstatusforthecurrentProgramme.
Transmission[m][b][][SetID][][Data][Cr]
Data00:Skip 01:Add
Acknowledgement[b][][SetID][][OK/NG][Data][x]
Real data mapping
00:Step0 Tint
: Step0:R50
A:Step10(SetID10) :
: Step49:R1
F:Step15(SetID15) Step50:0
10:Step16(SetID16) Step51:G1
: :
64:Step100 Step100:G50
:
6E:Step110 Balance
:
73:Step115 Step0:L50
74:Step116 :
: Step49:L1
CF:Step199 Step50:0
: Step51:R1
FE:Step254 :
FF:Step255 Step100:R50
Colour Temperature
Step0:W50
:
Step49:W1
Step50:0
Step51:C1
:
Step100:C50

85
ENG
ENGLISH
EXTERNAL CONTROL DEVICE SETUP
21. Key(Command: m c)
TosendIRremotekeycode.
Transmission[m][c][][SetID][][Data][Cr]
DataMin:00toMax:64
*DataKeycod-Seep.78
Acknowledgement[c][][SetID][][OK/NG][Data][x]
22. Back Light (Command: m g)
ToControlthebacklight.
Transmission[m][g][][SetID][][Data][Cr]
Data:dataMin:00toMax:64
Acknowledgement[g][][SetID][][OK/NG][Data][x]
23. Input select (Command: x b) (Main Picture Input)
Toselectinputsourceformainpicture.
Transmission[x][b][][SetID][][Data][Cr]
DataStructure
Data00:DTV 40:Component
10:Analogue 60:RGB
20:AV 90:HDMI
Acknowledgement[b][][SetID][][OK/NG][Data][x]
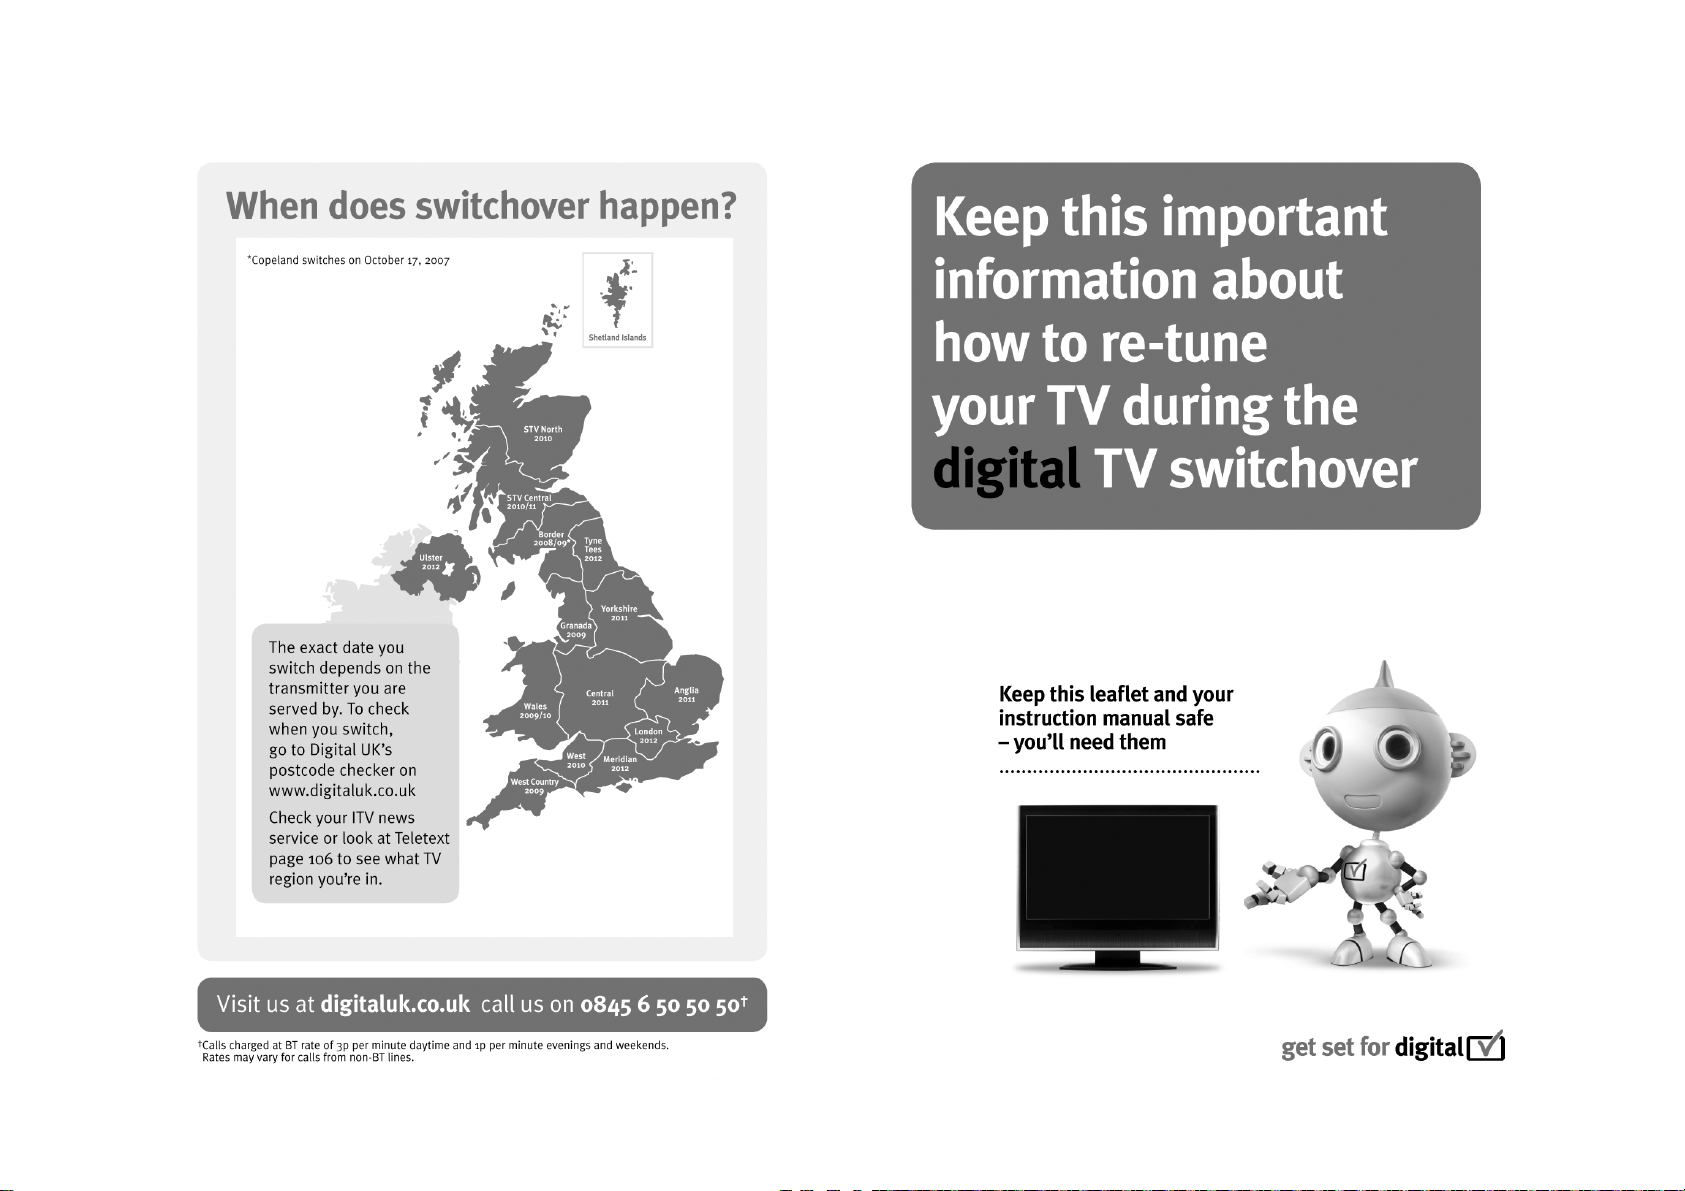
UK Only

Make sure to read the Safety Precautions before
using the product.
Keep the Owner’s Manual (CD) in an accessible
place for future reference.
The model and serial number of the SET is
located on the back and one side of the SET.
Record it below should you ever need service.
MODEL
SERIAL