Loading ...
Loading ...
Loading ...
11EN
3 Prepare
$OZD\VIROORZWKHLQVWUXFWLRQVLQWKLVFKDSWHULQ
sequence.
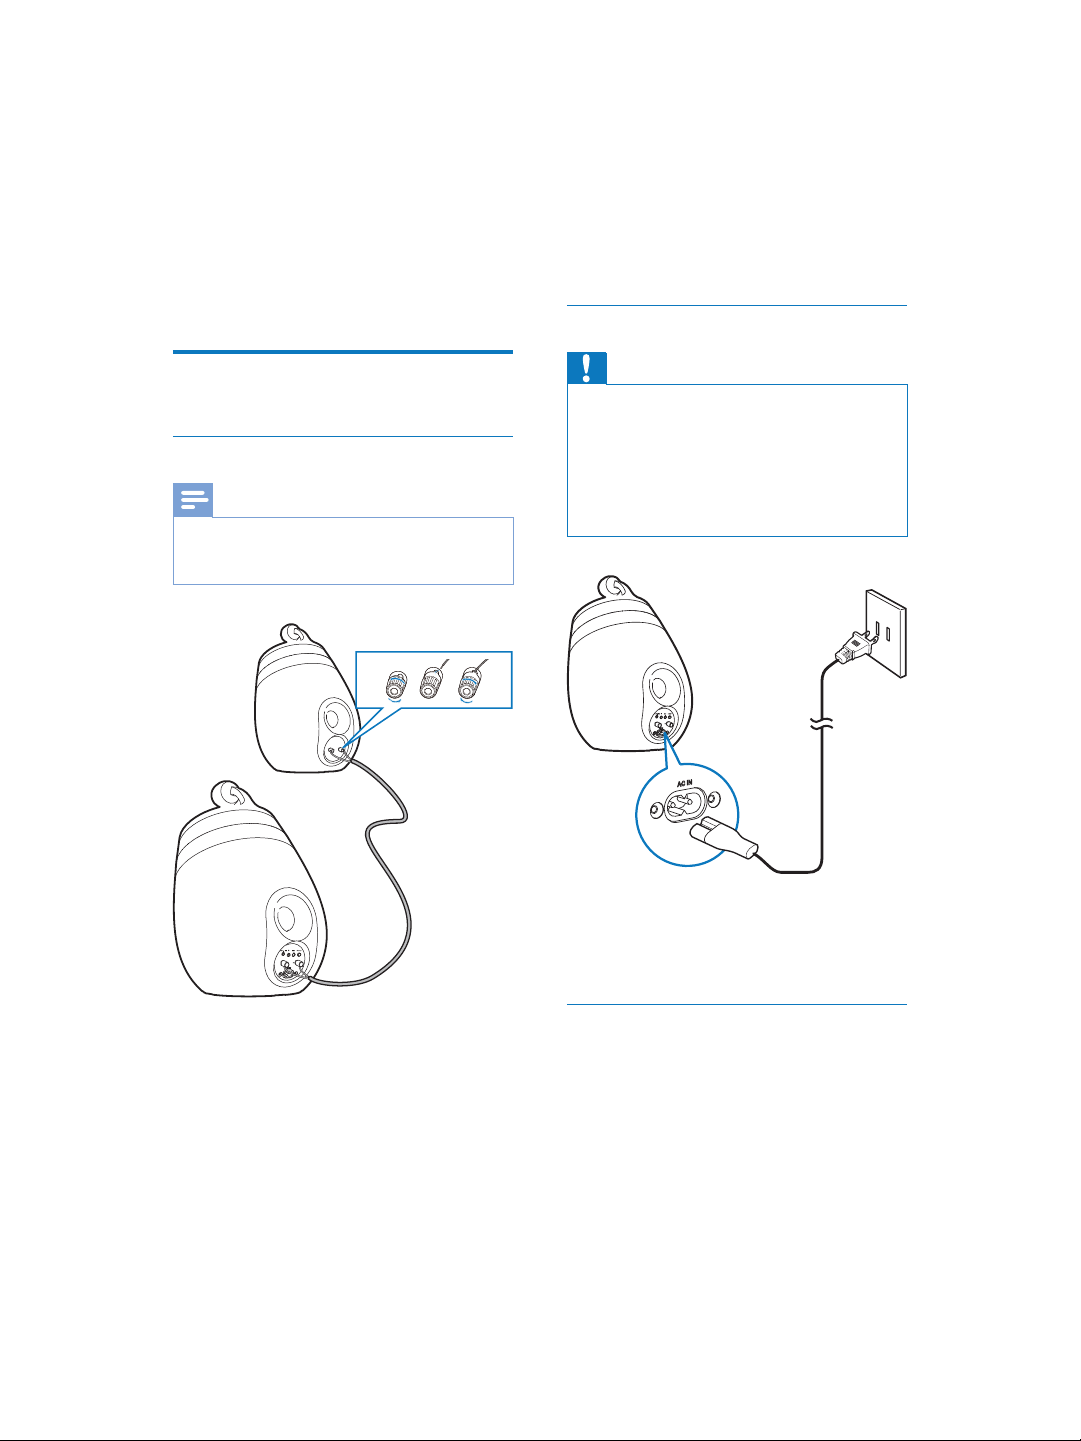
Connect
Connect speaker cables
Note
Insert the stripped portion of each speaker wire into
the socket completely.
For optimal sound, use the supplied speakers only.
1 Unscrew the speaker connectors.
2 Insert fully the end of a speaker cable with
red mark into the left red (+) connector.
3 Screw the left red (+) connector to secure
the cable.
4 Insert fully the end of a speaker cable
without red mark into the left black (-)
connector.
213
5 Screw the left black (-) connector to
secure the cable.
6 Repeat steps 2-5 to insert the other
speaker cable into the right connectors.
Connect power
Caution
Risk of product damage! Make sure that the power
supply voltage matches the voltage printed on the
bottom of the unit.
5LVNRIHOHFWULFVKRFN:KHQ\RXXQSOXJWKH$&FRUG
always pull the plug from the socket. Never pull the
cord.
%HIRUH\RXFRQQHFWWKH$&FRUGPDNHVXUHWKDW\RX
have completed all the other connections.
&RQQHFWWKH$&SRZHUFRUGWR
the ~ AC IN socket on the back of the
main speaker.
the wall power socket.
Turn DS9800W on
$IWHUSURSHUSRZHUFRQQHFWLRQWKHXQLW
switches on automatically.
Wait for successful boot-up of the unit.
» The boot-up takes about 35 seconds.
» During boot-up, the LED indicator
on the back of the unit blinks green
quickly.
Loading ...
Loading ...
Loading ...