Loading ...
Loading ...
Loading ...
10
11
Notes: Should the cup be hard to hold, either move the agitator into the mix more
slowly or start with softer ice cream. Do not continue to operate if you are having
trouble holding the cup.
Both the permanent agitator and the removable agitator are designed to reduce
the possibility of damage when contacting a paper cup. However, they should not
be forced or held solidly against the side or bottom of the cup. The hard ice cream
agitator is specially designed to mix the product aggressively and thoroughly, so use
of a cup holder or sturdy cup is recommended to prevent the agitator from going
through the side of the cup.
7. Swirl the cup around the agitator to produce a pleasing product appearance and to
avoid leaving a hole in the center of the mixture. Before removing the cup, allow excess
mixture to be thrown o the agitator and be caught by the cup or lid/collar. Follow
machine shut-o instructions based on the specific model:
• For Mix’n Machine Advance Programmable Model:
The machine will shut o automatically at the end of
the programmed cycle. When the program is within 4
seconds of completion, the LED Indicator light will blink so
preparation can begin to remove the cup from the agitator.
The blinking light will get progressively faster to indicate
that the program cycle is almost complete and the machine
will shut o. This provides an indication, so that excess
product can be spun o the agitator. See Figure 5.
• For Mix’n Machine Advance Timer Model: The machine
will shut o automatically at the end of the preset time.
When the program is within 4 seconds of completion, the
LED Indicator light will blink so preparation can begin to
remove the cup from the agitator. The blinking light will get
progressively faster to indicate that the program cycle is
almost complete and the machine will shut o. This provides
an indication, so that excess product can be spun o the
agitator. See Figure 5.
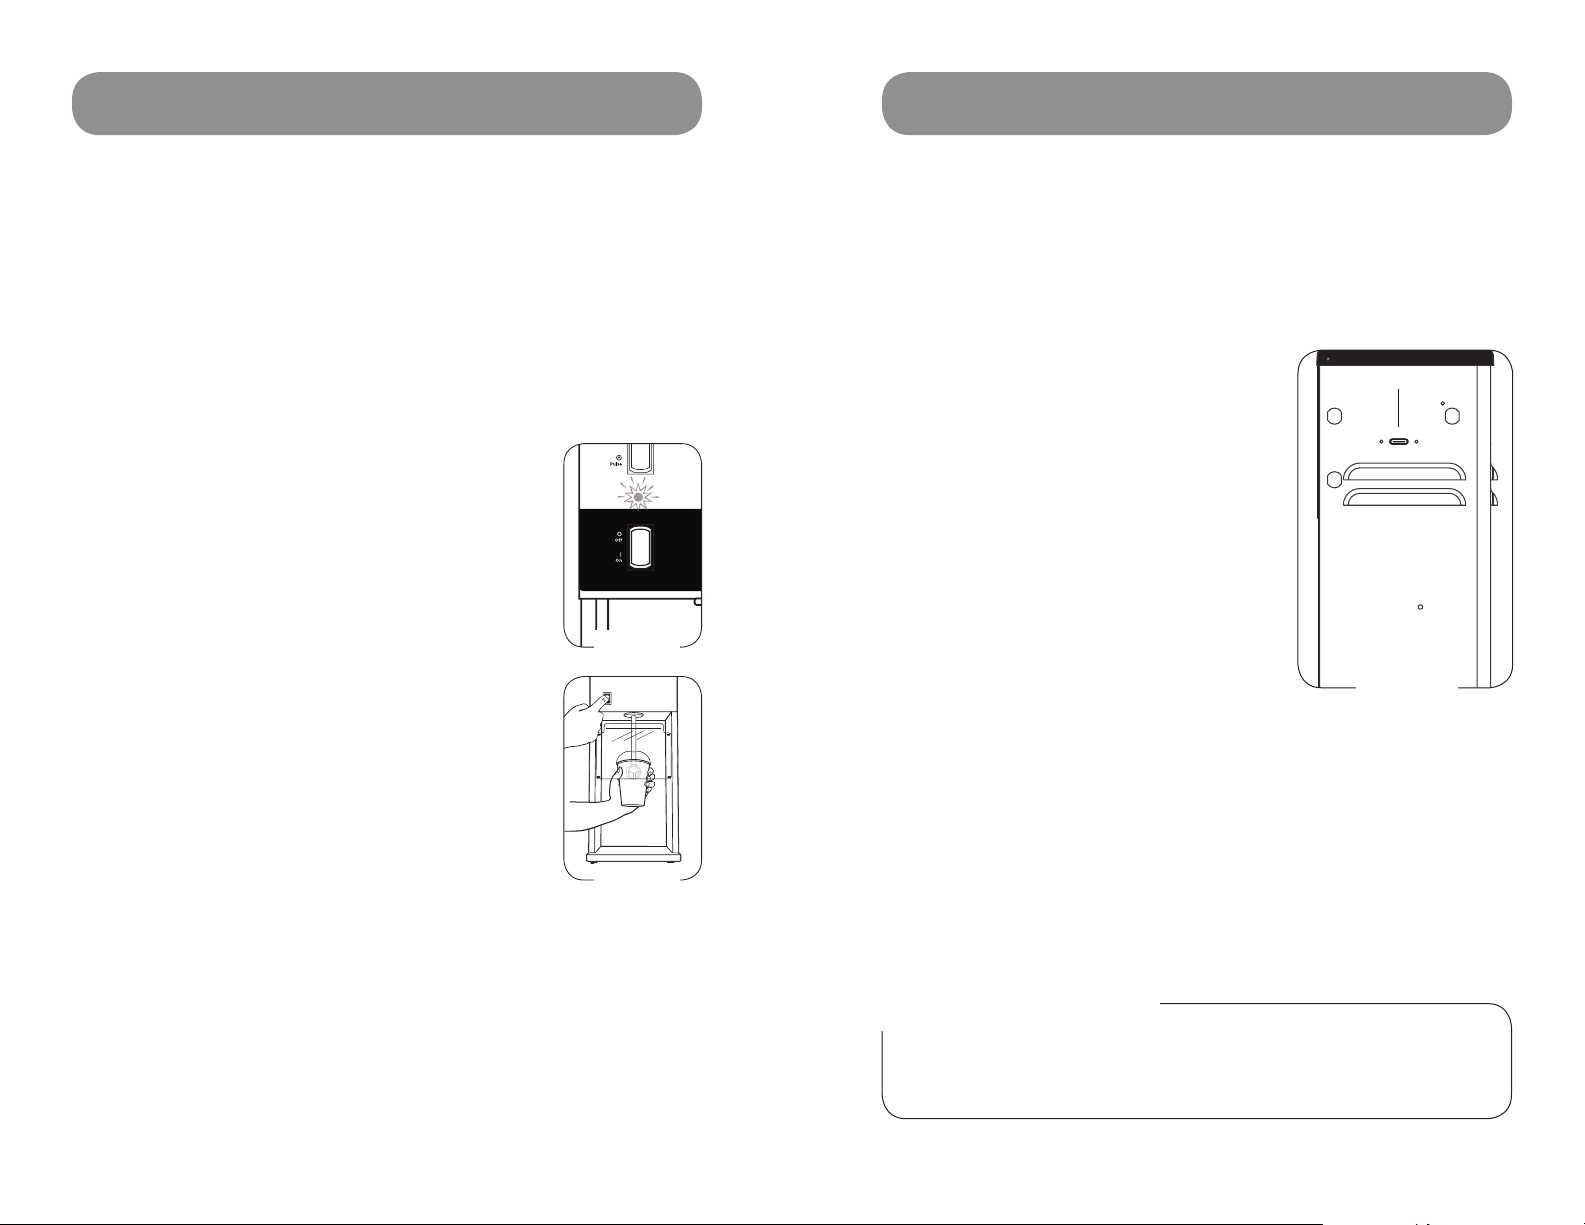
• For Mix’n Machine Advance Variable Speed Model:
Press ON/OFF power switch to OFF to stop the
machine. See Figure 6.
• For Mix’n Machine Standard Model (Countertop
and Wall Mount): Press ON/OFF power switch to
OFF to stop the machine. See Figure 6.
8. Press the ON/OFF switch to OFF when not in use.
• To use the PULSE switch to refresh drinks and desserts (Advance
Programmable Model only): Make sure the power is ON. Move the cup under
the agitator and lift up so the agitator touches the bottom of the cup. Depress
the PULSE switch to start the agitator. With a swirling motion, gradually move the
cup up and down over the spinning agitator and completely around all sides of the
cup. Swirl the cup around the agitator to produce a pleasing product appearance
and to avoid leaving a hole in the center of the mixture. Before removing the cup,
allow excess mixture to be thrown o the agitator and be caught by the cup or
lid/collar. Release the switch to stop the agitator.
GENERAL INSTRUCTIONS
FIGURE 5
ON
OFF
FIGURE 6
PROGRAMMING
The Mix’n Machine Advance Programmable Model is pre-programmed with six blending
options. The Mix’n Machine Advance Timer Model is pre programmed with one pre-set
timed blending cycle. The programs can be customized by using a programming chip
or programmer software kit available from Vita-Mix Corporation. Call your distributor or
Customer Service for more information.
Although your machine comes from the factory pre-set with program(s), follow
these instructions when using a custom programming chip.
Programming with a Custom Chip
1. Turn the power to the machine ON using the
ON/OFF switch located on the front of the machine.
2. Facing the front of the machine, locate the
programming port on the right side panel.
Insert the custom programmed chip with the
silver contact bars up.
3. Within 5 seconds, the six PRE-SET PROGRAMS
will be re-programmed. The LED Indicator
light on the front of the machine will blink
when the program is accepted. If the LED
light does not blink, remove the programmed
chip and see note below.
4. Remove the programming chip, return it
to the original package and store in a safe,
easily accessible spot.
Resetting the Pre-Set Programs to the
Original Factory Settings
1. Turn the power to the machine OFF using the ON/OFF switch
located on the front of the machine.
2. Hold down the PULSE button while turning the power back
ON using the ON/OFF switch.
IMPORTANT NOTES!
PROGRAMMING CHIP: If the above programming steps are taken and the
LED light does not blink or the custom programming does not appear with
the first blend cycle, turn the chip 180° (side-to-side) and try again.
Programming Port
SIDE VIEW
Loading ...
Loading ...
Loading ...