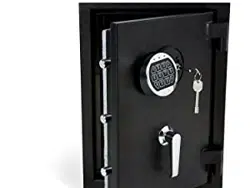
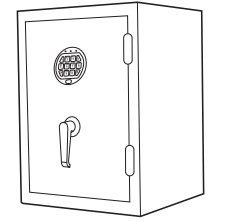
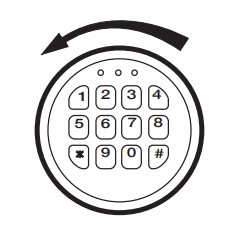
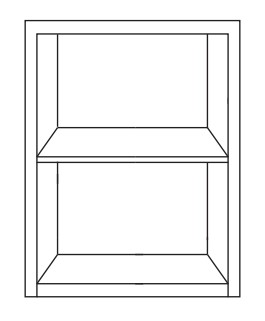
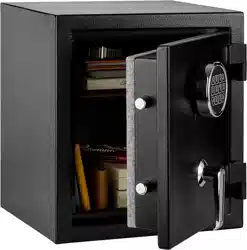
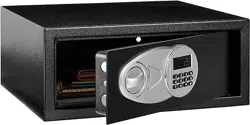
Documents: Go to download!
- Owner's manual - (English, French, Spanish, German, Chinese, Italian, Japanese)
- Welcome Guide: Fire Resistant Safe
- Specifications
Table of contents
USER MANUAL Fire Resistant Safe
Welcome Guide: Fire Resistant Safe
Contents:
Before getting started, ensure the package contains the following components:
Part | Qty | |
Safe | 1 | |
Keys | 2 | |
Expansion bolt | 1 |
Safety Measures
- Keep keys and combination in a secure place away from children.
- Do not store back up key, your combination or this document in the safe.
- Warning: Keep your safe closed and locked at all times when not in use. Children could accidentally be locked inside the safe.
- Do not move this safe using its handle. The handle should only be used for opening and closing the door of the safe.
- Do not store electronic media, computer disks, audio-visual media or photographic negatives in this safe. This material will not survive the rated internal temperature of the safe. This material may be damaged or destroyed.
Installing The Battery
- Turn the lock cover as shown in the illustration below. Connect a 9V alkaline battery (not included) to the battery connecting cap. Place the lock cover back into its original position.
- Repeat above steps for battery replacement.
NOTE:
- When changing the battery, always hold the battery connecting cap while disconnecting or attaching the battery. Do not pull on the wires. Doing this could cause the power supply to become disconnected from the lock.
- When the battery runs out, the red light will flash when you press any button on the keypad. Replace the batteries when the red light flashes.
Opening Safe For The First Time
- After installing the battery, to open an electronic lock the first time, press the following numbers/ symbols on the electronic keypad in this order: 1 - 5 - 9 - #. These numbers are preset.
- NOTE: You should change the entry code as soon as possible after opening the safe to insure proper security.
- After you have entered the factory code, you will need to turn the handle clockwise to open the door. You will have 5 seconds to turn the handle before the locking mechanism is reactivated.
Setting Your Own Code
- To enter your own security code you will need to follow the steps listed below:
- After opening the electronic safe (with the preset factory code of 1, 5, 9, #) locate the small red button on the inside of the door near the hinge.
- Press the red button and then release it. You will hear two beeps. The yellow light on the faceplate will be activated and will stay on for a period of time that should allow you to enter your code. You can only enter your code while the yellow light is on.
- With the door open and the yellow light on, enter your own personal security code, which can be 3 - 8 digits long, and confirm your new code by pressing the “ * “ symbol on the electronic touch pad. Before you close the door, try the new security code to make sure the lock releases the handle so you can turn it and retract the live action bolts.
- DO NOT SHUT THE DOOR UNTIL YOU HAVE CONFIRMED THAT YOUR NEW SECURITY CODE HAS BEEN ENTERED CORRECTLY.
- If the code fails, go through steps 1 and 2 again. If you write down your combination, you must keep this information in a secure place, away from children, not inside the safe. Then you should close and lock the safe.
- When you open the safe in the future enter the security code you have set followed by the “#” symbol.
- If the incorrect security code is entered 3 times, you will have an automatic lockout for 20 seconds before you can try your code again.
- If the incorrect security code is entered 3 additional times, there will be a 5-minute lockout before the code can be tried again.
Locking The Safe
- To lock the safe, close the door and rotate the handle counter clockwise until it stops. If the handle is not turned until it stops, the locking mechanism will not lock.
- NOTE ON LOCKING THE SAFE: Because the locking mechanism is deactivated for approximately 3 to 6 seconds after the combination is entered, wait a minimum of 6 seconds from the time the combination is entered to lock the safe.
Turning The Keypad Sound Off/On
- You can turn off the “Beep” sound of the keypad by entering the code * 6 3 3.
- To turn the “Beep” sound on, enter the code * 6 6.
Mounting The Safe
- The safe must be mounted to the floor. For optimal safety and security, the safe should be installed adjacent to a side wall, in an isolated, dry and secure area.
- The safe should be flat against the wall and floor.
- CHILDREN SHOULD NOT PLAY WITH OR AROUND THE SAFE AT ANY TIME.
Securing The Safe
- This safe must be mounted to the floor. Failure to do so will compromise the safety and security of the safe.
- To bolt down your safe, you will need:
Drill
Pencil
Hammer
- Place the safe in the desired location and locate the mounting hole with cap covered in the bottom of the safe.
- Remove the cap, then use a pencil to mark the mounting hole in the floor.
- Move the safe away, then use a 12 mm bit to drill mounting hole that are 2 in. (50 mm) deep.
- Put the expansion bolt (included) into the mounting hole, then turn the clamping screw counterclockwise to separate.
- Align the safe over the hole, then secure the safe with the clamping screw and replace the cap
Opening The Safe In Emergency
- A “Back Up Key” has been provided in case you have forgotten or lost your security code. To open the safe using the back up key, follow the steps below:
- Remove the cover by turning the cover counter clockwise as shown in the illustration. The lock can hang by the connecting cable while unlocking the safe.
- Insert the key in the key hole and turn counter-clockwise 1/4 turn (until stopped) in order to unlock the safe. Rotate the handle and open the door.
- Keep the door open until you have entered a new security code. Before entering your new code, remove the key and screw the cover back in place.
- Enter your new security code following the instructions.
Important
- Keep keys and records of your combination number in a secure place separate from your safe, away from children.
Shelves
- The shelves can be installed by locating the clips to the desired location and setting the shelf in place
WEEE
Regulatory information: Disposal of Waste Electrical and Electronic Equipment (WEEE)
The Waste Electrical and Electronic Equipment (WEEE) Directive aims to minimize the impact of electrical and electronic goods on the environment, by increasing re-use and recycling and by reducing the amount of WEEE going to landfill. The symbol on this product or its packaging signifies that this product must be disposed separately from ordinary household wastes at its end of life. Be aware that this is your responsibility to dispose of electronic equipment at recycling centers in order to conserve natural resources.
Each country should have its collection centers for electrical and electronic equipment recycling.
For information about your recycling drop off area, please contact your related electrical and electronic equipment waste management authority, your local city office, or your house hold waste disposal service.
Specifications
Model No. | B074KGMWRQ | B074KDHMKJ | B074KHWNJZ |
Power supply | 9 V ALKALINE BATTERY (not included) | ||
Dimensions | 400 mm x 360 mm x 310 mm | 500 mm x 360 mm x 350 mm | 660 mm x 430 mm x 350 mm |
Weight | 25 kg | 30.4 kg | 42.7 kg |
Capacity | 23.5 L | 34.3 L | 59.5 L |
See other models: 1012933-040-A60 LS-85i COR00002 TYTC6511USPD-BLK 1012853-038-A60