Loading ...
Loading ...
Loading ...
7
the wall units.
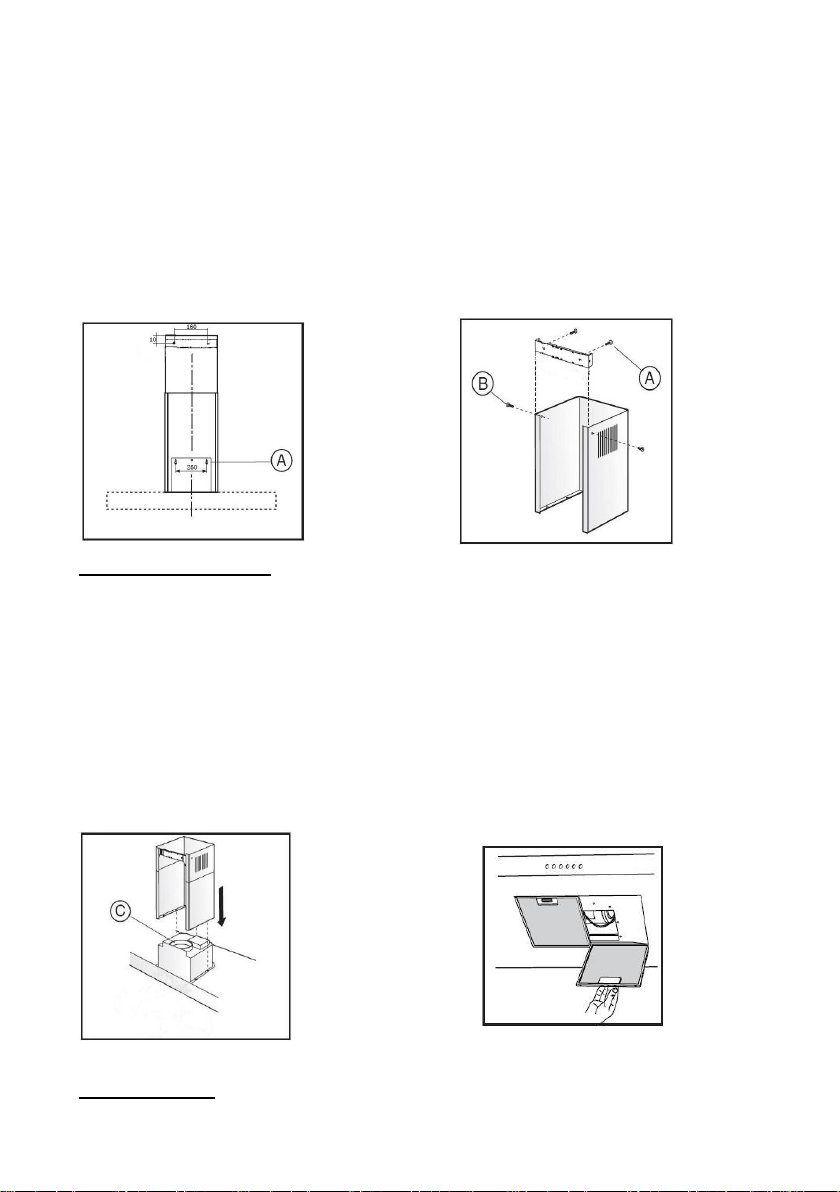
3. When the appliance has been adjusted, fix the hood using the
screws A. For the various installations use screws and screw anchors
suited to the type of wall (e.g. reinforced concrete, plasterboard,
etc.). If the screws and screw anchors are provided with the product,
kindly check the screws are suitable for the type of wall in which the
hood is to be fixed.
Fig.2 Fig.3
Fixing Chimney
1. Arrange the electrical power supply within the dimensions of the
chimney. If your appliance is to be installed in the ducting version or
in the version with external motor, prepare the air exhaust opening.
2. Adjust the width of the support bracket of the exterior chimney
(Fig.3). Then fix it to the ceiling using the screws A (Fig.2) make sure
that it is in line with your hood and respecting the distance from the
ceiling indicated in Fig.2. Connect the flange C to the air exhaust hole
using a connection pipe (Fig.4).
Fig.5
Fig.4
DUCT FIXING
Caution: To reduce the risk of fire, recommend use aluminium ductwork.
Loading ...
Loading ...
Loading ...