Loading ...
Loading ...
Loading ...
18 49-1000211 Rev. 0
REFRIGERATOR LOCATION
Ŷ Do not install the refrigerator where the
temperature will go below 60°F (16°C) because
it will not run often enough to maintain proper
temperatures.
Ŷ Do not install the refrigerator where the
temperature will go above 100°F (37°C) because it
will not perform properly.
Ŷ Do not install the refrigerator in a location exposed
to water (rain, etc.) or direct sunlight.
Ŷ Install it on a floor strong enough to support it fully
loaded.
CLEARANCES
Allow the following clearances for ease of installation,
proper air circulation and plumbing and electrical
connections.
6LGHV ´PP
7RS ´PP&DELQHW+LQJH&RYHU
%DFN ´PP
Installation Instructions
INSTALLING THE REFRIGERATOR
IMPORTANT NOTES
This refrigerator without the handles ranges from
´WR´FPFPGHSHQGLQJRQ\RXU
model (see dimension E on the previous page). Doors
and passageways leading to the installation location
PXVWEHDWOHDVW´FPLQRUGHUWROHDYHWKH
doors attached to the refrigerator while transporting
it into the installation location. If passageways are
less than ´ (91.4 cm), the refrigerator doors can
easily be scratched and damaged. The doors can be
removed to allow the refrigerator to be safely moved
indoors.
• If you need to remove the door, see Removing
French Doors.
• To remove the freezer door, see Removing
Freezer Drawer.
• If it is NOT necessary to remove doors, leave tape
and all packaging on doors until the refrigerator
is in the final location. Once in place, install door
handles (see Steps 1 and 2).
• SKID REMOVAL: Tilt refrigerator to each side to
remove skid.
• NOTE: Use a padded hand truck to move this
refrigerator. Place the refrigerator on the hand
truck with a side against the truck. We strongly
recommend that TWO PEOPLE move and
complete this installation.
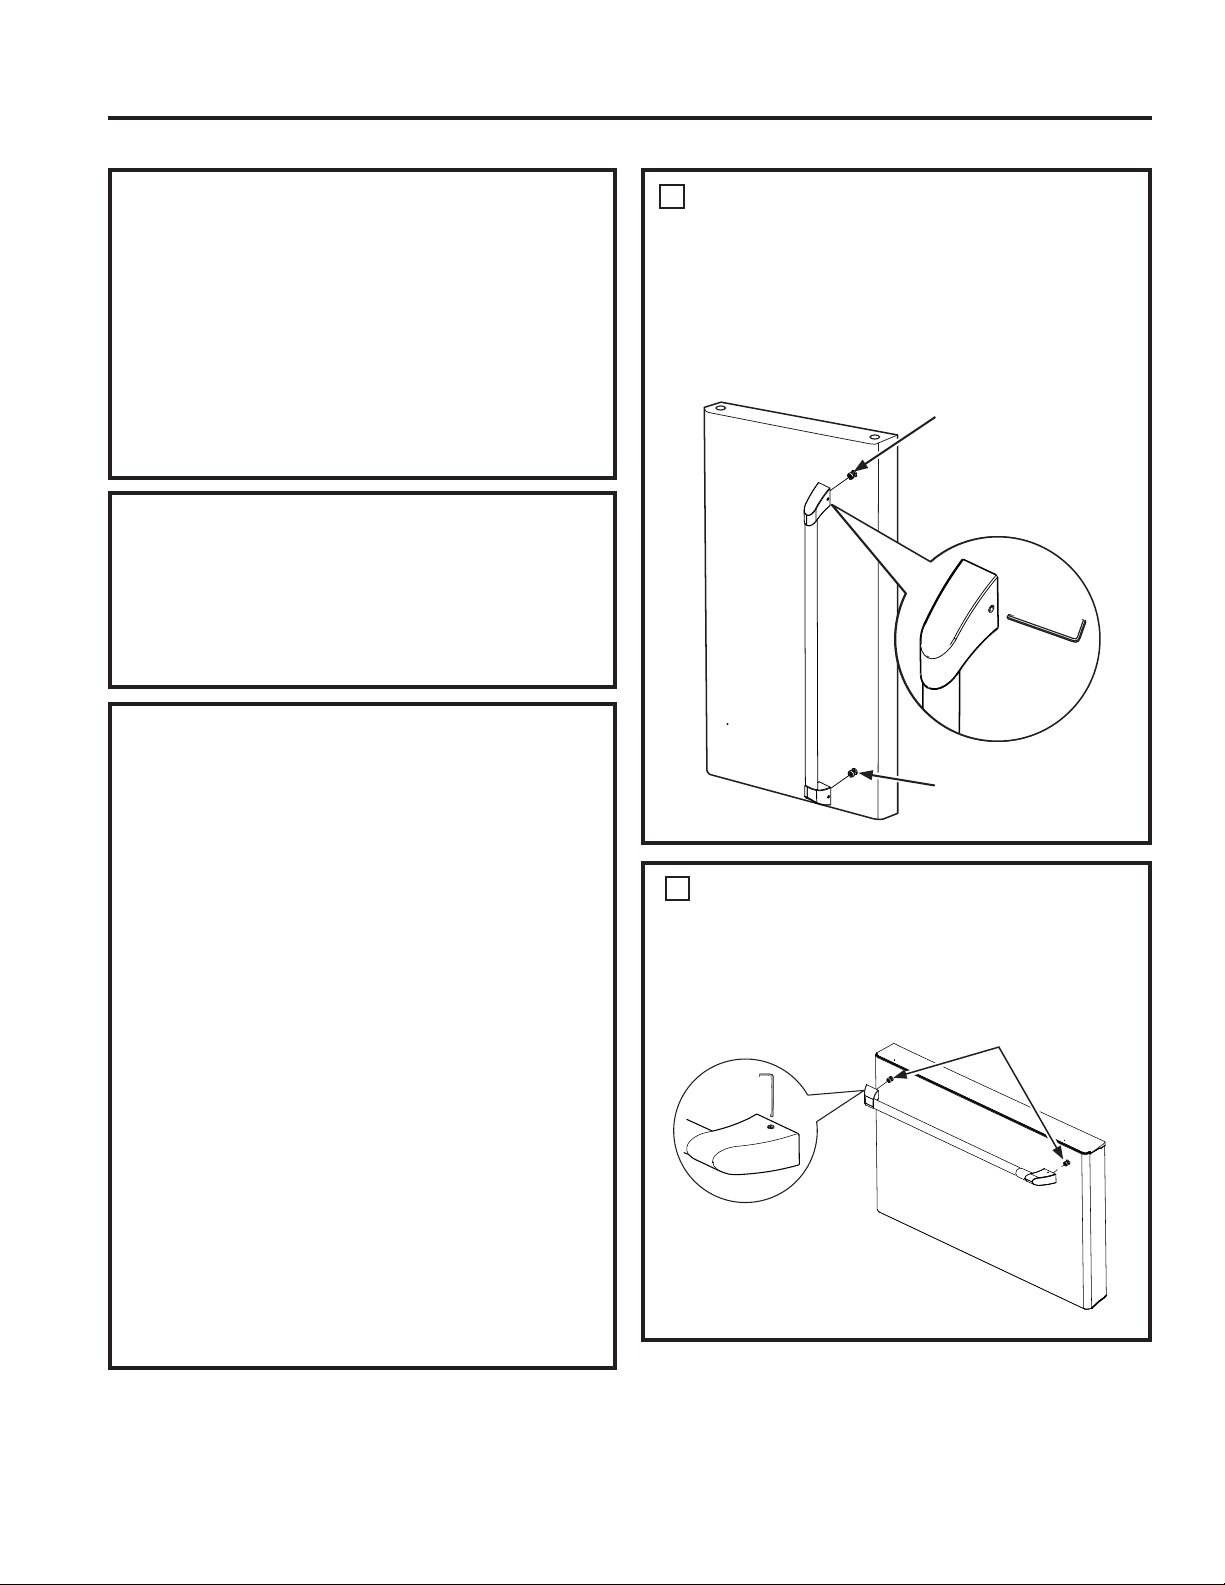
1
ATTACH FRESH FOOD
HANDLES
1. Loosen the set screws in the handle with the
1/8" Allen wrench.
2. Place handle over mounting fasteners.
3. Tighten set screws.
Follow the same procedure for both doors.
2
ATTACH FREEZER HANDLE
1. Loosen the set screws in the handle with the
1/8" Allen wrench.
2. Place handle over mounting fasteners.
3. Tighten set screws.
Mounting Fasteners
Mounting
Fastener
Mounting
Fastener
INSTALLATION INSTRUCTIONS
Loading ...
Loading ...
Loading ...