Loading ...
2
DOOR REVERSAL OPTIONS
If desired, you may change your door to open from the left
instead of the right, using the following directions:
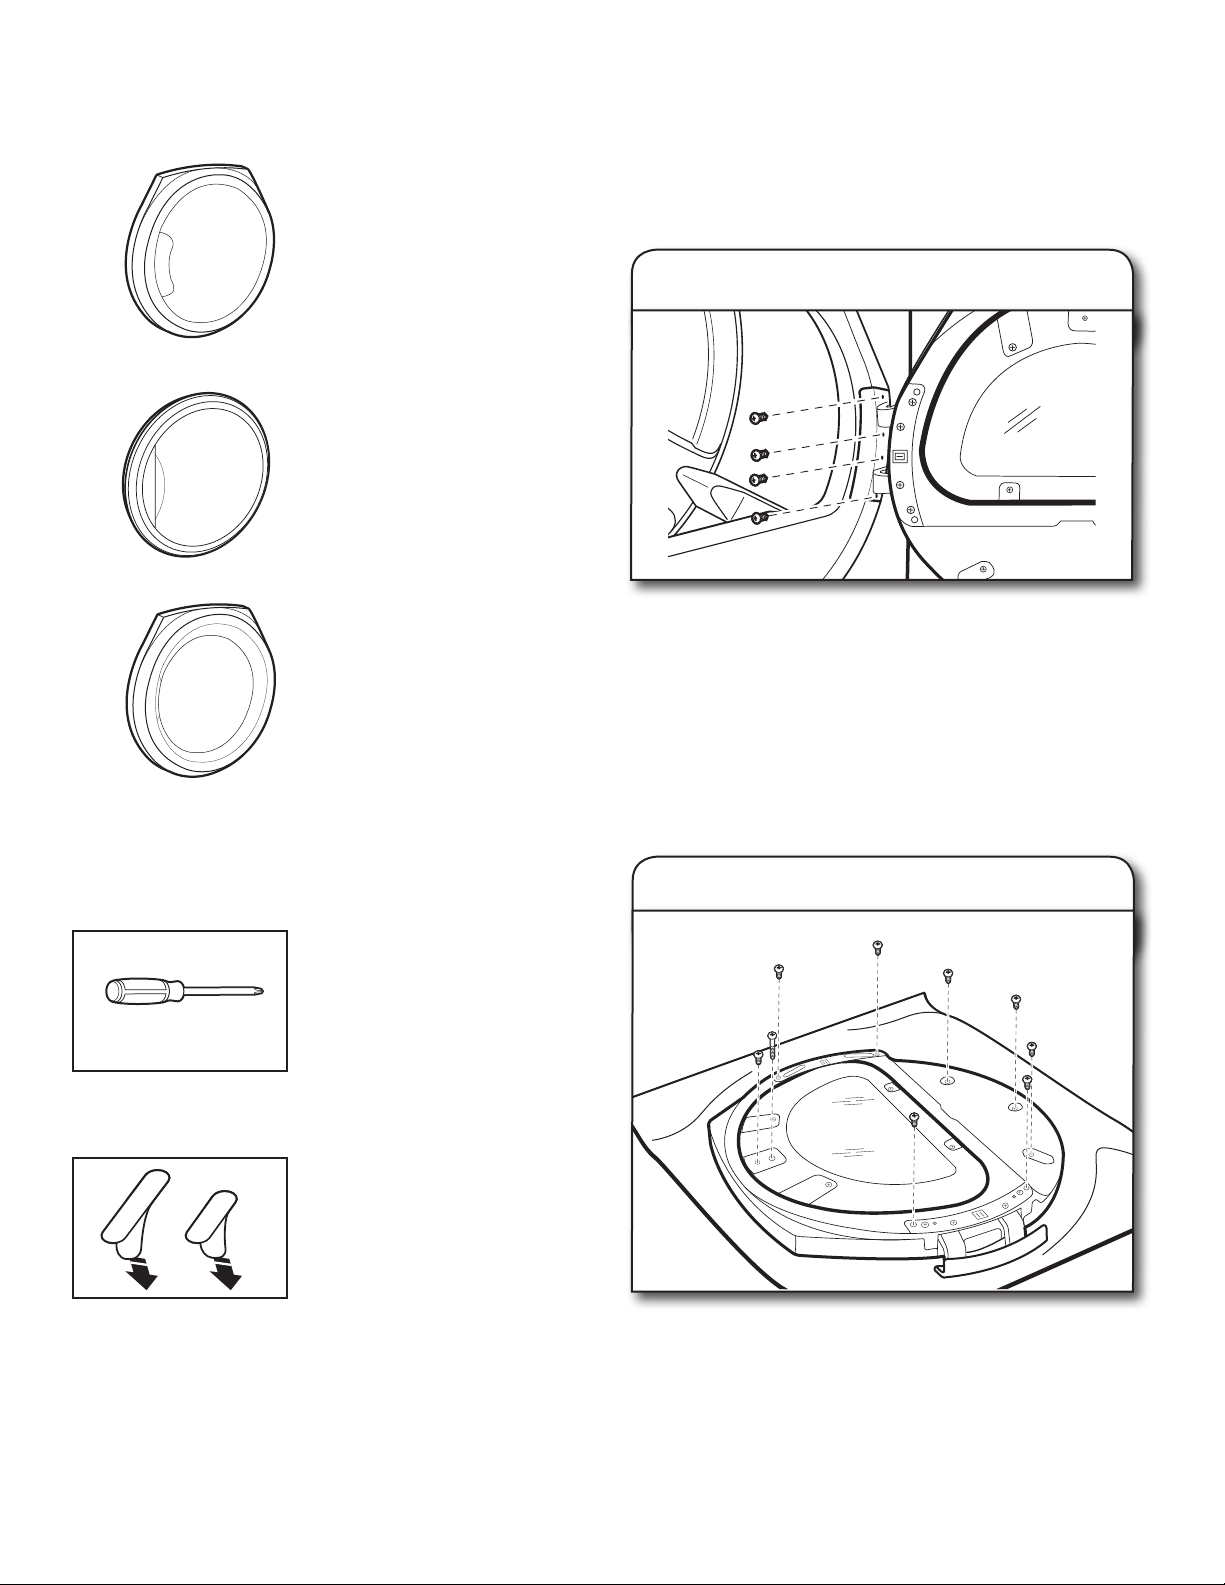
If your door looks like this,
follow the “Squared-Off
Door” instructions
(pages 2–3)
If your door looks like this,
follow the “Round Door”
instructions (page 4):
1. Remove screws from door hinge
1. Remove screws from door panel
Using a Phillips screwdriver, detach door from its original
location by removing all 4 screws from door hinge, as shown.
To help avoid damaging or scratching door, lay it on a towel or
soft cloth. Then use a Phillips screwdriver to remove the screws
(6 or 9, depending on model) from door panel, as shown.
REMOVING DRYER DOOR
(all styles)
TOOLS AND PARTS
Gather the required tools and parts before starting installation.
Tools needed:
Parts supplied:
Bolt hole cover labels (2 small, 1 large)
NOTE: If your dryer already has plastic bolt hole covers, you
may reuse them to complete door reversal, or you may replace
plastic covers with labels provided.
Phillips screwdriver
If your door looks like
this, follow the “Recessed
Window” instructions
(pages 4–5)
The procedure for removing the door from the dryer, reversing
the hinge, and reinstalling the door on the dryer is the same
for all models. Refer to the section for your style door for
instructions on disassembling and reversing the door.
SQUARED-OFF DOOR
Loading ...
Loading ...
Loading ...