Loading ...
Loading ...
Loading ...
25
� Water Tubing Connection Style 1: Press the colored
outer ring against the face of the fitting and gently pull the
dispenser tubing free as shown below.
A. Face of Fitting
NOTE: Keep the water tubing connector attached to the
tube that runs underneath the freezer. The door cannot
be removed if the connector is still attached to the tube
that runs through the door hinge.
� Water Tubing Connection Style 2: Firmly pull on the
clasp to release the tube, then pull the water tubing free as
show below.
NOTE: Keep the clasp attached to the tube that runs
underneath the freezer.
4. Disconnect the wiring, located behind the base grille on the
freezer door side as shown below.
A. P–Clamp D. Wiring Clip
B. Routing Plate E. Grommets
C. Electrical Housing F. Wiring Plugs
On models with the ice storage bin on the door:
NOTE: There are two wiring bundles that run underneath
the freezer - a large bundle with a large grommet and two
white plugs at the end, and a small bundle with a small
grommet and one yellow plug at the end.
� Remove the P-clamp using a 1/4" hex-head socket
wrench. Remove the small wiring bundle from the P-clamp.
� Remove the wiring clip using a 1/4" hex-head socket
wrench.
� Pull the electrical housing out from under the refrigerator.
Disconnect the wiring plugs from the housing.
� Gently pull the large wiring bundle (with two white plugs)
through the routing plate.
On models with the ice storage bin inside the freezer:
NOTE: The wiring configuration is simpler than what is
shown in the above graphic. There is only one wiring
bundle with one wiring plug, and there is not a routing
plate.
� Remove the wiring clip using a 1/4" hex-head socket
wrench.
� Pull the electrical housing out from under the refrigerator.
Disconnect the wiring plugs from the housing.
5. Close both doors and keep them closed until you are ready to
lift them free from the cabinet.
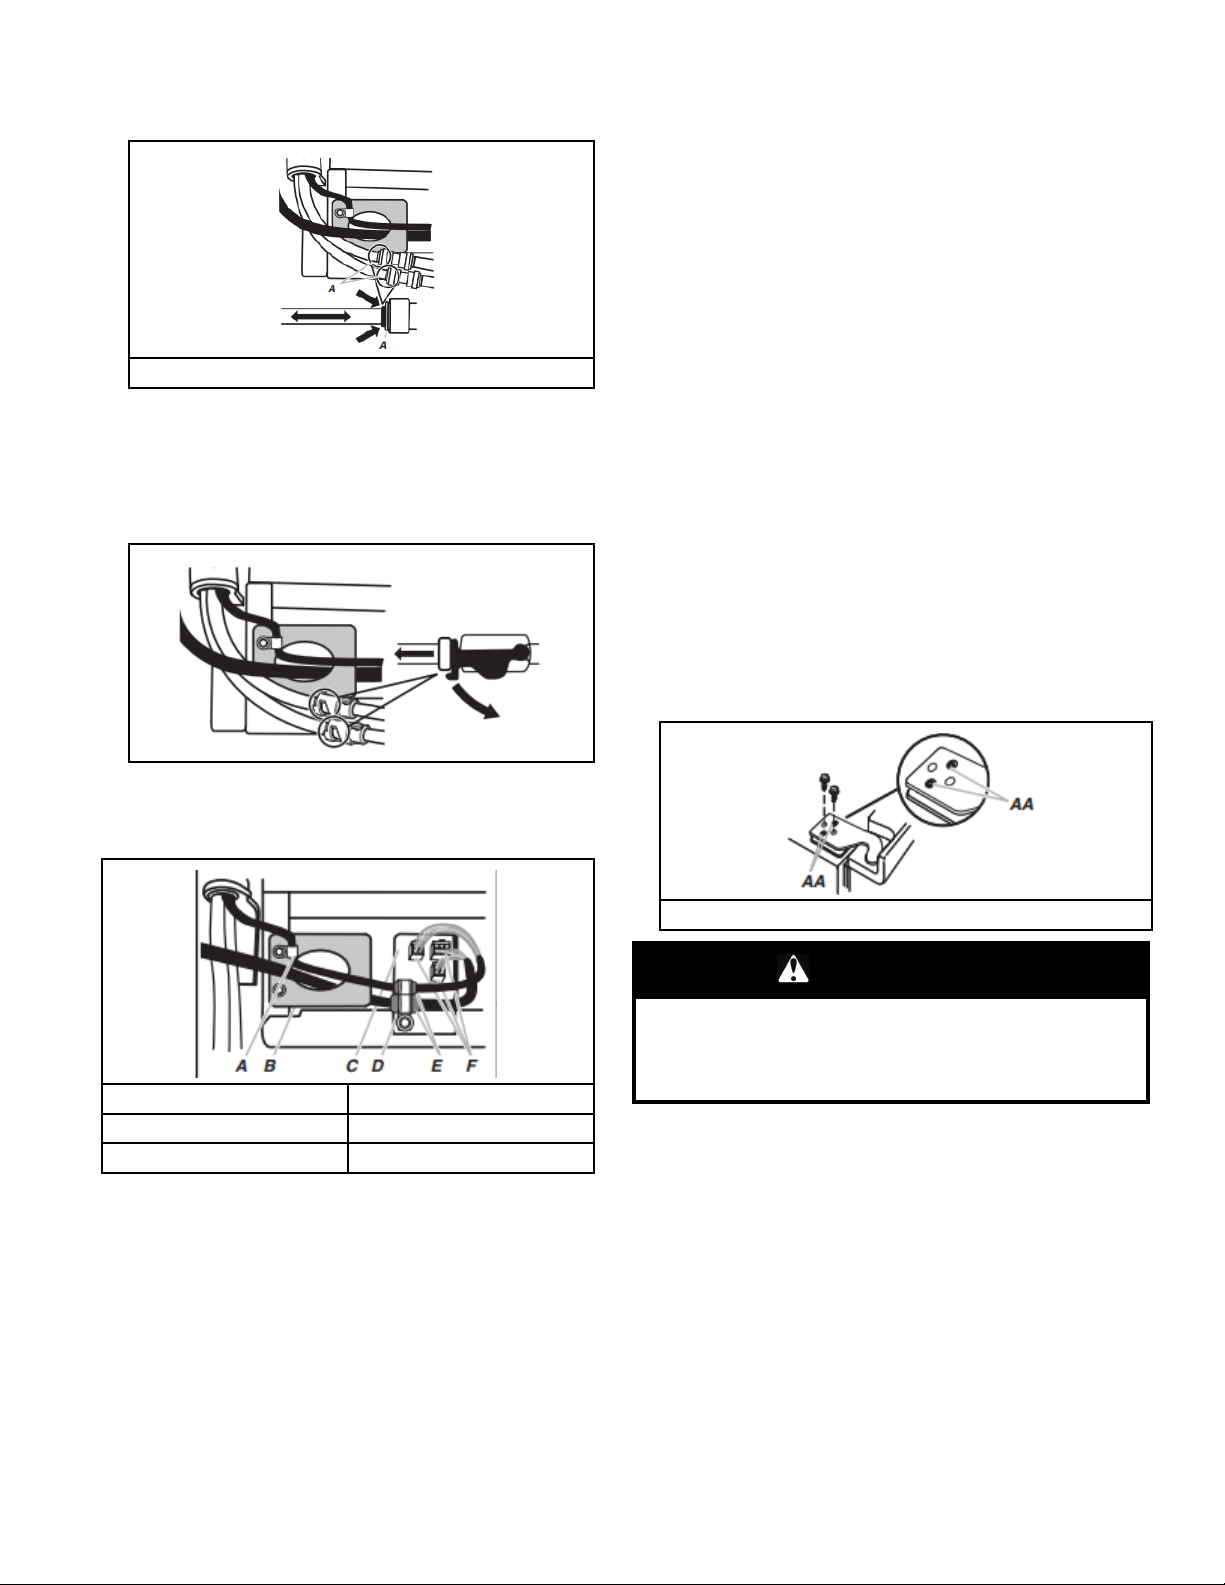
6. Depending on your model, use a 3/16" hex key or a TORX
T30 screwdriver to remove the top-left hinge screws as shown
below.
IMPORTANT: Do not remove either screw A. Hold the door
while hinge is being removed.
A. Do not remove these screws.
WARNING
Excessive Weight Hazard
Use two or more people to lift the appliance door.
Failure to do so can result in back or other injury.
7. Lift freezer door straight up off bottom hinge as shown below.
The water tubing and wiring remain attached to the freezer
door and pull through the bottom-left hinge.
Loading ...
Loading ...
Loading ...