Loading ...
2
2. When the desired thickness is reached, the ice sheet is released
and slides onto a cutter grid. The grid divides the sheet into
individual cubes.
3. The water containing the rejected minerals is drained after each
freezing cycle.
4. Fresh water enters the machine for the next ice making cycle.
5. Cubes fall into the storage bin. When the bin is full, the ice maker
shuts off automatically and restarts when more ice is needed. The
ice bin is not refrigerated, and some melting will occur. The
amount of melting varies with room temperature.
NOTE: As the room and water temperatures vary, so will the amount
of ice produced and stored. This means that higher operating
temperatures result in reduced ice production.
Using the Controls
1. To start ice production, press ON/OFF.
2. To stop ice maker operation, press ON/OFF.
NOTES:
■ Pressing the ON/OFF button does not shut off power to the ice
maker.
■ Allow 24 hours to produce the rst batch of ice. Discard the rst 2
batches produced.
FAST ICE Mode
Select the FAST ICE feature when you have an upcoming need for a
large amount of ice and the ice bin is low or empty. FAST ICE mode
will produce a greater quantity of ice in a 24-hour period.
■ Press FAST ICE while the ice maker is on. The indicator light will
illuminate.
■ Press FAST ICE again to turn off the FAST ICE feature. The
indicator light will turn off.
■ The FAST ICE mode will be on when you rst turn on the product.
It will turn off after 24 hours. To turn FAST ICE back on,
press FAST ICE.
Clean
It is recommended that you clean the ice maker when the “Cleaning
Needed” light is illuminated or 9 months has elapsed, or ice
production decreases signicantly. To clean your ice maker, see
“Ice Maker System” in the “Cleaning” section.
Door Ajar Alarm
The Door Ajar Alarm feature sounds an alarm when the ice maker
door is open for 5 minutes. The alarm will repeat every 2 minutes.
Close the door to turn off. The feature then resets and will reactivate
when the door is left open again for 5 minutes.
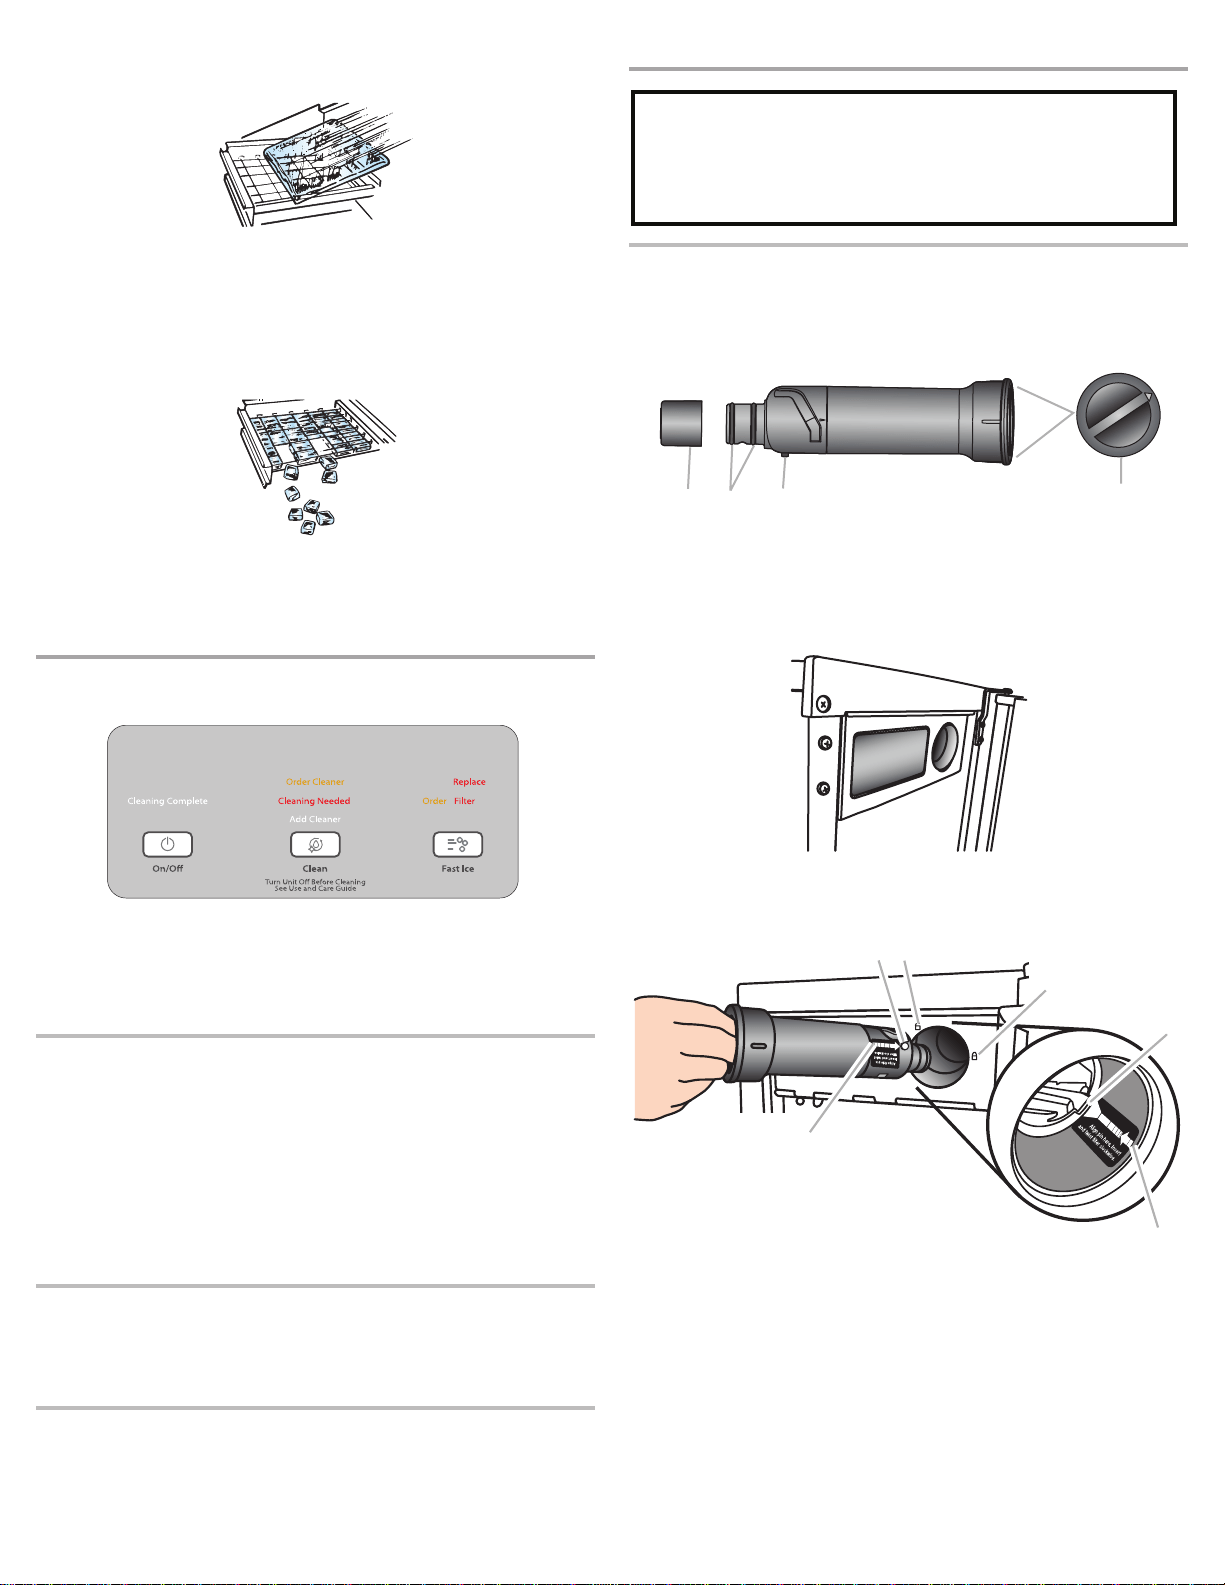
Water Filtration System
Installing a Water Filter
1. Purchase a Whirlpool approved water lter.
2. Take the water lter out of its packaging and remove the cover
from the O-rings. Be sure the O-rings are still in place after the
cover is removed.
3. The water lter compartment is located in the right-hand side of
the ice maker controls.
4. Using the arrow pointing to the alignment pin on the side of the
lter and the arrow inside the control housing, align the alignment
pin with the cutout notch and insert the lter into the housing.
Do not use with water that is microbiologically unsafe or
of unknown quality without adequate disinfection before
or after the system. Systems certified for cyst reduction
may be used on disinfected waters that may contain
filterable cysts.
AB C
D
A. Cover
B. O-rings
C. Alignment pin
D. Alignment arrow
A
C
B
D
E
F
A. Alignment pin
B. Unlocked symbol
C. Locked symbol
D. Cutout notch inside control housing
E. Arrow pointing to cutout notch
F. Arrow pointing to alignment pin
11-Jun-2018 15:29:29 EDT | RELEASED
In some European factories the letter "W" of the part code mentioned herein will be automatically
replaced by the number "4000" (e.g. "W12345678" becomes "400012345678")
Loading ...
Loading ...
Loading ...