Loading ...
Loading ...
Loading ...
Connection of Piping
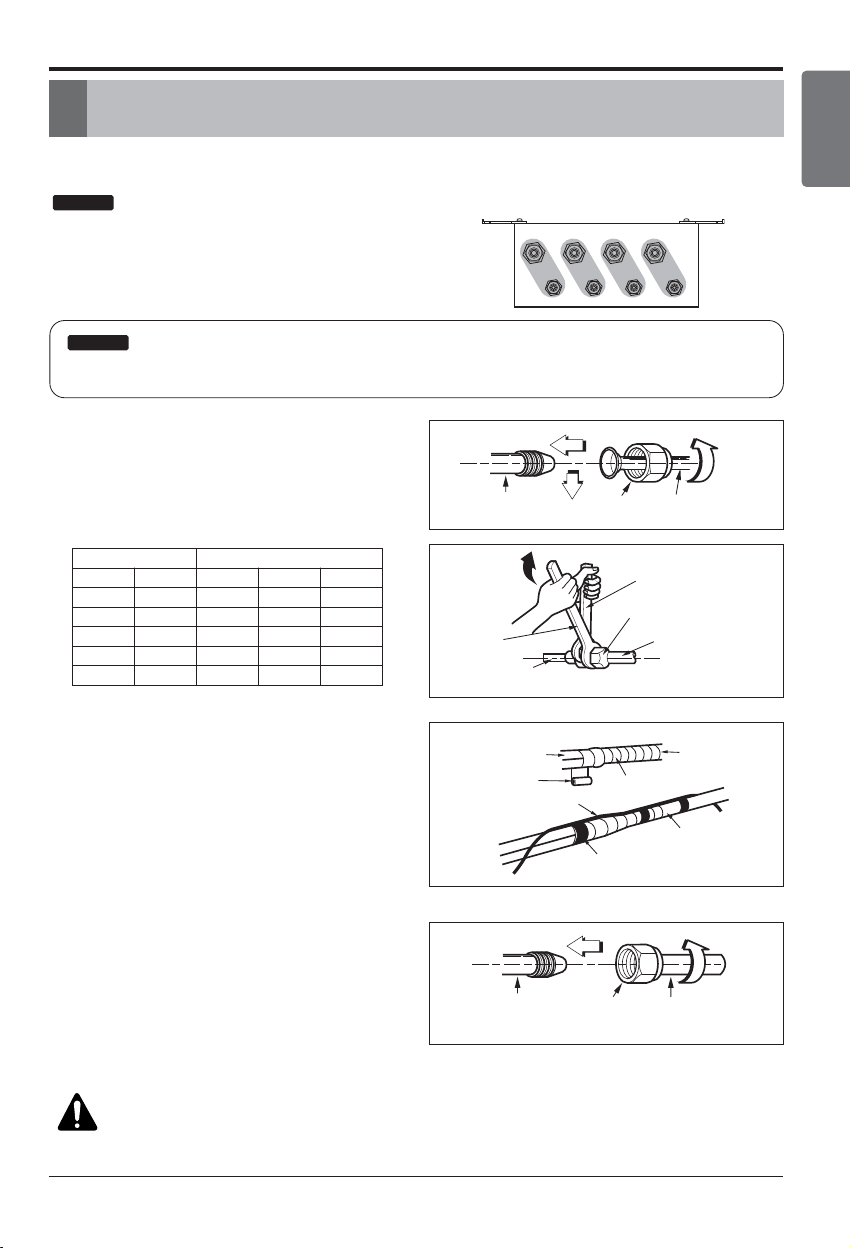
• When connecting indoor units, make sure to connect refrigerant pipes and connection wires to the appropriate
connection ports maked with matching alphabets. (A, B, C, D)
:
• Be sure to mark all the local refrigerant piping(liquid
pipes, gas pipes, etc.) for each indoor unit designating
clearly which room it belongs in.(A, B, C, D)
NOTICE
:
For flaring work the piping, follow the instructions in the installation manual to each unit.
NOTICE
Connecting the pipings to the indoor
unit and drain hose to drain pipe
1. Align the center of the pipings and sufficiently
tighten the flare nut by hand.
2. Tighten the flare nut with a wrench.
Wrap the insulation material around
the connecting portion.
1. Overlap the connection pipe insulation
material and the indoor unit pipe insulation
material. Bind them together with vinyl tape
so that there is no gap.
2. Wrap the area which accommodates the rear
piping housing section with vinyl tape.
Close up a socket for unoccupied
room with a brass cap.
1. Align the center of the piping and sufficiently
tighten the brass cap by hand.
2. Tighten the brass cap with a wrench.
3. Wrap the joint part with insulation.
BD Unit Socket Flare nut Pipes
Wrench
BD Unit Socket
Open-end wrench (fixed)
Connection pipe
Flare nut
Vinyl tape(narrow)
BD Unit
Connecting cable
Vinyl tape (wide)
Wrap with vinyl tape
Indoor unit pipe
Pipe
BD Unit Socket Pipe sealed
or welded
Brass cap
DCBA
CAUTIONS
• Never use the plastic cap for sealing.
• Make sure to use brass cap with the end of
pipe sealed or welded tightly.
Connection of Piping
Installation Manual 7
ENGLISH
Outside diameter Torque
mm inch N. m kgf.m lbf.ft
Ø6.35 1/4 14~18 1.4~1.8 10~13
Ø9.52 3/8 34~42 3.5~4.3 25~31
Ø12.7 1/2 49~61 5.0~6.2 36~45
Ø15.88 5/8 69~82 7.0~8.4 51~60
Ø19.05 3/4 100~120 10.0~12.2 73~88
Loading ...