Owner Manual Refrigerator
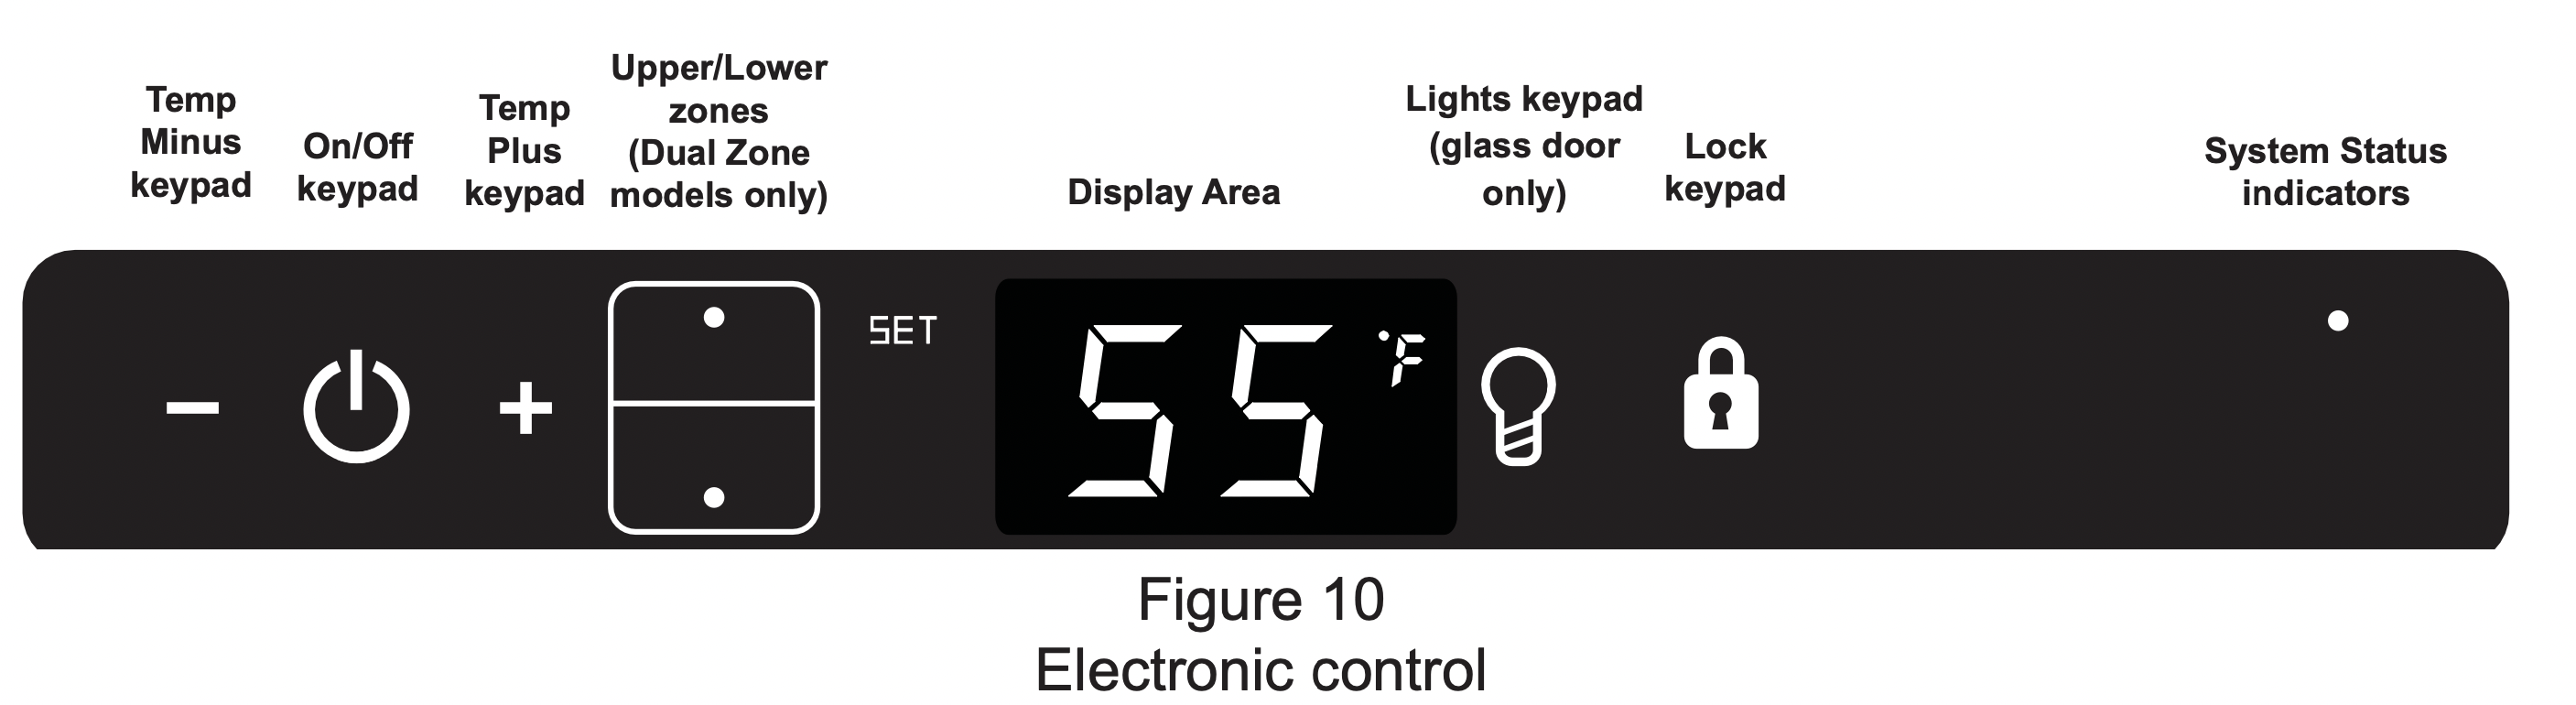
USING YOUR ELECTRONIC CONTROL
Starting your appliance (Single and Dual Zone):

Plug the appliance power cord into a 115 volt wall outlet. Your appliance is shipped from the factory in the "On" position and will begin start-up of cooling as soon as power is supplied. If the appliance does not start, confirm that the wall outlet has power, and that the control is in the "On" position, (See "Turning your appliance On and Off" below). The control display is covered with a clear plastic film. This film may be removed by carefully lifting the film at a corner.
On initial power up, the control display will indicate a "Power Failure" alarm. This is a normal condition as the appliance was powered-up at the factory for quality inspection and then removed from power. A momentary press of the "On/Off" keypad will reset this alarm condition. (See Alarms section on page 10).
Sleep mode (Single and Dual Zone):
If no keypads are pressed for 60 seconds, the display will enter sleep mode to conserve power. The control panel will go dark with the exception of the system status "OK" indicator which will remain enabled. Alarm conditions will wake the display, (see alarms on page 10).
To make the following changes to the control settings (turning the appliance ON/OFF, adjusting the temperature, changing the interior lights, and activating vacation mode), the control must be awake.
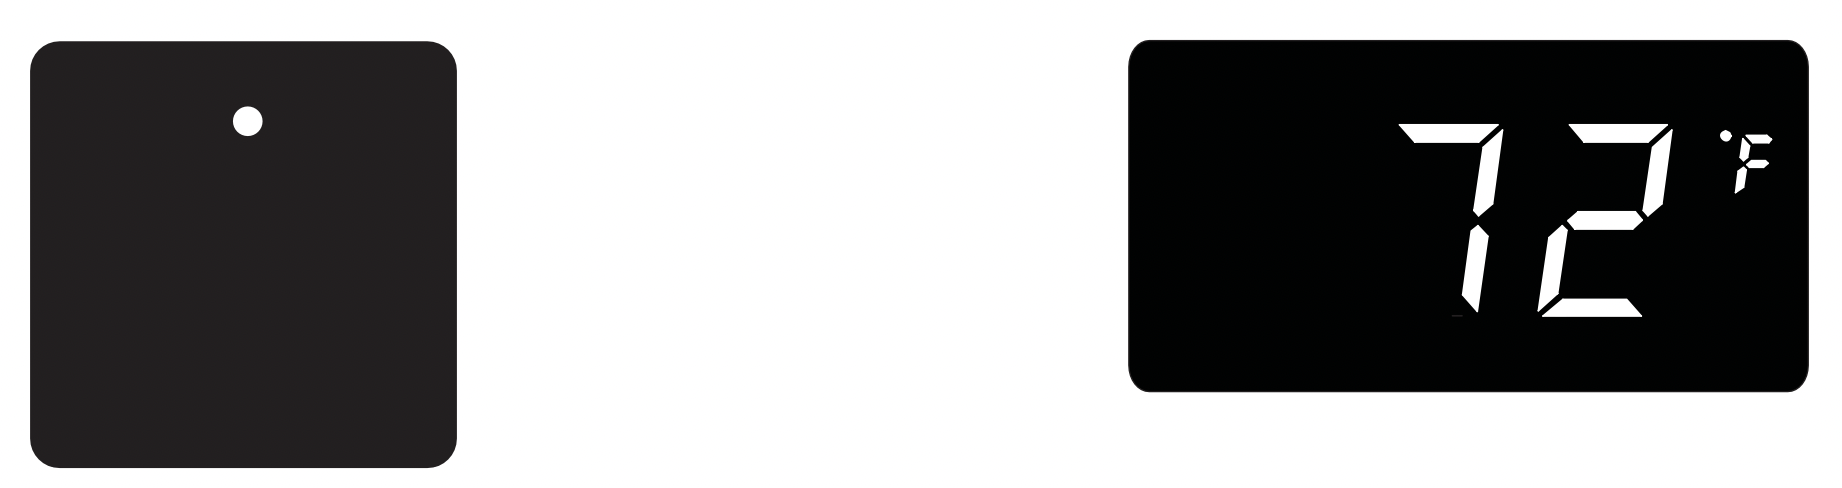
To wake the display press any keypad. A confirm tone will sound, and the current storage compartment temperature will be displayed.
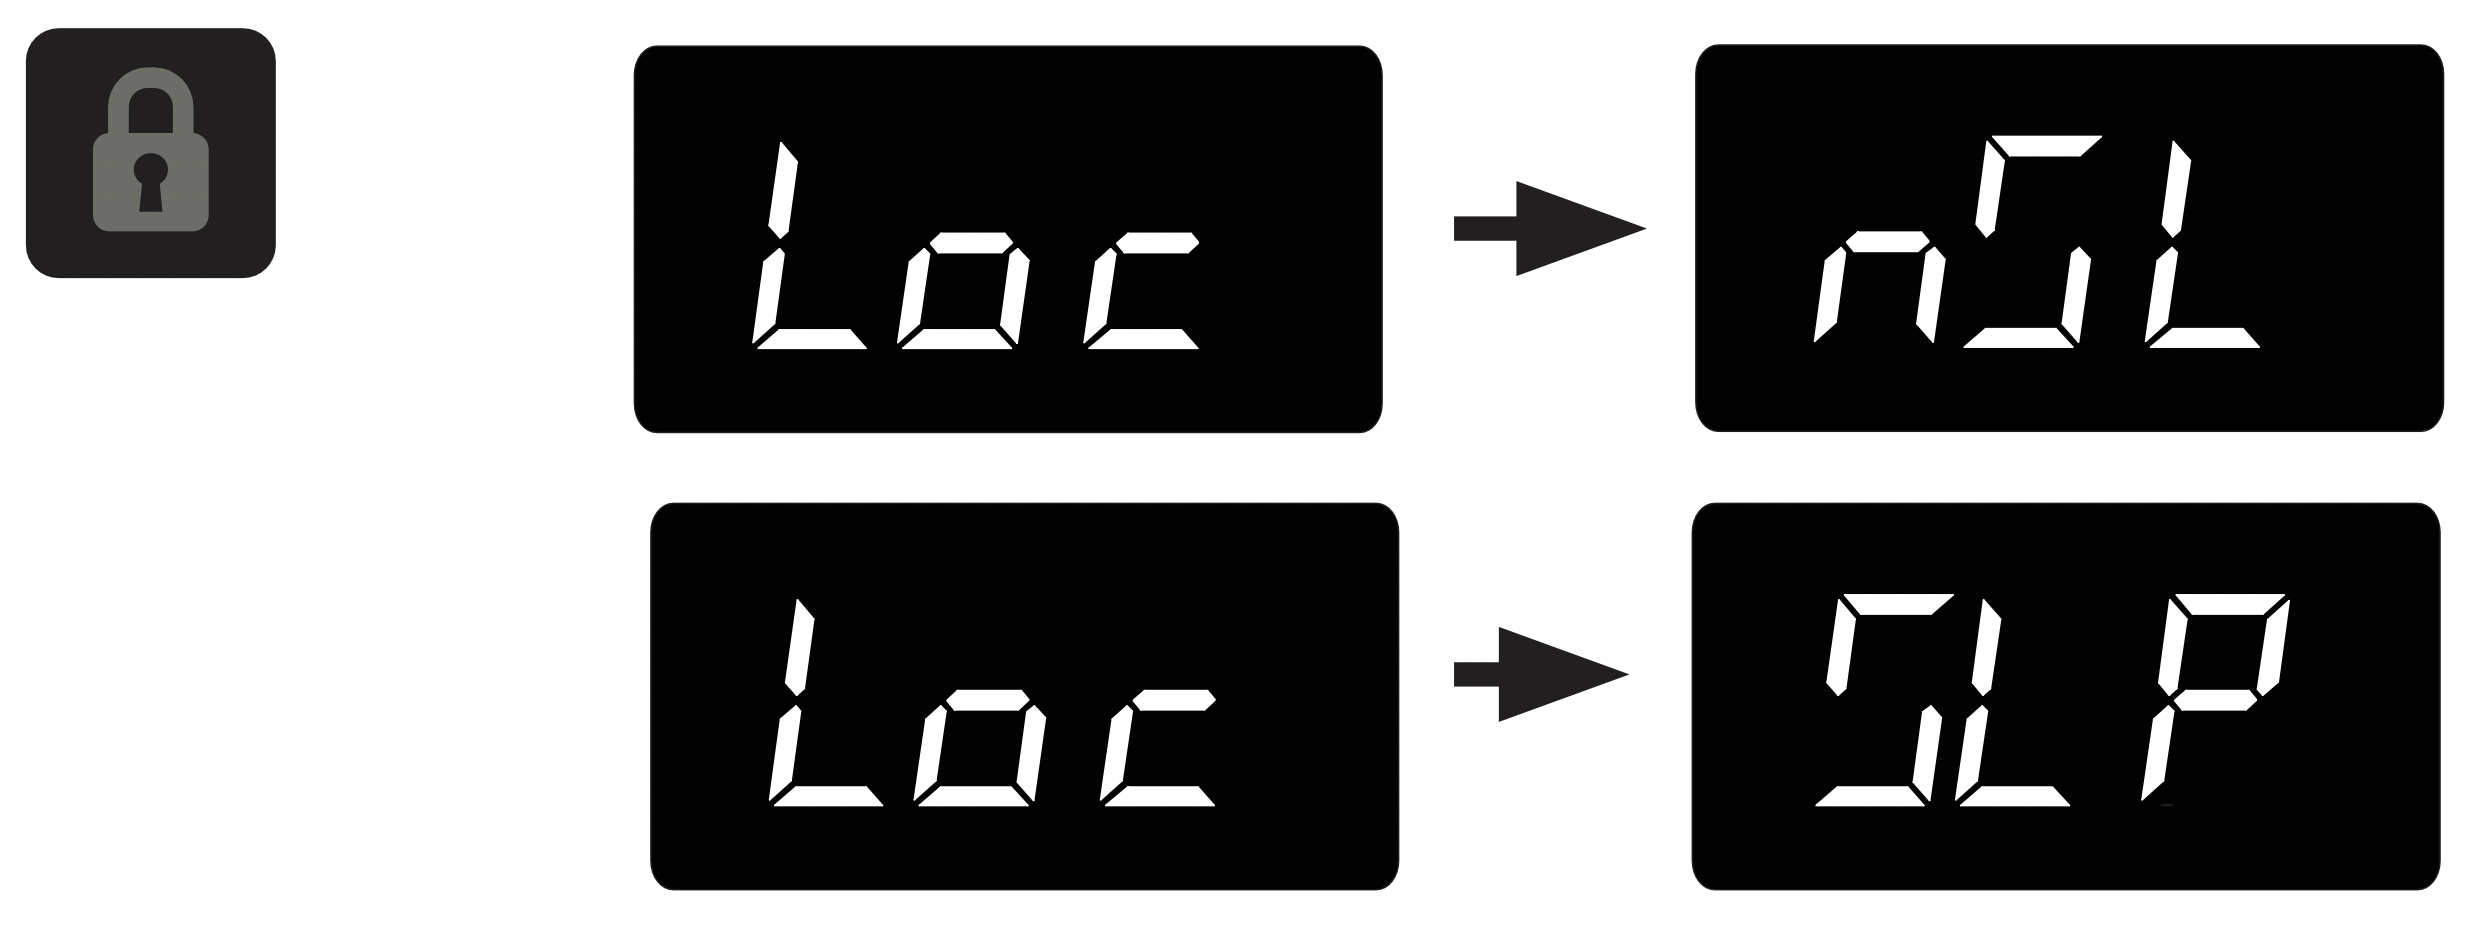
The sleep mode can be disabled if you prefer to have the display on continuously. Press and hold the "Lock" keypad until the display goes past "Loc" and reads "nSL". To enable the sleep mode, repeat the instruction, again going past "Loc" until the display reads "SLP".
Turning your appliance ON and OFF (Single and Dual Zone):

If the appliance is "On", (and out of sleep mode) the temperature will be shown in the display area of the control. To turn the appliance "Off", press and hold the "On/Off" keypad for 4-seconds. "OFF" will now be displayed on the control.

To turn the appliance "On", press and hold the "On/Off" keypad for 4-seconds.
Adjusting the temperature:
NOTE: When initially loading your product with warm contents, it may take up to 48-hours for the storage compartment temperature to stabilize.
When making temperature set-point changes, it may take up to 24-hours for the stored contents to stabilize at your new set-point temperature.
Factors that affect the storage compartment stabilized temperature:
- Changes to temperature setting.
- Room temperature changes.
- Temperature of stored contents.
- Loading warm contents.
- Cold content load will delay the change to a warmer set-point temperature.
- Warm content load will delay the change to a colder set-point temperature.
- Usage, (number and duration of the door openings).
- Use of the storage compartment display lighting, (glass door product only).
- Installation of the appliance in direct sunlight or next to a heat source.
Single Zone Models:

To set or check the set-point temperature (with the control out of sleep mode), press the "-" or "+" keypads. "SET" will be indicated on the user interface panel and the current set-point temperature will display and flash. Subsequent presses of the "-" or "+" keypads will adjust the temperature colder or warmer respectively. When you have reached your desired set-point temperature, press the "On/Off" keypad to accept, or do nothing and the "Set" mode will timeout in 10-seconds accepting the displayed temperature as the new set-point.

Dual Zone Models:
Temperatures can be set for each individual zone (upper and lower) in the dual zone wine cellar. To do so you must first select the zone you want to set the temperature for. You do so by pressing the upper or lower button on the display. When pressed the LED light will be illuminated for the respective display.
The available set-point temperature range for your appliance is 40°F (4.5°C) to 65°F (18.4°C). If you attempt to adjust the temperature outside of this range you will receive an audible notification.

To change the set temperature for a particular zone, with the zone selected and out of sleep mode, press the "-" or "+" keypads. "SET" will be indicated on the user interface panel and the current set-point temperature will display and flash. Subsequent presses of the "-" or "+" keypads will adjust the temperature colder or warmer respectively. When you have reached your desired set-point temperature, press the "On/Off" keypad to accept, or do nothing and the "Set" mode will time-out in 10-seconds accepting the displayed temperature as the new set-point.
The available set-point temperature range for your appliance is 45°F (7.3°C) to 55°F (12.9°C) for the lower zone and 55°F (12.9°C) to 62°F (16.8°C) for the upper zone. If you attempt to adjust the temperature outside of these ranges you will receive an audible notification.
Interior display lighting (Single and Dual Zone): (Glass door models only)

Your appliance is equipped with a dual light level display lighting feature. With the control out of sleep mode press the "Light" keypad once to activate the interior lighting display feature at full illumination. A confirmation tone will sound, and the light bulb "Icon" will illuminate. Pressing the "Light" keypad a 2nd time will dim the lighting to 50%. A 3rd press will deactivate the display lighting feature. The display lighting will automatically deactivate after 4-hours.
Temperature mode (Single and Dual Zone):

The temperature mode is preset from the factory in Fahrenheit (°F) but you have the option to change it to Centigrade (°C). To change the mode, press and hold the "-" keypad, while pressing the "+" keypad, then release the "-" keypad. The temperature will now be displayed in Centigrade (°C). Repeat the procedure to change the temperature mode back to Fahrenheit (°F).
Control lock (Single and Dual Zone):

The control panel can be locked to avoid unintentional changes. To lock the control, press and hold the "Lock" keypad until the display reads "Loc" then immediately release your finger from the keypad. The lock icon will flash 3-times and then continuously illuminate. When the control panel is locked, only the Lock keypad, System Status OK indicator , and the Alarm indicator are active. To un-lock the control panel, repeat this instruction until the display reads "nLc" then immediately release your finger from the keypad.

If the control lock is active (illuminated lock icon) the control will have to be unlocked before using the keypad to reset an alarm condition. See page 10 (Control Lock) for instructions for unlocking the control.
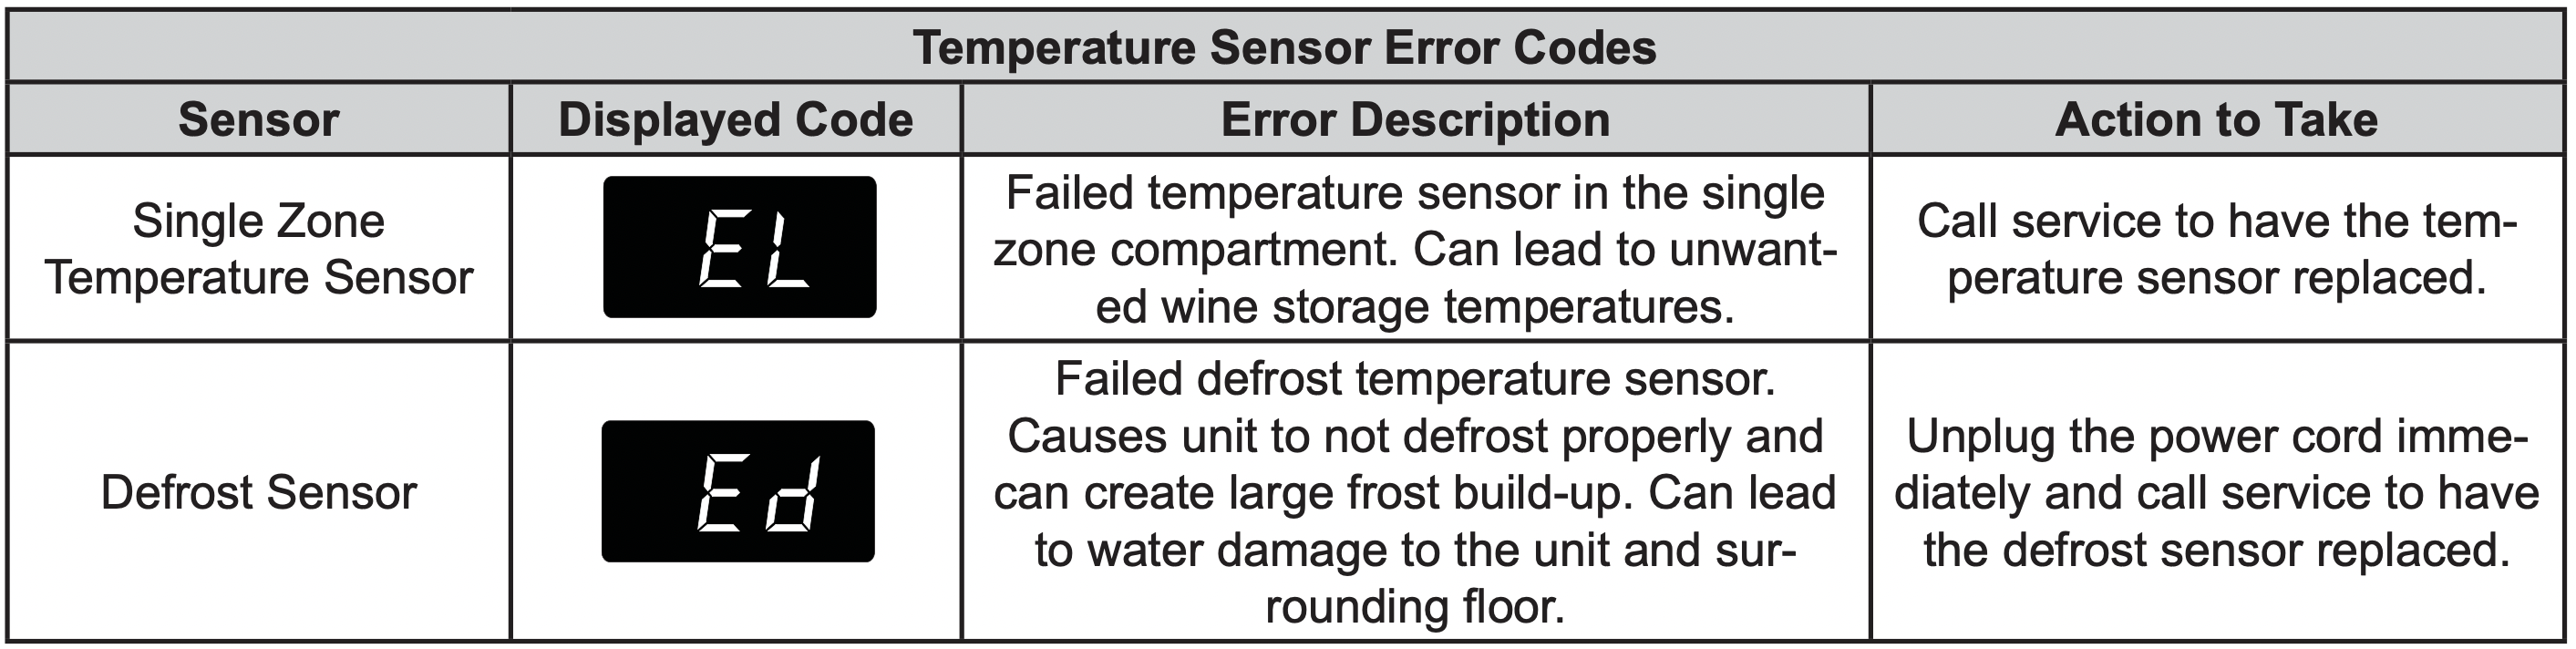
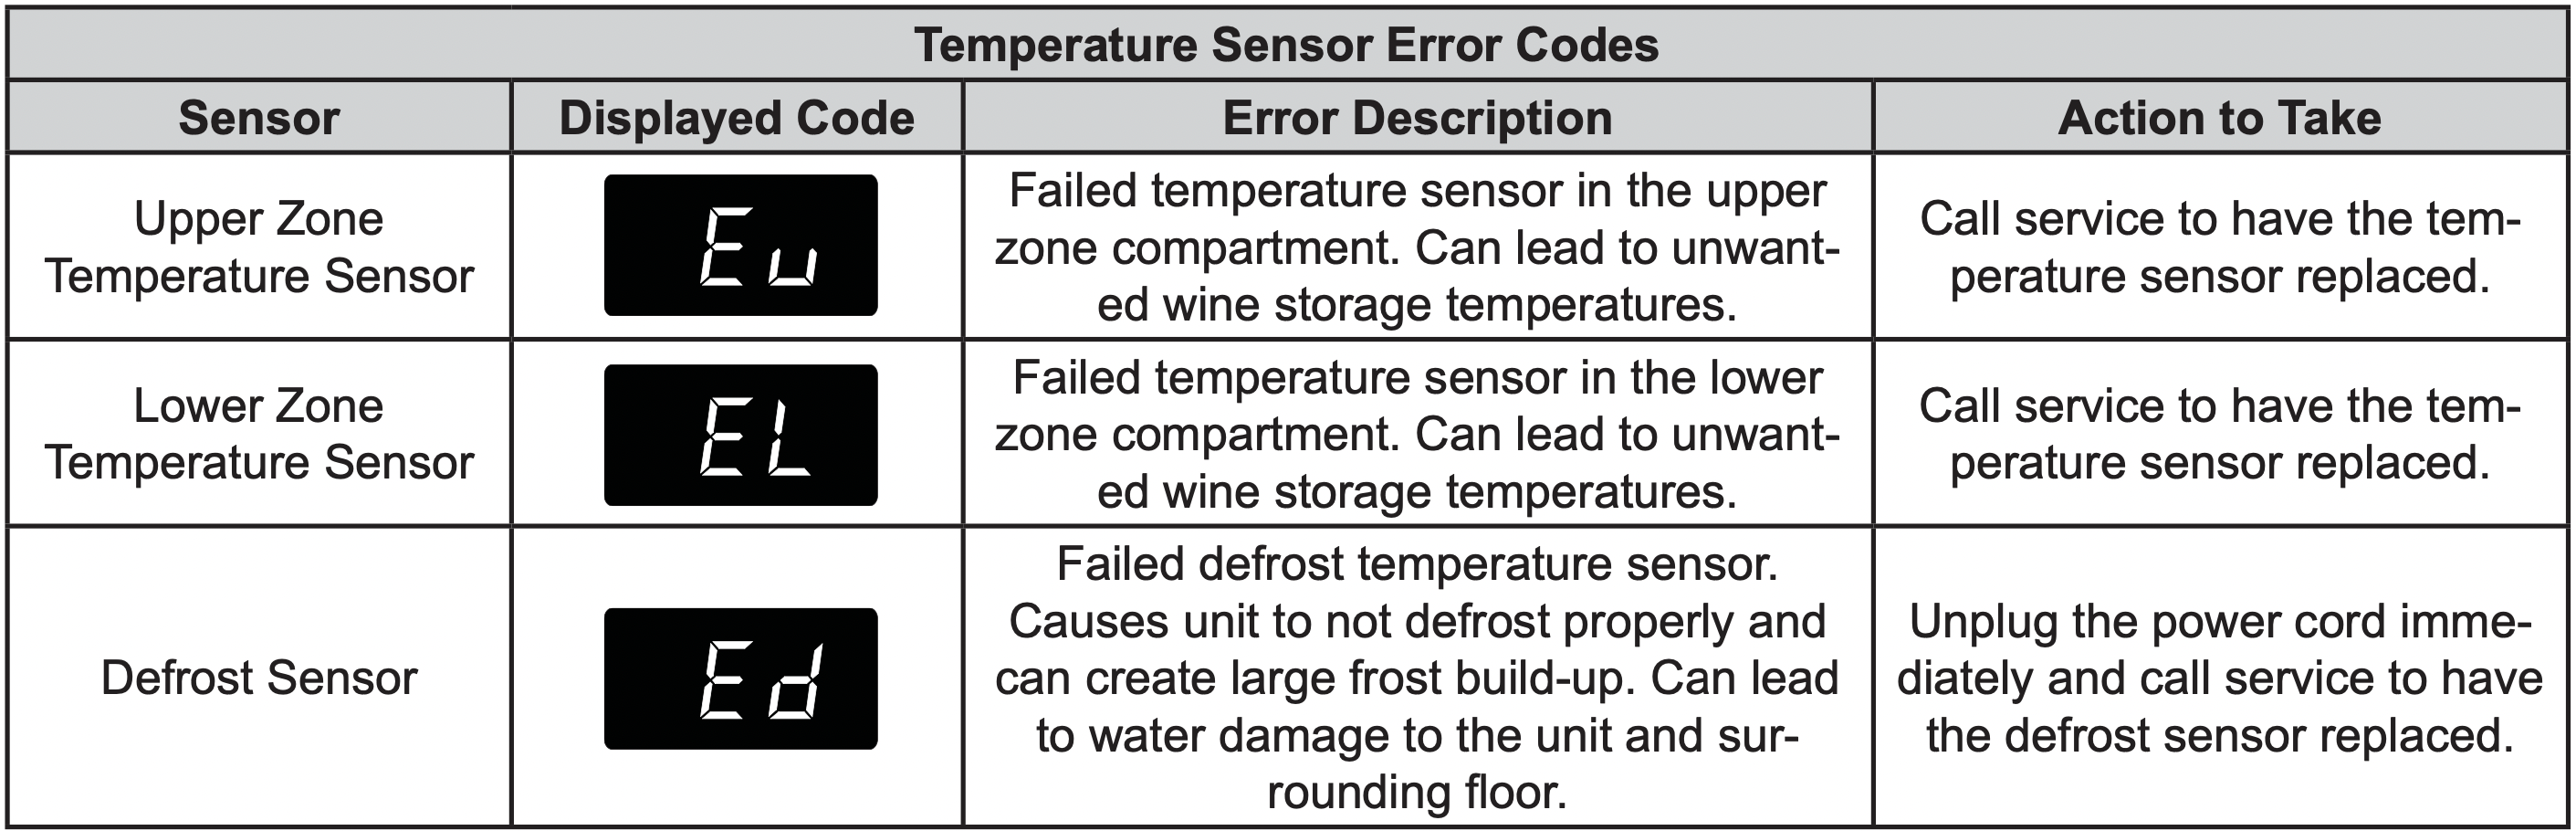
Temperature Sensor Error Codes
The temperature sensors are monitored continuously. Any OPEN or SHORTED circuit condition will initiate an ERROR CODE as listed below:
Single Zone Models:
Dual Zone Models:
Alarms (Single and Dual Zone):
The control will alert you to conditions that could adversely affect the performance of the appliance.
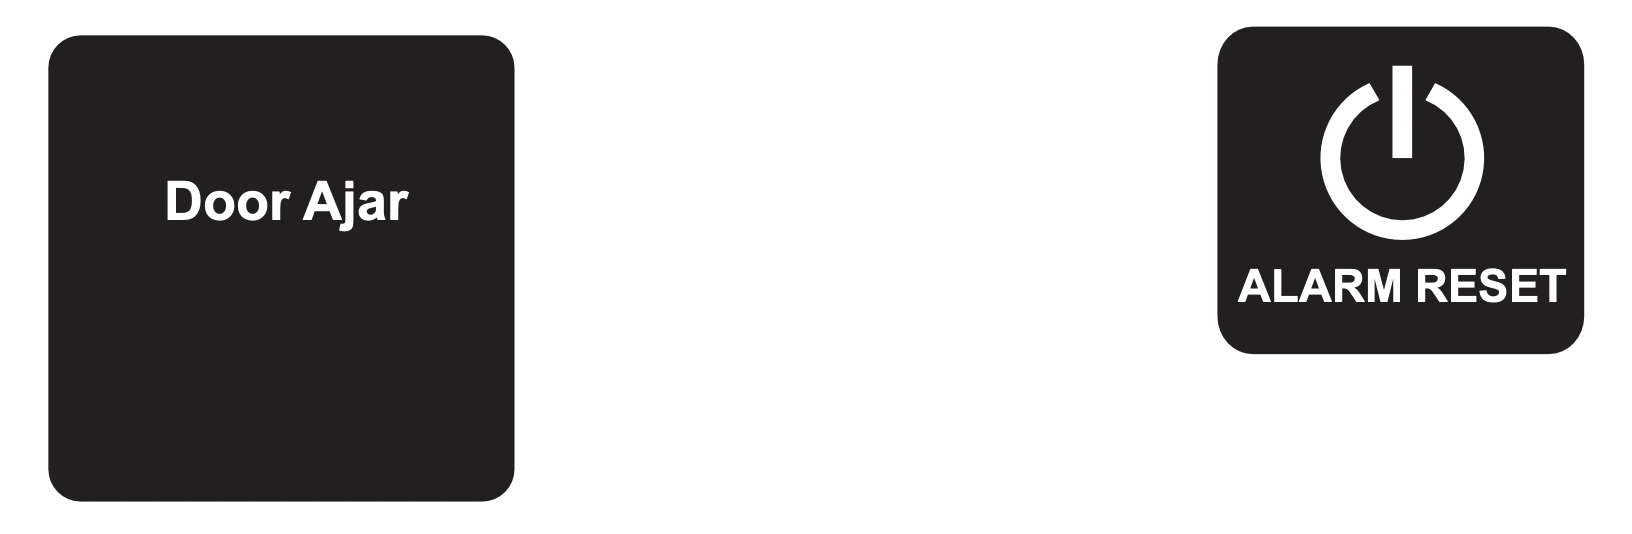
- Door ajar - If the door is open, or not closed properly, for more than 5-minutes the System Status OK indicator will turn-off, the "Door Ajar" indicator will flash, and a tone will sound every 60 seconds. Additionally, an "ALARM RESET" indicator will be displayed below the "On/Off" keypad.

The audible alarm can be muted, for each occurrence, by pressing the lock keypad.
This alarm condition can be reset by closing the door or momentarily pressing the "On/Off" keypad, (i.e.-if you are cleaning the storage compartment, etc.). The alarm will recur in 5-minutes if the alarm condition persists.
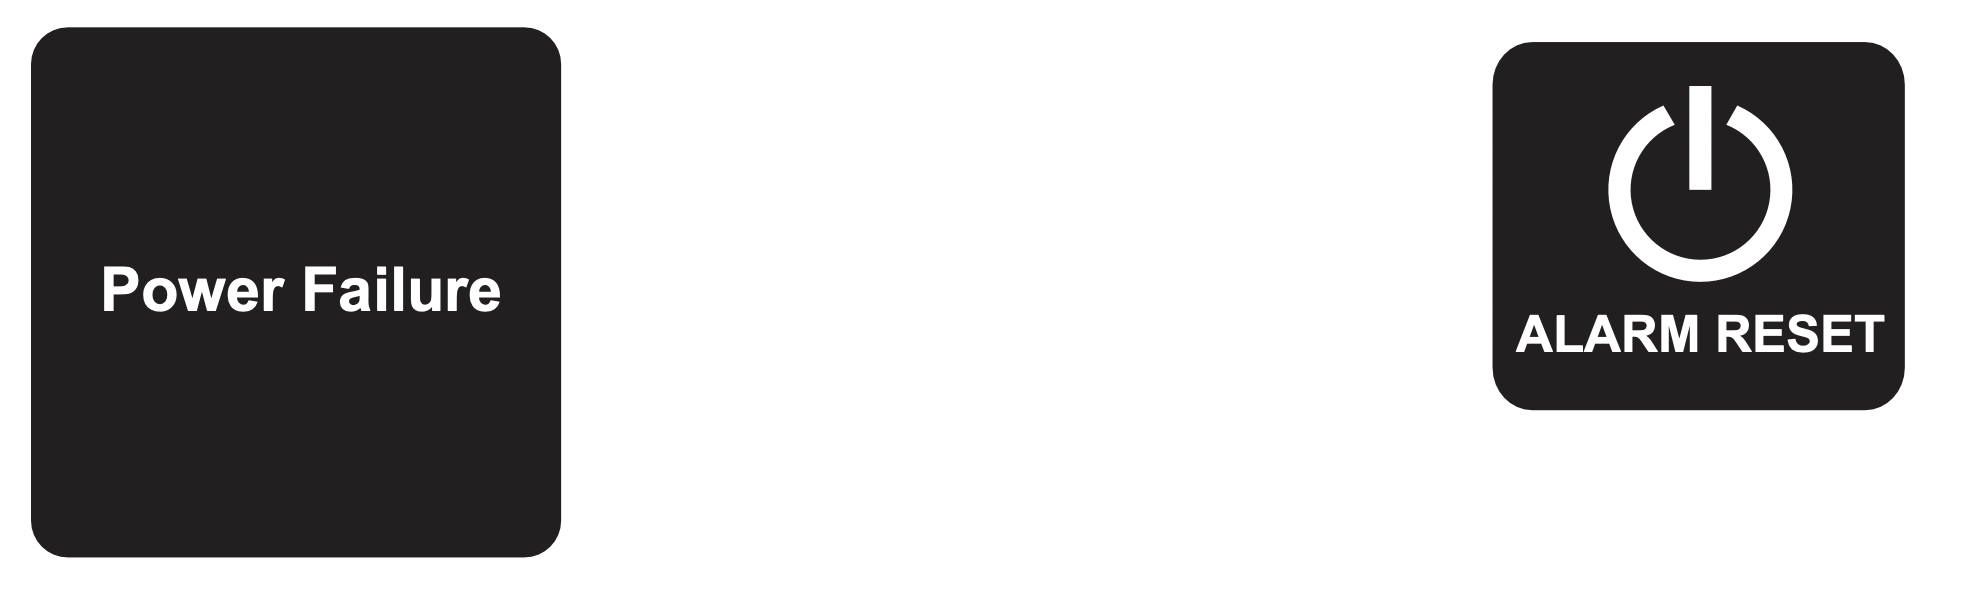
- Power failure - If power to the appliance is interrupted the System Status indicator will turn-off and the "Power Failure" indicator will flash. Additionally, an "ALARM RESET" indicator will be displayed below the "On/Off" keypad. No audible tone will sound. This alarm condition can be reset by momentarily pressing the "On/Off" keypad. If this alarm occurs, it is recommended that you check the condition of any perishables, even if the appliance is operating normally and the temperature has recovered, as prolonged power outages could result in excessive temperature excursions which may spoil perishables.
-
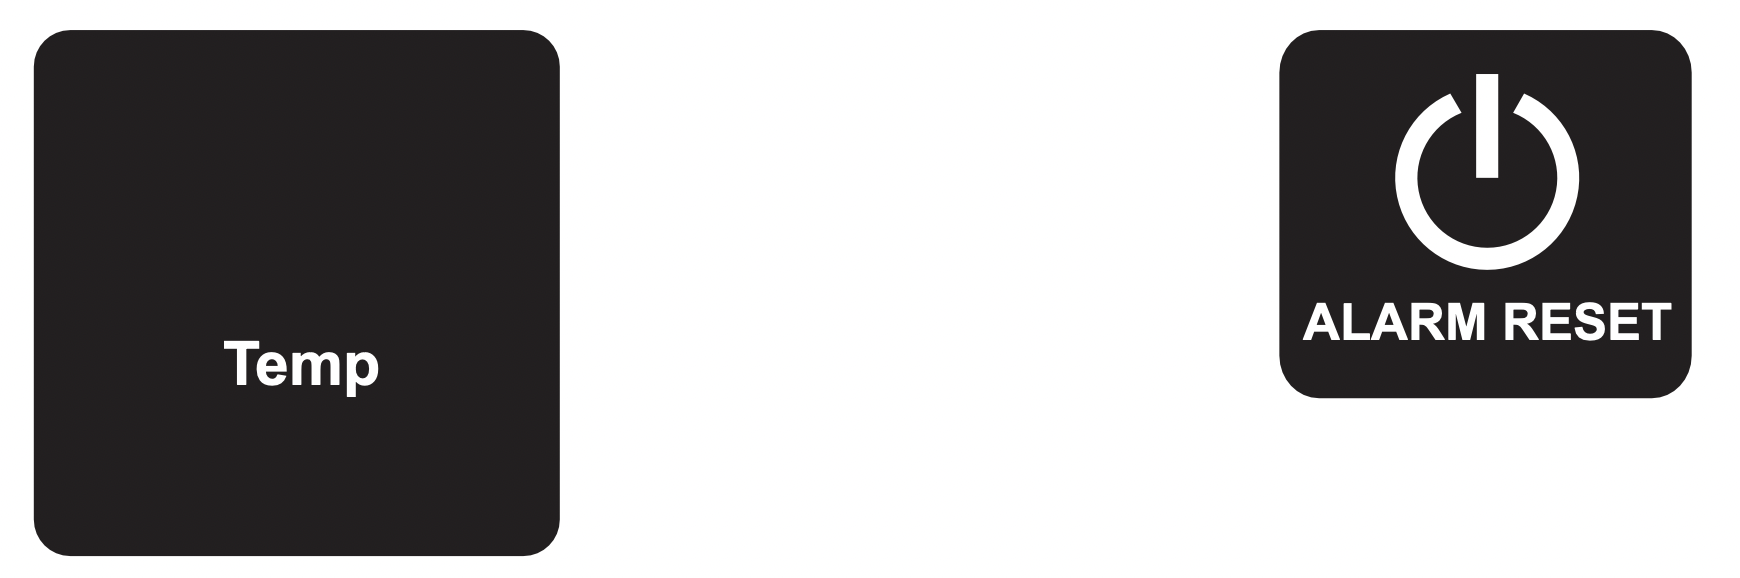
Temperature alarm - If the storage compartment temperature deviates excessively from your set-point temperature for an extended period of time, the "TEMP" indicator will flash, and an audible tone will sound every 60 seconds. Additionally, an "ALARM RESET" indicator will be displayed below the "ON/ OFF" keypad.
NOTE: After a high temperature alarm condition, check all perishables to ensure they are safe for consumption.
NOTE: The temperature alarm may occur as a result of high usage or introduction of warm contents to the storage compartment. If the temperature alarm continues to occur, your unit may require service.

The audible alarm can be muted, for each occurrence, by pressing the lock keypad.
This alarm condition can be reset by momentarily pressing the "On/Off" keypad. If this alarm occurs it is recommended that you check the condition of your stored contents, even though the appliance is operating normally and the temperature has recovered, as prolonged temperature excursions could spoil perishables.

Multiple alarms are possible, i.e.- "Door Ajar" for a prolonged period may trigger a "Temp" alarm, in which case both "Door Ajar" and "Temp" indicators will activate.
Vacation mode (Single and Dual Zone):
This operating mode can be used to save energy during high cost energy periods, or when you won't be using your appliance for an extended period of time by disabling the lights, alarm tones, and keypad entry tones. Vacation mode also serves as a Sabbath mode, disabling functions and its controls in accordance with the weekly Sabbath and religious holidays observed within the Orthodox Jewish community. When used as Sabbath mode, you may open or close the door at any time to access contents without concern of directly turning on or off any lights, digital readouts, solenoids, fans, valves, compressor, icons, tones, or alarms.
When activated, the display, alarm indicators and tones, keypad touch tones, interior lights, and all options are disabled. All keypad functions are disabled, with the exception of the "On/Off" keypad which is required to exit Vacationmode. Storage compartment temperatures are monitored and controlled at the settings prior to entering Vacation
mode.
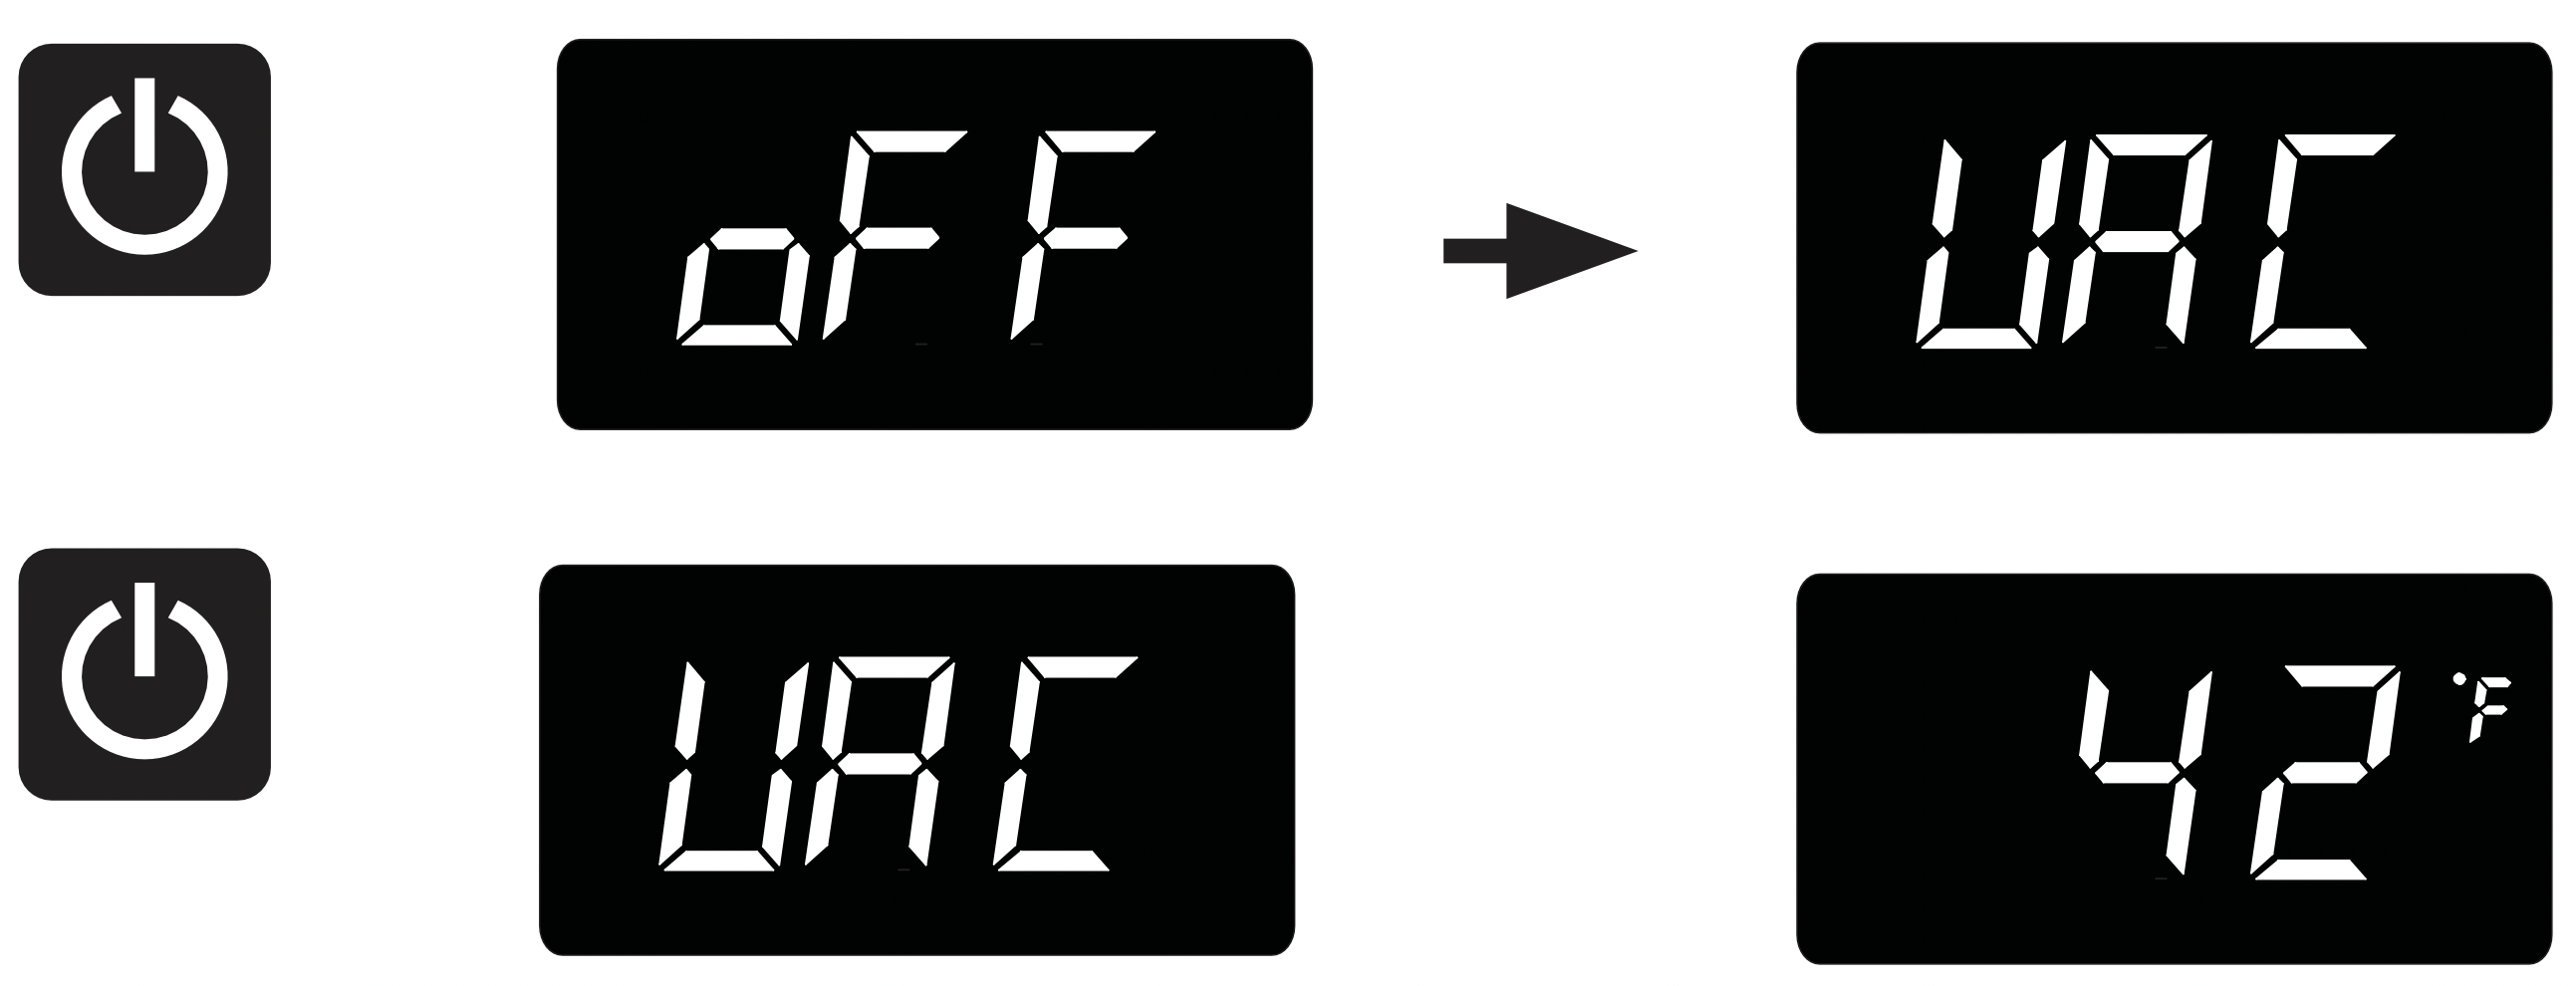
To enter Vacation Mode (with the control out of sleep mode), press and hold the "On/Off" keypad until the display goes past "OFF" and reads "VAC". The display will flash "VAC" 3-times to acknowledge your request, then will display "VAC" continuously until Vacation mode is exited. A power outage will not exit Vacation mode, exiting can only be accomplished manually. To exit Vacation mode and return to normal operation, press and hold the "On/Off" keypad until the control displays the temperature.
SHELVING CONFIGURATIONS
Shelving Configurations
Your appliance is equipped with full extension ball bearing shelf glides to provide maximum access and visibility for the product stored on the shelving arrangements listed below.
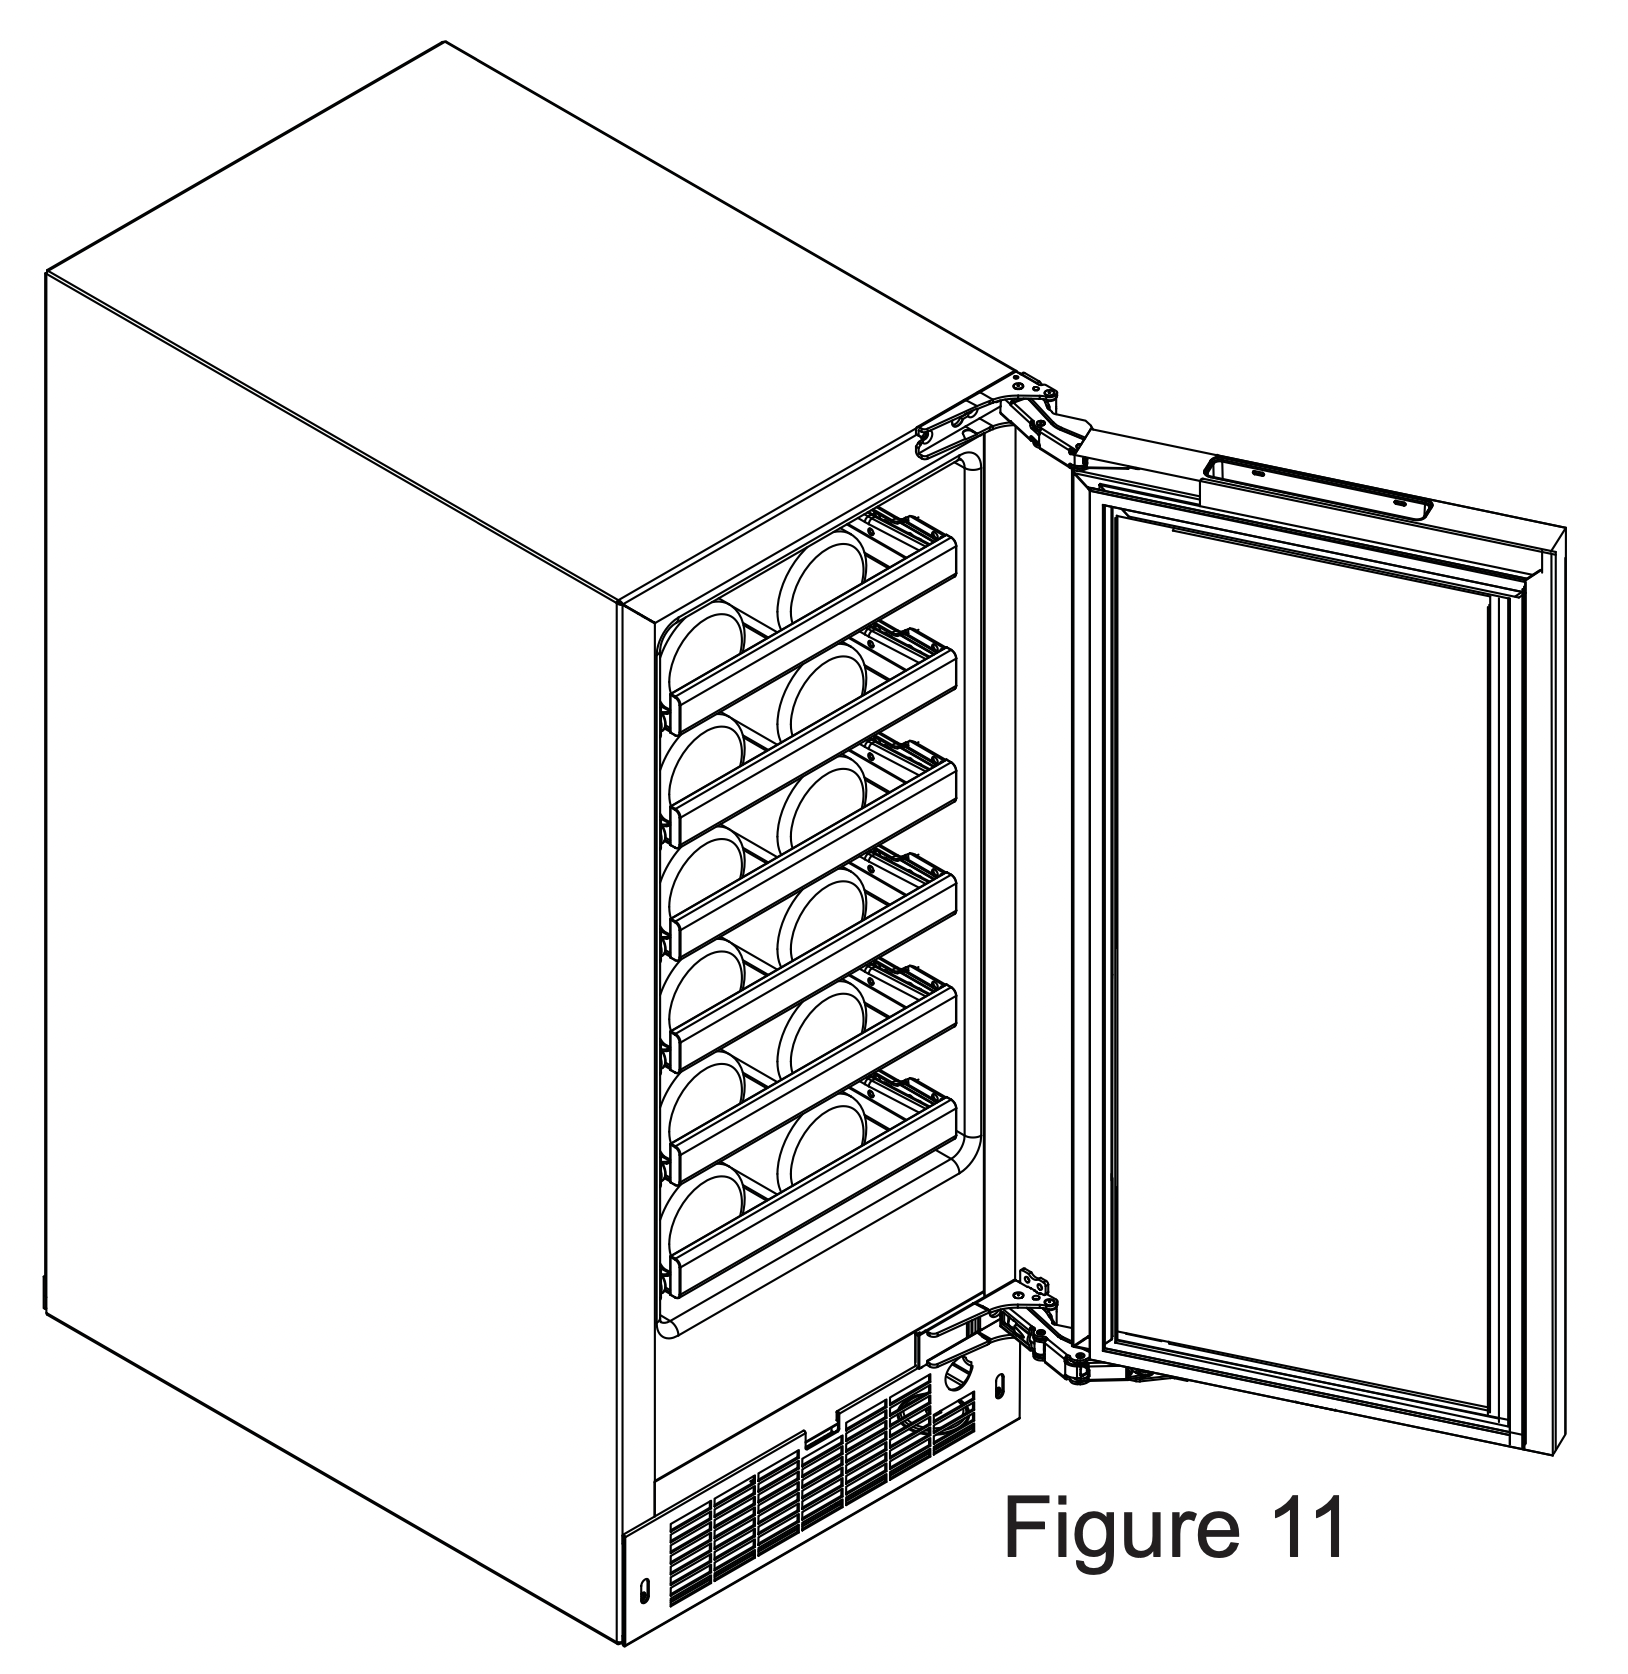
VWUI5150 Single Zone Wine Cellar: 15" (38.1 cm) Wide models:
(6) 4 bottle wire racks
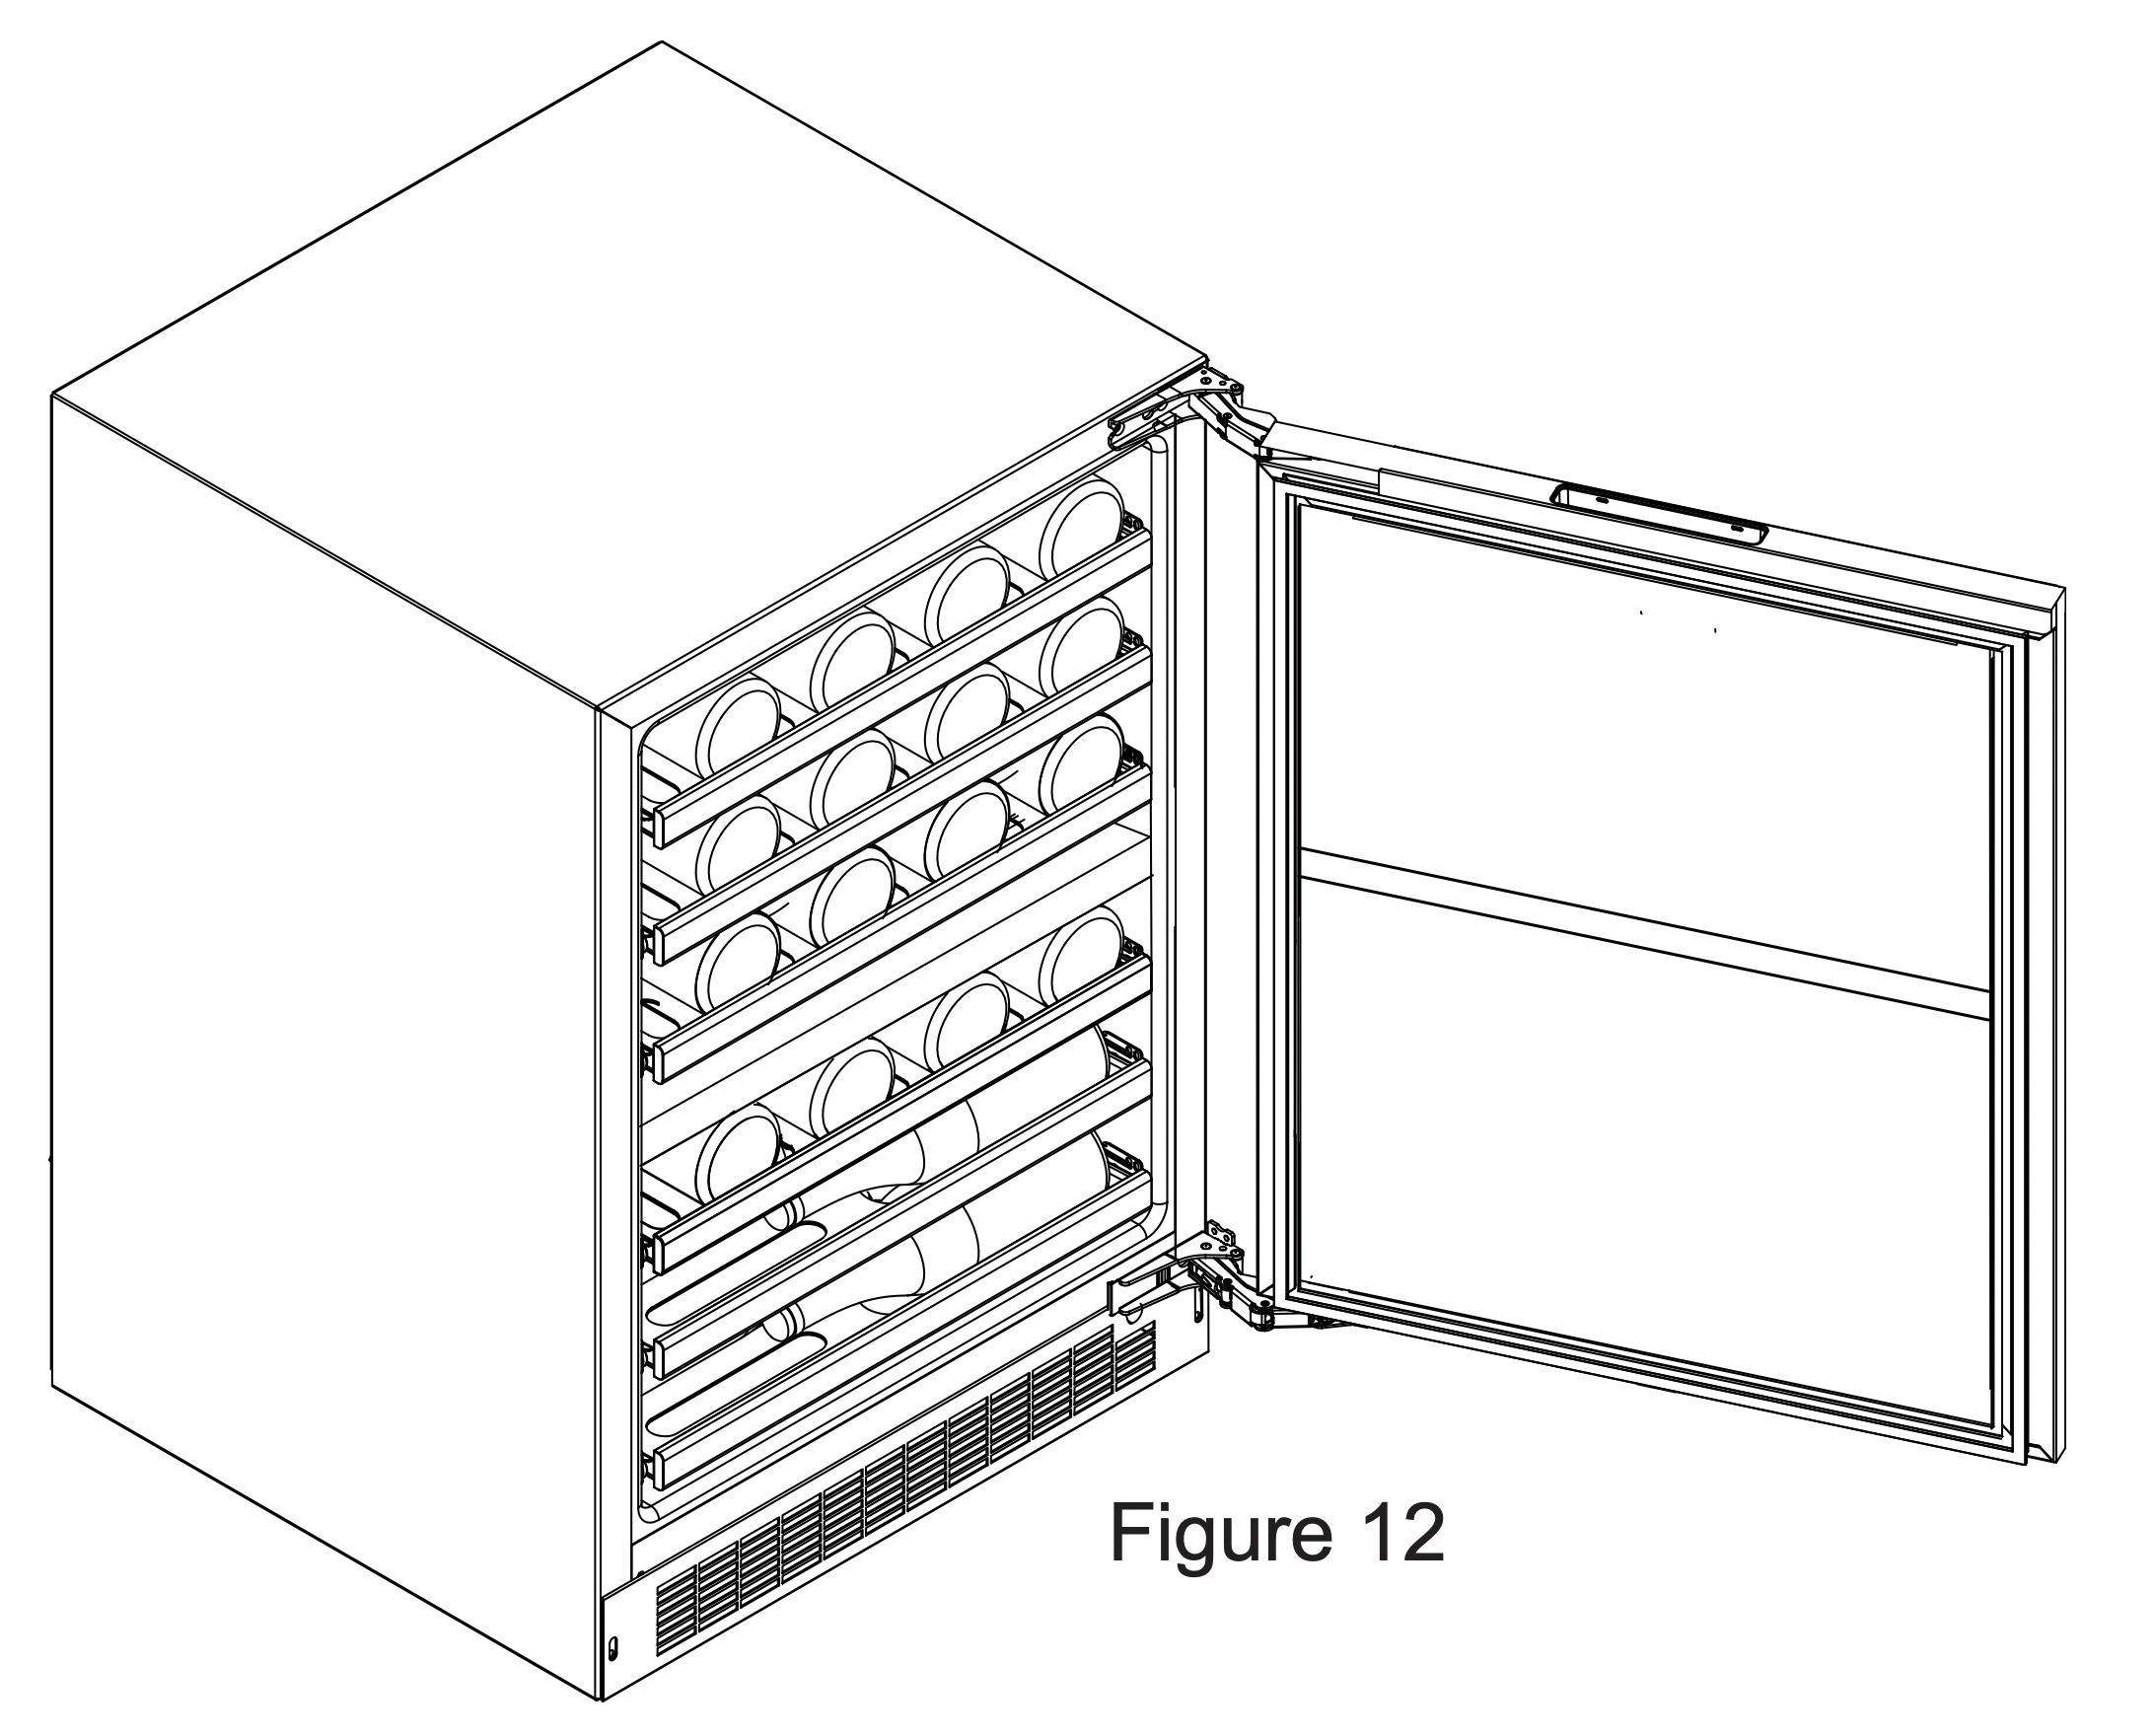
VWUI5240 Dual Zone Wine Cellar:
24" (61 cm) Wide models:
Upper Zone: (3) 8 bottle wire racks
Lower Zone:
(1) 8 bottle wire rack
(2) 4 bottle half-depth wire racks
CAUTION: Never try to remove a loaded shelf, remove everything from the shelf before removing. Use both hands when removing the shelf.
To remove a shelf:
Extend the shelf out of the cabinet until it stops.
Unload the shelf (see Figure 13).
Depress the locking tabs on both sides of the shelf and pull the shelf straight out (see Figure 13a). When the shelf is removed, push the extended cabinet mounted shelf extensions back into the cabinet.
To re-install a shelf:
Pull out the cabinet mounted shelf extensions to assist the engagement with the wire rack shelf.
Insert the wire rack side track into the cabinet mounted shelf extensions on both sides.
Push the wire rack completely into the cabinet to engage the locking tabs.
Pull the shelf out, (unloaded), to verify the wire rack is locked into the side rails. If the wire rack falls out, the locking tabs are not engaged; repeat the installation.
Load the shelf as required.

CARE AND CLEANING AND ENERGY SAVING TIPS
Front Grille
Be sure that nothing obstructs the required air flow openings in front of the cabinet. At least once or twice a year, brush or vacuum lint and dirt from the front grille area (see page 4).
CAUTION - SHOCK HAZARD: Disconnect electrical power from the appliance before cleaning with soap and water.
Cabinet
The painted cabinet can be washed with either a mild soap and water and thoroughly rinsed with clear water. NEVER use abrasive scouring cleaners.
Interior
Wash interior compartment with mild soap and water. Do NOT use an abrasive cleaner, solvent, polish cleaner or undiluted detergent.
Care of Appliance
- Avoid leaning on the door, you may bend the door hinges or tip the appliance.
- Exercise caution when sweeping, vacuuming or mopping near the front of the appliance. Damage to the grille can occur.
- Periodically clean the interior of the appliance as needed.
- Periodically check and/or clean the front grille as needed.
In the Event of a Power Failure
If a power failure occurs, try to correct it as soon as possible. Minimize the number of door openings while the power is off so as not to adversely affect the appliance's temperature.
Light assembly replacement
All models use LED lamps to illuminate the interior of the appliance. This component is very reliable, but should one fail, contact a qualified service technician for replacement of the LED.
The following suggestions will minimize the cost of operating your refrigeration appliance.
- Do not install your appliance next to a hot appliance (cooker, dishwasher, etc.), heating air duct, or other heat sources.
- Install product out of direct sunlight.
- Ensure the front grille vents at front of appliance beneath door are not obstructed and kept clean to allow ventilation for the refrigeration system to expel heat.
- Plug your appliance into a dedicated power circuit. (Not shared with other appliances).
- When initially loading your new product, or whenever large quantities of warm contents are placed within refrigerated storage compartment, minimize door openings for the next 12 hours to allow contents to pull down to compartment set temperature.
- Maintaining a relatively full storage compartment will require less appliance run time than an empty compartment.
- Ensure door closing is not obstructed by contents stored in your appliance.
- Allow hot items to reach room temperature before placing in product.
- Minimize door openings and duration of door openings.
- Use the warmest temperature control set temperature that meets your personal preference and provides the proper storage for your stored contents.
- When on vacation or away from home for extended periods, set the appliance to warmest acceptable temperature for the stored contents.
- Set the control to the “off” position if cleaning the appliance requires the door to be open for an extended period of time.
- For wine storage products:
When serving temperatures are not required, return the compartment(s) set temperature to the ideal red and white wine long term storage temperature of 13°C / 55°F.
TROUBLESHOOTING
WARNING - Electrocution Hazard
- Never attempt to repair or perform maintenance on the appliance until the main electrical power has been disconnected. Turning the appliance control "OFF" does not remove electrical power from the unit's wiring.
- Replace all parts and panels before operating.
CAUTION: In the unlikely event you lose cooling in your unit, do not unplug the product from the electric supply, but do call a qualified service technician immediately. It is possible that the loss of cooling capacity is a result of excessive frost build-up on the evaporator cooling coil. In this case, removing power to the unit will result in the melting of this excessive quantity of ice, which could generate melt water that exceeds the capacity of the defrost drain system and could result in water damage to your home. The end-user will be ultimately responsible for any water damage caused by prematurely turning the unit off without appropriately managing the excess water run-off.
|
Problem
|
Possible Cause
|
Remedy
|
|
Appliance not cold enough
(See “Adjusting the temperature" on page 8)
|
- Control set too warm
- Content temperature not stabilized.
|
- Adjust temperature colder. Allow 24 hours for temperature to stabilize.
|
- Excessive usage or prolonged door openings.
|
- Allow temperature to stabilize for at least 24 hours.
|
- Airflow to front grille blocked.
|
- Airflow must not be obstructed to front grille. See “clearances” on page 4.
|
- Door gasket not sealing properly.
|
- Check door alignment and/or replace door gasket.
|
|
Appliance too cold
(See “Adjusting the Temperature” on page 8)
|
|
- Adjust temperature warmer.
Allow 24 hours for temperature to stabilize.
|
- Door gasket not sealing properly.
|
- Check door alignment and/or replace door gasket.
|
|
No interior light.
|
- Failed LED light assembly or light switch.
|
- Contact a qualified service technician.
|
|
Light will not go out when door is closed
|
- Display light is turned on. (Glass door models only.
|
- Turn off display light, shut door.
|
- Door not activating light switch.
|
- Appliance not level, level appliance, (See page 4, “leveling legs”)
|
|
|
- Contact a qualified service technician.
|
|
Noise or Vibration
|
|
- Level appliance, see “Leveling Legs” on page 4.
|
- Fan hitting tube obstruction.
|
- Contact a qualified service technician.
|
|
Appliance will not run.
|
|
- Turn appliance on. See “Starting your appliance” on page 8.
|
- Power cord not plugged in.
- No power at outlet.
|
- Plug in power cord.
- Check house circuit.
|