Loading ...
Loading ...
Loading ...
6 7INSTALLING YOUR OVEN ACCESSORIESBEFORE OPERATING
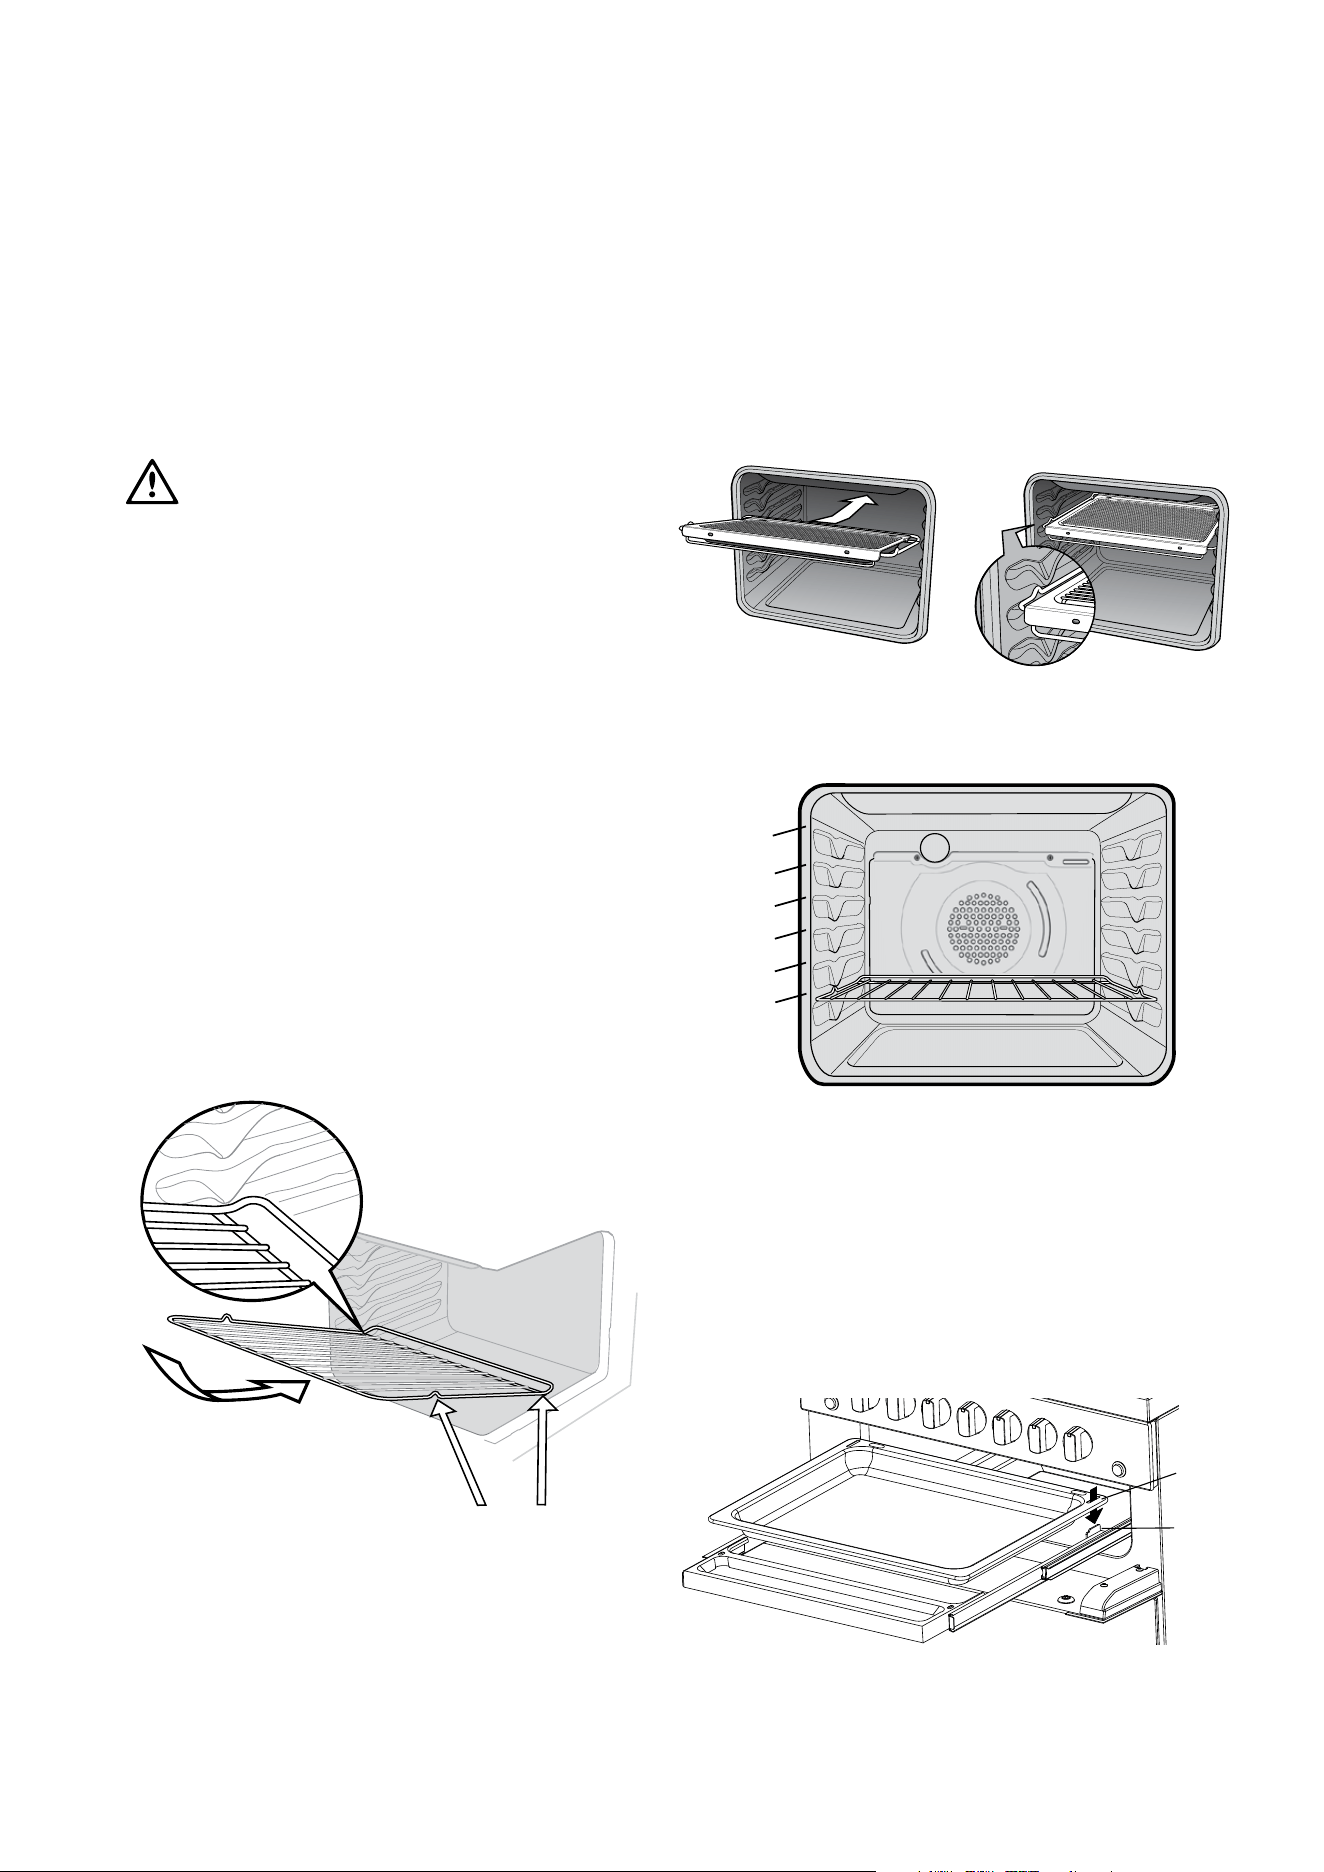
Grill in oven
(refer to Fitting Oven Shelves)
The grill dish with wire insert can be used in any of the
two upper height positions (shelf positions 4 and 5)
between the runners.
NOTE: You must remove the grill dish when baking in
the oven.
Grill dish
insertion
Grill dish
final position
Oven shelf location
5 shelf
positions
1
2
3
4
5
Not a shelf
position
NOTE: The top ledge is not a shelf position. There are no
stops for shelf withdrawal.
Separate grill
• To insert the grill tray in a separate grill underbench
product, open the grill door and fully extend the grill
drawer Position the grill tray so that the slots on the
outer edges fit over the tabs on the slides.
Rear slot
Slide tab
Preparing your appliance for the first time
• Please remove all internal boxes and bags from the
oven before operation.
• Please wipe out the oven interior prior to operation
with warm soapy water and polish dry with a soft
clean cloth. Do not close the oven door until the oven
is completely dry.
WARNING
CAUTION
• Do not line the oven with foil as it will damage
the enamel.
• New appliances can have an odour during first use. It
is recommended to ‘run in’ the oven before cooking
for the first time Operate the oven(s), empty, at a
temperature of 180°C for approximately 30 minutes.
For appliances with a separate grill, run the grill on
maximum for 15 minutes WITH GRILL DOOR OPEN
Please ensure that the room is well ventilated during
this process.
Installing your oven accessories
Fitting oven shelves
1. Ensure shelf orientation is correct (refer to diagram
below).
2. Slide oven shelves onto oven supports (side runners)
at an angle until raised back of shelf is past the stop
on oven supports (side runners).
3. Lower front of shelf and push in until stop is reached.
4. To remove oven shelves, withdraw to the stop and
raise the front of shelf to clear the stop.
Note the orientation
of the side and rear
features
BEFORE OPERATING YOUR APPLIANCE FOR THE FIRST TIME
Burner crowns and caps
• The burner crown must be fitted correctly into the
burner cup or damage will occur during operation.
• To do this, ensure that the 2 ribs on either side of the
spark plug hole are positioned into the 2 slots on the
burner cup (see diagram).
• Burner cap and burner crown must be clean and
located correctly for the burner to light.
NOTE: When the burner is correctly fitted it will sit level
on the hob.
burner crown
burner cup
Trivets
• Take care when placing the trivets as dropping them
may damage the hob or trivet.
burner cap
trivets
wok burner
burner crown
INSTALLING YOUR OVEN ACCESSORIES
Loading ...
Loading ...
Loading ...