Fridge-freezer Operating instructions
Installing the Appliance
Have a technician install and connect the appliance according to the enclosed Installation Instructions.
WARNING:
Do not install the appliance:
- outdoors,
- in an environment subject to drips of water,
- in rooms with risk of frost.
Transporting
The appliances are heavy and must be secured during transportation and installation.
Because of the weight/dimensions of the appliance and to minimize the risk of injuries and damage to the appliance at least two people are necessary to set-up the appliance securely.
Installation Location
A dry, well-ventilated room is suitable as an installation location. The installation location should not be exposed to direct sunlight or placed near a heat source, e.g. a cooker, radiator, etc. If installation next to a heat source is unavoidable, use a suitable insulating plate or observe the following minimum distances from the heat source:
- 1.2“ (3 cm) to electric or gas cookers.
- 12“ (30 cm) to an oil or coal-fired cooker. The floor of the installation location must not give way; if required, reinforce floor. To ensure that the Ice Maker functions correctly, the appliance must be upright.
Ventilation
The refrigeration unit is ventilated only via the ventilation grille in the base. Never cover the ventilation grille or place anything in front of it. Otherwise the refrigeration unit must work harder, increasing the power consumption.
Scope of Delivery
After unpacking all parts, check for any damage in transit. If you have any complaints, please contact the dealer from whom you purchased the appliance or our Customer Service department.
The following parts are included:
- Built-in appliance
- Interior fittings (depending on model)
- Bag containing installation materials
- Operating Instructions
- Installation Instructions
- Customer Service Booklet
- Warranty enclosure
- Information on the energy consumption and noises
Connecting the Appliance
Have a technician install and connect the appliance according to the enclosed Installation Instructions. Do not remove the transportation protection devices from the shelves and storage compartments until the appliance has been installed.
Always connect the water before the power.
Apart from statutory national regulations, you should comply with all applicable local electricity and water companies codes and requirements. After installing the appliance, wait at least 1 hour before switching the appliance On. During transportation the oil in the compressor may have flowed into the refrigeration system.
Before switching the appliance On for the first time, clean the interior of the appliance (see chapter “Cleaning the Appliance”).
Water Connection
CAUTION:
Connect the appliance to a drinking water line only:
- Minimum pressure: 0.2 Mpa (2 bar)
- Maximum pressure: 0.8 Mpa (8 bar)
- Pressure over 0.8 MPa (8 bar): install a pressure limiter between drinking water connection and hose set:
The water may be connected only by a competent fitter according to the local regulations of the appropriate Water Supply company.
A cold water connection is necessary for operating the automatic Ice Maker. The water pressure must be between 29 and 116 p.s.i. (2.0 and 8.0 bar). The installation must correspond to the local plumbing regulations.
A separate Shut-Off-Valve should be installed in the cold-water inflow.
The Shut-Off-Valve should not be located behind the appliance. It is recommended that you mount the Shut-Off-Valve directly next to the appliance or at another place that is easily accessible.
Electrical Connection
WARNING:
Risk of electric shock: Connect the appliance to a grounded, 3-phase outlet only. Never remove the ground phase. Do not use any adapters. Do not use any extension leads. ,
WARNING:
Risk of electric shock: Incorrect connection of the appliance may result in death, fire or electric shock. Improper connection of the protective conductor may result in electric shock. If you are in doubt as to whether the appliance has been properly grounded, have it tested by a qualified electrician or Customer Service technician. ,
WARNING:
Risk of electric shock: If the length of the power cord is inadequate, never use multiple outlets or extension leads. Instead, please contact Customer Service for alternatives.
This appliance must be connected to a permanently installed outlet.
The outlet must be near the appliance and also freely accessible following installation of the appliance.
The appliance complies with protection class I. Connect it to a correctly installed outlet. Correct means: with a protective conductor, 110 V – 120 V/ 60 Hz alternating current. The outlet must be protected by a 10 A – 16 A fuse.
The appliance comes with a UL registered 3-wire power cord. The appliance requires a 3-pole outlet. Please observe the following table with regard to this:

Check on the rating plate whether the indicated voltage and current type match the values of your power supply. The position of the rating plate can be found in the chapter entitled “Customer Service”. ,
WARNING: Never connect the appliance to electronic energy saving devices. Our appliances can be used with mains and sinecontrolled inverters. Mains-controlled inverters are used for photovoltaic systems which are connected directly to the national grid. Sine-controlled inverters must be used for isolated applications (e.g. on ships or in mountain lodges) which are not connected directly to the national grid.
Getting to Know Your Appliance
These Operating Instructions refer to several models.
The diagrams may differ.
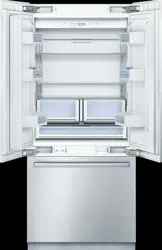
2 door model

3 door model

A Refrigerator Compartment
B Freezer Compartment
- Light Switch
- Controls
- Glass Shelf
- Light (LED)
- Fruit and Vegetable Container
- Cool-fresh” Container
- Ice Maker
- Ventilation
- Water Filter
- Butter and Cheese Compartment
- Door Shelf
- Storage Compartments for large Bottles
- Ice Cube Container
- Tray
- Door Drawer

A POWER Button
Serves to switch the whole appliance On and Off.
B ICE Button.
Serves to switch the Ice Maker On and Off.
See chapter “Ice Maker”.
C ALARM Button.
Serves to switch the warning signal Off.
See chapter “Alarm function”.
D COOL SUPER Button (Refrigerator Compartment)
Serves to switch the Super Cooling On and Off.
E FREEZER SUPER Button (Freezer Compartment).
Serves to switch the Super Freezing On and Off.
F Display panel.
The temperatures in the Refrigerator Compartment and in the Freezer Compartment are shown on the Display Panel. Activated special functions are shown via “symbol”.
The menus and setting options which are available are represented on the Display Panel in the Setup Mode. See chapter “Special Functions”.
G Selection Buttons.
The temperature setting is activated using the Selection Buttons, see chapter “Setting the Temperature”.
For selecting a menu in the Setup Mode, see chapter “Special Functions”.
H Setting Buttons
The temperature can be changed using the Setting Buttons, see chapter “Setting the Temperature”.
More settings can be selected in the Setup Mode, see chapter “Special Functions”.
I SETUP Button.
This button starts and ends the Setup Mode. If the Setup Mode is ended using the SETUP Button, the changes which have been made are stored.
J VACATION Button.
This button is used to switch Vacation Mode On and Off, see chapter “Special Functions”, section “Vacation Mode”.
Note:
A sound can be heard every time a button is pushed if this function is selected in the “Sound” menu during the Setup Mode.
Symbols in the display panel
 Refrigerator compartment display.
 Freezer compartment display.
 Super Cooling or Super Freezing is active (see chapter “Super Cooling” and “Super Freezing”).
 Vacation Mode is active (see chapter “Special Functions”).
 For the setting options in the Setup Mode (see chapter “Special Functions”).
 A warning message is displayed (see chapter “Alarm function”).
 Ice Maker is switched on (see chapter “Ice Maker”).
 Signal to the Water Filter is displayed (see chapter “Water Filter”).
Switching the Appliance On
Switch the appliance On with the POWER Button. The appliance begins to cool. Light turns on when the door is open.
The factory has recommended the following temperatures:
- Refrigerator Compartment: +37 °F (3 °C)
- Freezer Compartment: 0 °F (-18 °C)
CAUTION
Keep hands ang fingers sway trom rt an rear openings ofthe retigerator door when closing.
Fisk of injury to hands or fingers. "Never allow oiéran to cime on or play with the retrigeator door
Operating Tips
Tre appliance features a mulion whichis ited {orhe et door.
Tre door of he Rtrigerator Compartment can bo opened winout Raving fost open tha right doo
Ahheatng elements intograted ito the malion inorder {avoid condansaton. Ts ean be swrtened On and (Ot 600 chapter “Special Funcions’. section "Door Ral Heater).
CAUTION
To prevert damage to the appliance cor the feritre trans. fs the muon when
Closing the door.

Setting the Language
Te DipayLanguagas canbe changed accoring to the table in the chapter “Special Functions”, “Setup Mode”.
To change the Display Language:
1. Press the SETUP Button.
2. Press the < or > Selection Button, until the set language is displayed.
3. Press the + or - A Setting Button, until the desired language is displayed.
4. Press the SETUP Button, in order to store the settings.
Setting the Temperature Unit
The temperature can be displayed in degrees Celsius (°C) or degrees Fahrenheit (°F).
1. Press the SETUP Button. The first menu (Temperature Unit) is displayed.
2. Press the + or - Setting Button in order to switch between degrees Fahrenheit (°F) and degrees Celsius (°C).
3. Press the SETUP Button, in order to store the settings. The set temperature is displayed again on the Display Panel.
Setting the temperature
Refrigerator Compartment (can be selected from +35 °F (2 °C) to +46 °F (8 °C))
We recommend a setting of +37 °F (3 °C).
Perishable food should not be stored above +37 °F.
1. Activate the Setup Mode with the Selection Button > The symbol  is displayed.
2. Set the temperature with the + (warmer) or - (cooler) Setting Buttons.
Freezer Compartment (can be selected from +7 °F (-14 °C) to –9 °F (-23 °C))
We recommend a setting of 0 °F (-18 °C).
1. Activate Setup Mode with the Selection Button <. The symbol  is displayed.
2. Set the temperature with the + (warmer) or _ (cooler) Setting Buttons.
Special Functions
The following Special Functions can be selected or displayed:
Setup Mode
In Setup Mode you can make your personal settings.
Switching On
Press the SETUP Button.
The first menu (temperature unit) is displayed on the Display Panel.

Making Settings
1. Switch on Setup Mode.
2. Press the Selection Button < or >. The next menu is displayed and its current setting (mostly ON or OFF).

3. Press the Setting Button < or >.

4. Press the Selection Button < or > to save and move to the next menu.
Switching Off
Press the SETUP Button. All of the changed settings are stored.
Note: If no button is selected within 20 seconds, the Setup Mode ends automatically. All of the changed settings are stored. The set temperature is displayed again on the Display Panel.
Menus in the Setup Mode
The following settings can be made.

Vacation Mode
If leaving the appliance for a long period of time, you can switch the appliance over to the energy-saving Vacation Mode.
When Vacation Mode is switched On, the following settings are made:
The appliance operates in Energy-Saving Mode.
The light is switched Off.
The “Super Freezing” function is ended (if activated).
Switching On
Press the VACATION Button.
The “VACATION” symbol is displayed on the Display Panel.
Switching Off
Press the VACATION Button.
The previous settings and temperature values are restored.
Sabbath Mode
- When Sabbath Mode is switched On, the following settings are switched Off:
- Ice Maker
- Acoustic Signal
- Interior Light
- Messages in the Display Panel
- The background illumination of the Display Panel is reduced
- Buttons are locked.
Switching On
1. Press and hold down the COOL SUPER Button.
2. Press the VACATION Button.
3. Press the COOL SUPER Button and hold down for a further 3 seconds.
The “VACATION” symbol flashes on the Display Panel and “SABBATH” is displayed.
Switching off
Press the VACATION Button.
The previous settings and temperature values are once again activated.
Energy Saving Mode
If the Energy Saving Function (Eco Function) is activated, the appliance switches to the Energy Saving Operation. This Energy Saving Function is preset at the factory in order to reduce energy consumption. The background illumination of the Display Panel is likewise reduced.
Switching On
1. Press the SETUP Button.
2. Press the Selection Button >, until “ECO MODE” and the current setting (OFF) is displayed.
3. Press the Setting Button +, in order to reset the setting.
4. Press the SETUP Button, in order to store the setting. “ECO” is displayed on the Display Panel.
Switching Off
1. Press the SETUP Button.
2. Press the Selection Button >, until “ECO MODE” and the current setting (ON) is displayed.
3. Press the Setting Button -, in order to reset the setting.
4. Press the SETUP Button, in order to store the setting.
Door Rail Heater
To prevent condensation, the door rail heater can be switched On and Off as required.
Switching On
1. Press the SETUP Button.
2. Press the Selection Button >, until “DRY DOOR“ and the current setting (OFF) is displayed.
3. Press the Setting Button +, in order to reset the setting.
4. Press the SETUP Button, in order to store the setting.
Switching Off
1. Press the SETUP Button.
2. Press the Selection Button >, until “DRY DOOR“ and the current setting (ON) is displayed.
3. Press the Setting Button - , in order to reset the setting.
4. Press the SETUP Button, in order to store the setting.
Alarm Function
Door Alarm
The Door Alarm switches On if an appliance door is left open for longer than three minutes. Close the door to switch Off the Warning Signal.
Temperature Alarm
The Temperature Alarm switches On if the Freezer Compartment is too warm and the frozen food is at risk of thawing.
The set temperature of the Freezer Compartment flashes and “ALARM” is displayed on the display panel. When the ALARM button is pressed, the temperature display for the Freezer Compartment indicates for five seconds the warmest temperature reached in the Freezer Compartment.
Then this value is deleted. The temperature display for the Freezer Compartment indicates the set Freezer Compartment temperature without flashing. Henceforth the “warmest temperature” will be redefined and saved.
The alarm display goes out as soon as the set temperature has been reached again.
The alarm may switch on without any risk to the frozen food:
- when the appliance is switched On,
- when large quantities of fresh food are placed in the appliance,
- if the Freezer Compartment Door is open too long.
Switching Off the Alarm
Press the ALARM button to switch Off the Warning Signal.
Refrigerator Compartment
When Purchasing Food, Please Note:
The freshness at point of purchase is important for the shelf-life of your food.
In principle, the fresher the produce when placed in the “Cool-Fresh” Container, the longer it stays fresh. Therefore, when buying food, always pay attention to the degree of freshness.
Observe the expiration date specified by the manufacturer for ready products and bottled products.
Arranging Food in the Appliance
- Wrap or cover food before placing in the appliance. This will retain the aroma, color and freshness of the food. In addition, flavors will not be transferred between foods and the plastic parts will not become discolored.
- Allow warm food and drinks to cool down before placing in the appliance.
- Do not block air outlet openings with food in the refrigerator compartment, otherwise the air circulation will be impaired. Food which is stored directly in front of the air outlet openings may be frozen by the cold air flowing out.
- Avoid contact of oil and fat with the plastic parts and door seal.
Super Cooling
Super cooling cools the Refrigerator Compartment as cold as possible for approx. 6 hours. Then the appliance automatically switches to the temperature set prior to super cooling mode.
Switch on super cooling mode, e.g.
- Before placing large quantities of food in the refrigerator compartment
- For fast cooling drinks:
Switching On
Press the COOL SUPER Button.
The display panel indicates the symbol “SUPER¾” and the compartment for which the function was switched On.

Switching Off
Press the COOL SUPER Button.
“Cool-Fresh” Container
The “Cool-Fresh” Container has a temperature of almost 32 °F (0 °C). Ideal for storing fish, meat, sausage, cheese and milk.
The temperature in the “Cool-Fresh” Container can be reduced slightly with the slide control.
We recommend the following controller position:
- COLD: Meat, sausage and poultry
- COLDER: Fish

Freezer Compartment
Using the Freezer Compartment
To store deep-frozen food.
To make ice cubes.
To freeze food.
Note: Ensure that the Freezer Compartment door has been closed properly. If the door is open, the frozen food will thaw. The Freezer Compartment will become covered in thick ice. Also, energy is wasted due to high power consumption!
Freezing and Storing Food
Purchasing Frozen Food
- Packaging must not be damaged.
- Use by the “expiration” date.
- Temperature in the supermarket freezer must be 0 °F (-18 °C) or lower.
- If possible, transport deep-frozen food in an insulated bag and place immediately in the Freezer Compartment.
Freezing Fresh Food
Freeze fresh and undamaged food only.
To retain the best possible nutritional value, flavor and color, vegetables should be blanched before freezing. Eggplants, peppers, zucchini and asparagus do not require blanching. Literature on freezing and blanching can be found in bookshops.
Note: Keep food that is to be frozen away from food that is already frozen.
- The following foods are suitable for freezing: Cakes and pastries, fish and seafood, meat, game, poultry, vegetables, fruit, herbs, eggs without shells, dairy products such as cheese, butter and quark, and ready meals and leftovers such as soups, stews, cooked meat and fish, potato dishes, soufflés and desserts.
- The following foods are not suitable for freezing: Types of vegetables that are usually consumed raw such as lettuce or radishes, eggs in shells, grapes, whole apples, pears and peaches, hard-boiled eggs, yogurt, soured milk, sour cream, crème fraîche and mayonnaise.
Packing Frozen Food
To prevent food from losing its flavor or drying out, place in airtight containers.
1. Place food in packaging.
2. Remove air.
3. Seal the wrapping.
4. Label packaging with contents and date of freezing.
Suitable Packaging:
Cling wrap, tubular film made of polyethylene, aluminum foil, freezer containers. These products are available from specialist outlets.
Unsuitable Packaging:
Wrapping paper, greaseproof paper, cellophane, bin liners and used shopping bags.
Items Suitable for Sealing Packaged Food:
Rubber bands, plastic clips, string, cold-resistant adhesive tape, etc. Bags and tubular film made of polyethylene can be sealed with a film heat sealer.
Shelf Life of Frozen Food
Depends on the type of food.
At a temperature of 0 °F (-18 °C):
- Fish, sausage, ready meals and cakes and pastries: up to 6 months
- Cheese, poultry and meat: up to 8 months
- Vegetables and fruit: up to 12 months
Super Freezing
Food should be frozen solid as quickly as possible in order to retain vitamins, nutritional value, appearance and flavor.
To prevent an undesirable temperature rise when placing fresh food in the Freezer Compartment, switch On super freezing several hours beforehand. As a rule, 4–6 hours is adequate. 24 hours are necessary when using the maximum freezer capacity fully.
After 2 days the temperature set before super freezing is automatically restored.
Switching On
Press the FREEZER SUPER Button. The Display Panel indicates the symbol “SUPER¾” and the compartment for which the function was switched On.

Switching Off
Press the FREEZER SUPER Button.
Thawing Frozen Food
Depending on the type and application, select one of the following options:
- at room temperature,
- in the refrigerator,
- in an electric oven, with/without convection,
- in the microwave.
Note: Do not refreeze thawing or thawed food. Only ready meals (boiled or fried) may be refrozen. Do not store the frozen produce for the maximum storage period.
Ice Maker
Ice Maker The Ice Maker makes ice cubes.
The Ice Maker starts to make ice cubes as soon as the appliance has reached the set temperature. If the Ice Cube Container is full, the Ice Maker automatically switches Off.
CAUTION:
Do not place bottles or food in the Ice Cube Container in order to cool them quickly. The Ice Maker may be blocked and could be damaged.
Switching On
Note:
If the Ice Maker is used for the first time and/or after a long period of not being used, do not use the ice that is produced in the first day for hygienic reasons. Throw the ice cubes away and clean the Ice Cube Container.
1. Make sure that Ice Cube Container is in its place and locked into position.
2. Press the ICE button. The symbol “ICE” is lit on the Display Panel.

Switching Off
Note:
Before switching the Ice Maker Off, it is most important that you switch the Water Supply to the appliance Off for a few hours. Press the ICE button.
Before Calling for Service
Before you call Customer Service: Please check whether you can troubleshoot yourself based on the following information. Customer Service will charge you for advice – even if the appliance is still under guarantee!
Appliance
Appliance has no refrigeration capacity.
The light does not work.
The display does not illuminate.
Appliance has been switched Off.
Press the POWER Button.
Power failure
Check whether the power is on.
The fuse has been switched Off.
Check the fuse.
The Power Plug has not been inserted properly.
Check whether the Power Plug is secure.
The refrigeration unit is switching On more frequently and for longer.
Appliance opened frequently.
Do not open the appliance unnecessarily.
The Ventilation Openings have been covered.
Remove obstacles.
Large quantities of fresh food are placed in the freezer
Switch Super Cooling and/or Super Freezing On.
The temperature in the Refrigerator Compartment or Freezer Compartment is too cold.
Temperature has been set too low.
Increase the temperature (see chapter Selecting the Temperature).
The light (LED) does not work.
The LED lamp is defective.
Call Customer Service.
Light switch is jammed.
Check whether it can be moved.
You experience unpleasant odors.
Strongly smelling food is not sealed.
Clean the appliance. Seal strongly smelling food (see chapter “Odors”).
Display indicates “E..”.
Electronics have detected a fault.
Call Customer Service.
Display indicates “LOWPOWER”.
The mains voltage falls below the permitted limiting value.
When the line voltage reaches the stipulated value again, the warning message goes out. If the warning message lasts for longer, inform the energy supply company.
Display indicates “HIGHVOLT”.
The line voltage exceeds the permitted limiting value.
When the line voltage reaches the stipulated value again, the warning message goes out. If the warning message lasts for longer, inform the energy supply company.
Condensation forms on the rail on the left door.
Condensation of warm air.
Switch on heater in the rail (see chapter “Special Functions“, section “Door Rail Heater“).
Ice maker
The Ice Maker doesn’t work.
Ice Maker is not connected to the power supply.
Call Customer Service.
Ice Maker does not contain any fresh water.
Ensure that the water is properly connected.
The Freezer Compartment temperature is too warm.
Check Freezer Compartment temperature and, if required, set slightly colder.
The Ice Maker does not make enough ice or the ice is deformed.
The appliance or Ice Maker has only just been switched On.
Approximately 24 hours is needed until ice production starts.
A lot of ice has been taken.
Approximately 24 hours is needed until the Ice Cube Container is filled again.
Low water pressure.
Connect the appliance to the stipulated water pressure only (see chapter “Connecting Appliance”, section “Water Connection”).
The Filter Cartridge is damaged or used.
Exchanging the Filter Cartridge.
The Ice Maker does not make any ice.
The Ice Maker is switched Off.
Switch the Ice Maker On at the control panel.
The appliance is not supplied with water.
Contact the installer or the Water Supply company.
Water Supply has kinks.
Turn Off the Water Supply at the Shut Off Tap. Smoothen out the kinks, exchange where necessary.
Low Water Pressure.
Connect the appliance to the stipulated water pressure only (see chapter “Connecting Appliance”, section “Water Connection”).
Temperature in the freezer space is too warm.
Check Freezer Compartment temperature and, if required, set slightly colder.
Ice Cube Container is not properly inserted.
Check the position, re-insert where necessary.
Incorrect Shut Off Tap installed.
Incorrect Shut Off Taps can cause low water pressure and damage to the appliance.
Ice forms in the inflow hose to the Ice Maker.
Low Water Pressure.
Connect the appliance to the stipulated water pressure only (see chapter “Connecting Appliance”, section “Water Connection”).
Shut Off Tap incorrectly opened.
Open Shut Off Tap fully.
Temperature in the Freezer Compartment is too warm.
Set temperature slightly colder in the Freezer Compartment.
Water runs from the appliance.
The Water Connection Hose is not properly sealed.
Replace the hose with a manufacturer’s original part.
Incorrect Shut Off Tap installed.
Incorrect taps can cause low water pressure and damage to the appliance.