Loading ...
Loading ...
Loading ...
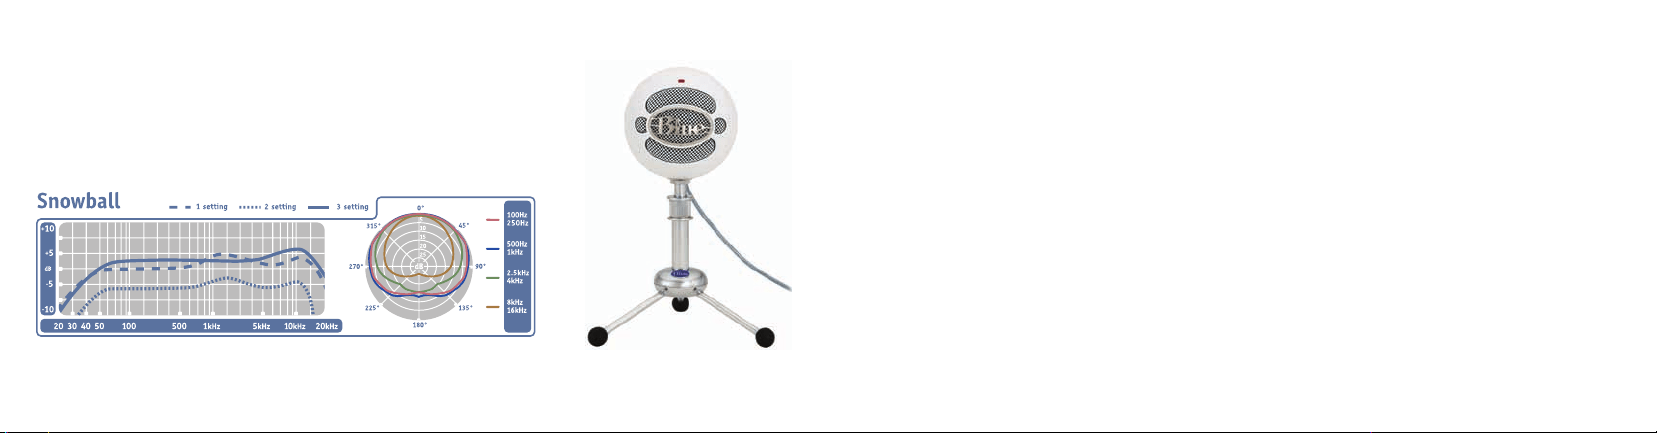
This frequency chart is only a start. It gives the recordist a basis of the sound provided. How the microphone reacts in a particular application will
differ greatly because of many variables. Room acoustics, distance from sound source (proximity), tuning of the instrument and mic cabling are only
a few of the interacting issues. For an artist or an engineer, how the microphones are used creates the basis of the sound.
Frequency Response
Polar Response
how to set up
The Snowball features a unique swivel mount located on the bottom center of the mic body. Be sure to
mount the Snowball on the Blue Snowball desktop tripod or on a standard-thread counter-weighted tripod
mic stand. For reduction of low-frequency rumble and additional positioning options, mount the Snowball
in the Blue Ringer, available from your authorized Blue dealer. Be sure to position the Snowball over the
center leg of the tripod to further prevent tipping. Once mounted, you can gently pivot the Snowball back
and forth for optimum positioning in front of the sound source.
Once safely mounted, connect the Snowball to the USB port on your Macintosh or Windows computer (the
Snowball is USB 2.0 compatible— see the right sidebar for full system requirements). Make sure that the
active, on-axis side of the diaphragm (the side with the BLUE logo) is facing the desired source. When
connected, the LED just above the Blue logo will glow red, indicating power has reached the Snowball and
it is ready to roll. For additional set-up information, FAQs about the Snowball and the latest news regarding
software compatibility, visit the Blue Microphones Snowball page at www.bluemic.com/products/snowball.
Loading ...
Loading ...
Loading ...