Documents: Go to donwload!
User Manual
- User Manual - (English, French)
- Wiring Diagram - (English)
- Product Specifications Sheet - (English)
- Energy Guide - (French)
- Specification Sheet - (French)
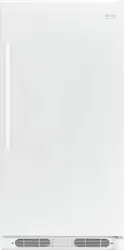
Use & Care for Frigidaire FFRU17B2QW
Table of Contents
- Product Registration
- Important Safety Instructions
- First Steps
- Setting the Temperature Control
- Optional FeaturesEnergy-Saving Tips
- Care and Cleaning
- Before You Call
- Major Appliance Warranty
FIRST STEPS
This Use & Care Guide provides general operating instructions for your model. Use the unit only as instructed in this Use & Care Guide. Before starting the unit, follow these important first steps.
Location
Choose a place that is near a grounded electrical outlet.
For the most efficient operation, the appliance should be located where surrounding temperatures will not exceed 110°F (43°C). The Freeze Control Feature is designed to automatically maintain the selected interior temperature within these boundaries.
Allow space around the unit for good air circulation. Leave a 3 inch (75 mm) space on all sides of the unit for adequate circulation.
NOTE : The exterior walls of the unit may become quite warm as the compressor works to transfer heat from the inside. Temperatures as much as 30° F warmer than room temperature can be expected. For this reason it is particularly important in hotter climates to allow enough space for air circulation around your appliance.
Leveling
The appliance must have all bottom corners resting firmly on a solid floor. The floor must be strong enough to support a fully loaded unit.
NOTE : It is very important for your appliance to be level in order to function properly. If the unit is not leveled during installation, the door may be misaligned and not close or seal properly, causing cooling, frost, or moisture problems.
To Level Your Appliance
After discarding crating screws, use a carpenter’s level to level the unit from front-toback. Adjust the plastic leveling feet in front, ½ bubble higher, so that the door closes easily when left halfway open.
To install the shelf grommet to the shelf:
- 1. With the wire shelf installed, press the shelf grommet down onto the wire that is anchored into the appliance wall. Be sure to keep the larger end of the shelf grommet away from the wall.
- 2. Push the shelf grommet onto the wire until it snaps in place.
- 3. Slide the shelf grommet into the grommet already in the unit wall until it is flush.
To install the handle clips to the basket:
- 1. Place the basket on a firm, flat surface.
- 2. With the narrow side of the handle clip on the inside of the basket, snap the handle clip to the recessed area in the basket.
- 3. Once the inside surface snaps in place, continue the process by rolling the handle clip slightly outward and pressing down firmly to snap onto the outside surface. If installed incorrectly, the handle clip will not lay flat.
Door Removal
If door must be removed, unplug the unit.
- Gently lay appliance on its back, on a rug or blanket.
- Remove 2 base screws and base panel.
- Remove wire from clips on bottom of cabinet if required.
- Unplug connector, if required, by holding the cabinet connector in place, and pulling door connector out.
- Remove bottom hinge screws.
- Remove plastic top hinge cover.
- Remove screws from top hinge.
- Remove top hinge from cabinet.
- Remove door and bottom hinge from cabinet.
- To replace door, reverse the above order and securely tighten all screws to prevent hinge slippage.
SETTING THE TEMPERATURE CONTROL
Cool Down Period
For safe food storage, allow 4 hours for the unit to cool down completely. The appliance will run continuously for the first several hours.
Temperature Control
The temperature control is located inside the unit. The temperature is factory preset to provide satisfactory food storage temperatures. However, the temperature control is adjustable to provide a range of temperatures for your personal satisfaction. If a colder temperature is desired, turn the temperature control knob toward COLDEST, and allow several hours for temperatures to stabalize between adjustments.
See other models: FFRA2822U2 FGGS3045KW FGF366EC FGGF3058RW FFRA0811Q1