• Press and hold for 3 seconds to switch on/off the unit.
Press to view the current battery level in power on status.
• Press repeatedly to switch between VOCAL ON and VOCAL OFF .
• Press repeatedly to switch the different DBB effect among in DBB1/DBB2/ DBB OFF .
•. Press to enter the bluetooth mode.
• Press and hold to disconnect bluetooth connection.
• Press repeatedly to change the different voice tone among voice1/voice2/ voice3/voice off.
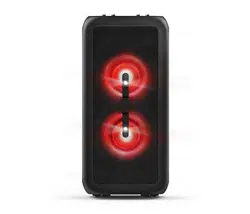
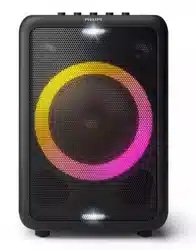
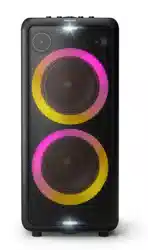
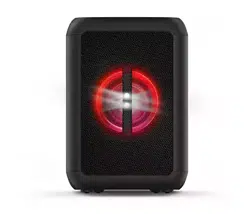
• Press repeatedly to switch among different light modes of LED indicator light on the speaker.
Press and hold to switch on/off the strobe light.
• Press to temporarily pause a playback; press it again to resume the playback.
• Press to skip to the nexttrack.
• Press to returnto the previoustrack.
• Press [VOLUME+] to turn up the volume.
• Press [VOLUME-] to turn down the volume.
• The volume that is used for karaoke or making announcements can be adjusted via the microphone volume knob.
•The microphone echo volume that is used for karaoke or making announcements can be adjusted via the microphone echo volume knob.
•The volume of your connected guitar can be controlled by guitar volume control knob on the top panel.
• An external microphone can be connected via microphone socket stereo jack for singing karaoke or for making announcements.
•The guitar socket on the top panel is used to connect aguitar.
•USB storage devices can be connected to the USB on the top panel for MP3 music.
MICROPHONE PLAYBACK
• Insert one microphone into the microphone socket on the top panel and adjust to a low level use the microphone volume knob on the top panel.
•Adjust the microphone volume and echo level to your desired level. Use the microphone volume knob on the top panel.
Now .enjoy the karaoke singingl
CHARGING OPERATION
• Use the AC power cord(included)to connect AC power input socket on the unit to AC power outlet. It is better to switch on the unit before charging in order to display battery charging status, The current charging-indicator light on the unit will flash during charging, when the unit appear four charging-indicator light on the unit will keep solid indicates that the battery has been fully charged.
Note: The built-in charging battery of the unit can also be charged in power off status and the unit can not display the charging status.
The Party Speaker will have the function of LED flash prompt when the battery level is low.
CHECK THE BATTERY LIFE
•The speaker is designed with as mart battery check feature for your convenience.
• Press the view battery level button to show the current battery level on the LED indicator of the unit in power on mode while the unit is no charging.
4 LED WHITElight up=app. 100% full
3 LED WHITElight up=app.75% full
2 LED WHITElight up=app. 50% full
1 LED WHITElight up=app. 25% full(indicating charging isneeded)
Get started
Caution
• Use of controls or adjustments or performance of procedures other than herein may result in hazardous laser exposure or other unsafe operation.
Connect
LINE IN
This unit has an audio input terminal. You can input the analog stereo audio signals from extra devices such as VCD, CD, VCR, MP3 player, etc.
Use the audio cable to connect the input terminal LINE IN on the top panel of this player, the unit switch to the LINE IN mode automatically.
GUITARIN connection
You can connect a guitar to this party speaker directly through the Guitar input socket on the top panel.
Use the 6.5mm (1/4") guitar connector connect the GUITAR IN socket on the top panel, then the volume of your connected guitar can be controlled by guitar volume control knob on the top panel.
Connect power
Caution
• Risk of product damage! Make sure that the power supply voltage corresponds to the voltage printed on the back or the underside of the product.
* Risk of electric shock! When you unplug the power cord, always pull the plug from the socket Never pull the cord.
Note
• Before connecting to AC power; make sure that you have completed all other connections.
Connect the AC power cord to the AC IN jack on the rear panel of the unit, then Plug the other end of the AC power cord into a power outlet.
Turn on
Press .
Press and hold for 3 seconds to switch on/off the unit.
Play from USB
Play from a USB storage device
Note
Make sure that the USB device contains playable audio contents in supported formats.
1. Press and hold for 3 seconds to switch on the unit.
2. Insert the USB plug of the device into the socket.
the unit switch automatically to USB play mode.
3. Press to select an audio track.
Play starts automatically.
Control play
In USB mode, follow the instructions below to control play.
Button
Action
Press to skip to the previous or next track
Increase/decrease volume.
Press to pause or resume play.
Play audio through Bluetooth
The product can stream music from your Bluetooth device to the system through Bluetooth.
Connect a device
Note
• Before pairing a device with this product, read its user manual for Bluetooth compatibility.
• The product can memorize a maximum of eight paired devices.The ninth paired device will replace the first one.
• Any obstacle between this product and a Bluetooth device can reduce the operational range. Keep away from any other electronic device that may cause interference.
• The operational range between this product and a Bluetooth device is approximately 10 meters (30 feet).
Connect a device manually
1. Press button to select the bluetooth mode.
2. On your Bluetooth device, enable Bluetooth and search for Bluetooth devices that can be paired (see the user manual of the device).
3. Select [ PHILIPS TANX100] displayed on your device for pairing.
After successful connection, the bluetooth indicator keep solid.
Play from Bluetooth device
After successful Bluetooth connection, play audio on the Bluetooth device.
Audio streams from your Bluetooth device to this product.
Disconnect a device
• Press and hold button for three seconds;
• Disable Bluetooth on your device;
• Move the device beyond the communication range
Note
• Before connecting another Bluetooth device, disconnect the current device first.
Adjust sound
Adjust volume
During play, press +VOL - to increase or decrease volume.
Enhance bass
Dynamic Bass Boost (DBB) setting is generated automatically for each EQ selection.You can manually select the DBB setting that best suits your listening environment.
• During play press DBB repeatedly to select:
• DBB 1
• DBB 2
• DBB OFF
Other features
Listen to an external device
With this product, you can listen to an external audio device such as an MP3 player
Play from an MP3 player
1. Press and hold for 3 seconds to switch on the unit.
2. Connect an audio input cable (not supplied) with a 3.5 mm connector on both ends to:
• the LINE IN socket on the product.
• the headphone socket on the MP3 player
• the unit switch to the LINE IN mode automatically.
3. Play audio on the MP3 player (refer to its user manual).
Turn decorative light on or off
In power-on mode, press LIGHT repeatedly to select a speaker light color or turn the light off:
In power on mode, press LIGHT repeatedly to switch among different light modes of LED indicator light on the speaker.
In power on mode, Press and hold to switch on/off the strobe light.
Product information
USB playability information
Compatible USB devices:
• USB flash memory (USB 2.0)
• USB flash players (USB 2.0)
• memory cards (requires an additional card reader to work with this unit)
Supported formats:
• USB or memory file format FAT12, FAT16, FAT32 (sector size: 512 bytes)
• MP3 bit rate (data rate): 32-320 Kbps and variable bit rate
• Directory nesting up to a maximum of 8 levels
• Number of albums/ folders: maximum 99
• Number of tracks/titles: maximum 999
• File name in Unicode UTF8 (maximum length: 128 bytes)
Unsupported formats:
• Empty albums: an empty album is an album that does not contain MP3 files, and is not be shown in the display.
• Unsupported file formats are skipped. For example, Word documents (.doc) or MP3 files with extension .dlf are ignored and not played.
• AAC.WAV, PCM audio files
• WMA files
Maintenance
Clean the cabinet
• Use a soft cloth slightly moistened with a mild detergent solution. Do not use a solution containing alcohol, spirits, ammonia or abrasives.
Supported MP3 formats
• Maximum title number: 999 (depending on file name length)
• Supported Bit-rates: 32-320 (kbps), variable bit rates
Troubleshooting
Caution
• Never remove the casing of this unit
To keep the warranty valid, never try to repair the system yourself. If you encounter problems when using this unit, check the following points before requesting service. If the problem remains unsolved, go to the Philips website. When you contact Philips, ensure that your unit is nearby and the model number and serial number are available.
No power
• Make sure that the AC power plug of the unit is connected properly
• Make sure that there is power at the AC outlet.
• To save power; the unit switches to standby automatically 15 minutes after a play reaches the end and no control is operated.
No sound or poor sound
• Adjust the volume.
No response from the unit
• Disconnect and reconnect the AC power plug, then turn on the unit again.
Cannot display some files in USB device
• The number of folders or files in the USB device has exceeded a certain limit.This phenomenon is not a malfunction.
• The formats of these files are not supported.
USB device not supported
• The USB device is incompatible with the unitTry another one.
About Bluetooth device
The audio quality is poor after connection with a Bluetooth-enabled device.
• The Bluetooth reception is poor Move the device closer to this product or remove any obstacle between them.
Cannot connect with the device.
• The Bluetooth function of the device is not enabled. Refer to the user manual of the device for how to enable the function.
• This product is already connected with another Bluetooth-enabled device. Disconnect that device and then try again.
The paired device connects and disconnects constantly.
• The Bluetooth reception is poor Move the device closer to this product or remove any obstacle between them.
• For some devices, Bluetooth connection may be deactivated automatically as a power-saving feature.This does not indicate any malfunction of this product.
Important
Safety
This 'boit of lightning' indicates uninsulated material within your unit may cause an electrical shock For the safety of everyone in your household, please do not remove product covering.
The 'exclamation point' calls attention to features for which you should read the enclosed literature closely to prevent operating and maintenance problems.
WARNING:To reduce the risk of fire or electric shock this apparatus should not be exposed to rain or moisture and objects filled with liquids, such as vases, should not be placed on this apparatus.
CAUTION:To prevent electric shock match wide blade of plug to wide slot, fully insert
Warning
• Never remove the casing of this device.
• Never lubricate any part of this device.
• Never place this device on other electrical equipment
• Keep this device away from direct sunlight naked flames or heat
• Never look into the laser beam inside this device.
• Ensure that you always have easy access to the power cord, plug, or adaptor to disconnect this device from the power.
• Do not use this apparatus near water
• Install in accordance with the manufacturer's instructions.
• Do not install near any heat sources such as radiators, heat registers, stoves, or other apparatus (including amplifiers) that produce heat.
• Protect the power cord from being walked on or pinched, particularly at plugs, convenience receptacles, and the point where they exit from the apparatus.
• Only use attachments/accessories specified by the manufacturer
• Use only with the cart, stand, tripod, bracket, or table specified by the manufacturer or sold with the apparatus. When a cart is used, use caution when moving the cart/apparatus combination to avoid injury from tip-over
• Unplug this apparatus during lightning storms or when unused for long periods of time.
• Refer all servicing to qualified service personnel. Servicing is required when the apparatus has been damaged in any way, such as power-supply cord or plug is damaged, liquid has been spilled or objects have fallen into the apparatus, the apparatus has been exposed to rain or moisture, does not operate normally, or has been dropped.
• Battery usage CAUTION -To prevent battery leakage which may result in bodily injury, property damage, or damage to the remote control:
• Install the battery correctly, + and - as marked on the remote control.
• Do not mix batteries (old and new or carbon and alkaline, etc.).
• Remove the battery when the remote control is not used for a long time.
• The battery shall not be exposed to excessive heat such as sunshine, fire or the like.
• Apparatus shall not be exposed to dripping or splashing.
• Do not place any sources of danger on the apparatus (e.g. liquid filled objects, lighted candles).
• Where the MAINS plug or an appliance coupler is used as the disconnect device, the disconnect device shall remain readily operable.
Caution
• Use of controls or adjustments or performance of procedures other than herein may result in hazardous laser exposure or other unsafe operation.
Hearing safety
Listen at a moderate volume.
• Using headphones at a high volume can impair your hearing.This product can produce sounds in decibel ranges that may cause hearing loss for a normal person, even for exposure less than a minute.The higher decibel ranges are offered for those that may have already experienced some hearing loss.
• Sound can be deceiving. Over time your hearing 'comfort level' adapts to higher volumes of sound. So after prolonged listening, what sounds 'normal' can actually be loud and harmful to your hearing.To guard against this, set your volume to a safe level before your hearing adapts and leave it there.
To establish a safe volume level:
• Set your volume control at a low setting.
• Slowly increase the sound until you can hear it comfortably and clearly, without distortion.
Listen for reasonable periods of time:
• Prolonged exposure to sound, even at normally 'safe' levels, can also cause hearing loss.
• Be sure to use your equipment reasonably and take appropriate breaks.
Be sure to observe the following guidelines when using your headphones.
• Listen at reasonable volumes for reasonable periods of time.
• Be careful not to adjust the volume as your hearing adapts.
• Do not turn up the volume so high that you can't hear what's around you.
• You should use caution or temporarily discontinue use in potentially hazardous situations.
Q: My tanx 100/37 won't turn on.its only five months old. How does the one year warranty work? Reply
Q: My tanx 100/37 won't turn on. It's only five months old. Fix it or tell about the one year warranty. Reply
Q: all 3 buttons stuck “on” power, dbb and light… the bluetooth is blinking and syncs with my phone but no volume. also it’s not responding and can not turn it off. how do i reset it? or turn it off? Reply


 .
. Press and hold for 3 seconds to switch on/off the unit.
 socket.
 to select an audio track.


 button to select the bluetooth mode.