Loading ...
Loading ...
Loading ...
First Steps Energy Saving Tips
.
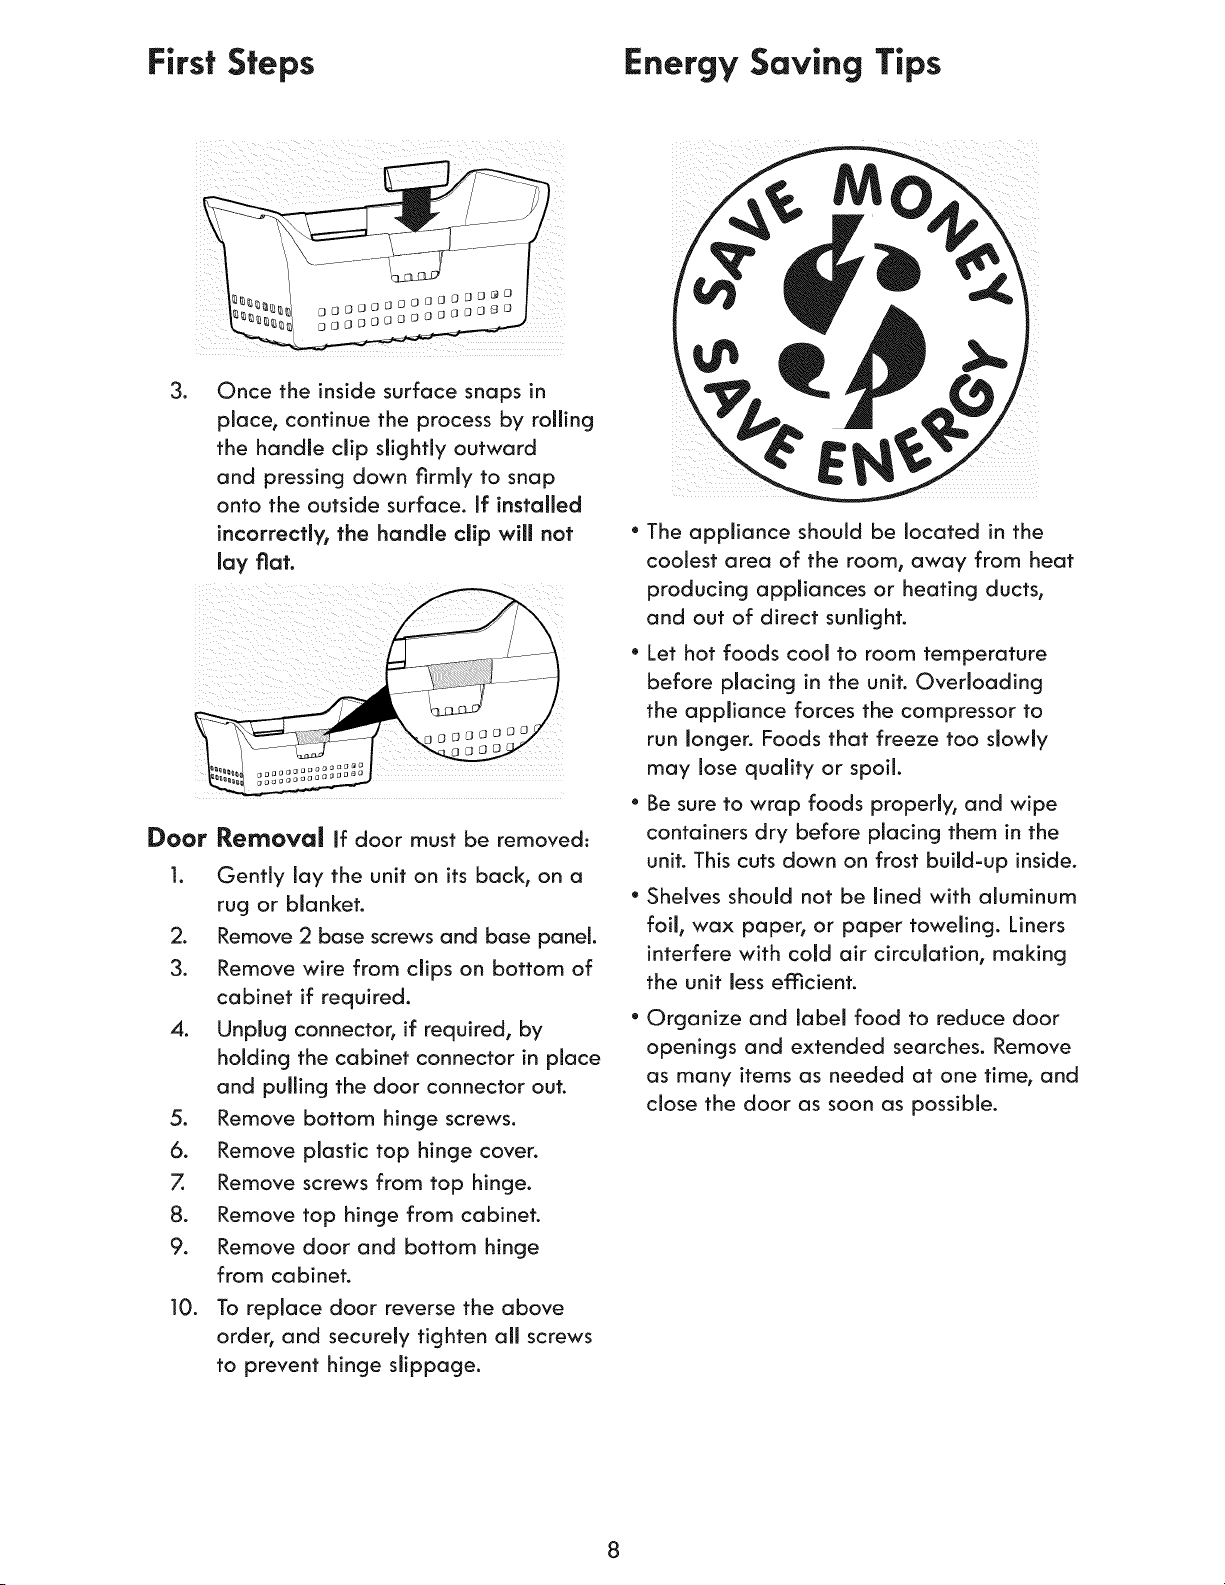
Once the inside surface snaps in
place, continue the process by roiling
the handle dip slightly outward
and pressing down firmly to snap
onto the outside surface. If installed
incorrectly, the handle clip will not
lay fiat.
Removed if door must be removed:
Gently lay the unit on its back, on a
rug or blanket.
2. Remove 2 base screws and base panel.
3. Remove wire from clips on bottom of
cabinet if required.
4. Unplug connector, if required, by
holding the cabinet connector in place
and pulling the door connector out.
5. Remove bottom hinge screws.
6. Remove plastic top hinge cover.
7. Remove screws from top hinge.
8. Remove top hinge from cabinet.
9. Remove door and bottom hinge
from cabinet.
10. To replace door reverse the above
order, and securely tighten all screws
to prevent hinge slippage.
• The appliance should be located in the
coolest area of the room, away from heat
producing appliances or heating ducts,
and out of direct sunlight.
• Let hot foods cool to room temperature
before placing in the unit. Overloading
the appliance forces the compressor to
run longer. Foods that freeze too slowly
may lose quality or spoil
• Be sure to wrap foods properly, and wipe
containers dry before placing them in the
unit. This cuts down on frost build-up inside.
• Shelves should not be lined with aluminum
foil, wax paper, or paper toweling. Liners
interfere with cold air circulation, making
the unit less efficient.
Organize and label food to reduce door
openings and extended searches. Remove
as many items as needed at one time, and
dose the door as soon as possible.
Loading ...
Loading ...
Loading ...