Loading ...
Loading ...
Loading ...
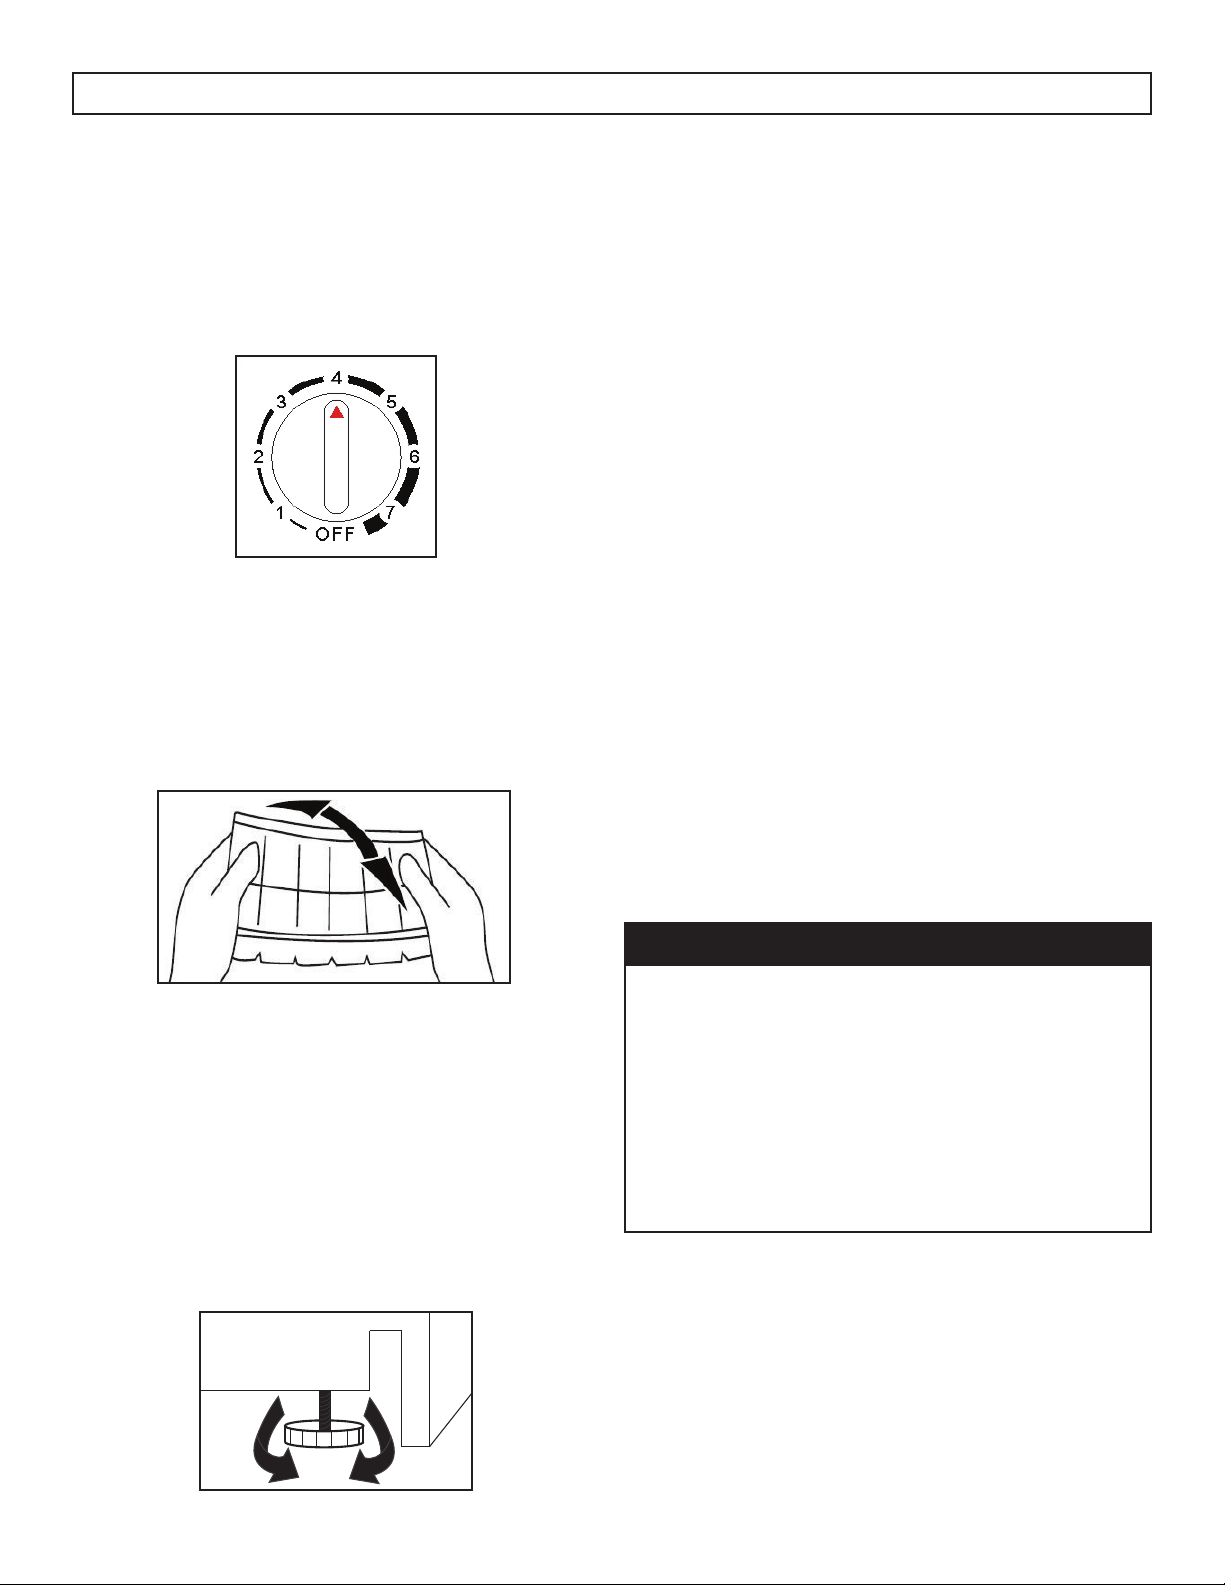
TEMPERATURE SELECTION
The temperature of the appliance can be adjusted
by turning the thermostat dial. The range of
temperature controls is from position “OFF”, or no
cooling, to “7”, the coldest setting. The setting “4”
should be satisfactory for home use.
4
ICE CUBE TRAY
The ice cube tray is fl exible. Twist the tray to remove
the ice cubes. If the ice cube tray becomes frozen
solid to the surface of the freezer, run a little water
over the tray to release it. Never use a knife or other
metal instruments to remove the ice cube tray or ice
build up as this may damage the evaporator.
DEFROSTING THE APPLIANCE
This appliance should be defrosted approximately
every 6 months or whenever the layer of frost in the
freezer compartment reaches 6 mm (1/4”) thick.
Remember to protect your fl oors during the
defrosting process by putting towels or a pan under
the appliance in case of leaking.
• Remove all food and set the thermostat to the
“OFF” or “0” position.
• Unplug the appliance and leave the door open.
• Ensure that the drip tray is under the evaporator
to collect melted water.
• After the frost has melted, discard the melted
water and leave the unit off with the door open
until the interior of the refrigerator is dry.
• After defrosting is complete, set the temperature
control to maximum for 2 to 3 hours before
returning to the desired temperature setting.
If the refrigerator will not be used for a long period
of time, disconnect the appliance from the electrical
supply and leave the door partially open. This will
help reduce mold and mildew build-up.
IMPORTANT
Never use sharp or pointed instruments to
remove ice from the freezer compartment.
The freezer compartment contains refrigerated
gas lines. If these lines are accidentally pierced it
will render the refrigerator inoperable and void
the manufacturer’s warranty.
Do not allow the refrigerator to continue
operation if the freezer compartment is pierced.
LEVELING INSTRUCTIONS
There is an adjustable leg on the bottom of the
appliance that can be turned up or down to ensure
that the appliance is level.
1. Move the appliance to its fi nal location.
2. Turn the leveling leg counter-clockwise as far as
it will go, until the top of the foot is touching the
bottom of the chassis.
3. Slowly turn the leveling leg clockwise until the
appliance is level.
OPERATING INSTRUCTIONS
Loading ...
Loading ...
Loading ...