Loading ...
Loading ...
Loading ...
Safety Instructions Operating Instructions Care and Cleaning Troubleshooting Tips Consumer Support
www.GEAppliances.com
Oven Light
(on some models)
Before replacing the bulb, disconnect
electrical power to the oven at the main
fuse or circuit breaker panel.
Let the bulb cool completely before
removing it. Replace the bulb with a
40-watt appliance bulb only. Do not touch
a hot bulb with a damp cloth because the
bulb will break.
15
Do not allow food spills with a high
sugar or acid content (such as
tomatoes, sauerkraut, fruit juices or
pie filling) to remain on the surface.
They may cause a dull spot even
after cleaning.
To clean the inside of the door:
■ Soap and water will normally do the
job. Heavy spattering or spillovers may
require cleaning with a mild abrasive
cleaner. Soap-filled steel wool pads may
also be used.
If necessary, you may use an oven cleaner. Follow
the package directions.
■ Clean the inside of the oven window
with a mild non-scratching cleaner and
a damp cloth.
To clean the outside of the door:
■ Use soap and water to thoroughly clean
the top, sides and front of the oven
door. Rinse well. You may also use a
glass cleaner to clean the glass on the
outside of the door. Do not let water
drip into the vent openings.
■ Spillage of marinades, fruit juices,
tomato sauces and basting materials
containing acids may cause
discoloration and should be wiped up
immediately. When surface is cool,
clean and rinse.
■ Do not use oven cleaners, cleaning
powders or harsh abrasives on the
outside of the door.
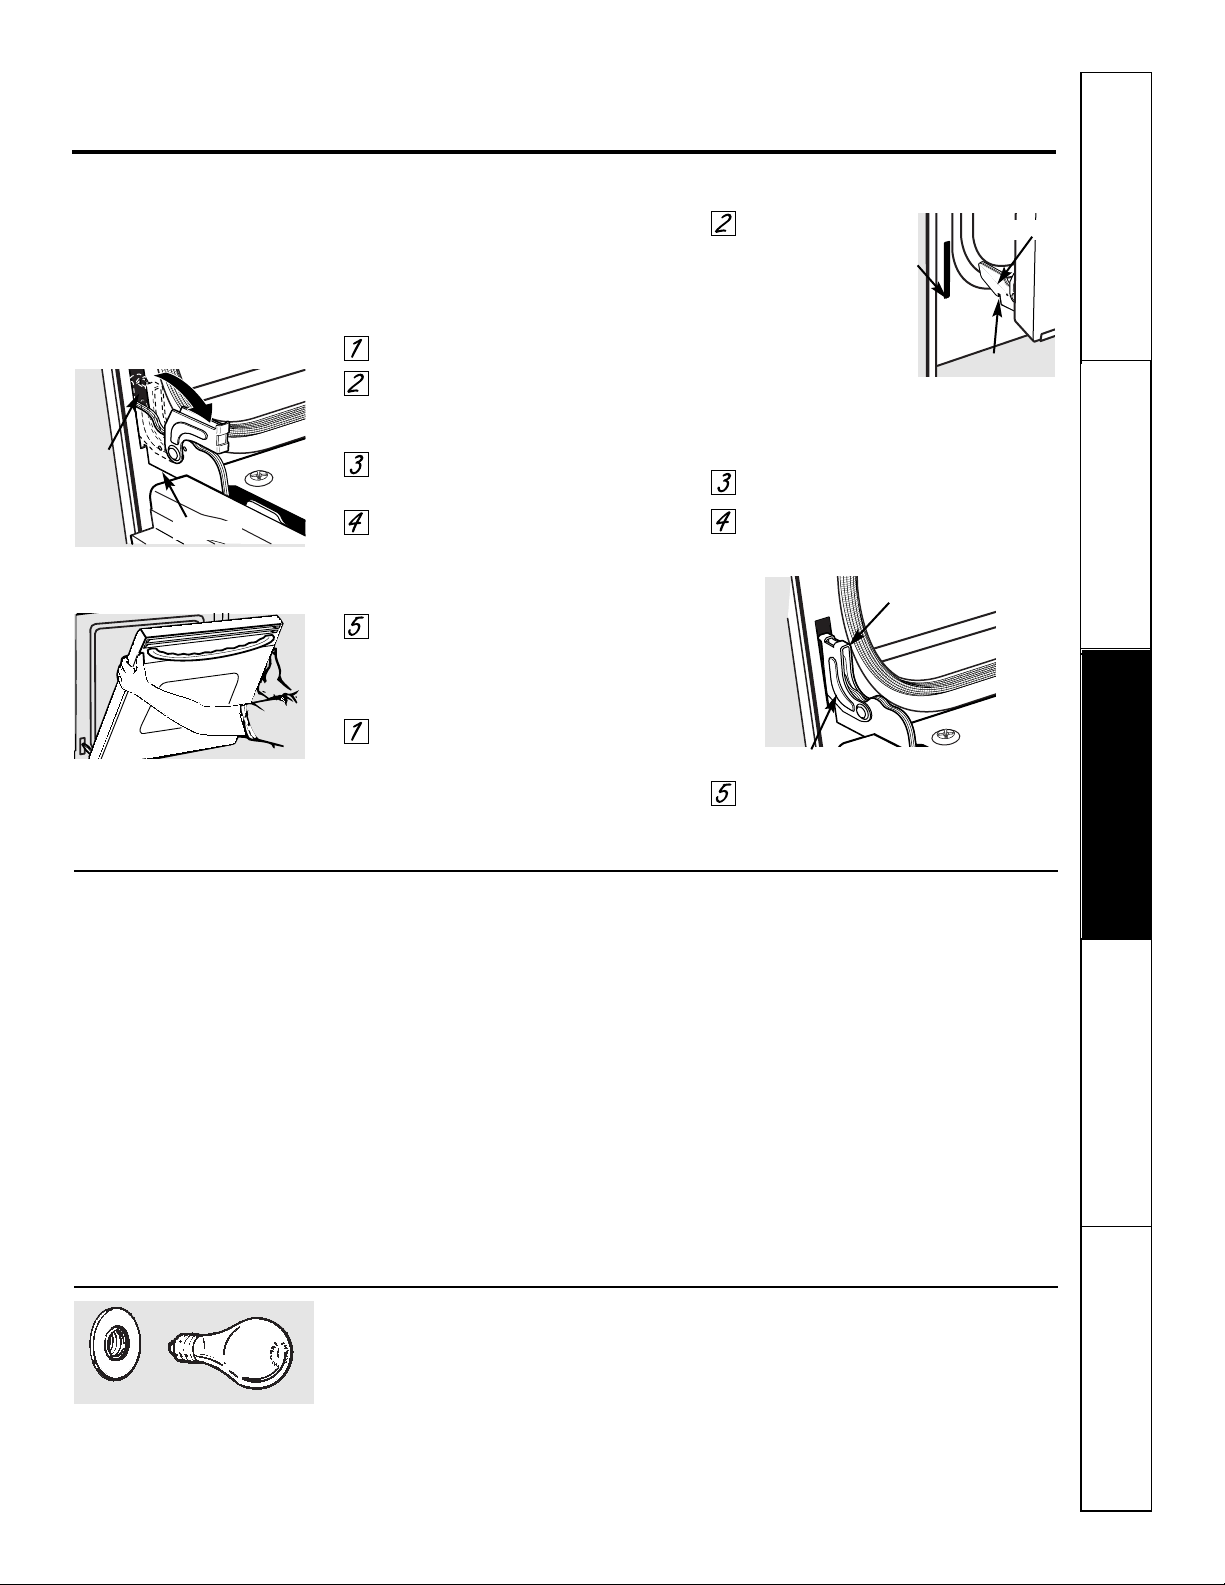
The oven door is removable for easier
access to the lightbulb.
Do not lift the door by the handle.
To remove the door:
Fully open the door.
Pull the hinge locks down toward
the door frame, to the unlocked
position. This may require a tool.
Firmly grasp both sides of the door
at the top.
Close door to the door removal
position, which is halfway between
the broil stop position and fully
closed.
Lift door up and out until the hinge
arm is clear of the slot.
To replace the door:
Firmly grasp both sides of the door
at the top.
With the door
at the same
angle as the
removal
position, seat the
indentation of the
hinge arm into the
bottom edge of the
hinge slot. The notch in the hinge
arm must be fully seated into the
bottom of the slot.
Fully open the door.
Push the hinge locks up against the
front frame of the oven cavity, to the
locked position.
Close the oven door.
Hinge lock (unlocked position)
Slot
Lift-Off Oven Door
Hinge arm
Removal position
Locked position
Sealed hinge arm
Hinge arm
Indentation
Bottom
edge
of slot
Loading ...
Loading ...
Loading ...