Loading ...
Loading ...
Loading ...
7
Setting Surface & Oven Controls
* These settings are based on using medium-weight metal or aluminum
pans with lids. Settings may vary when using other types of pans. The color
of the flame is the key to proper burner adjustment. A good flame is clear, blue and
hardly visible in a well-lighted room. Each cone of flame should be steady and
sharp. Adjust or clean burner if flame is yellow-orange.
For Electric Ignition models ONLY: In
the event of an electrical power outage,
the surface burners can be lit manually.
To light a surface burner, hold a lit match
to the burner head, then slowly turn the
Surface Control knob to LITE. After
burner lights push in and turn knob to
desired setting. Use CAUTION when
lighting surface burners manually.
*Flame Size Type of Cooking
High Flame Start most foods; bring water to a boil; pan broiling.
Medium Flame Maintain a slow boil; thicken sauces, gravies; steaming.
Low Flame Keep foods cooking; poach; stewing.
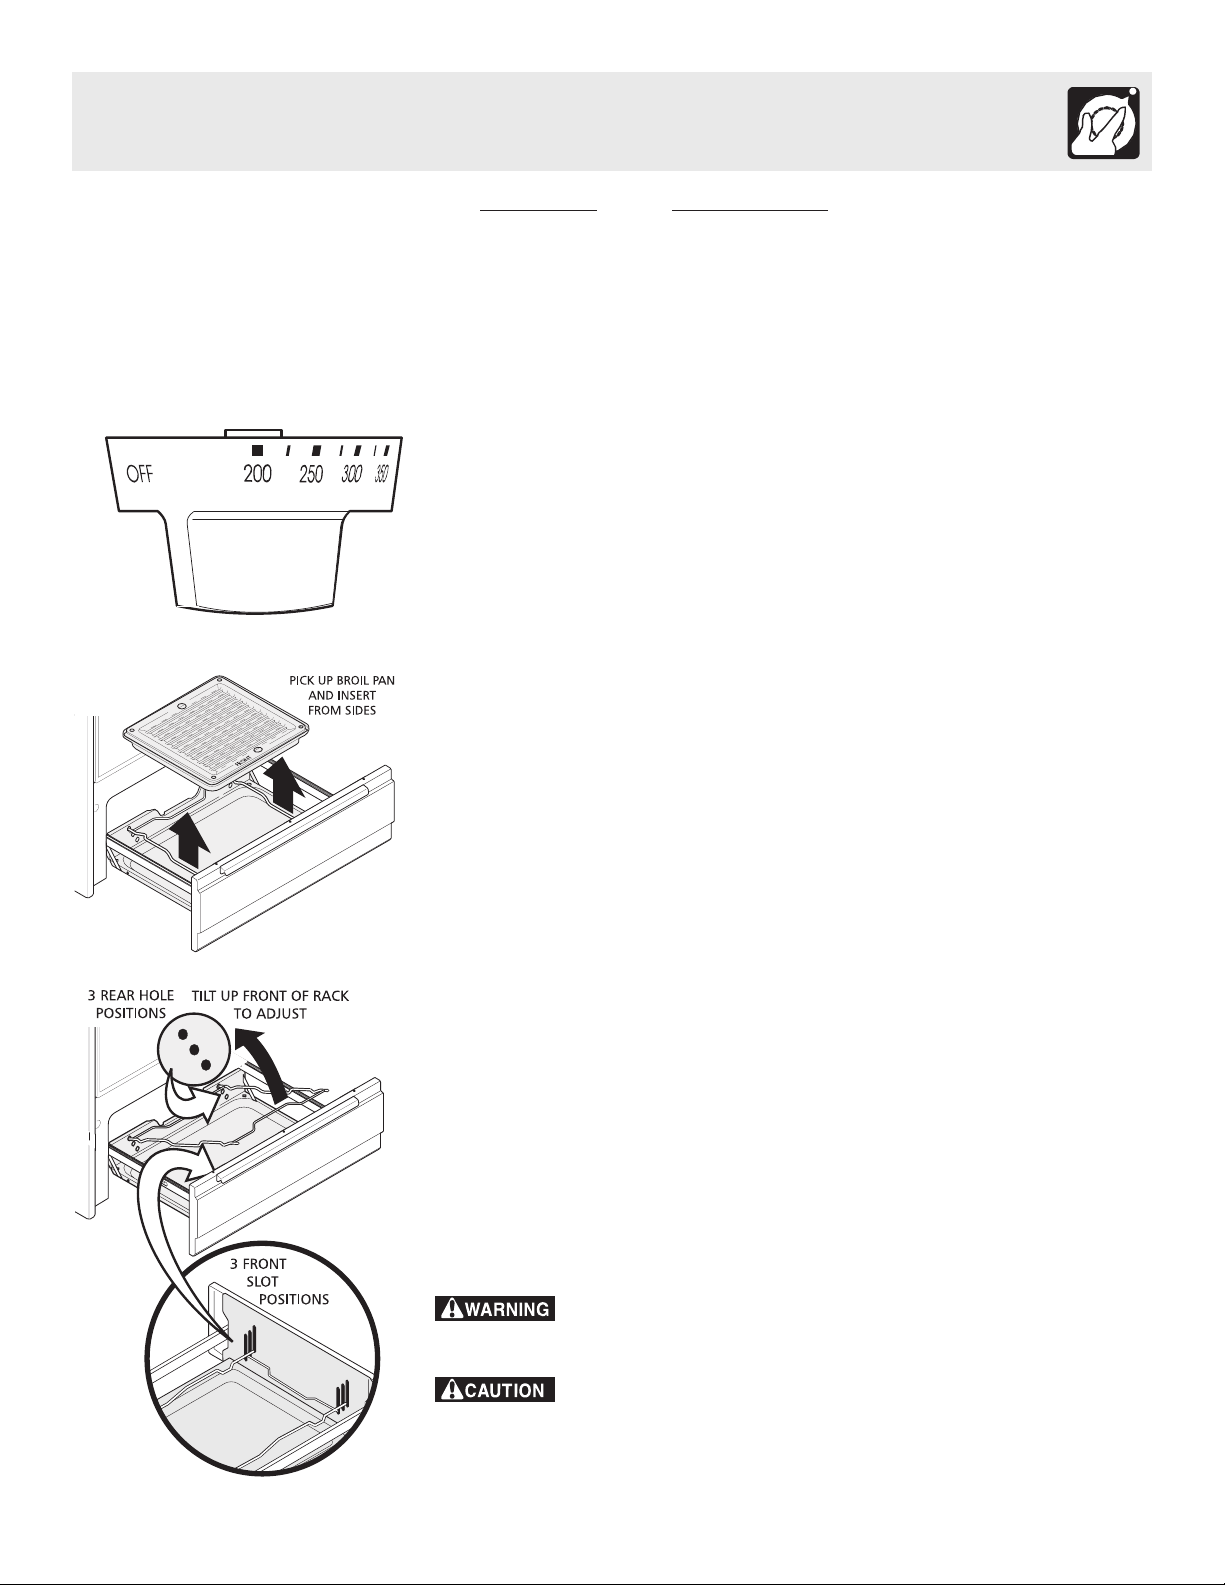
Note: The graphics shown for the oven control knob may not look identical to the knob
on your range. The illustration is representational (See Fig. 1).
Bake
1. Arrange oven racks while the oven is still cool. See "Arranging Oven Racks" under
Before Setting Oven Controls.
2. Push in and turn the Temperature Control knob to the desired temperature.
3. Preheat the oven for 10 to 12 minutes before baking. Preheating is not necessary
when roasting, cooking casseroles or broiling most foods.
4. When cooking is finished, turn the Temperature Control knob to OFF.
Fig. 1
Broil
1. Slide broiler drawer out to the stop position.
2. Remove broiler pan & insert (Fig. 2).
3. Always position rack before setting control, while range is cool.
4. Position rack by tilting front of rack up and pulling rack out from locating holes in
rear of broiler drawer. Reposition back of rack in the desired locating holes and
allow front of rack to slide down into the corresponding slots in front of broiler
drawer (Fig. 3).
For rare meats, position the rack closer to the burner (upper position).
For medium foods use middle position.
For well-done foods such as chicken, lobster tails or thick cuts of meat, position
the rack further from the burner (lower position).
5. Place insert on broiler pan, then place meat on insert. DO NOT use the broiler
pan without the insert. DO NOT cover the insert with aluminum foil. The exposed
fat could ignite.
6. Place broiler pan on rack; make sure the broiler pan and insert is positioned as
shown (Fig. 2). Be sure front of pan is positioned correctly in rack.
7. Slide the broiler drawer all the way into the range.
8. Push in and turn the Temperature Control knob to BROIL.
9. Broil on one side until food is browned; turn and cook on the second side. Season
and serve. ALWAYS pull the broiler drawer out to the stop position before turning
or removing food.
10. When broiling is finished, turn the Temperature Control knob to OFF.
11. When removing broiler pan from broiler drawer always use pot holders.
DO NOT use the broiler drawer for storage. Items placed in the broiler
drawer will catch fire.
Should a broil fire occur, leave the broiler drawer closed and turn the
oven OFF. If the fire continues, throw baking soda on the fire or use a fire extinguisher.
DO NOT put water or flour on the fire. Flour may be explosive.
Fig. 2
Fig. 3
Loading ...
Loading ...
Loading ...