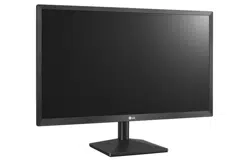
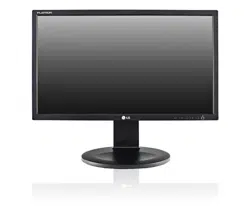
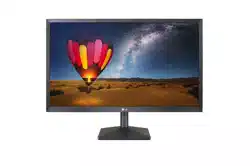
LG 22MN430M-B 22” Fhd Ips Monitor
Product's Documents
Below are documents related to this product, you can read online or download:
- Owner's manual - (English) Read Online | Download pdf
CAUTION:
NOTE:
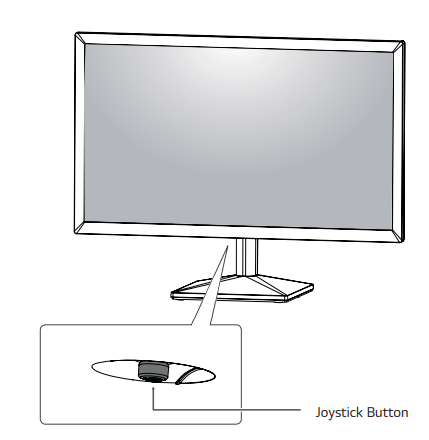
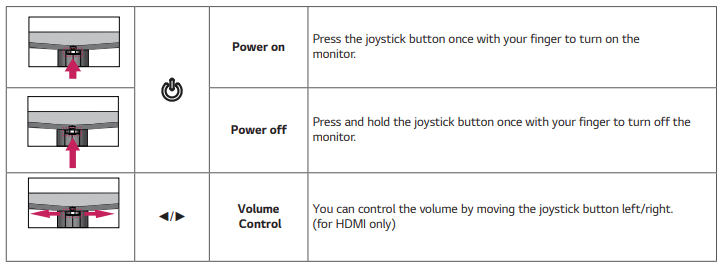
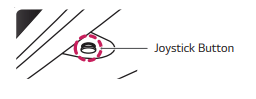
How to Use the Joystick Button
You can easily control the functions of the monitor by pressing the joystick button or moving it left/right with your finger.
Basic Functions
NOTE:

CAUTION:
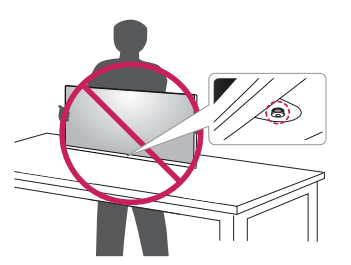
Mounting on a table
CAUTION:
WARNING:
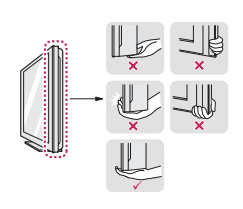
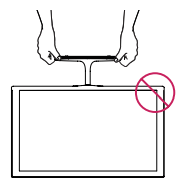
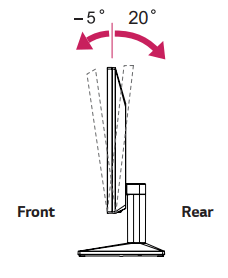
When you adjust the angle, do not hold the bottom of the Monitor set frame as shown on the following illustration, as may injure your fingers.
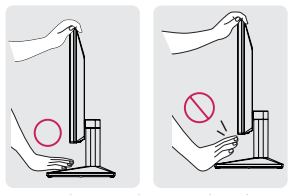
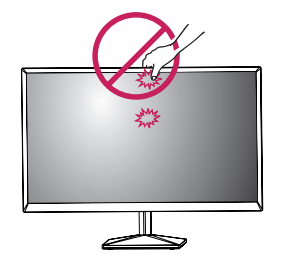
Do not touch or press the screen when adjusting the angle of the monitor.
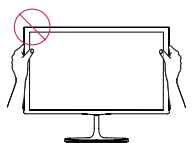
Do not hold this set like below picture.Monitor screen can detach from stand base and injure your body.
NOTE:
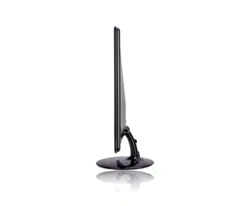
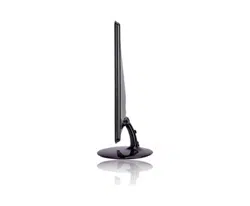
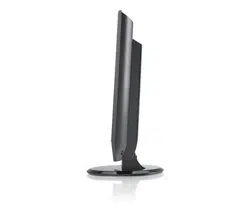
The angle of the screen can be adjusted forward or backward from -5° to 20° for a comfortable viewing experience.
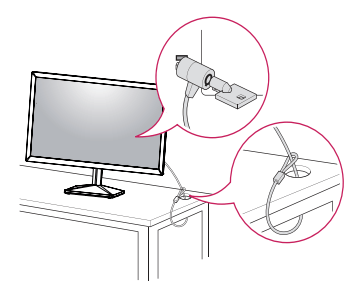
Using the Kensington security system
The Kensington security system connector is located at the back of the Monitor set. For more information of installation and using, refer to the manual supplied with the Kensington security system. Connect the Kensington security system cable between the Monitor set and a table.
NOTE:
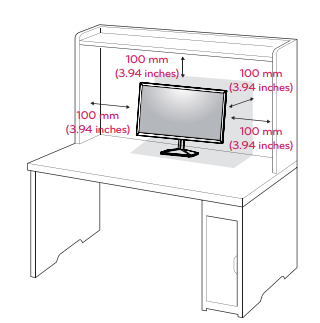
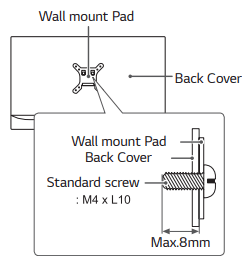
Mounting on a wall
For proper ventilation, allow a clearance of 100 mm (3.94 inches) on each side and from the wall. Detailed instructions are available from your dealer, see the optional Tilt Wall Mounting Bracket Installation and Setup Guide.

If you intend to mount the Monitor set to a wall, attach Wall mounting interface (optional parts) to the back of the set.
When you install the Monitor set using a wall mounting interface (optional parts), attach it carefully so it will not drop.
CAUTION:
Disconnect the power cord first, and then move or install the Monitor set. Otherwise electric shock may occur.
NOTE:
D-SUB connection
Transmits analog video from your PC to the Monitor set.
NOTE:
When using a D-Sub signal input cable connector for Macintosh
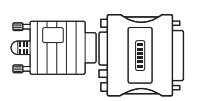
Mac adapter: For Apple Macintosh use, a separate plug adapter is needed to change the 15 pin high density (3 row) D-SUB VGA connector on the supplied cable to a 15 pin 2 row connector.
HDMI connection
Transmits the digital video and audio signals from your PC to the Monitor set.
NOTE:
NOTE:
HDMI connection
Transmits the digital video and audio signals from your AV devices to the monitor.
NOTE:
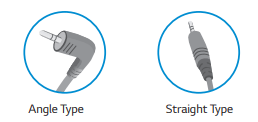
Connecting Headphones
Connect peripherals to the monitor via the headphones port. Connect as illustrated.
NOTE:
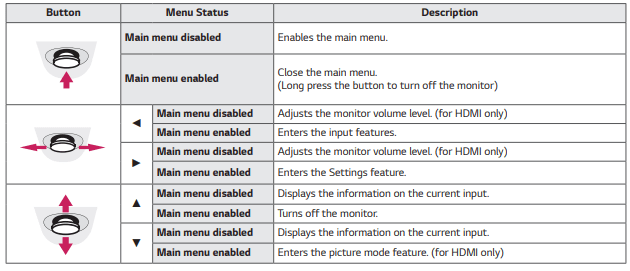
Main Menu FeaturesD
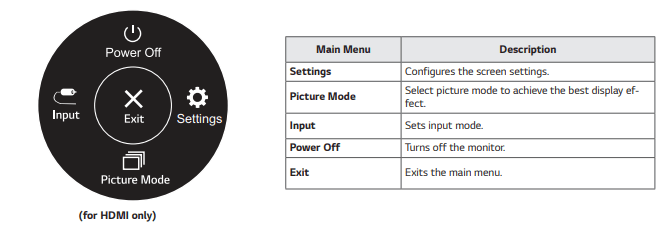
1. Settings > Quick Settings:
Brightness,Contrast: Adjusts the contrast and brightness of the screen.
Volume: Adjusts the volume.(for HDMI only)
NOTE: You can adjust Mute/ Unmute by moving the joystick button to ▼ in the Volume menu.
Settings > Input:
Input List: Selects the input mode.
Aspect Ratio: Adjusts the aspect ratio of the screen.
Full Wide: Displays the video in wide-screen, regardless of the video signal input.
Original: Displays video according to the aspect ratio of the video signal input.
NOTE: The options may disabled at the recommended resolution (1920 x 1080).
2. Settings > Picture:
Picture Mode
Custom: Allows the user to adjust each element. The color mode of the main menu can be adjusted.
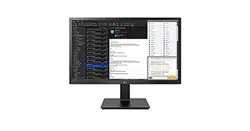
Reader: Optimizes the screen for viewing documents. You can brighten the screen in the OSD menu.
Photo: Optimizes the screen to view photos.
Cinema: Optimizes the screen to improve the visual effects of a video.
Color Weak- ness: This mode is for users who cannot distinguish between red and green. It enables users with color weakness to easily distinguish between the two colors.
Game: Optimizes the screen for gameplay.
Picture Adjust
Brightness,Contrast: Adjusts the contrast and brightness of the screen.
Sharpness: Adjusts the sharpness of the screen.
SUPER RESOLUTION+:
High: Optimized picture quality is displayed when a user wants crystal clear images. It is effective forhigh quality video or game.
Middle: The optimized picture quality is displayed when a user wants images between low and high modes for comfortable viewing. It is effective for UCC or SD video.
Low: The optimized picture quality is displayed when a user wants smooth and natural images. It is effective for slow -moving pictures or still images.
Off: Select this option for everyday viewing. SUPER RESOLUTION+ is turned off in this mode.
Black Level:
Sets the offset level (for HDMI only).
High: Keeps the current contrast ratio of the screen.
Low: Lowers the black levels and raises the white levels from the current contrast ratio of the screen.
DFC:
On: Adjusts the brightness automatically according to the screen.
Off: Disables the DFC feature.
NOTE:
Game Adjust:
Response Time: Sets a response time for displayed pictures based on the speed of the screen. For a normal environment, it is recommended that you use Fast. For a fast-moving picture, it is recommended that you use Faster. Setting to Faster may cause image sticking.
Faster: Sets the response time to faster.
Fast: Sets the response time to fast.
Normal: Sets the response time to normal.
Off: Does not use the response time improvement feature.
FreeSync: Provides seamless and natural images by synchronizing the vertical frequency of the input signal with that of the output signal.
CAUTION:
On: FreeSync function on.
Off: FreeSync function off
Black Stabilizer: You can control the black contrast to have better visibility in dark scenes. Increasing the Black Stabilizer value brightens the low gray level area on the screen. (You can easily distinguish objects on dark game screens.) Reducing the Black Stabilizer value darkens the low gray level area and increases the dynamic contrast on the screen.
Cross Hair: Cross Hair provides a mark on the center of the screen for First Person Shooter(FPS) games. Users can select the cross hair that fits their gaming environment among four different cross hairs.
Color Adjust:
Gamma:
Mode 1, Mode 2, Mode 3: The higher the gamma value, the darker the image becomes. Likewise, the lower the gamma value, the lighter the image becomes.
Mode 4: If you do not need to adjust the gamma settings, select Mode 4.
Color Temp:Selects the factory default picture color.
Warm: Sets the screen color to a reddish tone.
Medium: Sets the screen color between a red and blue tone.
Cool: Sets the screen color to a bluish tone.
Custom: The user can adjust it to red, green or blue by customization.
Red/Green/ Blue: You can customize the picture color using Red, Green, and Blue colors.
Configuration Adjust (D-SUB only)
Horizontal: To move image left and right.
Vertical: To move image up and down.
Clock: To minimize any vertical bars or stripes visible on the screen background.The horizontal screen size will also change.
Phase: To adjust the focus of the display. This item allows you to remove any horizontal noise and clear or sharpen the image of characters.
Resolution (D-SUB only)
User can set the desired resolution.This option is enabled only when the screen resolution on your computer is set to the following(D-SUB only).
NOTE: The function is enabled only when the screen resolution on your computer is set to the following, except that the PC output wrong resolution.
1024x768, 1280x768, 1360x768, 1366x768,Off 1280x960, 1600x900,Off 1440x900, 1600x900,Off
Picture Reset: Do you want to reset your settings?
No: Cancel the select.
Yes: Returns to the default settings.
Language: To choose the language in which the control names are displayed.
SMART ENERGY SAVING:
High: Saves energy using the high-efficiency SMART ENERGY SAVING feature.
Low: Saves energy using the low-efficiency SMART ENERGY SAVING feature.
Off: Disables the SMART ENERGY SAVING feature.
Automatic Standby: The monitor will automatically switch to standby mode after a certain period.
OSD Lock: Prevents incorrect key input.
On: Key input is disabled.
NOTE: All function except for the OSD Lock mode, brightness, Contrast, Input, Information and Volume are disabled.
Off: Key input is enabled.
Information: The display information will be shown the Model, Serial Number, Total Power On Time, Resolution.
Reset: Do you want to reset your settings?
No: Cancel the select.
Yes: Returns to the default settings.
NOTE: Saving Data depends on the Panel. So, those values should be different from each panel and panel vendor. If you select the option of SMART ENERGY SAVING is High or Low, monitor luminance become lower or higher depend on source.
No image appears
Is the power cord of the display connected?
Do you see an "Out of Range" message on the screen?
Do you see a "NO SIGNAL" message on the screen or black screen?
Can't you control some functions in OSD?
Can't you select some menu in OSD?
CAUTION:
Display image is incorrect
The screen color is mono or abnormal.
The screen blinks.
Do you see an "Unrecognized monitor, Plug&Play (VESA DDC) monitor found" message?
Have you installed the display driver?
The screen is flickering.
Did you select the recommended resolution?

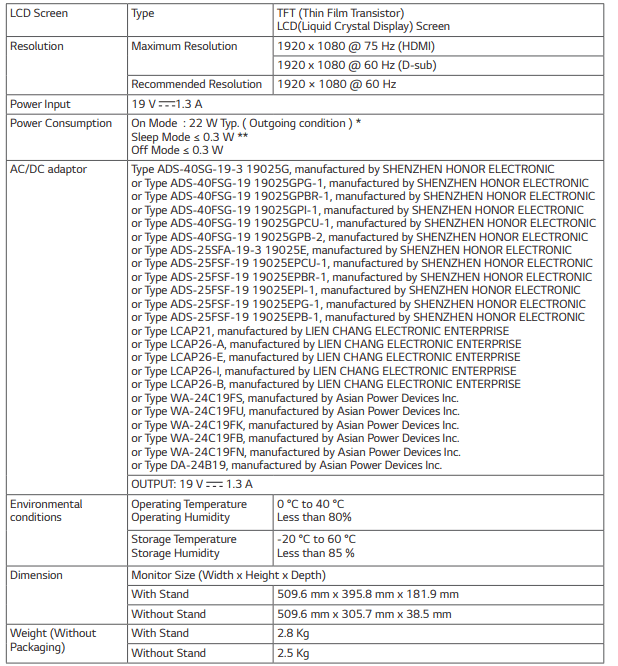
Product specifications shown above may be changed without prior notice due to upgrade of product functions.
* The power consumption level can be different by operating condition and monitor setting.
* The On mode power consumption is measured with LGE test standard(Full White pattern , Maximum resolution).
** The monitor goes to the Sleep Mode in a couple of minutes(Max 5 minutes).
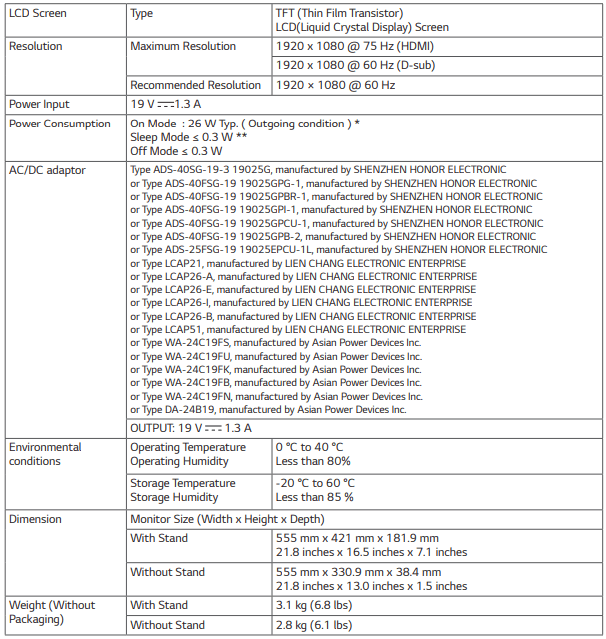
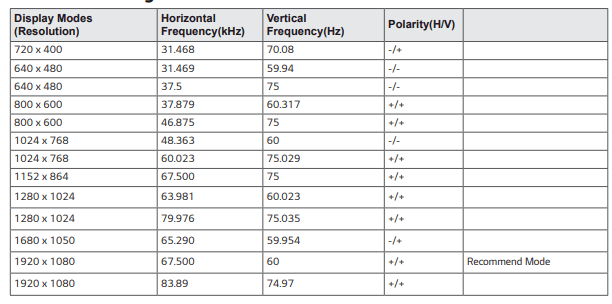
D-sub PC Timing
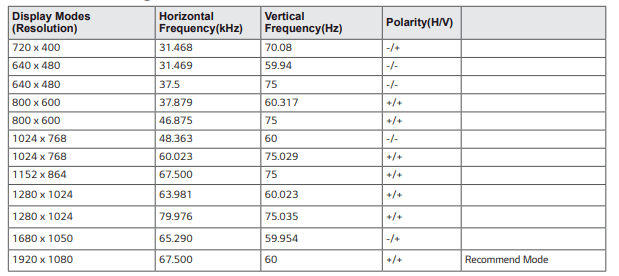
HDMI PC Timing
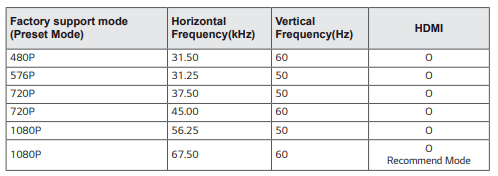
HDMI AV Timing
Reference file: LG 22MN430M-B 22” Fhd Ips Monitor
Additionally, the document applies to other LG Electronics models: 22MN430M, 24ML44B