Loading ...
Loading ...
Loading ...
1
2
3
4
5
6
7
8
9
10
11
12
13
14
15
ENGLISH
CD-DD4500
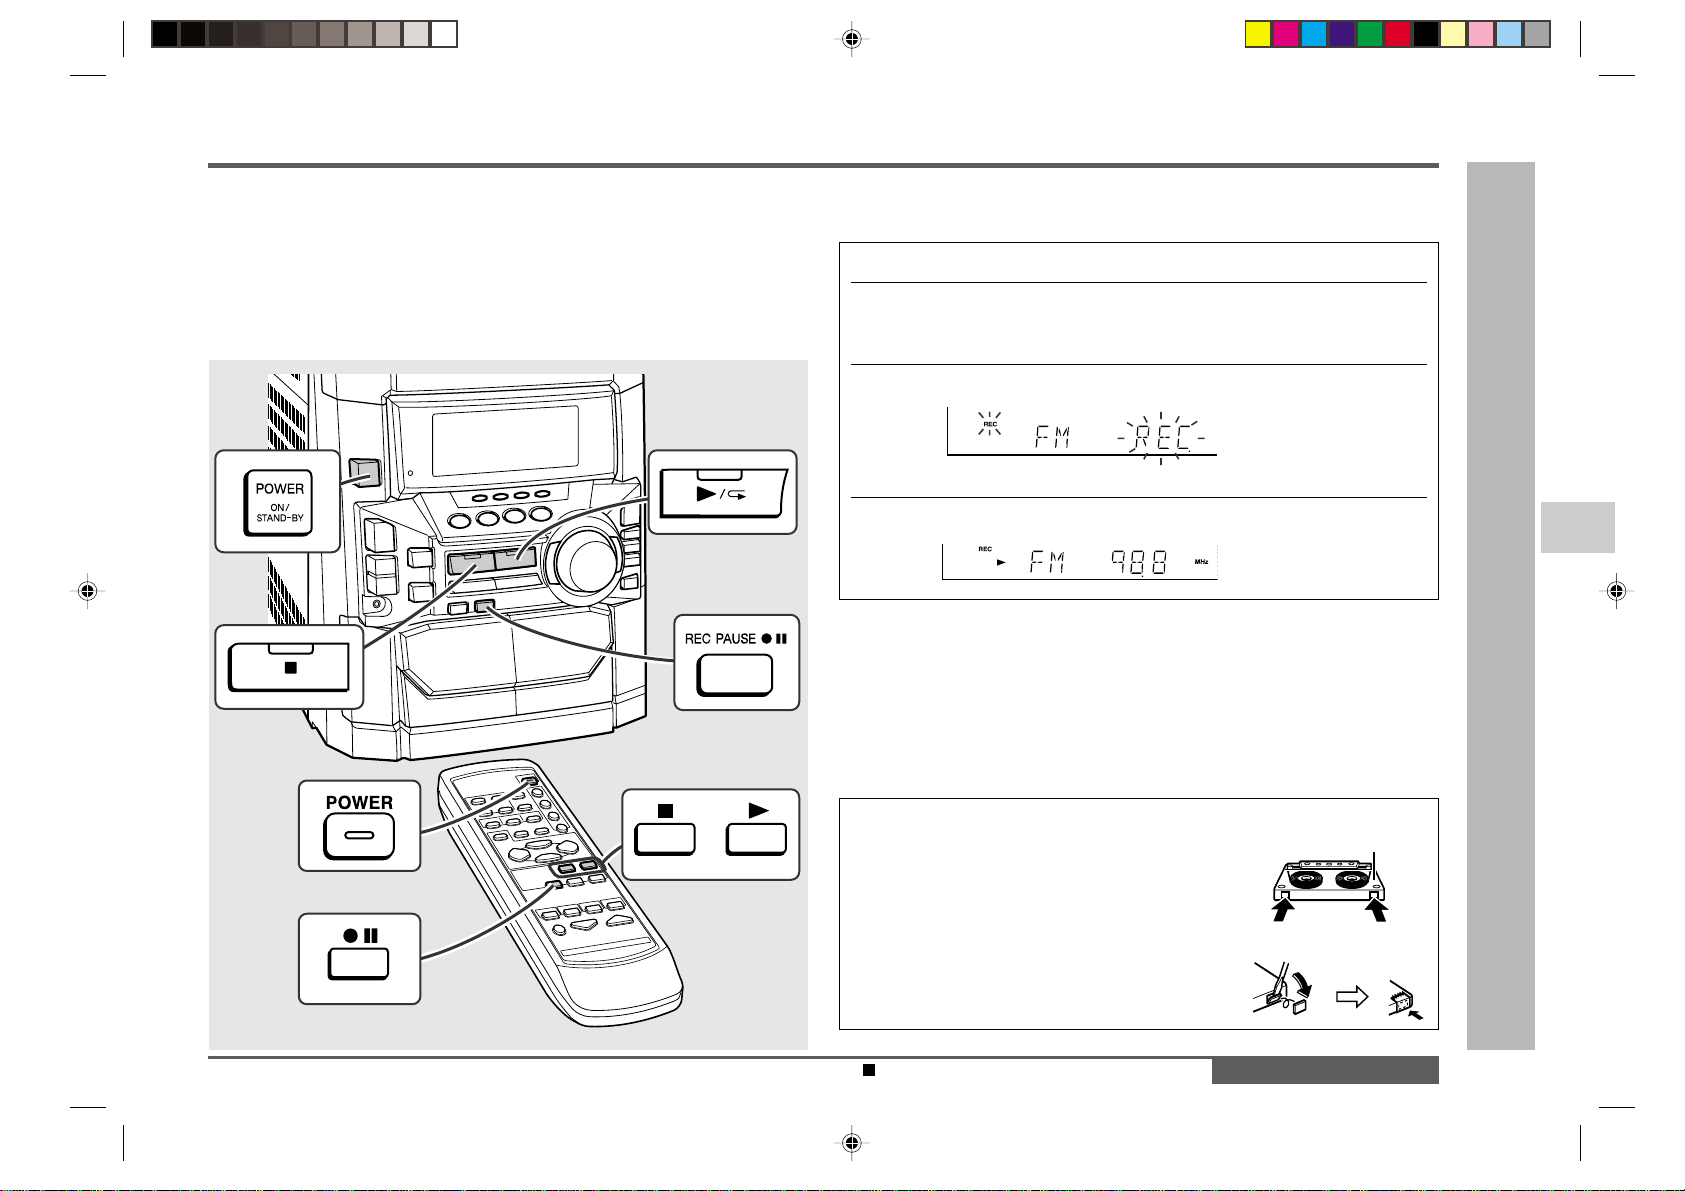
Tape Recording
– Recording from the Radio –
1 Tune in to the desired station (see page 19).
2 Load a cassette into the TAPE 2 cassette compartment with the
side to be recorded on facing you.
Wind past the leader of the tape, on which recording cannot be performed.
3 Press the REC PAUSE
I6 I6
I6 I6
I6 (
I6I6
I6I6
I6) button.
Recording will be paused.
4 Press the
0/R0/R
0/R0/R
0/R (
0 0
0 0
0 ) button to start recording.
To interrupt recording:
Press the REC PAUSE I6 (I6) button.
To resume recording, press 0/R ( 0 ) button.
To stop recording:
Press the ■ (TAPE ■) button.
Note:
If you hear a whistling noise whilst recording an AM station, move the AM loop aerial.
Recording from the Radio
Erase-prevention tab of cassette tapes:
● When recording on a cassette tape, make sure
that the erase-prevention tabs are not re-
moved.
Cassettes have removable tabs that prevent
accidental recording or erasing.
●
To protect the recorded sound, remove the tab
after recording.
Cover the tab hole with adhesive tape to record
on the tape without the tab.
Side A
Tab for side ATab for side B
Recording can be operated in the TAPE 2 compartment. The TAPE 1 is for playback
only.
Listening to the Radio (See page 19.)
Before recording:
● When recording important selections, make a preliminary test to ensure that the
desired material is properly recorded.
● SHARP is not liable for damage or loss of your recording arising from malfunction of
this unit.
● The volume and sound controls can be adjusted with no effect on the recorded
signal (Variable Sound Monitor).
● For recording, use only normal tapes. Do not use metal and CrO2 tapes.
E-22
Downloaded from: http://www.usersmanualguide.com/
Loading ...
Loading ...
Loading ...