Loading ...
Loading ...
Loading ...
9
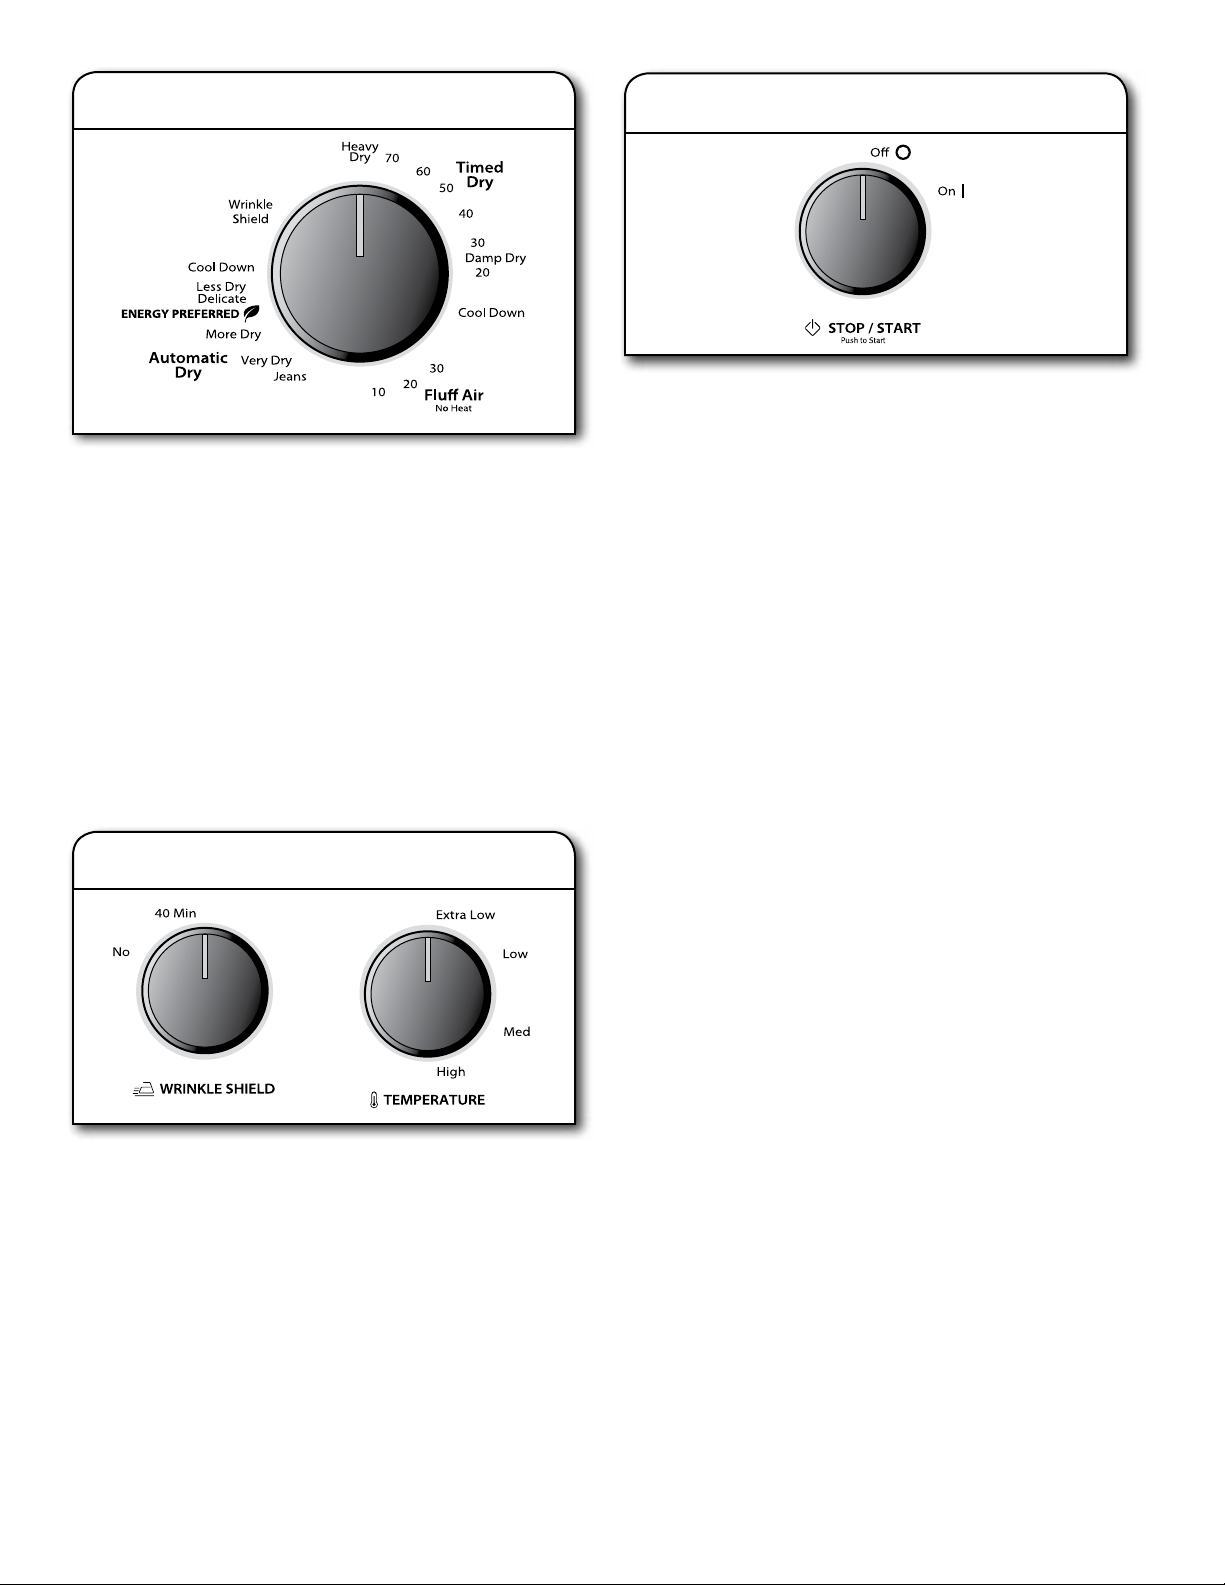
5. Press STOP/START to begin cycle
Press and hold the Stop/Start knob to begin the cycle.
To end the cycle early, turn the Stop/Start knob to OFF.
Promptly remove garments after cycle has completed to reduce
wrinkling. Use the Wrinkle Shield feature to avoid wrinkling
when you are unable to remove a load from the dryer as soon
as it stops.
4. Set cycle settings and options
Select cycle settings and options by turning the knob to the
desired position.
NOTE: Not all options and settings are available with all cycles.
Temperature
Turn the Temperature knob to change the drying temperature
setting. See “Setting the Drying Temperature.”
Wrinkle Shield feature (on some models)
Get 40 minutes of heat-free, periodic tumbling at the end
of a cycle. Turn the Wrinkle Shield knob to select NO
to turn off at any time before the cycle has ended.
3. Select the desired cycle
Select the desired cycle for your load. See the “Cycle Guide”
for more information about each cycle.
AUTOMATIC DRY Cycles
You can select a different dryness level, depending on your
load, by turning the knob to dryness level.
Selecting More Dry or Very Dry, Energy Preferred, or Less Dry
automatically adjusts the dryness level at which the dryer will
shut off. Once a dry level is set, it cannot be changed without
stopping the cycle.
Automatic Dry cycles give the best drying in the shortest time.
Drying time varies based on fabric type, load size, and dryness
setting.
NOTE: More Dry or Very Dry removes more load moisture.
Choose Energy Preferred for optimal energy savings. Less Dry
removes less moisture and is used for loads you may want to
put on a hanger to complete drying.
Loading ...
Loading ...
Loading ...