Loading ...
Loading ...
Loading ...
10
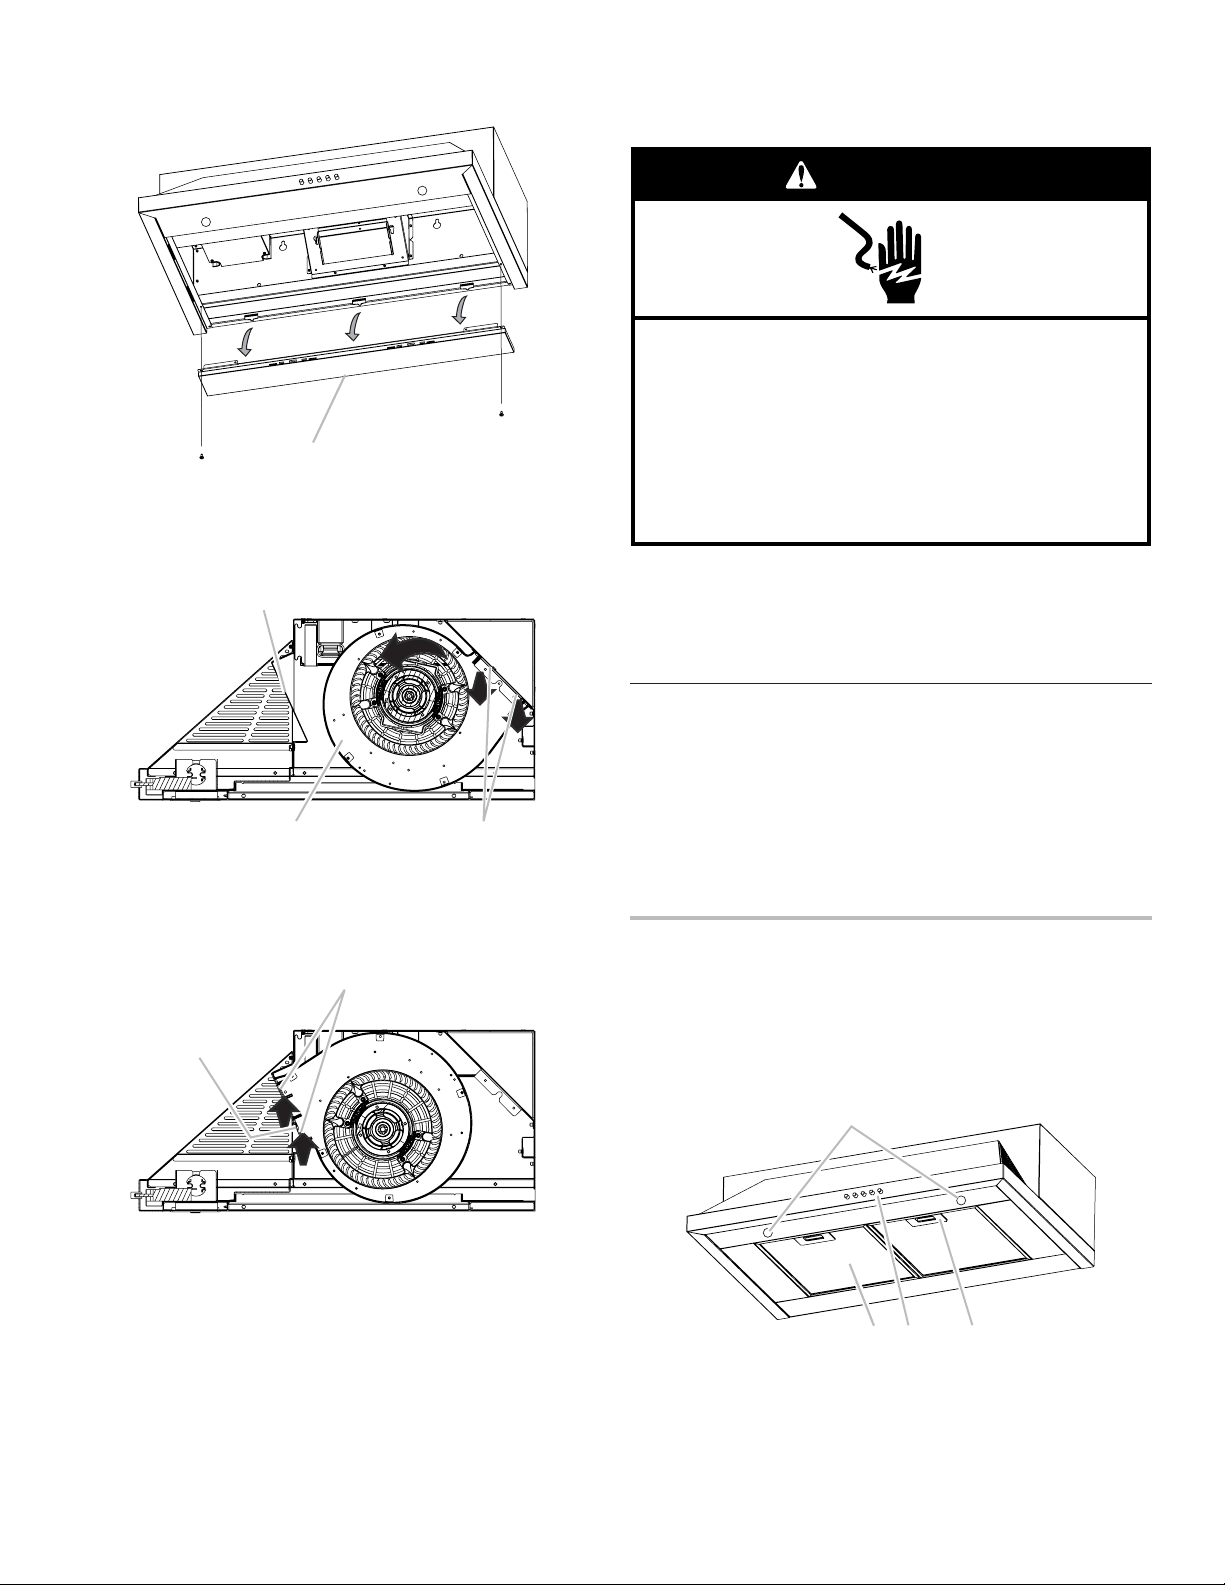
7. For non-vented (recirculating) installations:
■ Remove screws and rear support.
■ Remove the blower mounting screws. Push up on the
blower to detach the blower from the mounting plate.
■ Remove the vent knockout from the front mounting plate.
■ Rotate the blower and attach to front mounting
plate. Install the blower mounting screws.
■ Install charcoal filters. See the “Range Hood
Care” section.
8. Using 2 people, lift range hood into final position, feeding
electrical wire through wiring opening. Position the range
hood so that the large end of the keyhole slots are over
the screws. Then push the hood toward the wall so that
the screws are in the neck of the slots. Tighten mounting
screws to cabinet, making sure mounting screws are in
narrow neck of slots.
9. Check that damper, if used, rotates up and down freely.
10. Reinstall the rear support.
11. Replace the 2 lateral supports.
12. Replace filters. See the “Range Hood Care” section.
13. Plug 3 prong power cord into a grounded 3 prong outlet
located inside the cabinet above the range hood.
14. For Vented Installations Only:
Connect ventwork to hood. Seal joints with clamps
to make secure and airtight.
Complete Installation
1. Replace grease filters. See the “Range Hood Care” section.
2. Check the operation of the range hood fan and light.
See “Range Hood Use” section.
If range hood does not operate, check to see whether a
circuit breaker has tripped or a household fuse has blown.
Disconnect power and check wiring connections.
NOTE: To get the most efficient use from your new range
hood, read the “Range Hood Use” section.
RANGE HOOD USE
The range hood is designed to remove smoke, cooking
vapors and odors from the cooktop area. For best results,
start the hood before cooking and allow it to operate several
minutes after the cooking is complete to clear all smoke and
odors from the kitchen.
The hood controls are located on the center of the range hood.
A
A. Rear support
A
B
C
A. Front mounting plate knockout
B. Blower mounting screws
C. Blower
A
B
A. Front mounting plate
B. Blower mounting screws
Electrical Shock Hazard
Plug into a grounded 3 prong outlet.
Do not remove ground prong.
Do not use an adapter.
Do not use an extension cord.
Failure to follow these instructions can result in death,
fire, or electrical shock.
WARNING
A
B
C
D
A. Halogen lamp housings
B. Grease filter handle
C. Blower and light controls
D. Grease filter
Loading ...
Loading ...
Loading ...