Loading ...
Loading ...
Loading ...
8
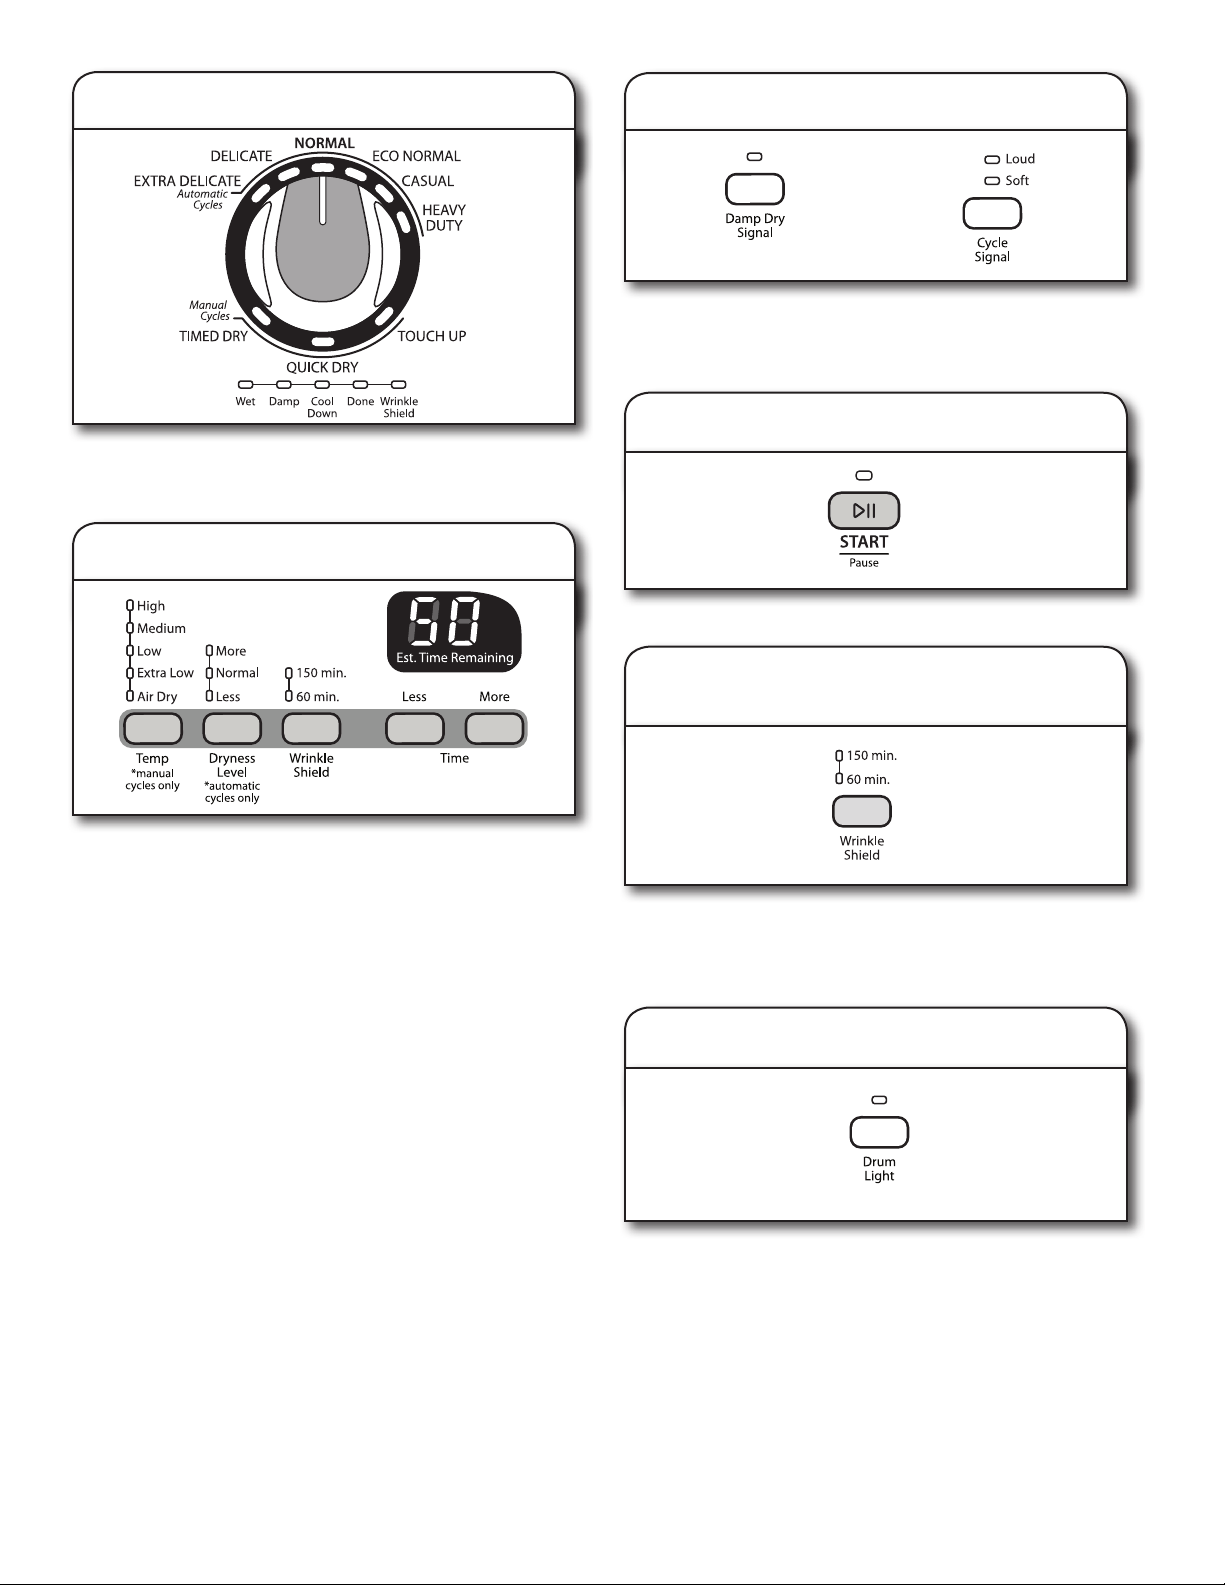
7. Press START/PAUSE to begin cycle
Press the START/PAUSE button to begin the cycle.
8. Remove garments promptly
after cycle is nished
Promptly remove garments after cycle has completed to
reduce wrinkling. If you are unable to remove the load
promptly, press the Wrinkle Shield button to turn ON or OFF
at any time before the cycle has ended.
5. Set cycle settings
The default cycle settings will be shown. For some cycles,
you may select alternate settings by pressing the button for
that setting. Time adjusts for Manual Cycles only.
NOTE: Not all options and settings are available with all cycles.
Temp (for use with Manual Cycles only)
Press the TEMP button to change the drying temperature
from the default setting. Press MORE TIME or LESS TIME
and the time will change by 1-minute intervals. Press and
hold MORE TIME or LESS TIME and the time will change
by 5-minute intervals.
Dryness Level (for use with Automatic Cycles only)
You can select a different dryness level, depending on your
load, by pressing the button for More, Normal, or Less.
Selecting More, Normal, or Less automatically adjusts the
dryness level at which the dryer will shut off. Once a dryness
level is set, it cannot be changed without stopping the cycle.
Automatic cycles give the best drying in the shortest time.
Drying time varies based on fabric type, load size, and dryness
setting.
NOTE: More Dry removes more load moisture. Normal Dry
is used for a starting point for automatic drying. Less Dry
removes less moisture and is used for loads you may want
to put on a hanger to complete drying.
Wrinkle Shield™ feature
n
Get up to 60/150 minutes of heat-free, periodic tumbling at
the end of a cycle. Press the WRINKLE SHIELD™ button to
turn ON or OFF at any time before the cycle has ended.
n
The WRINKLE SHIELD™ feature is preset to “OFF.” If
selected for other cycles, the WRINKLE SHIELD™ feature
setting will remain “ON” the next time that cycle is selected.
4. Select the desired cycle
Select the desired cycle for your load. See the “Cycle Guide”
or the display for more information about each cycle.
NOTE: Not all options and settings are available with all cycles.
6. Select cycle options (if desired)
Add additional options by pressing the button.
NOTE: Not all options and settings are available with all
cycles.
9. Additional features (on some models)
Select Drum Light to turn on the light inside the dryer drum.
When pressed during a cycle or not running, the Drum Light
turns on and will remain on until DRUM LIGHT is pressed
again, the door is opened and closed, or the door is left open
for 30 minutes.
Loading ...
Loading ...
Loading ...