User Guide Iron
PARTS
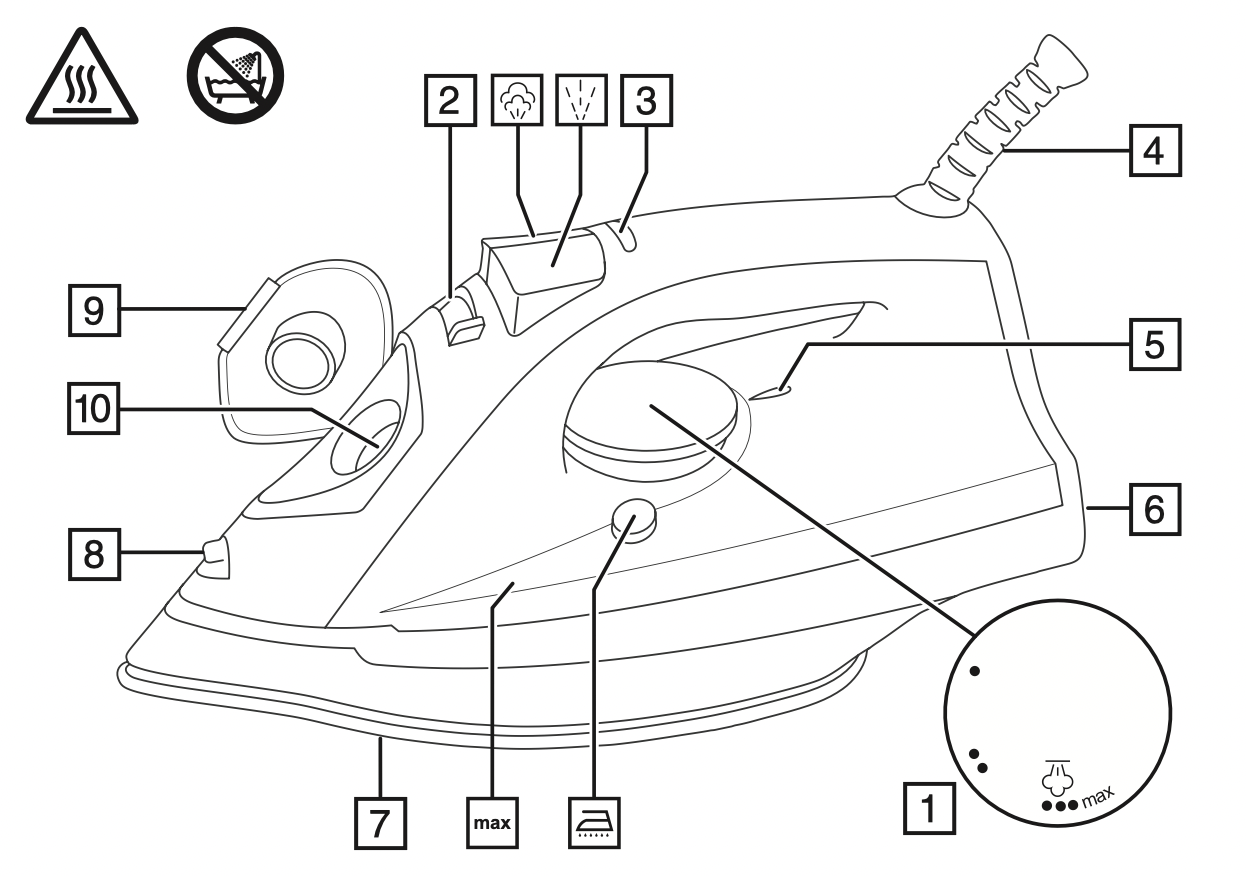
- Temperature control
- Steam control
- Light
- Swivel cord
- Marker
- Heel
- Soleplate
- Spray nozzle
- Cover
- Water inlet
BEFORE USING FOR THE FIRST TIME
- Remove labels, stickers and packaging from the iron and soleplate.
- Don’t worry if the iron smokes a little at first. It will stop after a short time.
- Iron an old piece of cotton fabric, to clean the soleplate.
PREPARATION
- Check for textile care symbols (
 ).
).
- Iron fabrics needing low temperatures
 first, then those that need medium temperatures
  , and finish with those needing high temperatures
  .
.
TEMPERATURE SETTING GUIDE
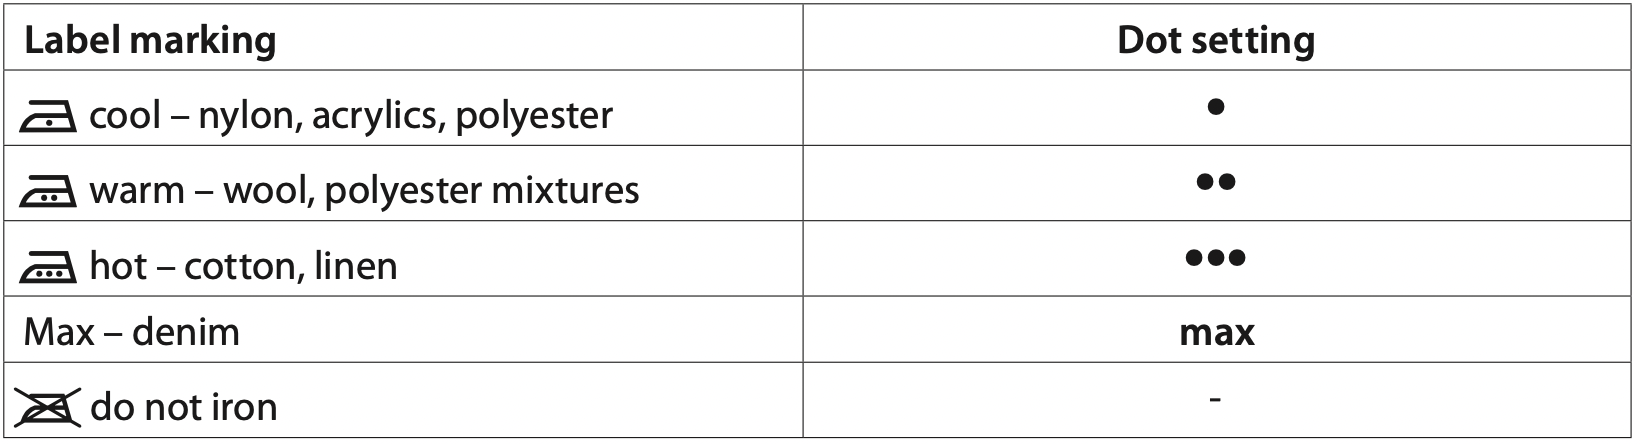
If the instructions on the fabric label differ from this guide, follow the instructions on the label.
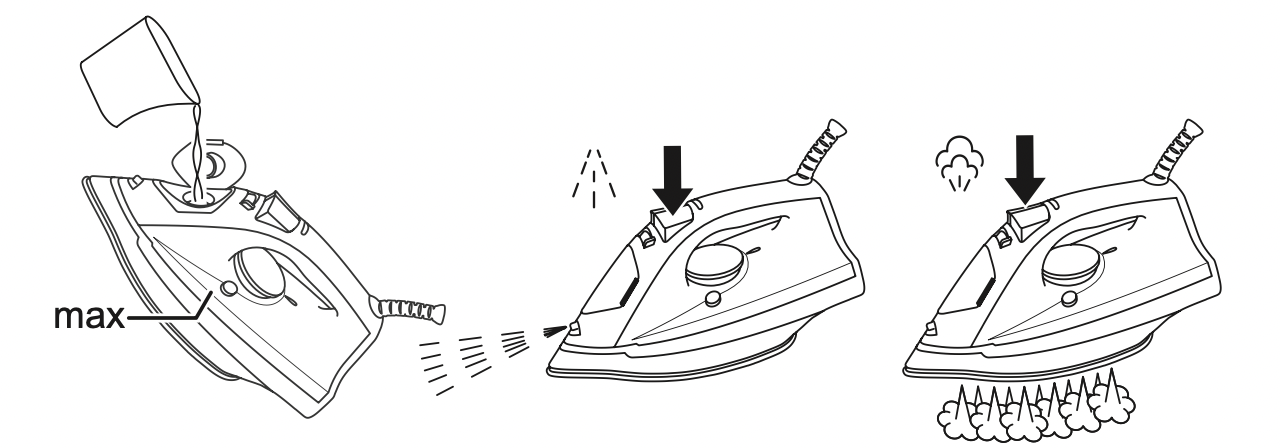
FILLING
You may use the iron with tap-water, but if you live in a hard water area, you should use distilled water (not chemically descaled or softened water).
If you buy distilled water, check that it’s suitable for use in irons.
- Set the temperature control to
 and set the steam control to
  .
.
- Unplug the iron.
- Hold the iron with the front raised.
- Open the water inlet cover.
- Pour slowly, to let the air in the reservoir escape, otherwise you’ll cause an air lock and the water will overflow.
- Don’t fill past the max marking or water will escape in use.
- Wipe up any spillage.
SWITCH ON
- Set the temperature control to
 and set the steam control to
  .
.
- Stand the iron on its heel.
- Put the plug into the power socket (switch the socket on, if it’s switchable).
- Turn the temperature control to bring the setting you want next to the marker. The light will come on.
- When the iron reaches the temperature you set, the light will go out. It’ll then cycle on and off as the thermostat operates to maintain the temperature.
STEAM IRONING
- To steam iron, set the temperature control to
 or higher.
- Set the steam control to the setting you want,
 = no steam,
  = high steam.
- Wait till the light goes out, then start ironing.
SPRAY
Water spotting affects some fabrics. Test this out on a hidden part of the fabric.
- Lift the iron off the fabric.
- Aim the spray nozzle at the fabric.
- Press the
 button – you may have to press it 2 or 3 times to pump water through the system.
SHOT OF STEAM
- Check that the temperature control is at
 or higher.
- Lift the iron off the fabric.
- Press the
 button.
- Leave 4 seconds between shots to let the temperature build up.
DRY IRONING
- If you’re going to be dry ironing for 20 minutes or more, empty the reservoir first to avoid spontaneous bursts of steam.
- Set the steam control to
 .
.
- Set the desired temperature.
- Wait till the light goes out, then start ironing.
VERTICAL STEAMING
Remove wrinkles from hanging clothes, hanging curtains, and furnishing fabrics.
- Check that there’s adequate ventilation behind the fabric, otherwise moisture may build up, causing mildew.
- Check that there’s nothing behind the fabric that may be damaged by the steam.
- Check that pockets, turn-ups, and cuffs are empty.
- Check that there’s water in the reservoir.
- Set the temperature control to max and set the steam control to
 .
.
- Hold the iron close to (but not touching) the fabric.
- Press the
 button.
- Leave 4 seconds between shots, to let the temperature build up.
AFTER USE
- Set the temperature control to
 and set the steam control to
  .
.
- Unplug the iron.
- Open the water inlet cover.
- Hold the iron over a sink, turn it upside down and drain the water from the reservoir.
- Stand the iron on its heel and leave it to cool down completely.
- When cold, wipe off any moisture and close the water inlet cover.
- Wipe outer surfaces with a damp cloth.
- Remove spots from the soleplate with a little vinegar – take care not to scratch it.
- Store the iron on its heel, to avoid corrosion and damage to the soleplate.
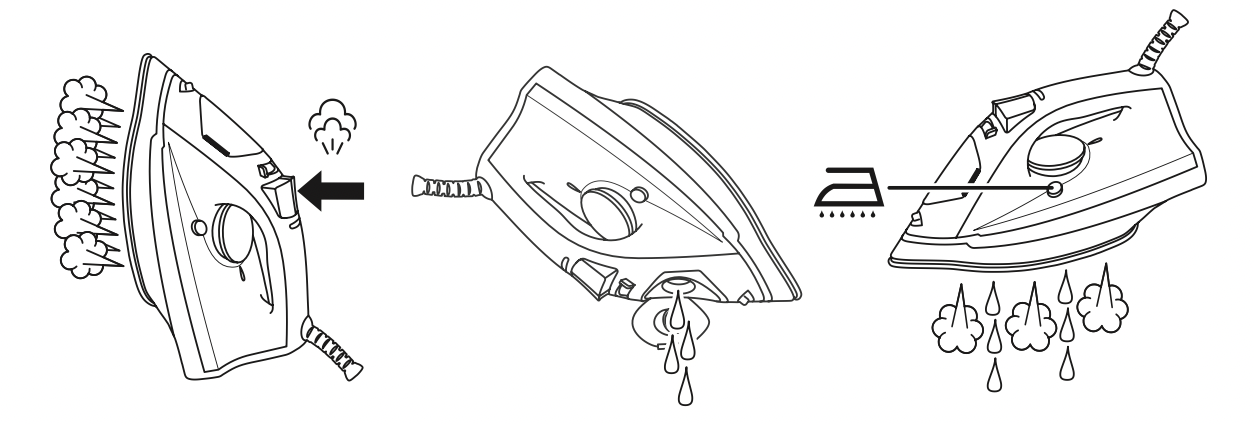
SELF CLEAN
To avoid scale build up, use the self clean function at least monthly in normal water areas, more often in hard water areas.
You’ll need a basin or a large bowl to catch the water coming out of the soleplate.
- Fill the reservoir to the max mark.
- Set the temperature control to max and set the steam control to
 .
.
- Stand the iron on its heel.
- Put the plug into the power socket and wait till the light goes out.
- Hold the iron over the basin or bowl, with the soleplate down.
- Press the
 , and hold it down.
- Gently move the iron to and fro, over the basin or bowl.
- Water and steam will wash scale and dust through the soleplate, and into the sink.
- When the reservoir is empty, release the
 button.
- Unplug the iron, and stand it on its heel to cool.
- Follow the steps under AFTER USE.