Loading ...
Loading ...
Loading ...
29OPERATION
ENGLISH
1 Gently pull the handle to open the ice
compartment.
2 To remove the in-door ice bin, grip the front
handle, slightly lift the bottom, and slowly pull
out the bin as shown.
Assembling the In-Door Ice Bin
CAUTION
• When handling the ice bin, keep hands away
from the icemaker tray area to avoid personal
injury.
• Avoid touching the auto shutoff (feeler arm)
when replacing the ice bin. See the label on the
ice compartment door for details.
1 Carefully insert the in-door ice bin, slanting
the top slightly to fit it under the icemaker.
2 Gently push the handle to close the ice
compartment.
Automatic Icemaker
Before Using the In-Door Icemaker
NOTE
• Ice is made in the automatic in-door icemaker
and sent to the dispenser. The icemaker
produces 70 - 182 cubes in a 24-hour period,
depending on freezer compartment
temperature, room temperature, number of
door openings and other operating conditions.
• It takes about 12 to 24 hours for a newly
installed refrigerator to begin making ice.
• Ice-making stops when the in-door ice bin is full.
When full, the in-door ice bin holds
approximately 6 to 8 (12-16 oz.) glasses of ice.
• Foreign substances or frost on the ice-detecting
sensor can interrupt ice production. Make sure
the sensor area is clean at all times for proper
operation.
• To increase ice production, use the Ice Plus
function. The function increases both ice making
and freezing capabilities.
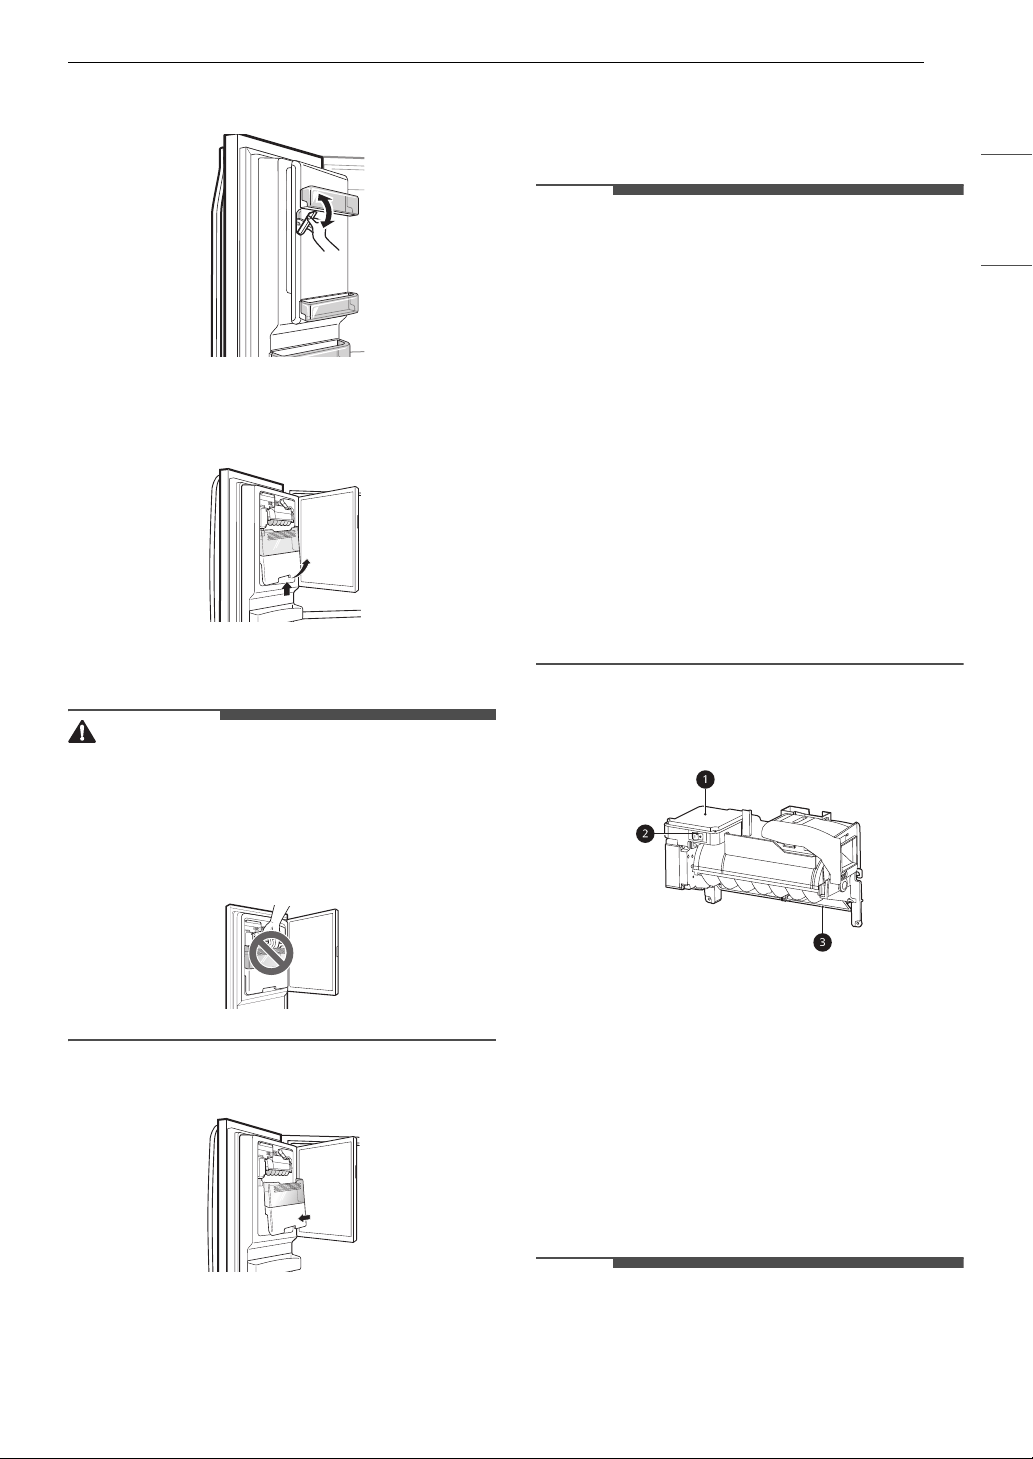
In-Door Icemaker
a Icemaker
b Power Switch
c Auto Shutoff (feeler arm)
Before Using the Freezer Icemaker
This feature is only available on some models.
The feature may vary depending on model
purchased.
NOTE
• Throw away the first few batches of ice (about
140 - 160 cubes) after installation. This is also
necessary if the refrigerator has not been used
for a long time.
Loading ...
Loading ...
Loading ...