Loading ...
Loading ...
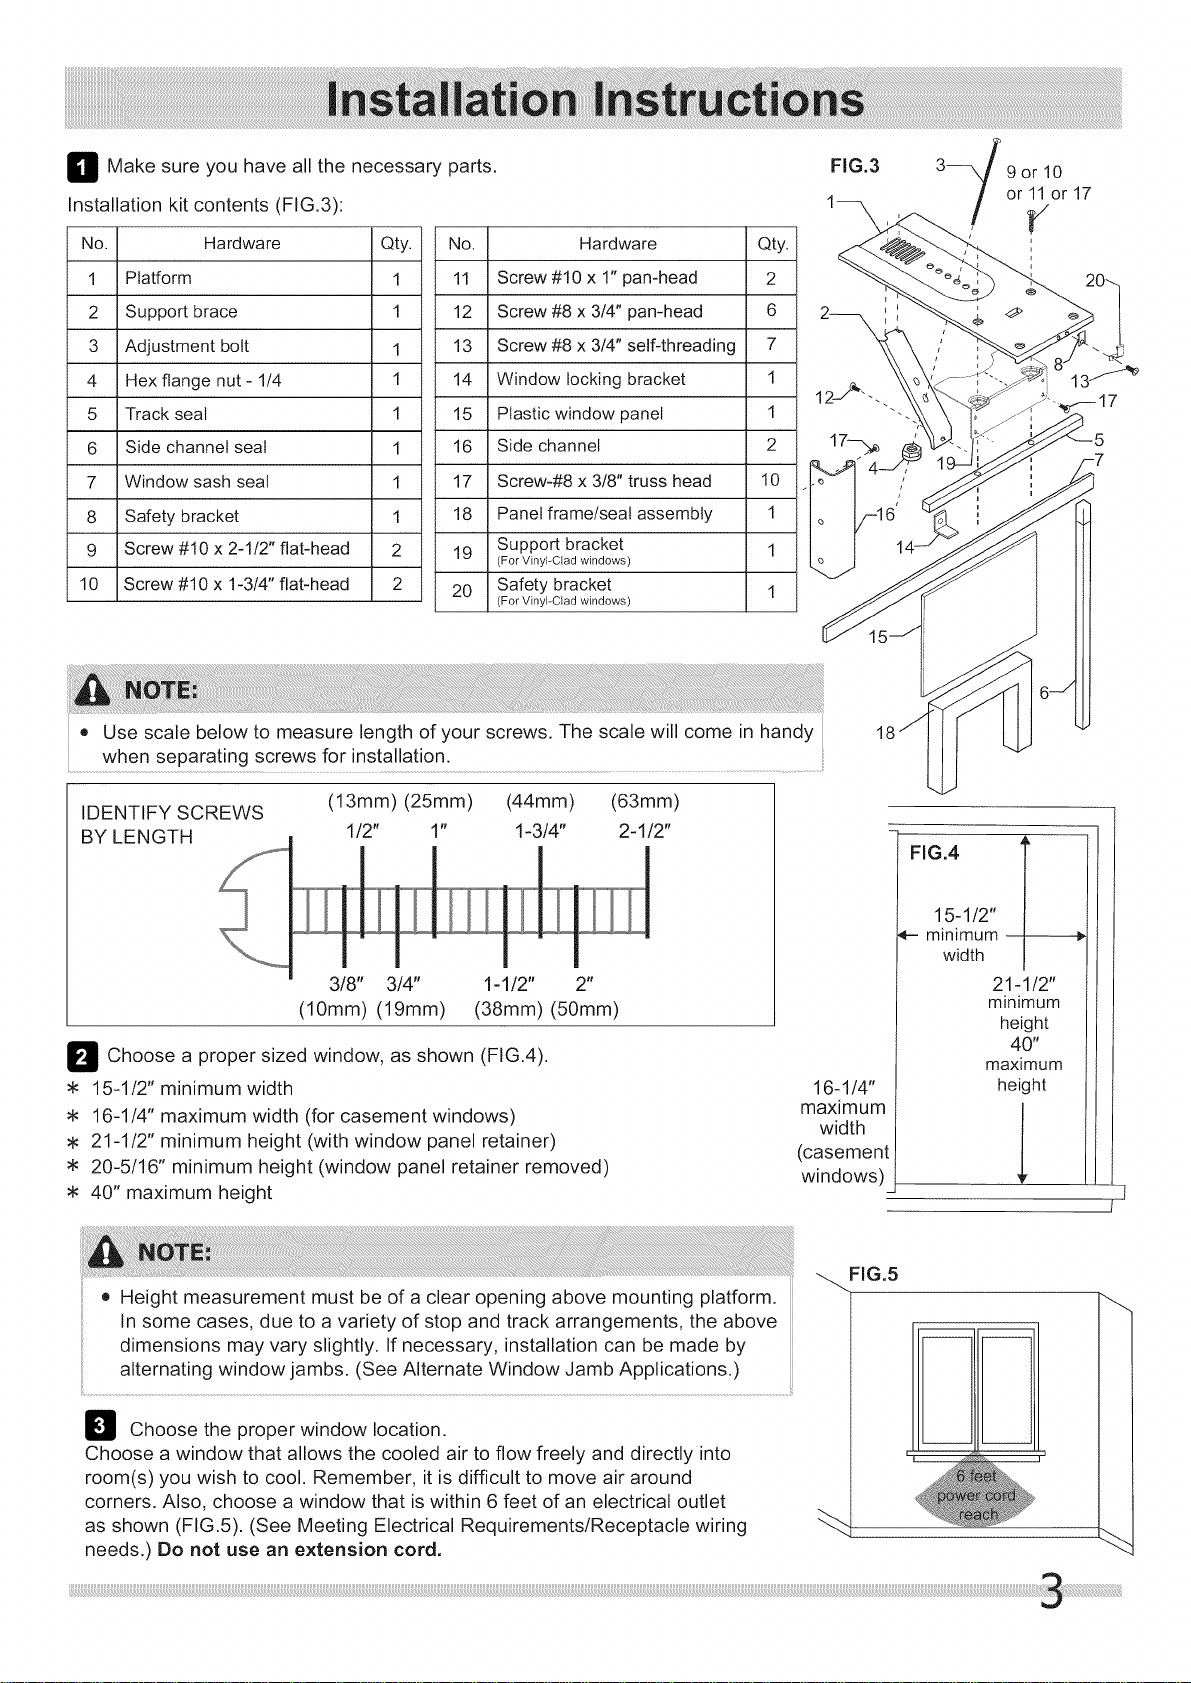
_Make sureyouhaveallthenecessaryparts•
Installation kit contents (FIG.3):
No. Hardware Qty.
1 Platform 1
2 Support brace 1
3 Adjustment bolt 1
4 Hex flange nut- 1/4 1
5 Track seal 1
6 Side channel seat 1
7 Window sash seal 1
8 Safety bracket 1
9 Screw #10 x 2-1/2" flat-head 2
10 Screw #10 x 1-3/4" flat-head 2
No• Hardware Qty.
11 Screw #10 x 1" pan-head 2
12 Screw #8 x 3/4" pan-head 6
13 Screw #8 x 3/4" self-threading 7
14 Window locking bracket 1
15 Plastic window panel 1
16 Side channel 2
17 Screw-#8 x 3/8"truss head 10 .
18 Panel frame/seal assembly 1
Support bracket 1
19 (For VinyFClad windows)
20 Safety bracket 1
(For VinyFCtad windows)
FIG.3
9or10
or 11or 17
e Use scale below to measure length of your screws• The scale will come in handy
when separating screws for installation•
18
IDENTIFY SCREWS
BY LENGTH ,f ..... 1/2"
318" 3/4"
(10ram) (19ram)
(13mm) (25mm) (44mm) (63mm)
1" 1-3/4" 2-1/2"
1=1/2" 2"
(38mm) (50ram)
_ Choose a sized window, as shown
proper (FIG.4).
* 15-1/2" minimum width
16-1/4" maximum width (for casement windows)
21-1/2" minimum height (with window panel retainer)
* 20-5/16" minimum height (window panel retainer removed)
40" maximum height
16-1/4"
maximum
width
casement
windows)
FIG.4
15-1/2"
minimum
width
21-1/2"
minimum
height
40"
maximum
height
l
q
l
• Height measurement must be of a clear opening above mounting platform•
In some cases, due to a variety of stop and track arrangements, the above
dimensions may vary slightly• If necessary, installation can be made by
alternating window jambs• (See Alternate Window Jamb Applications•)
Choose the proper window location•
Choose a window that allows the cooled air to flow freely and directly into
room(s) you wish to cool. Remember, it is difficult to move air around
corners• Also, choose a window that is within 6 feet of an electrical outlet
as shown (FIG.5). (See Meeting Electrical Requirements/Receptacle wiring
needs•) Do not use an extension cord.
-_FIG.5
Loading ...
Loading ...
Loading ...