Loading ...
Loading ...
Loading ...
10 electrolux.com.au
UNPACKING
ENVIRONMENTAL TIPS
ENVIRONMENT
Most of the packing materials are recyclable.
Please dispose of those materials through your
local recycling depot or by placing them in
appropriate collection containers.
Important – check for any damages or marks. If you find
the refrigerator is damaged or marked, you must report it
within 7 days should you wish to claim for damage/ marks
under the manufacturers warranty. This does not affect
your statutory rights.
Clean your refrigerator thoroughly following the instructions
in the “Cleaning” section and wipe off any dust that has
accumulated during shipping.
LOCATING THE REFRIGERATOR
CAUTION
Automatic aerosol systems (such as insect control)
should not be located adjacent to the product as
the spray may cause long term damage to the
external surfaces of the appliance.
Do not put the refrigerator in a location that is too cold or is
unprotected, for example in a garage or on a veranda. The
ambient temperature should be above 10°C.
Put the refrigerator in a dry place avoiding areas of high
moisture or humidity.
Ensure the refrigerator is located on an even surface.
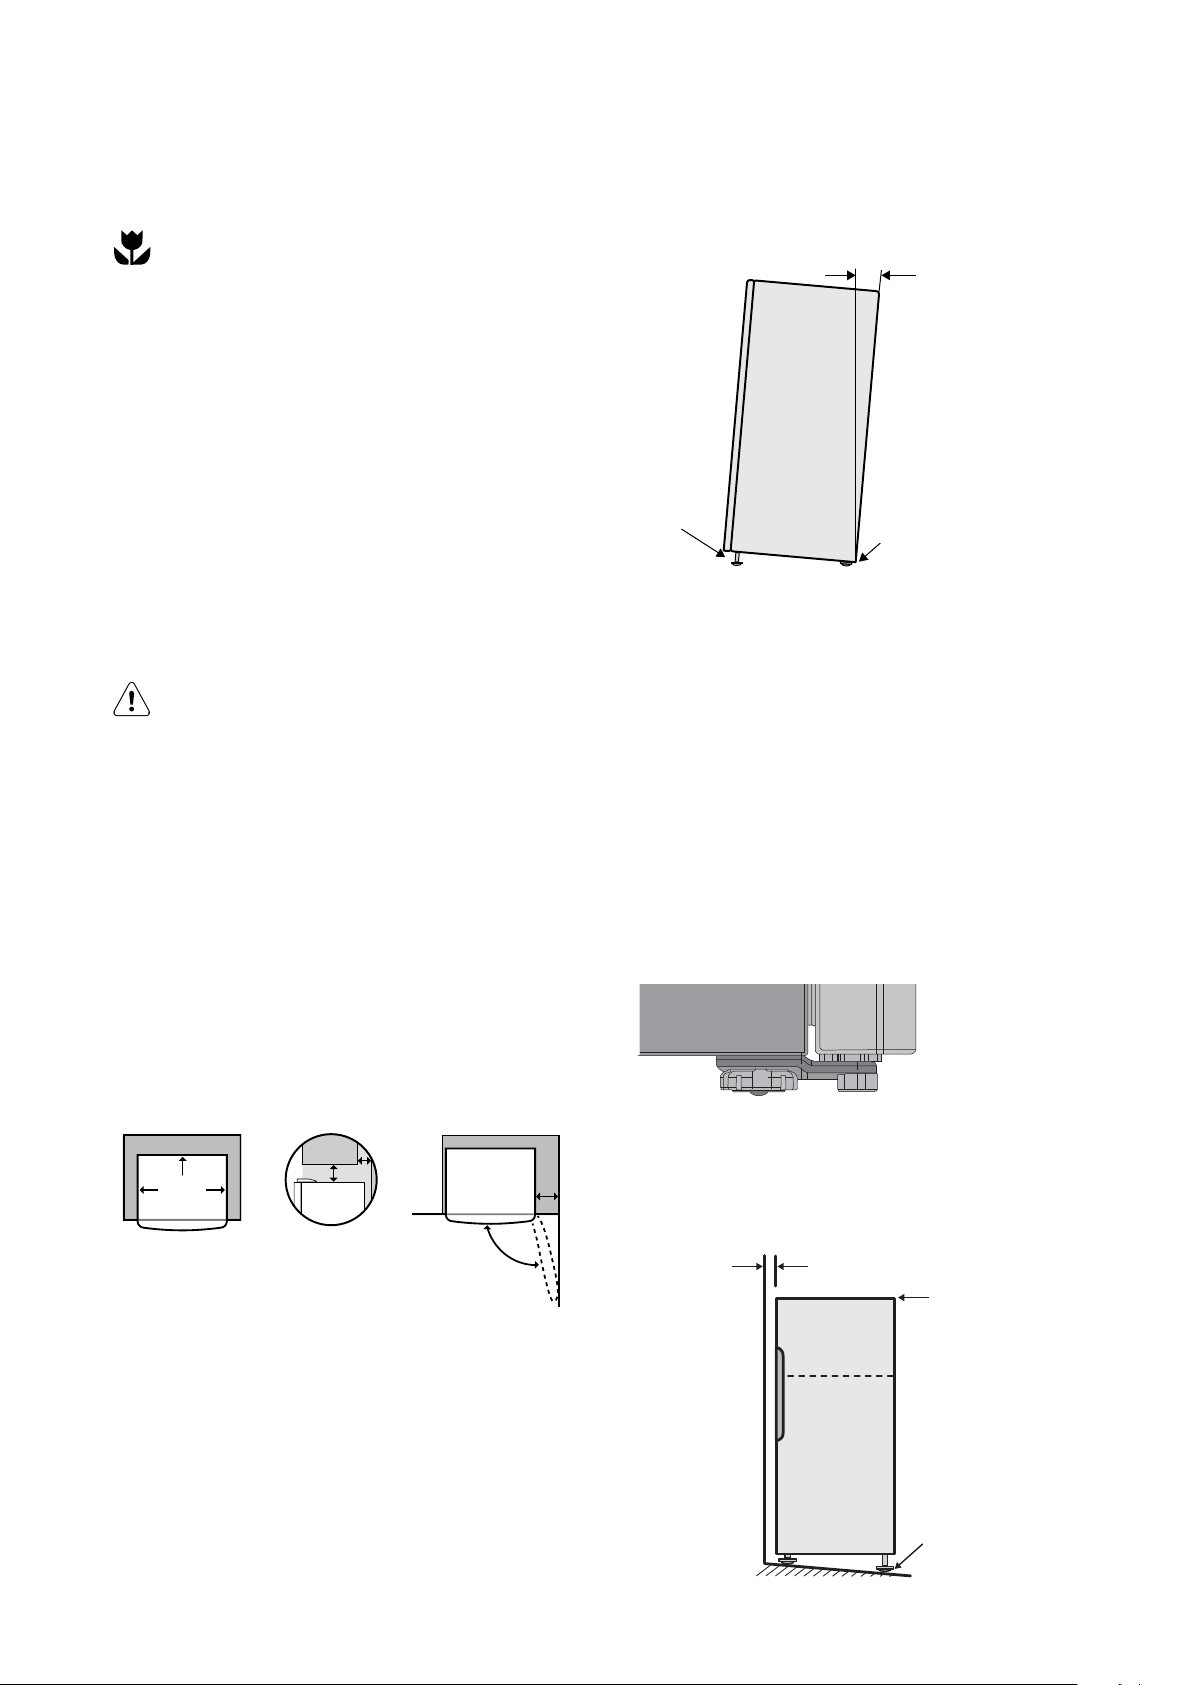
Adequate ventilation around your refrigerator
The diagram below shows the recommended airspace to
allow for ventilation of your refrigerator.
350mm
50mm
Recommended
airspace
CABINET
DOOR
30mm
30mm
X
Y
If you have a cupboard above the refrigerator with a rear gap
of less than 100 mm (Y), recommended clearance at the top of
the refrigerator increases from 50mm to 90mm (X) minimum.
When positioned in a corner area, spacing of at least
350mm (300mm for multi-door models) on the hinge side
will allow the doors to open enough to enable the removal
of bins and shelves.
NOTE: Doors are designed to sit proud of cabinetry (not
flush). The clearances shown above are the recommended
minimum clearances.
The clearance at the rear must not exceed 75mm.
INSTALLING YOUR NEW APPLIANCE
INSTALLING YOUR REFRIGERATOR
1. Roll the refrigerator into place.
10 - 15mm
Fixed rear rollers
Height adjusting nut
The rollers are designed for forward or backward
movement only. They are not castors. Moving the
refrigerator sideways may damage your floor and the
rollers. Before moving your refrigerator ensure height
adjusting nut and the stability foot are fully wound up
off the floor.
2. Wind the large height adjusting nut under door hinge
down until the refrigerator is tilted back by 10mm
(see diagram).
3. Wind the large height adjusting nut on the handle
side down until the refrigerator is level and stable. If
you have difficulty winding the nut or height adjusting
foot down, have someone tilt the refrigerator back so
you have better access.
stability foot
wound up
4. Check the alignment of the refrigerator to the
surrounding cupboards to see if it is level. You can
adjust the level as detailed in step 2 and 3.
adjust front feet for
uneveness of oor
eg. wind this foot
down or up.
top of refrigerator is
level ie horizontal.
aligned to
cupboards
ie even gap.
Loading ...
Loading ...
Loading ...