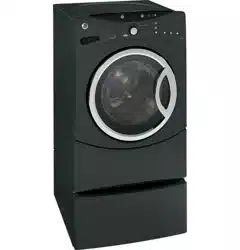
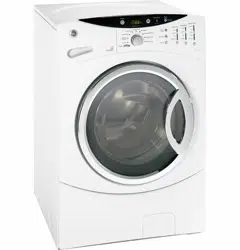
You can locate your model number on a label on the side of the washer.
1. Power
Press to “wake up” the display. If the display is active, press to put the washer into standby mode.
NOTE: Pressing POWER does not disconnect the appliance from the power supply.
1. Power
Press to “wake up” the display. If the display is active, press to put the washer into standby mode.
NOTE: Pressing POWER does not disconnect the appliance from the power supply.
About the washer control panel
You can locate your model number on a label on the side of the washer.
1. Power
Press to “wake up” the display. If the display is active, press to put the washer into standby mode.
NOTE: Pressing POWER does not disconnect the appliance from the power supply.
2. Wash Cycles
The wash cycles are optimized for specific types of wash loads. The chart below will help you match the wash setting with the loads. The GentleClean™ lifters lightly tumble the clothes into the water and detergent solution to clean the load.
WHITES
For heavily to lightly soiled white cottons, household linens, work and play clothes.
COLORS/NORMAL
For heavy to lightly soiled colorfast cottons, household linens, work and play clothes.
STAIN WASH
For heavy soiled colorfast cottons, household linens, work and play clothes.
EASY CARE (PERMA PRESS)
For wrinkle-free and permanent press items.
ACTIVE WEAR
For active sports, exercise and some casual wear clothes. Fabrics include modern technology finishes and fibers such as spandex, stretch and micro-fibers.
DELICATES
For lingerie and special-care fabrics with light to normal soil. Provides gentle tumbling and soak during wash and rinse.
HANDWASH
For items labeled hand-washable with light soils. Provides gentle rocking to mimic the handwashing action.
WASHABLE WOOLS
For the washing of machine washable wool products, provided that they are washed according to the instructions on the garment label. When selecting this cycle, you must use a detergent suitable for washing wool.
MY CYCLE
Press to use, create or modify custom wash cycles.
SPEED WASH
For lightly soiled items that are needed in a hurry. Cycle time is approximately 30 minutes, depending on selected options.
DRAIN & SPIN
Drain and spin at any time.
RINSE & SPIN
To quickly rinse out any items at any time.
3. Soil Level
Changing the SOIL LEVEL increases or decreases the wash time to remove different amounts of soil. To change the SOIL LEVEL, press the SOIL LEVEL button until you have reached the desired setting. You can choose between Extra Light, Light, Normal or Heavy soil.
4. Spin Speed
Changing the SPIN SPEED changes the final spin speed of the cycles. Always follow the fabric manufacturer’s care label when changing the SPIN SPEED.
To change the SPIN SPEED, press the SPIN SPEED button until you have reached the desired setting. Higher spin speeds are not available on certain cycles, such as Delicates.
Higher spin speeds remove more water from the clothes and will help reduce dry time, but may also increase the possibility of setting wrinkles on some fabrics.
5. Wash Temp
Adjust to select the proper water temperature for the wash cycle. The prewash and rinse water is always cold to help reduce energy usage and reduce setting of stains and wrinkles.
Follow the fabric manufacturer’s care label when selecting the wash temperature.
To change the wash temperature, press the WASH TEMP button until you have reached the desired setting. The Sanitized wash temperature is not available on certain cycles, such as Delicates.
When selecting the Sanitize wash temperature, the washer increases the water temperature to sanitize and kill more than 99% of many common bacteria found in home laundry. The sanitize wash temperature is only available on Stain Wash and Whites Wash cycles. For best results, select the heavy soil setting when using the Sanitize wash temperature setting.
NOTE: The first 10 seconds of the wash fill is always cold. This feature assists in conditioning the fabric and preventing stains from setting on garments.
6. START/PAUSE
Press to start a wash cycle. If the washer is running, pressing it once will pause the washer and unlock the door. Press again to restart the wash cycle.
NOTE: If the washer is paused and the cycle is not restarted within 2 hours, the current wash cycle will be cancelled.
NOTE: The washer performs automatic system checks after pressing the START button. Water will flow in 45 seconds or less. You may hear the door lock and unlock before water flows; this is normal.
About the washer features
NOTE: Features may not be available on all washer models.
Cycle Signal
Use the SIGNAL button to change the volume of the end of cycle signal.
Press the button until you reach the desired volume.
Prewash (on some models)
Prewash is an extra wash before the main wash. Use it for heavily soiled clothes or for clothes with a care label that recommends prewashing before washing. Be sure to add high-efficiency detergent, or the proper wash additive to the prewash dispenser.
NOTE: When selecting prewash, it is recommended to use powder detergent in the main wash (detergent) compartment.
Extra Rinse
Use an extra rinse when additional rinsing is desired to remove excess dirt and detergent from soiled loads.
Delay Start
You can delay the start of a wash cycle for up to 18 hours on models GHDVH626, GCVH6260, WCVH6260, WBVH6240, WHDVH626, WCVH6600, WHDVH660, GCVH6600 and GHDVH670, and for up to 10 hours on models WBVH5100 and GBVH5140. Press the DELAY START button to choose the number of hours you want to delay the start of the cycle, then press the START button. The machine will count down and start automatically at the correct time.
NOTE: If you forget to fully close the door, a reminder signal will beep reminding you to do so.
NOTE: If you open the door when the delay is counting down, the machine will enter the pause state. You must close the door and press START again in order to restart the countdown.
Lock
You can lock the controls to prevent any selections from being made. Or you can lock the controls after you have started a cycle.
Children cannot accidentally start the washer by touching pads with this option selected.
To lock the washer, press and hold the lock button for 3 seconds. To unlock the washer controls, press and hold the lock button for 3 seconds.
The control lock icon on the display will light up when it is on.
NOTE: The POWER button can still be used when the machine is locked.
MY CYCLE (on some models)
To save a favorite cycle, set the desired settings for wash cycle, soil level, spin speed and wash temp settings and hold down the MY CYCLE button for 3 seconds. A beep will sound to indicate the cycle has been saved.
To use your custom cycle, press the MY CYCLE button before washing a load.
To change the saved cycle, set the desired settings and hold down the MY CYCLE button for 3 seconds.
NOTE: When using MY CYCLE, wash options cannot be modified after the cycle has been started.
NOTE: If you change wash options with MY CYCLE before starting the cycle, the MY CYCLE light will turn off and you will be returned to the base cycle.
The Dispenser Drawer
Slowly open the dispenser drawer by pulling it out until it stops.
After adding laundry products, slowly close the dispenser drawer. Closing the drawer too quickly could result in early dispensing of the bleach, fabric softener or detergent.
You may see water in the bleach and fabric softener compartments at the end of the cycle. This is a result of the flushing/siphoning action and is part of the normal operation of the washer
The Prewash Compartment
Only use the Prewash Compartment if you are selecting the Prewash cycle for heavily soiled clothes. Add measured detergent or prewash additive to the back left prewash compartment of the dispenser drawer.
Detergent or prewash additive is flushed from the dispenser in the prewash cycle (if selected).
NOTE: Liquid detergent will drain into the washer drum as it is added.
Detergent usage may need to be adjusted for water temperature, water hardness, size and soil level of the load. Avoid using too much detergent in your washer as it can lead to over sudsing and detergent residue being left on the clothes.
The Detergent Compartment
High efficiency detergent is required for this washer. Use the detergent manufacturer’s recommended amount.
The detergent selection insert must be placed in the detergent compartment in a specific position according to what type of detergent you are using.
Powder Detergent – Place the insert in the rear position. The Powder Icons must line up on center when the insert is in the powder position.
Liquid Detergent – Place the insert in the forward position. The Liquid Icons must line up on center when the insert is in the liquid position.
Move the insert by pulling it up and replace it by sliding it down between either the rear or front detergent compartment molded rails, as desired, for powder or liquid detergent.
Add measured detergent to the front left detergent compartment of the dispenser drawer.
Detergent is flushed from the dispenser at the beginning of the wash cycle. Either powdered or liquid detergent can be used.
Detergent usage may need to be adjusted for water temperature, water hardness, size and soil level of the load. Avoid using too much detergent in your washer as it can lead to oversudsing and detergent residue being left on the clothes.
The Liquid Bleach Compartment
If desired, measure out the recommended amount of liquid bleach, not to exceed 1/3 cup (80 ml) and pour into the center compartment labeled “LIQUID BLEACH” marked with this symbol .
Do not exceed the maximum fill line. Overfilling can cause early dispensing of the bleach which could result in damaged clothes.
NOTE: Do not use powdered bleach in the dispenser.
The Fabric Softener Compartment
If desired, pour the recommended amount of liquid fabric softener into the compartment labeled “FABRIC SOFTENER.”
Use only liquid fabric softener in the dispenser.
Dilute with water to the maximum fill line.
Do not exceed the maximum fill line. Overfilling can cause early dispensing of the fabric softener which could stain clothes.
NOTE: Do not pour fabric softener directly on the wash load.
The Dispenser Drawer
Slowly open the dispenser drawer by pulling it out until it stops.
After adding laundry products, slowly close the dispenser drawer. Closing the drawer too quickly could result in early dispensing of the bleach, fabric softener or detergent.
You may see water in the bleach and fabric softener compartments at the end of the cycle. This is a result of the flushing/siphoning action and is part of the normal operation of the washer
The Detergent Compartment
High efficiency detergent is required for this washer. Use the detergent manufacturer’s recommended amount.
The detergent selection insert must be placed in the detergent compartment in a specific position according to what type of detergent you are using.
Powder Detergent – Place the insert in the rear position. The Powder Icons must line up on center when the insert is in the powder position.
Liquid Detergent – Place the insert in the forward position. The Liquid Icons must line up on center when the insert is in the liquid position.
Move the insert by pulling it up and replace it by sliding it down between either the rear or front detergent compartment molded rails, as desired, for powder or liquid detergent.
Add measured detergent to the front left detergent compartment of the dispenser drawer.
Detergent is flushed from the dispenser at the beginning of the wash cycle. Either powdered or liquid detergent can be used.
Detergent usage may need to be adjusted for water temperature, water hardness, size and soil level of the load. Avoid using too much detergent in your washer as it can lead to oversudsing and detergent residue being left on the clothes.
The Liquid Bleach Compartment
If desired, measure out the recommended amount of liquid bleach, not to exceed 1/3 cup (80 ml) and pour into the compartment labeled “LIQUID BLEACH” marked with this symbol .
Do not exceed the maximum fill line. Overfilling can cause early dispensing of the bleach which could result in damaged clothes.
NOTE: Do not use powdered bleach in the dispenser.
The Fabric Softener Compartment
If desired, pour the recommended amount of liquid fabric softener into the compartment labeled “FABRIC SOFTENER.”
Use only liquid fabric softener in the dispenser.
Dilute with water to the maximum fill line.
Do not exceed the maximum fill line. Overfilling can cause early dispensing of the fabric softener which could stain clothes.
NOTE: Do not pour fabric softener directly on the wash load.
Loading and using the washer
Always follow fabric manufacturer’s care label when laundering.
Dispenser Drawer Area: Detergent and fabric softener may build up in the dispenser drawer. Residue should be removed once or twice a month.
Remove the drawer by first pulling it out until it stops. Then reach back into the left rear corner of the drawer cavity and press down firmly on the lock tab, pulling out the drawer.
Remove the inserts from the bleach and fabric softener compartments and the detergent insert. Rinse the inserts and the drawer with hot water to remove traces of accumulated laundry products.
To clean the drawer opening, use a small brush to clean the recess. Remove all residue from the upper and lower parts of the recess.
Return inserts to the proper compartments. Replace the dispenser drawer.
About the washer features
Fabric Care Labels
Below are fabric care label “symbols” that affect the clothing you will be laundering.
Troubleshooting Tips
Problem
Possible Cause
What To Do
Not spinning or agitating
Drain hose is kinked or improperly connected
• Straighten drain hose and make sure washer is not sitting on it.
Household drain may be clogged
• Check household plumbing. You may need to call a plumber.
Drain hose siphoning; drain hose pushed too far down the drain
• Ensure there is an air gap between hose and drain.
Washer pump filter may be clogged
• Have your pump filter cleaned.
Load is out of balance
• Redistribute clothes and run drain & spin or rinse & spin.
• Increase load size if washing small load containing heavy and light items.
Leaking water
Door gasket is damaged
• Check to see if gasket is seated and not torn. Objects left in pockets may cause damage to the washer (nails, screws, pens, pencils).
Door gasket not damaged
• Water may drip from the door when the door is opened. This is a normal operation.
Check back left of washer for water
• If this area is wet, you have oversudsing condition. Use less detergent.
Fill hoses or drain hose is improperly connected
• Make sure hose connections are tight at washer and faucets and make sure end of drain hose is correctly inserted in and secured to drain facility.
Household drain may be clogged
• Check household plumbing. You may need to call a plumber.
Not draining
Drain hose is kinked or improperly connected
• Straighten drain hose and make sure washer is not sitting on it.
Household drain may be clogged
• Check household plumbing. You may need to call a plumber.
Drain hose siphoning; drain hose pushed too far down the drain
• Ensure there is an air gap between hose and drain.
Washer pump filter may be clogged
• Have your pump filter cleaned.
Not spinning
Drain hose is kinked or improperly connected
• Straighten drain hose and make sure washer is not sitting on it.
Household drain may be clogged
• Check household plumbing. You may need to call a plumber.
Drain hose siphoning; drain hose pushed too far down the drain
• Ensure there is an air gap between hose and drain.
Washer pump filter may be clogged
• Have your pump filter cleaned.
Load is out of balance
• Redistribute clothes and run drain & spin or rinse & spin.
• Increase load size if washing small load containing heavy and light items.
Motor is overheated
• Washer motor will stop if it becomes overheated. It will automatically restart after a cool down period of up to 30 minutes (if washer has not been manually turned off).
Door is open
• Make sure door is closed.
Incomplete cycle or timer not advancing
Drain hose is kinked or improperly connected
• Straighten drain hose and make sure washer is not sitting on it.
Household drain may be clogged
• Check household plumbing. You may need to call a plumber.
Drain hose siphoning; drain hose pushed too far down the drain
• Ensure there is an air gap between hose and drain.
Washer pump filter may be clogged
• Have your pump filter cleaned.
Automatic load redistribution
• Timer stops at 1 minute, machine has redistributed the load once or twice. This is normal operation. Do nothing; the machine will finish the wash cycle.
Loud or unusual noise; vibration or shaking
Cabinet moving
• Washer is designed to move 1/4" to reduce forces transmitted to the floor. This movement is normal.
All rubber leveling legs are not firmly touching the floor
• Push and pull on the back right and then back left of your washer to check if it is level. If the washer is uneven, adjust the rubber leveling legs so they are all firmly touching the floor. Your installer should correct this problem.
Unbalanced load
• Open door and manually redistribute load. To check machine, run rinse and spin with no load. If normal, unbalance was caused by load.
Clothes too wet
Drain hose is kinked or improperly connected
• Straighten drain hose and make sure washer is not sitting on it.
Household drain may be clogged
• Check household plumbing. You may need to call a plumber.
Drain hose siphoning; drain hose pushed too far down the drain
• Ensure there is an air gap between hose and drain.
Washer pump filter may be clogged
• Have your pump filter cleaned.
Load is out of balance
• Redistribute clothes and run drain & spin or rinse & spin.
• Increase load size if washing small load containing heavy and light items.
No power/washer not working or dead
Drain hose is kinked or improperly connected
• Straighten drain hose and make sure washer is not sitting on it.
Household drain may be clogged
• Check household plumbing. You may need to call a plumber.
Drain hose pushed too far down the drain
• Ensure there is an air gap between hose and drain.
Washer pump filter may be clogged
• Have your pump filter cleaned.
Washer is unplugged
• Make sure cord is plugged securely into a working outlet.
Water supply is turned off
• Turn both hot and cold faucets fully on.
Circuit breaker/fuse is tripped/blown
• Check house circuit breakers/fuses. Replace fuses or reset breaker. Washer should have separate outlet.
Controls are not set properly
• Hold START/PAUSE button to start cycle.
Automatic self system checks
• First time the washer is plugged in, automatic checks occur. It may take up to 20 seconds before you can use your washer. This is normal operation.
Water does not enter washer or enters slowly.
Automatic self system checks
• After START is pressed, the washer does several system checks. Water will flow several seconds after START is pressed.
Water supply is turned off
• Turn on both hot and cold faucets fully
Water valve screens are stopped up
• Turn off the water source and remove the water connection hoses from the upper back of the washer. Use a brush or toothpick to clean the screens in the machine. Reconnect the hoses and turn the water back on.
Snags, holes, tears, rips or excessive wear
Pens, pencils, nails, screws or other objects left in pockets
• Remove loose items from pockets.
Pins, snaps, hooks, sharp buttons, belt buckles, zippers and sharp objects left in pockets
• Fasten snaps, hooks, buttons and zippers
Wrinkling
Improper sorting
• Avoid mixing heavy items (like work clothes) with light items (like blouses).
Overloading
• Load your washer so clothes have enough room to move freely.
Incorrect wash cycle
• Match Cycle selection to the type of fabric you are washing (especially for easy care loads).
Repeated washing in water that is too hot
• Wash in warm or cold water.
Grayed or yellowed clothes
Not enough detergent
• Use correct amount of detergent.
Not using HE (high efficiency) detergent
• Use HE detergent.
Hard water
• Use hottest water safe for fabric.
• Use a water conditioner like Calgon brand or install a water softener.
Water is not hot enough
• Make sure water heater is delivering water at 120°–140°F (48°–60°C).
Detergent is not dissolving
• Try a liquid detergent.
Dye transfer
• Sort clothes by color. If fabric label states wash separately, unstable dyes may be indicated.
Colored spots
Incorrect use of fabric softener
• Check fabric softener package for instructions and follow directions for using dispenser.
Dye transfer
• Sort whites or lightly colored items from dark colors.
• Promptly remove wash load from washer.
Water temperature is incorrect
Water supply is improperly connected
• Make sure hoses are connected to correct faucets.
House water heater is not set properly
• Make sure house water heater is delivering water at 120°–140°F (48°–60°C).
Additionally, the document applies to other GE - General Electric models: GBVH5140, GCVH6260, GCVH6600, GHDVH626, GHDVH670, WBVH5100, WBVH6240, WCVH6260, WCVH6600, WHDVH626, WHDVH660, WCVH6400, WBVH5200


 must line up on center when the insert is in the powder position.
 must line up on center when the insert is in the liquid position.
 .
.


 must line up on center when the insert is in the powder position.
 must line up on center when the insert is in the liquid position.
 .
.