Loading ...
Loading ...
Loading ...
!
6
2. INSTALLATION
! Release the power chord and
drain hose from the securing
clip at the rear of the machine.
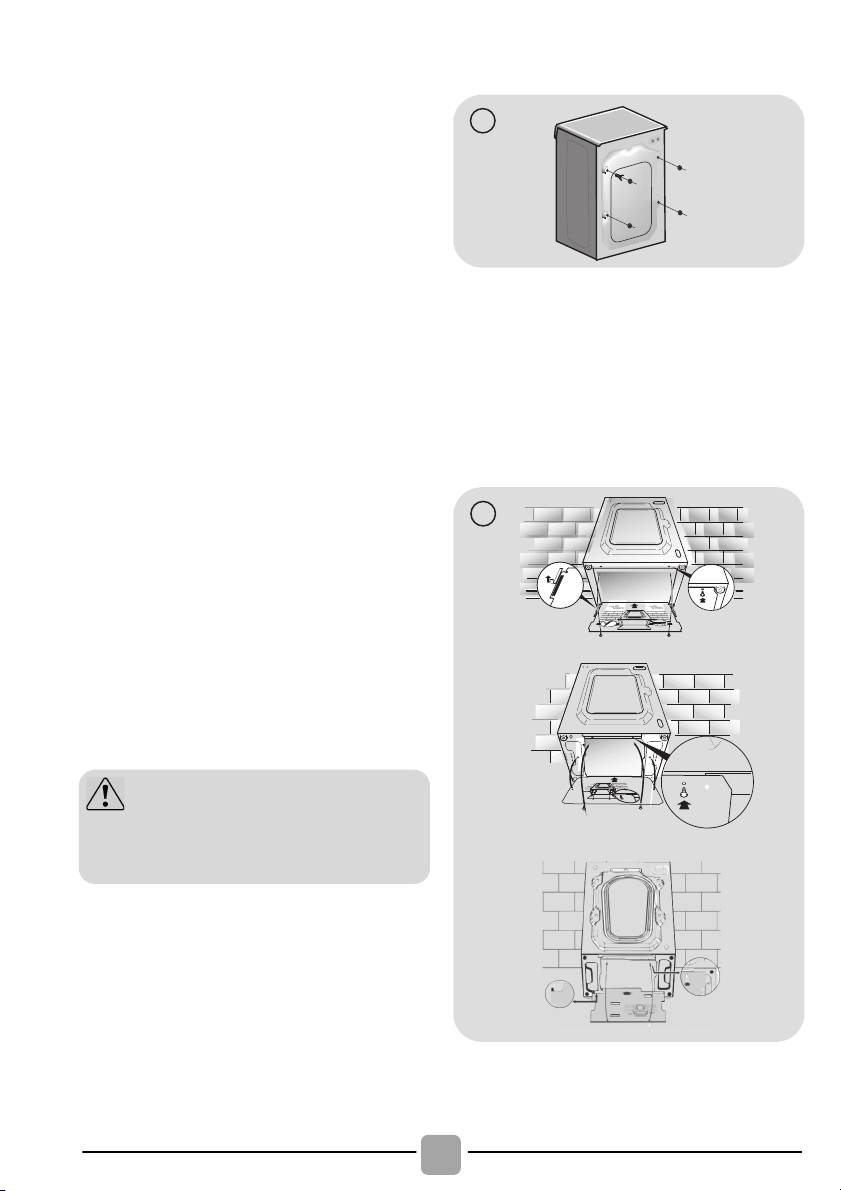
! Remove the 2 or 4 transportation
screws (A) on the back and
remove the 2 or 4 flat washers,
rubber bungs and plastic spacer
tubes (B) as illustrated in figure 1.
! If the washing machine is built-in,
unscrew the 3 or 4 transportation
screws (A) and remove the 3 or
4 flat washers, rubber bungs and
plastic spacer tubes (B).
!
During the removal of the screws
occasionally spacer tubes fall
inside the product, these can be
remove by tilting the product forward
and recovering them from the floor
or inside the base of the machine.
! Cover the open transportation
screw holes with the 2 or 4
plastic caps included in the
instruction bag.
Place the corrugated plastic
sheet, found on top of the
appliance during the unpacking
process, into the base of the
appliance as shown in figure 2
(according to the model,
consider version A, B or C).
A
A
A
A
B
B
B
B
1
3
2
1
3
1
2
A
C
B
2
WARNING:
keep packaging materials
away from children.
Loading ...
Loading ...
Loading ...