Loading ...
Loading ...
Loading ...
6
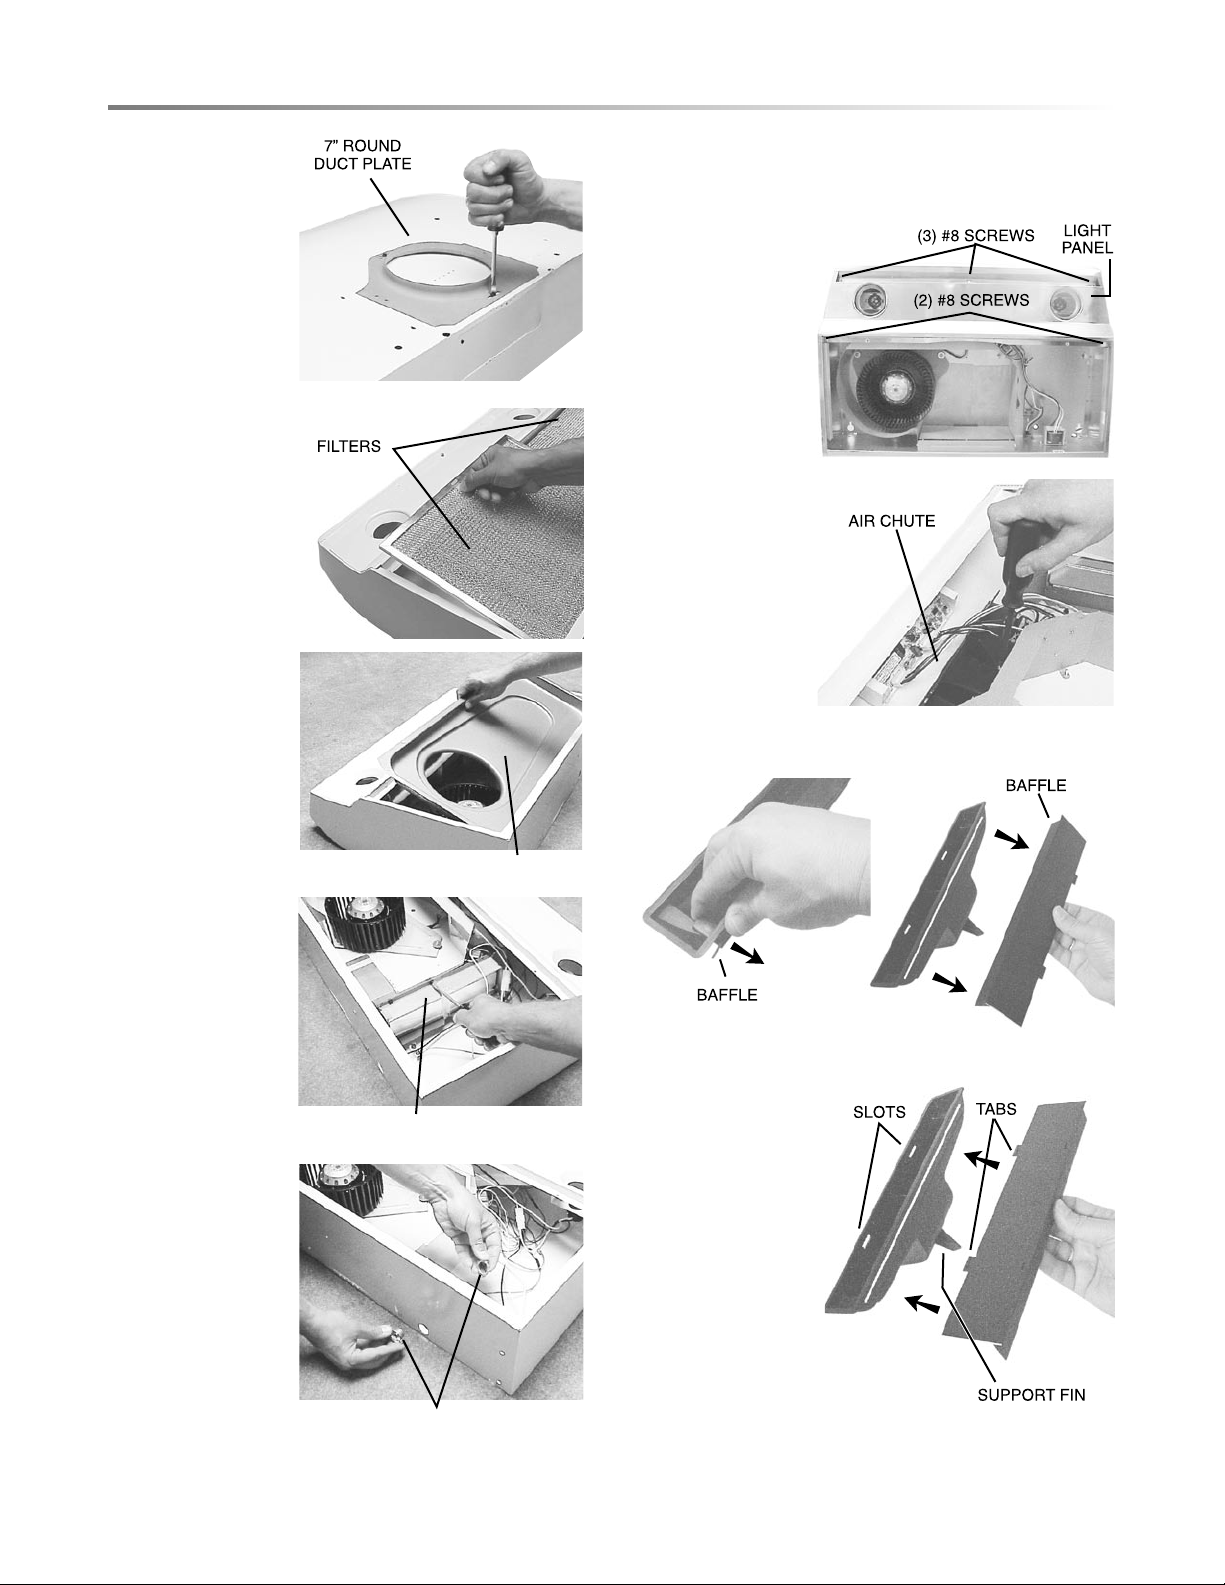
NON-DUCTED INSTALLATION - Skip to page 8.
The following Steps (6 thru 14) are for DUCTED
INSTALLATION ONLY.
6 Rem ove L i g h t
Pa nel - held in
place with (5) #8
screws. Disconnect
l i g ht a s s e m b ly
w i r e h a r n e s s
(white connector).
7 Remove Air Chute
- held in place with
one (1) screw.
Note: Be careful
not to disconnect
any wires.
8 Remove Baffle from air chute.
1 Remove 7” Round
Duct Plate from top
of hood. Set duct
plate aside - with
mounting screws.
2 R e m o v e t a p e
holding Filters in
place. Pull down
on filter tabs or
finger holes and
lift filters out. Set
filters aside.
3 Remove Teflon
®
-
Coated Bot t om
Cover from hood.
S e t c o v e r a n d
mounting screws
aside.
Teflon
®
is a registered
trademark of DuPont.
4 Remove Damper/
Duct Connector
from insid e the
hood. Set connector
aside - with mounting
screws and parts
bag.
5 Remove either top
or ba ck w i r i n g
knockout and install
approved Electrical
Cable Clamp.
PREPARE THE HOOD
TEFLON
®
-COATED BOTTOM COVER
(Held in place with 2 screws)
DAMPER/ DUCT CONNECTOR
ELECTRICAL CABLE CLAMP
9 Rotate baff le.
Reinsert baffle
into ai r chute
(as shown) so
that baffle Tabs
fit all the way
into
Slots in air
chute. An audible
“click” will be
heard when fully
installed. This
will close off the
air flow through
the non-ducted
slots on top of
hood.
Loading ...
Loading ...
Loading ...