Loading ...
Loading ...
Loading ...
Initial operation 9
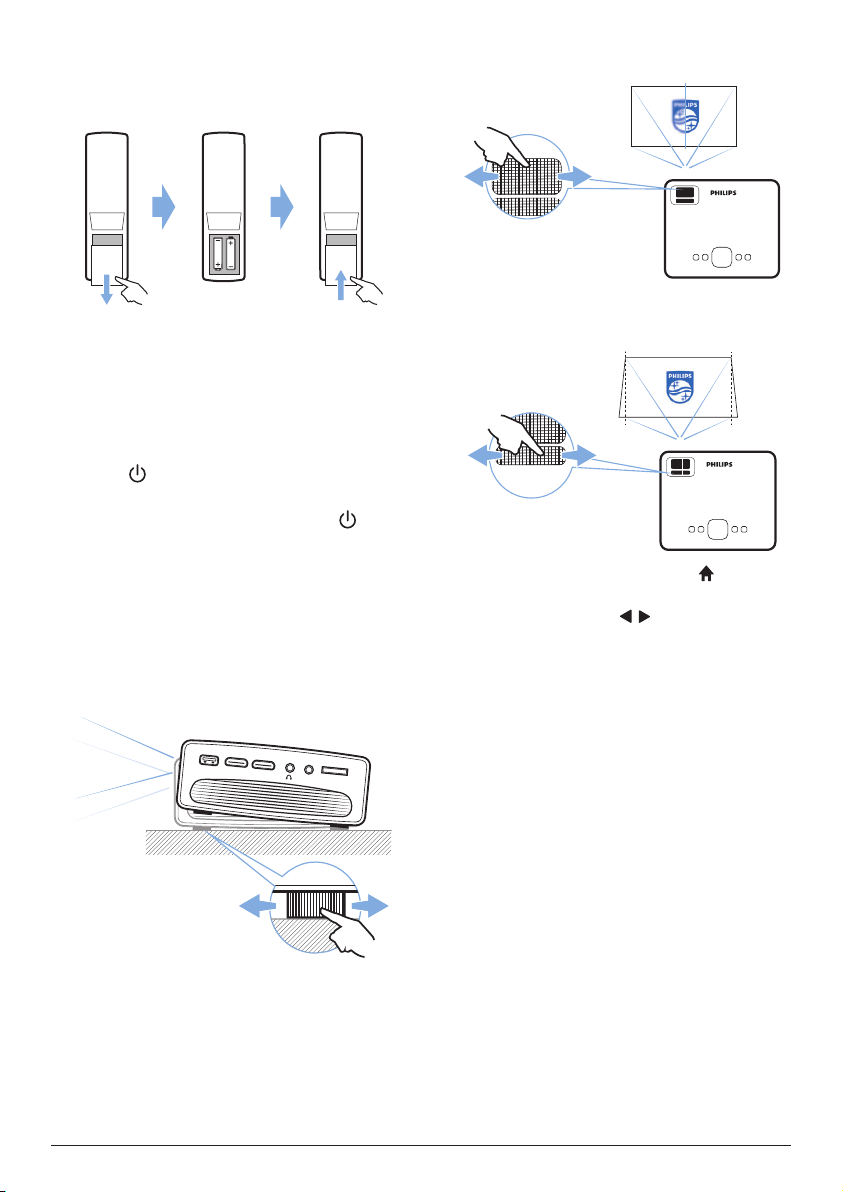
1 Open the battery compartment.
2 Insert the supplied batteries (type AAA)
with correct polarity (+/- ) indicated.
3 Close the battery compartment.
• When using the remote control, point
the remote control at the IR sensor on
the projector, and make sure there is no
obstacle between the remote control and
the IR sensor.
Power on and setup
1 Press to turn on the projector. The LED
on the projector turns from red to green.
• To turn off the projector, press again.
The LED on the projector turns from
green to red.
• The distance between the projector and
the screen determines the actual size of
the image.
2 To adjust the screen height when placing
the projector on the table, turn the angle
adjustment knob located on the bottom of
the projector.
M
I
C
R
O
S
DA
U
X
H
DMI 1
H
DMI
2
US
B
MICRO SD
AUX
HDMI 1 HDMI 2
USB
3 To adjust image focus, turn the focus knob
on the top of the projector.
NeoPix
Ultra
4 To correct keystone or distorted images to
be rectangular or square, turn the keystone
knob on the top of the projector.
NeoPix
Ultra
• Or to adjust image shape,
press , and
select Settings -
Advanced Settings
- V.
Keystone, then press
/ on the remote
control to adjust the screen position.
Loading ...
Loading ...
Loading ...