Loading ...
Loading ...
Loading ...
6
OPERATING INSTRUCTIONS
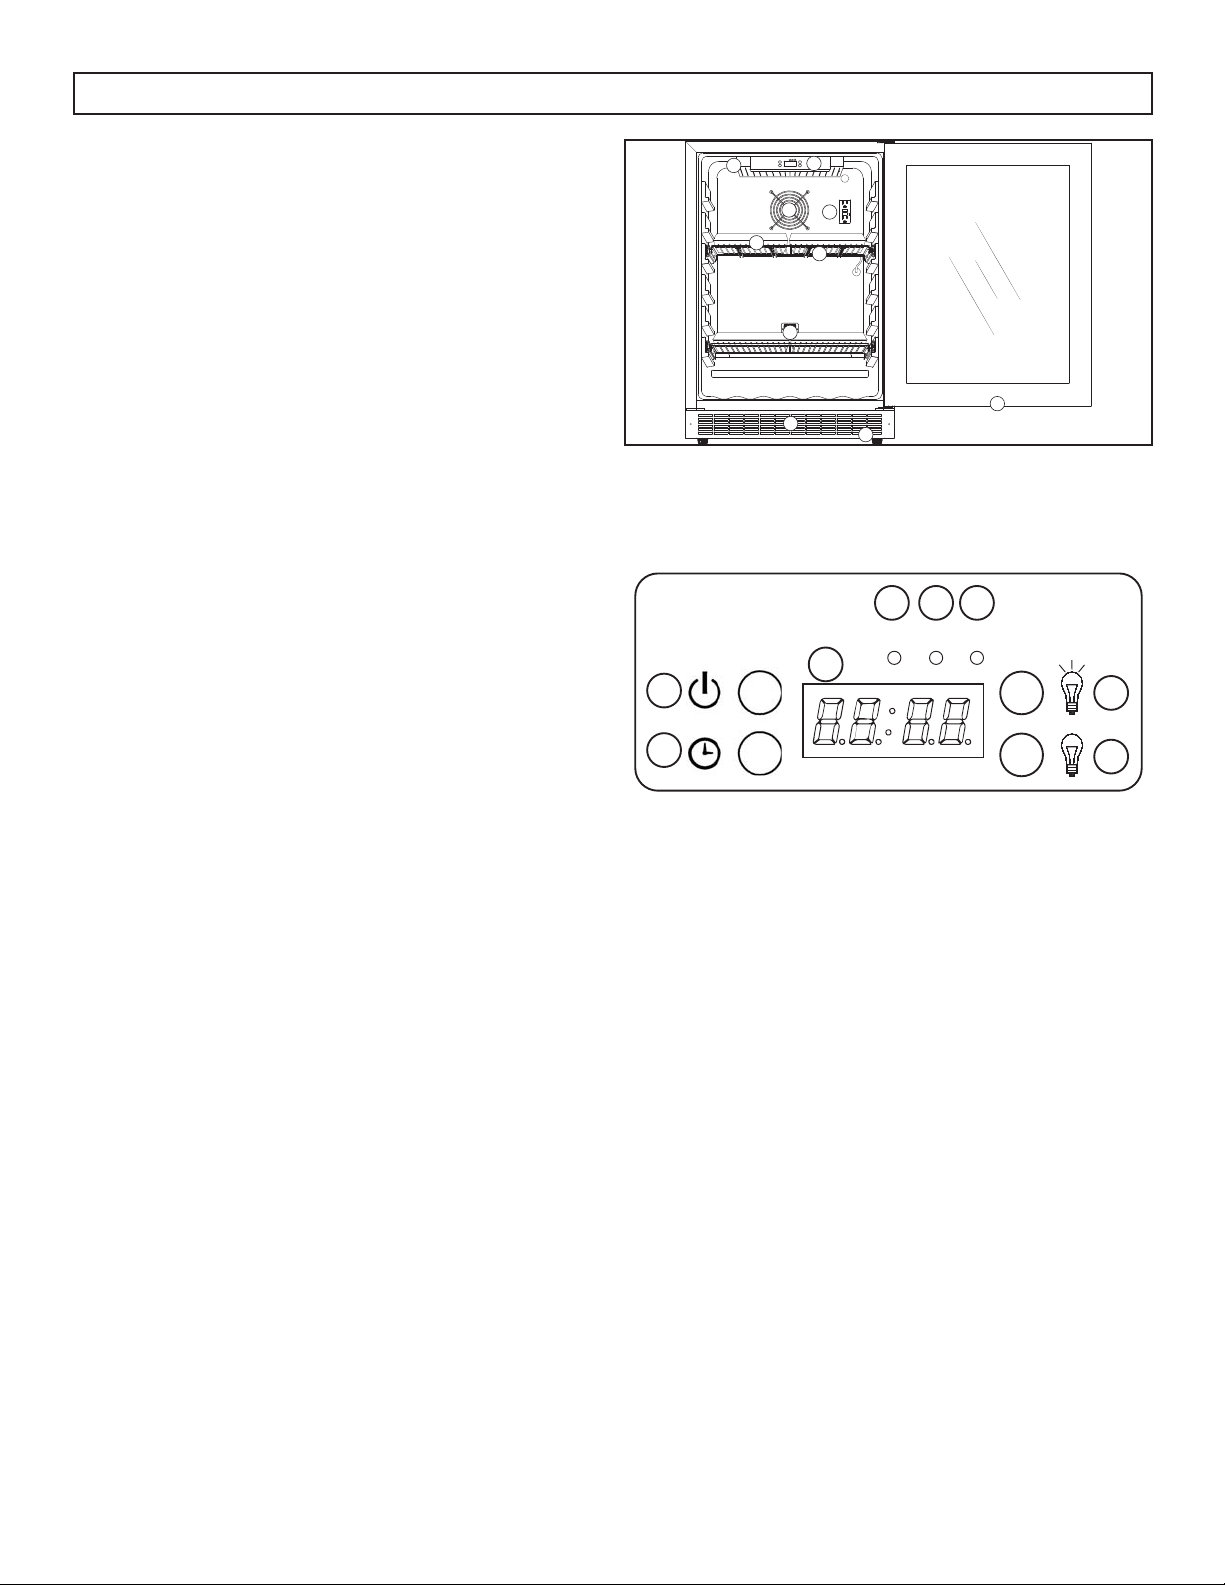
FEATURES
1. LED light box
2. Control panel
3. Air outlet / Fan
4. GFCI outlet
5. Wire shelves
6. LED light strip (on bottom of shelf)
7. Seed trays and humidity domes (x6)
8. Front mounted exhaust
9. Adjustable foot
10. Air inlets (top and bottom of door)
CONTROL PANEL
1. Power button
• Used to turn the appliance on or off.
• Powering off the appliance clears all light
programming.
2. Clock button
• Press once to check the running cycle time.
• Press and hold for 3 seconds to set the clock.
3. Display screen
• Time display screen.
4. R indicator: Light will fl ash when setting the
running cycle time.
5. N indicator: Light will fl ash when setting the light
on time.
6. F indicator: Light will fl ash when setting the light
off time.
7. Light on button
• Press once to check the light on time.
• Press and hold for 3 seconds to set the light
on time.
• Use to increase the number when setting a
function.
8. Light off button
• Press once to check the light off time.
• Press and hold for 3 seconds to set the light
off time.
• Use to decrease the number when setting a
function.
R N F indicator: illuminated to signify that light
running mode is in operation.
1
2
3
5
6
7
8
9
10
4
R
N
F
1
2
3
4 5 6
7
8
NOTE ON LIGHT SYSTEM
The light box on the ceiling of the cabinet and
the light strips on the under side of the shelf are
connected to the same control panel. Setting light on
and light off times in the control panel will control
both sets of lights.
If you only wish to run the light box on the ceiling of
the cabinet, unplug the wire leading to the lights on
the shelf.
If you only wish to run the lights on the shelf, unplug
the wire leading to the light box.
Always ensure that the light system you wish to run
is plugged into the control panel.
Loading ...
Loading ...
Loading ...