

1 Foil & Cutter cassette
2 Cassette release button
3 Shaver head lock switch
4 Pop-out long hair trimmer
5 On/off switch
6 – setting button (sensitive)
7 + setting button (intensive)
8 Reset button
9 Shaver display
10 Shaver power socket
11 Travel case
12 Special cord set
|
Recommended ambient temperature for charging is 5 °C to 35 °C. The battery may not charge properly or at all under extreme low or high temperatures. Recommended ambient temperature for shaving is 15 °C to 35 °C. Do not expose the shaver to temperatures higher than 50 °C for extended periods of time. • Using the special cord set 12, connect the shaver to an electrical outlet with the motor switched off and charge it for at least one hour. • A full charge provides up to 50 minutes of cordless shaving time. This may vary according to your beard growth and environmental temperature. |
![]() |
| The shaver display shows the charge status of the battery. During charging or when using the shaver, the respective green charge indicator will blink. When the battery is fully charged the green charge indicator will light up continuously, provided the shaver is connected to an electrical outlet. Some minutes after completing the charging, the shaver switches to the stand-by-mode: The display turns off. The low charge indicator blinks red to indicate that the battery is running low. The remaining battery capacity is sufficient for 2 to 3 shaves. |
|
![]() |
Personalizing your shaver By holding down the accelerator button –/+ (6 or 7) you can adjust the shaving power to your individual needs in the different areas of your face from sensitive to intensive. The pilot light in the on/off switch 5 changes within the following range: (–) sensitive shave - light blue - dark blue - green (+) intensive shave For a thorough and fast shave we recommend the green (intensive) setting. When switching on next time, the last used setting will be activated. |
|
![]() |
How to use Press the on/off switch 5 to operate the shaver: • The pivoting shaver head and floating foils automatically adjust to every contour of your face. • To shave hard to reach areas (e.g. under the nose) slide the shaver head lock switch 3 to the back position to lock the pivoting head at an angle. • To trim sideburns, moustache or beard, slide the pop-out long hair trimmer 4 upwards. Tips for the perfect dry shave For best shaving results, Braun recommends you follow 3 simple steps: 1. Always shave before washing your face. 2. At all times, hold the shaver at right angles (90°) to your skin. 3. Stretch your skin and shave against the direction of your beard growth. |
|
Regular cleaning ensures better shaving performance. Rinsing the shaver head under running water after each shave is an easy and fast way to keep it clean: • Switch the shaver on (cordless) and rinse the shaver head under hot running water until all residues have been removed. You may use liquid soap without abrasive substances. Rinse off all foam and let the shaver run for a few more seconds. • Next, switch off the shaver, press the release button 2 to remove the Foil & Cutter cassette 1 and let it dry. • If you regularly clean the shaver under water, then once a week apply a drop of light machine oil on top of the Foil & Cutter cassette. Alternatively, you may clean the shaver with a brush: • Switch off the shaver. Remove the Foil & Cutter cassette 1 and tap it out on a flat surface. Using a brush, clean the inner area of the pivoting head. However, do not clean the cassette with the brush as this may damage it. |
|
|
Replacing the Foil & Cutter cassette / reset To maintain 100% shaving performance, replace the Foil & Cutter cassette 1, when the replacement symbol lights up on the shaver display 9 after about 18 months or when cassette is worn. The replacement symbol will remind you during the next 7 shaves to replace the Foil & Cutter cassette. Then the shaver will automatically reset the display. After you have replaced the Foil & Cutter cassette, use a ball-pen to push the reset button 8 for at least 3 seconds to reset the counter. While doing so, the replacement light blinks and goes off when the reset is complete. The manual reset can be done at any time. |
|
| Problem: | Possible reason: | Remedy: |
| SHAVER | ||
| Unpleasant smell from the shaver head. | Shaver head is cleaned with water. | When cleaning the shaver head with water only use hot water and from time to time some liquid soap (without abrasive substances). Remove Foil & Cutter cassette to let it dry. |
| Battery performance dropped significantly. |
1. Foil and cutter are worn which requires more power for each shave. 2. Shaver head is regularly cleaned with water but not lubricated |
1. Renew Foil & Cutter cassette. 2. If the shaver is regularly cleaned with water, apply a drop of light machine oil on top of the foil once a week for lubrication. |
| Shaving performance dropped significantly. |
1. Foil and cutter are worn. 2. Personal setting of shaving performance has been changed. 3. Shaving system is clogged. |
1. Renew Foil & Cutter cassette. 2. For a thorough and fast shave we recommend the green (intensive) setting. 3. Soak the Foil & Cutter cassette into hot water with a drop of dish liquid. Afterwards rinse it properly and tap it out. Once dry apply a drop of light machine oil on the foil. |
| Shaver turns off with fully charged battery. | Foil and cutter are worn which requires more power than the motor can deliver. The appliance turns off. |
– Renew Foil & Cutter cassette. – Regularly oil the shaving system, especially when cleaning with water only. |
| Battery segments in the display are skipped with decreasing battery capacity. | Foil and cutter are worn which requires more power for each shave. |
– Renew Foil & Cutter cassette. – Regularly oil the shaving system, especially when cleaning with water only |
| Shaving parts have been changed recently but replacement symbol lights up. | Reset button has not been pushed. | – Push the reset button for at least 3 seconds to reset the counter. |
Reference file: 
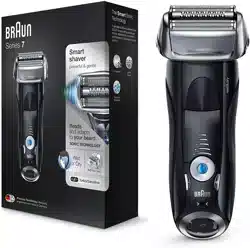
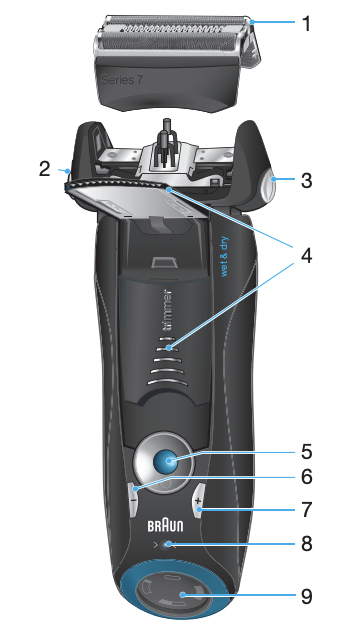
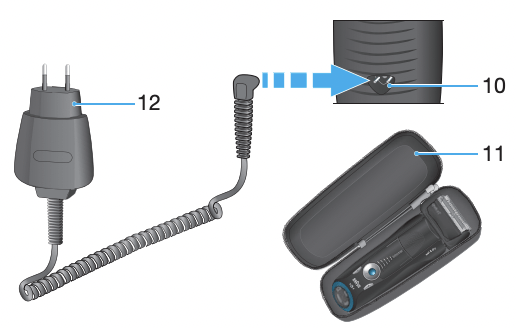
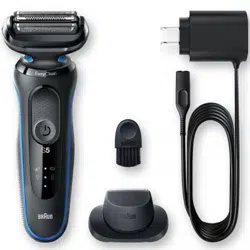
Braun 7840S Series 7 Wet & Dry Electric Shaver
Series: Series 7
Additionally, the document applies to other Braun models: 7893S, 7855S, 7842S, 7740S