Getting to know your appliance
Before reading the instructions. please fold out the back pages. These operating instructions refer to several models.
Diagrams may vary.
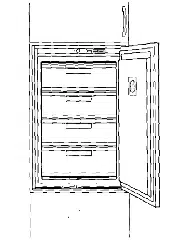
Figure 1
Example of features
- Temperature selector/ interior light
- Shelf in the refrigerator compartment
- Vegetable compartment
- Ventilation grille
- Shelf for tubes and small tins
- Butter and cheese compartment
- Egg rack
- Shelf for large bottles
Ventilation
Fig. 1/4
The refrigerating unit is ventilated only via the ventilation grille in the base. NEVER cover or block the ventilation grille.
Otherwise. the refrigerating unit must work harder. increasing the power consumption.
Note ambient temperature and ventilation
The appliance can be operated at the following ambient temperatures depending on the “climatic category” (see rating plate). (The rating plate can be found inside the appliance at the bottom left-hand side. Fig 13).
Climatic Ambient temperature category from...to
SN +10 °C bis 32°C
N +16 °C bis 32°C
ST +18 °C bis 38 °C
T. +18 °C bis 43°C
Connecting the appliance
After installing the appliance. wait at least 1/2 hour until the appliance starts up.
During transportation the oil in the compressor may have flowed into the refrigeration system.
Before switching on the appliance for the first time. clean the interior (see Cleaning).
The socket should be freely accessible.
Connect the appliance to 220-240 V/50 Hz alternating current via a correctly installed earthed socket. The socket must be fused with a 10 A fuse or higher.
If the appliance is to be operated in a non-European country. check on the rating plate whether the indicated voltage and current type correspond to the values of your mains supply.
The rating plate is situated in the bottom left-hand side of the appliance.
The power cord may be replaced by an electrician only.
Switching ON the appliance
Turn the temperature selector Fig. Ei/2 from “0”. The appliance begins to cool.
When the door is open the interior light switches ON.
Setting the temperature
We recommend an average setting of approx. +4 °C.
Perishable food should not be stored warmer than +4 °C.
Turn the temperature selector Fig. /2 to a setting. Higher settings indicate lower temperatures in the refrigerator and freezer compartments. We recommend the following settings:
+ Low setting (energy-saving mode. e.g. 1-2) for short-term storage of food in the freezer compartment.
+ Medium setting (e.g. 2-3) for long-term storage of food and for freezing fresh food.
+ Higher setting (e.g. 4-5). temporary setting if: high ambient temperature. door opened frequently. large amounts of food placed in the refrigerator compartment.
Cooling capacity
The temperature in the refrigerator compartment may rise temporarily if fairly large quantities of food are placed in it.
Therefore. the temperature selector should be set to a higher setting (e.g. 4) for 7 hours.
Operating information
The temperature in the refrigerator compartment becomes temporarily colder:
- If large amounts of fresh food are frozen in the freezer compartment.
The temperature in the refrigerator compartment becomes warmer:
- If the appliance door is opened frequently
- If large amounts of food are inserted
- If the ambient temperature is high.
Condensation droplets or hoarfrost in the refrigerator compartment
While the refrigerating unit is running. condensation droplets or hoarfrost form on the rear panel of the refrigerator compartment. This is normal.
It is NOT necessary to wipe off the condensation droplets or the hoarfrost. The rear panel defrosts automatically. The condensation flows into the drainage channel! Fig 3. Ell and is conveyed to the refrigerating unit where it evaporates.
Switching OFF and disconnecting the appliance
Switching OFF the appliance
Turn the temperature selector Fig. 2/2 to “O”. The refrigerating unit and interior light switch OFF.
Disconnecting the appliance
If the appliance is not to be used for a prolonged period:
1. Pull out the mains plug or trip the fuse.
2. Defrost and clean the appliance
3. Leave the appliance door and freezer-compartment door open.
Rearranging the interior
If required. the interior shelves and the door containers can be repositioned: pull the shelf forwards. lower and swivel out sideways Fig 4. Lift the container and remove Fig 5.
Vegetable container
Fig 6
The vegetable container can be removed for loading and unloading produce and for cleaning. Pull the container slightly forwards and swing out to the side.
Special features (not all models)
Vario shelf
Fig. 7
The front half of the Vario shelf can be taken out. You can then place tall items (e.g. cans. bottles) on the shelf below.
Butter and cheese compartment
Figure 8
The bottom part of the cheese and butter dishes may be removed for cleaning.
Effective capacity
Specifications on the effective capacity without interior features according to the current standard can be found on the rating plate.
With interior features the usable capacity according to the rating plate specifications is:
Refrigerator compartment:
- Effective capacity: 177L
- Usable capacity: 171L
Storing of food
Take note of the cold zones in the refrigerating zone!
Due to the air circulation in the refrigerating zone. zones with different temperatures are produced:
+ Coldest zones are on the rear walls and are found. according to model. between the printed side arrows and the glass shelf below
Fig. 10/A or between both arrows
Fig. 11/B
Note: Store the most sensitive foods in the coldest zones (e.g. fish. sausage. meat).
+ Warmest zone is near the door at the top.
Note: Store the following in the warmest zone. e.g. cheese and butter. When serving. the cheese keeps it aroma and the butter remains spreadable.
When storing the food. note that food is well wrapped or covered over.
In this way. the aroma. colour and freshness remain. Apart from which. the transfer of taste and dying of plastic parts is avoided.
We recommend that you arrange the food inside the refrigerator as follows:
+ on the shelves in the main refrigerator section (from the top down): bakery products. ready-to-eat items. dairy products. meat and salami
+ in the vegetable containers: vegetables. lettuce. fruit
+ in the door racks (from the top down): butter. cheese. eggs. tubes. small bottles. large bottles. milk and fruit-juice cartons.
Attention! Never clean the appliance with a steam cleaner! Steam may come into contact with electrical components and cause a short-circuit or an electric shock! The steam may damage the plastic surfaces.
Do not use abrasive or acidic cleaning agents and solvents.
Regularly clean the condensation channel and drainage hole. Fig. 3. so that the condensation can flow out. Clean the condensation channel with cotton buds. etc.
The rinsing water must not run through the drain hole into the evaporation pan.
Attention!
Never clean the shelves or containers in the dishwasher. The parts may warp!
Cleaning the appliance
+ Attention: Pull out the mains plug or switch off the fuse!
Wipe the door seal with water only and then dry thoroughly.
+ Clean the appliance with tepid rinsing water. The rinsing water must not get into the temperature selector or light. Fig. 2
+ After cleaning: reconnect and switch on the appliance.
+ The base panel. Fig 11,can be removed for cleaning; to do this. press down the clips in the ventilation slots and simultaneously remove the base panel forwards.
Tips for saving energy
Install the appliance in a dry. well ventilated room. but not in direct sunlight and not near a heat source (e.g. radiator. cooker. etc.). If required. use an insulating plate.
+ Allow drinks to cool down before placing in the appliance!
+ Open and close the door as briefly as possible.
+ Occasionally clean the rear of the appliance with a vacuum cleaner or paint brush to prevent an increased power consumption.
Normal noises
+ Ahumming noise is emitted by the motor (compressor). When the motor switches ON. the noise may briefly increase in volume.
+ A bubbling. gurgling or whirring noise is emitted by the refrigerant as it flows through the tubing.
+ Aclicking noise can be heard when the thermostat switches the motor ON/OFF.
Noises which can be easily rectified
+ Drawers. baskets or shelves are loose or are sticking
Please check that the they are correctly positioned and. if required. reinsert them.
+ Bottles and/or receptacles are touching each other
Please move bottles and/or receptacles away from each other.
Eliminating minor faults by yourself
Before you call customer service. please check whether you can eliminate the fault by yourself based on the following information.
A technician who is called out for consultation purposes will charge the customer. even if the appliance is still under guarantee.
The interior light does not function; the refrigerating unit is running.
Possible cause
- The incandescent bulb is defective.
- The light switch is jammed. Fig. 12/B
Remedy
Replacing the incandescent bulb.
1. Pull out the mains plug or switch OFF the fuse.
2. Pull the cover grid forwards Fig. FA/A.
3. Change the bulb (Replacement bulb. 220-240 V a.c.. E14 lamp holder. see defective bulb for wattage).
Check whether it can be moved.
The floor of the refrigerator compartment is wet.
Possible cause
The condensation drainage pipe is blocked. Fig.3
Remedy
Clean the condensation channel and the drainage pipe (Fig.3. see “Cleaning the appliance”).
The temperature in the refrigerator compartment is too cold.
Possible cause
Temperature selector has been set too high.
Remedy
Set the temperature selector to a lower setting.
The refrigerating unit switches ON ever more frequently and longer.
Possible cause
Appliance door opened frequently.
The ventilation slots are blocked.
Remedy
Do NOT open the door unnecessarily.
Remove any obstructions.
The refrigerator is not cooling.
Possible cause
The temperature selector is set to “0”.
Power failure; the fuse has been switched off; the mains plug has not been inserted properly.
Remedy
Turn the temperature selector from “O”.
Check that the power is ON and check the fuses.