Loading ...
Loading ...
Loading ...
11
REMOTE MOTOR UNIT INSTALLATION
It is recommended that the roof space motor unit be mounted in an environment that is free of
other gases and air pressure that could create blow back. The motor unit has been designed with the
option of vertical or horizontal installation. Either mounted on a wall, roof purlon or ceiling joist. Some
other simple support framework may need to be added to provide the best installation.
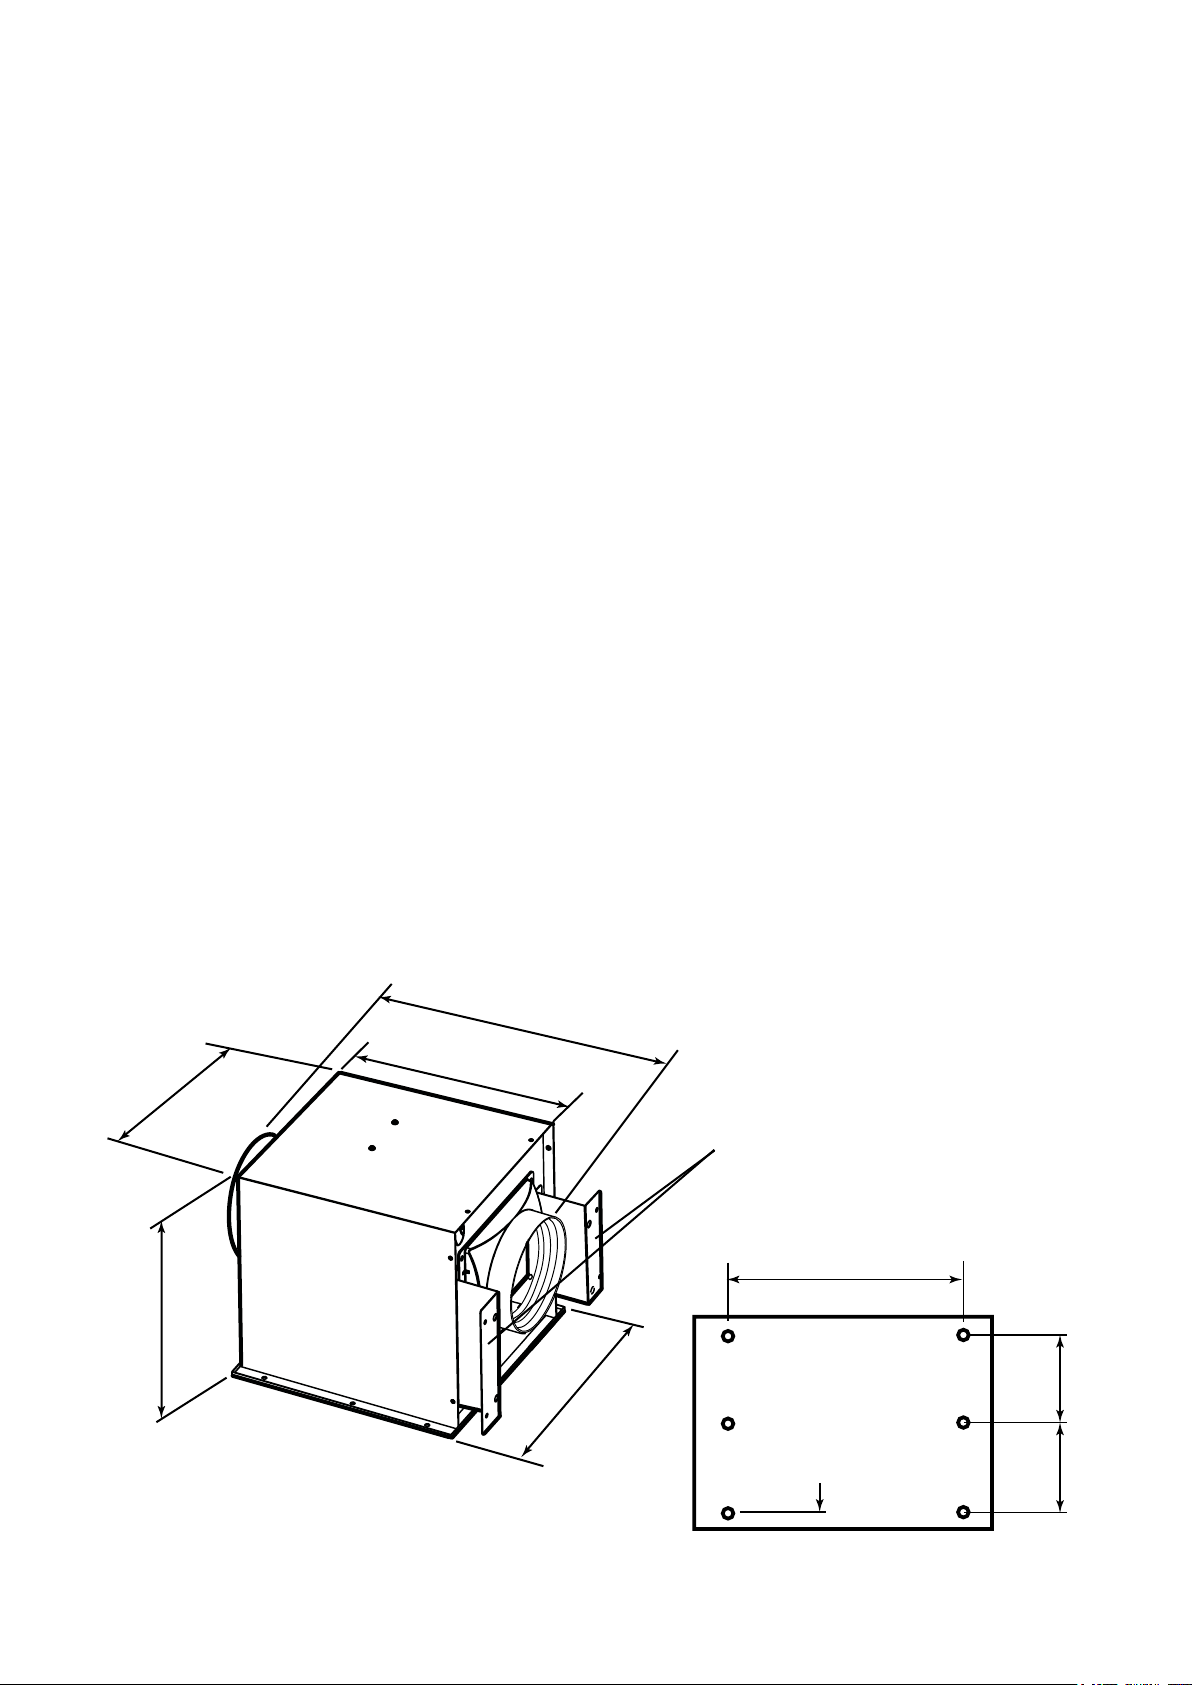
Take motor unit out of the packaging. Attached the black attachment modules using 4 screws on
each side. FIGURE 1.
Attach the two rigid metal connector sleeves. FIGURE 2.
Consider the location of the ducting to minimize the length of and the number of bends in the
ducting. THE DUCTING MUST BE TAUT TO PREVENT NOISE. CUT TO SUIT. The supplied ducting is
in 2 lengths. Use the most appropriate length to suit the installation on the entry and exit side.
Establish a suitable position in the roof space for the motor unit. Install it as close as
practical to the rangehood and the external vent.
Using the screws provided mount the motor unit onto a suitable structure in the roof space.
Check that the direction of air is owing the right way! Mount on a board across the roof joists if
required. FIGURE 3.
Feed the duct through from the rangehood and attach to the inlet side of the motor unit. Get the
duct as taut as possible to stop noise from vibration. It is important that the duct does not rest
against the stainless steel chimney.
Attach another length of duct to the outlet side with the ducting then directed to an external vent
in the roof or wall. FIGURE 2.
Ensure that there are no leaks and seal with duct tape. The ducting ts very tightly. Stretch the
end of the ducting out and it will t very well.
Feed the power cable from the motor unit down the chimney and plug it into the
rangehood. FIGURE 4.
1.
2.
3.
4.
5.
6.
317
280
414
322
313
120
120
42
Mounting holes in base
296
Optional wall mounting
brackets shown.
Loading ...
Loading ...
Loading ...