Loading ...
Loading ...
Loading ...
8 Philips · NeoPix Easy+
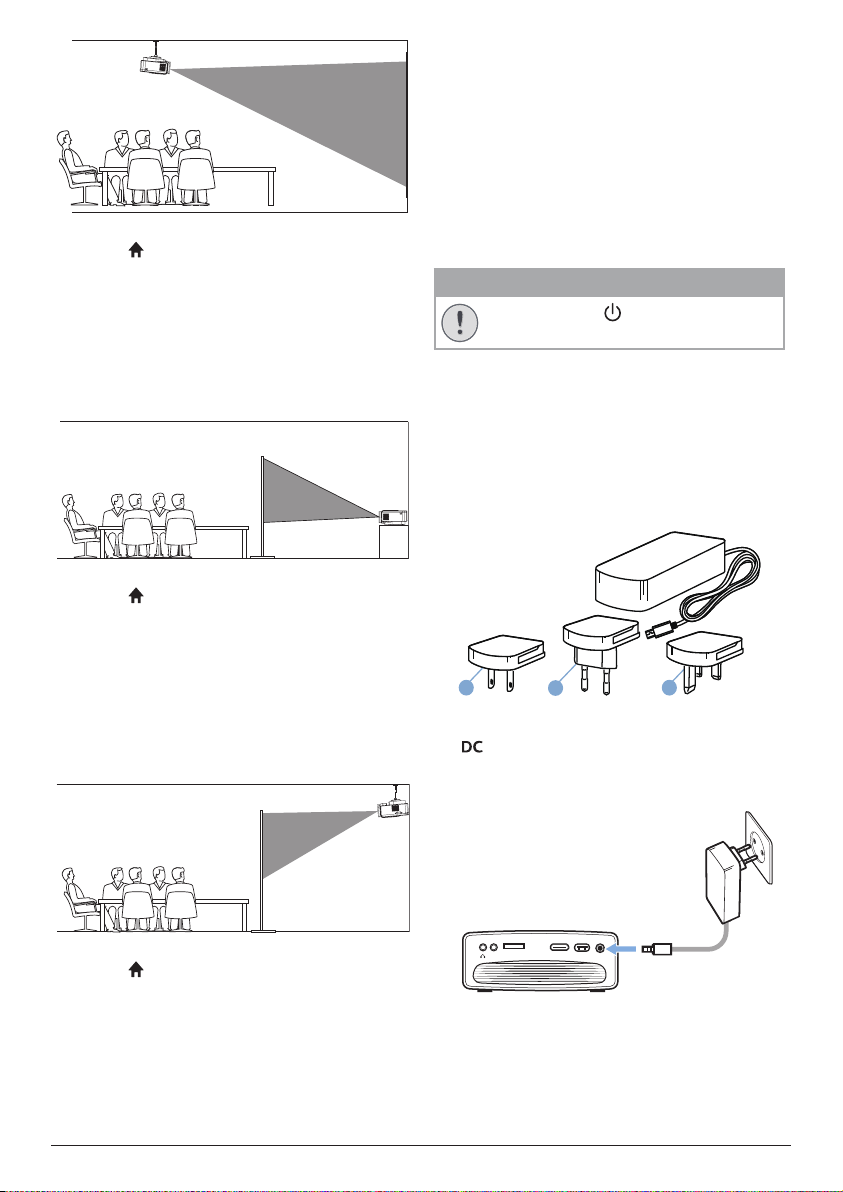
2 To adjust projection to the correct position,
press , and select Settings - Picture
Settings - Projection Location - Front
Ceiling.
Rear table
1 Place the projector on a table behind the
projection screen. A special rear projection
screen is required.
2 To adjust projection to the correct position,
press , and select Settings - Picture
Settings - Projection Location - Rear.
Rear ceiling
1 Mount the projector on ceiling with upside
up behind the projection screen. To mount
the projector on ceiling behind the screen,
a projector mount and a special rear
projection screen is required.
2 To adjust projection to the correct position,
press , and select Settings - Picture
Settings - Projection Location - Rear
Ceiling.
Changing screen size
The projection screen size (or size of images) is
determined by the distance between the lens
of the projector and the projection surface.
• The projection image size is to up to 80’’
(200 cm).
• The projection distance is 80 cm -
200 cm/24”- 60”.
Connecting power supply
CAUTION!
Always use the button to turn the
projector on and off.
1 Fix an appropriate plug (EU, UK, US) onto
the round base of the power adapter by
aligning the pins and holes.
• To detach the plug from the power
adapter, hold down the tab at the edge
of the round base, and simultaneously
turn and unlock the plug from the round
base of the power adapter.
US UK
EU
2 Connect the included power adapter to the
socket on the projector, and then to the
wall outlet.
• The LED on the projector turns red.
MICRO SD HDMI USB DCAUX
b
a
Loading ...
Loading ...
Loading ...