Loading ...
ASSEMBLY INSTRUCTIONS 18597-000 ONE LIGHT VANITY SCONCE
1. Turn off electrical power at the source by disconnecting the circuit breaker or removing the fuse from the fuse box. Turning
the power off at the light switch is not sufficient to prevent electrical shock.
2. Expose the supply wires from the outlet box. Outlet box is not included.
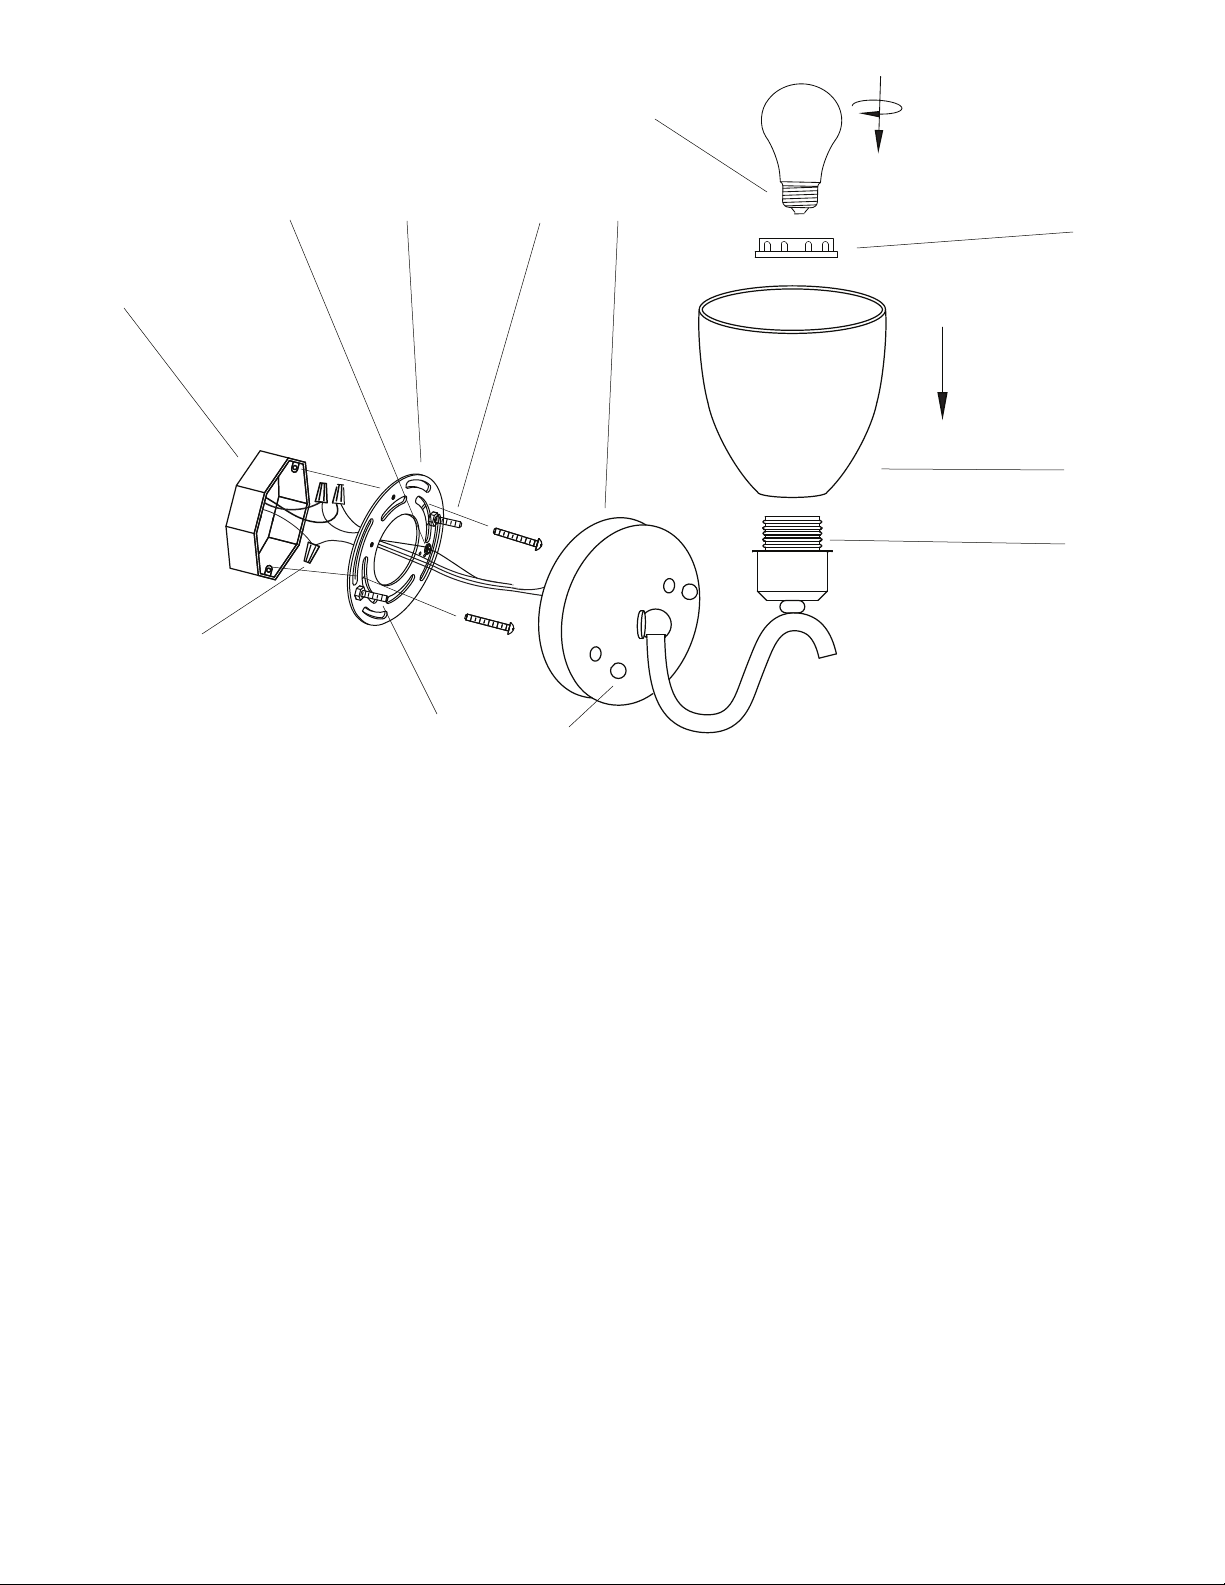
3. Thread the two Short Machine Screws (A) into the two holes of the Mounting Bracket (B). When threaded properly into the
Mounting Bracket (B) the ends of the two Short Machine Screws (A) will face into the outlet box. Tighten the two Short
Machine Screws (A) to secure the Mounting Bracket (B) to the outlet box.
4. Make electrical connections:
Required Supply Circuit: 120 V, 60 Hz
Connect the white wire from the fixture to the white wire from the
supply circuit.
Connect the black wire from the fixture to the black wire from the
supply circuit.
Connect the green wire (or bare copper wire) to the grounding conductor from the supply circuit.
Use U.L./CSA listed wire connectors suitable for the size, type and number of conductors.
No loose strands or connections should be present.
Secure wire connectors with U.L./ CSA listed electrical tape.
6. Align the two holes in the Lamp Fixture (C) to the ends of the two
are preassembled to the Mounting Bracket (B).
Mounting Bracket Screws (D). The Mounting Bracket
7.
Screws (D)
Allow the ends of the two Mounting Bracket Screws (D) to pass through the two holes in the Lamp Fixture (C).
8. Secure the two Mounting Bracket Screws (D) to the Lamp Fixture (C) by threading the two Finials (E) to the ends of the
11. Install one 60 Watt incandescent light bulb into the Socket (F). Light bulb not included.
DO NOT EXCEED RECOMMENDED WATTAGE.
10.
Place the Shade (G) on the Socket (F) and secure with Shade Nut (H).
12. Restore power at source.
13. Turn light on at wall switch.
122012AMZsm
For Customer
Assistance:
www.evolutionlightingllc.com
Made In China
Bulb
(not included)
If a ground wire does not exist in the outlet box, connect the fixture ground wire directly to the Ground Screw (J) located
on the Mounting Bracket (B). If you have electrical questions consult a qualified, licensed electrician.
Outlet Box
(not included)
A
B C
D
E
F
G
H
Wire
Connector
9. Remove Shade Nut (H) from the Socket (F).
two Mounting Bracket Screws (D).
J
GND
Loading ...
Loading ...
Loading ...