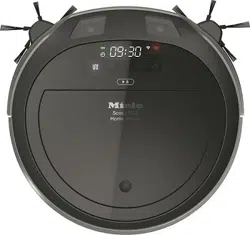
Miele SCOUTRX2 Autumn Red Vacuum Cleaner

User Manual

For SCOUTRX2.

PDF File Manual, 80 pages, Read Online | Download pdf file

SCOUTRX2 photo
background
en Operating Instructions Robot Vacuum Cleaner
fr Mode d'emploi Aspirateur-robot
M.-Nr. 10 783 332
HS18
Loading page 2...
Loading page 3...
Loading page 4...
Loading page 5...
Loading page 6...
Loading page 7...
Loading page 8...
Loading page 9...
Loading page 10...
Loading page 11...
Loading page 12...
Loading page 13...
Loading page 14...
Loading page 15...
Loading page 16...
Loading page 17...
Loading page 18...
Loading page 19...
Loading page 20...
Loading page 21...
Loading page 22...
Loading page 23...
Loading page 24...
Loading page 25...
Loading page 26...
Loading page 27...
Loading page 28...
Loading page 29...
Loading page 30...
Loading page 31...
Loading page 32...
Loading page 33...
Loading page 34...
Loading page 35...
Loading page 36...
Loading page 37...
Loading page 38...
Loading page 39...
Loading page 40...
Loading page 41...
Loading page 42...
Loading page 43...
Loading page 44...
Loading page 45...
Loading page 46...
Loading page 47...
Loading page 48...
Loading page 49...
Loading page 50...
Loading page 51...
Loading page 52...
Loading page 53...
Loading page 54...
Loading page 55...
Loading page 56...
Loading page 57...
Loading page 58...
Loading page 59...
Loading page 60...
Loading page 61...
Loading page 62...
Loading page 63...
Loading page 64...
Loading page 65...
Loading page 66...
Loading page 67...
Loading page 68...
Loading page 69...
Loading page 70...
Loading page 71...
Loading page 72...
Loading page 73...
Loading page 74...
Loading page 75...
Loading page 76...
Loading page 77...
Loading page 78...
Loading page 79...
Loading page 80...

Other documents for Miele SCOUTRX2

The following documents are available:
User Manual Other Documents Photos

Specifications

User Manual - Transcript

  • Page 1: en Operating Instructions Robot Vacuum Cleaner fr Mode demploi Aspirateurrobot MNr 10 783 332 HS18
  • Page 3 - English - : en Contents IMPORTANT SAFETY INSTRUCTIONS 4 Appliance overview 10 Caring for the environment 12 Functions and features of the robot vacuum cleaner 13 Included accessories 13 Preparing for use 13 Use 15 Scout RX2 App 20 Maintenance 22 Purchasing accessories 22 Ordering the correct accessories 22 Emptying the dust box 22 Cleaning the dust box 23 Cleaning the exhaust filter 23 Cleaning the side brushes 23 Cleaning the roller brush 24 Cleaning the dust box seals 25 Replacing the dust box seal unit 25 Cleaning the front wheel 26 Cleaning the sensors 26 Changing the batteries in the remote control 26 Replacing the rechargeable battery 26 Storage 28 Cleaning and care 28 After sales service 28 Contact in case of fault 28 Warranty 28 Frequently Asked Questions 29 Fault messages 32 Copyright and licenses 34 Limited Warranty Vacuum Cleaners USA 35
  • Page 4 - English - : en IMPORTANT SAFETY INSTRUCTIONS READ ALL INSTRUCTIONS BEFORE USING THIS APPLI ANCE This robot vacuum cleaner complies with all current local and na tional safety requirements Inappropriate use can however lead to personal injury and damage to property Please read the operating instructions before using the robot vac uum cleaner for the first time They contain important information on the safety use and maintenance of the robot vacuum cleaner This prevents both personal injury and damage to the appliance Keep these operating instructions in a safe place and pass them on to any future user Switch the robot vacuum cleaner off before any maintenance work and cleaning or if it is not going to be used for a longer period of time It should also be switched off when dealing with problems To do so slide the switch I0 on the side of the robot vacuum cleaner to the 0 position The same should be done if you notice any unusual behavior with your robot vacuum cleaner Correct use This robot vacuum cleaner is intended for cleaning flooring in do mestic households and similar working and residential environments The robot vacuum cleaner is not intended for outdoor use The robot vacuum cleaner must only be used for domestic house hold purposes to vacuum dry floor surfaces Any other usage modi fication or alteration is not supported by the manufacturer and could be dangerous Persons which lack physical sensory or mental abilities or experi ence with the machine should not use it without supervision or in struction by a responsible person
  • Page 5 - English - : en IMPORTANT SAFETY INSTRUCTIONS Safety with children Danger of suffocation Ensure that any plastic wrappings bags etc are disposed of safely and kept out of the reach of children Children must be kept away from the robot vacuum cleaner unless they are constantly supervised Please supervise children in the vicinity of the robot vacuum cleaner and do not let them play with it Keep the rechargeable battery and the batteries for the remote control out of the reach of children WARNING To reduce the risk of fire electric shock or injury Check the voltage rating of the vacuum cleaner before connecting the power cord to an electrical outlet Your power source should cor respond with the voltage rating plate located on the underside of the vacuum Use only household AC outlets Never use DC power sources If you are not sure of your homes voltage supply consult a qualified electrician Connecting the vacuum cleaner to a higher volt age than indicated in these instructions may result in damage to the vacuum cleaner or injury To reduce the risk of electric shock this appliance has a polarized plug one blade is wider than the other This plug will fit in a polar ized outlet only one way If the plug does not fit fully in the outlet re verse the plug If it still does not fit contact a qualified electrician to install the proper outlet Do not alter the plug in any way
  • Page 6 - English - : en IMPORTANT SAFETY INSTRUCTIONS Technical safety The robot vacuum cleaner operates at 144V It is classified as a class III appliance This appliance is supplied by a safety extralow voltage SELV power source where the voltage is low enough to protect users from the risk of electrical shock A Class II plugin power supply is used for supplying power to charge the robot vacuum cleaner Before each use of the robot vacuum cleaner check both the vac uum cleaner and all of the accessories supplied with it for any visible signs of damage Do not use a damaged appliance or component The electrical outlet must be fitted with a 15A fuse Compare the connection data on the data plate of the robot vac uum cleaner and the power supply voltage and frequency with that of the mains electricity supply This data must match exactly Reliable and safe operation of this robot vacuum cleaner can only be assured if the base station has been connected to the mains electricity supply While the vacuum cleaner is under warranty repairs should only be performed by a Mieleauthorized service technician Otherwise the warranty will be void Repairs should only be carried out by a Mieleauthorized service technician Repairs and other work by unqualified persons can cause considerable danger to users Make sure that the power cord is not damaged bent or twisted Do not place any heavy items on top of it Do not let the robot vacuum cleaner travel over the power cord or other cords Only use the parts supplied for charging the rechargeable battery adapter power unit and base station
  • Page 7 - English - : en IMPORTANT SAFETY INSTRUCTIONS Batteries and rechargeable batteries will deplete over time They can then leak corrosive fluids Avoid contact with the eyes and skin In the event of contact rinse thoroughly with water and seek medical advice The robot vacuum cleaner is fitted with sensors to detect steps and drops in height Do not cover these sensors or the camera and ensure that the function of the sensors is not hindered by obstacles while the cleaner is moving Do not attach any adhesive labels to the front of the base station as this conceals an infrared transmitter Do not place any items in front of it Do not immerse the robot vacuum cleaner or the parts supplied in water Clean all parts with a dry or slightly damp cloth only Do not drop the robot vacuum cleaner or any of the accessories supplied with it Items that have been dropped or damaged should not be used for safety reasons Miele can only guarantee the safety of the appliance when gen uine Miele replacement parts are used Faulty components must only be replaced with genuine Miele parts Proper use Do not use the robot vacuum cleaner without the dust box prefil ter and exhaust filter fitted Remove all breakable or lightweight items from the floor and make sure that the robot vacuum cleaner cannot become entangled in cords curtains fringes cables or similar Animals must be kept away from the robot vacuum cleaner Do not allow animals to stand or sit on the robot vacuum cleaner Take the necessary precautions to ensure that the robot vacuum cleaner cannot fall from high places such as balconies Block access to these places eg by installing physical barriers
  • Page 8 - English - : en IMPORTANT SAFETY INSTRUCTIONS Do not use the robot vacuum cleaner to vacuum up anything which has been burning or is still glowing eg cigarettes ashes or coal whether glowing or apparently extinguished Do not use it in the vicinity of a fireplace Do not use the robot vacuum cleaner to vacuum up any water liq uid or damp dirt Wait until any freshly cleaned or shampooed car pets or floor coverings are completely dry before attempting to vac uum Do not use the robot vacuum cleaner to vacuum toner dust Toner such as that used in printers and photocopiers can conduct elec tricity Do not use the robot vacuum cleaner to vacuum up any in flammable or combustible liquids or gases and do not use it in areas where such substances are stored Do not sit or lie on the surface being cleaned while the robot vac uum cleaner is running This is to prevent the risk of loosely fitting clothes or long hair coming into contact with the roller brush or other moving parts of the robot vacuum cleaner Caution Be aware that the robot vacuum cleaner moves au tonomously Exercise caution when walking in the area that the robot vacuum cleaner is operating in to avoid stepping on or tripping over it Handling the rechargeable battery and remote control batteries Please contact Miele Service before shipping the rechargeable battery Do not drop or throw the rechargeable battery For safety reasons do not continue to use a rechargeable battery which has been dropped or damaged Keep the rechargeable battery or the batteries away from flames or other heat sources Do not heat the rechargeable battery or bat teries or place them in direct sunlight
  • Page 9 - English - : en IMPORTANT SAFETY INSTRUCTIONS Do not dismantle the rechargeable battery Do not cause a short circuit by bridging the contacts of the rechargeable battery or the batteries either unintentionally or delib erately Do not allow the rechargeable battery or the batteries to come into contact with liquids Do not attempt to recharge the remote control batteries Discontinue use of the rechargeable battery if you notice an un usual smell from it if liquid is leaking from it it is significantly over heating or if it is discolored or deformed Dispose of the recharge able battery immediately Disposing of the batteries and the rechargeable battery Remove the rechargeable battery from the robot vacuum cleaner and the bat teries from the remote control Insulate the metal contacts with ad hesive tape to prevent short circuits Dispose of the batteries and the rechargeable battery in a municipal recycling facility Do not dispose of batteries or the rechargeable battery with normal household waste Accessories Only use genuine accessories with the ORIGINAL Miele logo on them The manufacturer cannot otherwise guarantee the safety of the product California Proposition 65 THE FOLLOWING WARNING IS REQUIRED BY THE STATE OF CALIFORNIA FOR CALIFORNIA RESIDENTS ONLY WARNING Cancer and Reproductive Harm wwwP65Warningscagov SAVE THESE INSTRUCTIONS
  • Page 10 - English - : en Appliance overview Illustrations A B and C for this section are on the pullout pages in the back of these operating instructions A Robot vacuum cleaner top and bottom a Display b WiFi display c Video function display for Scout RX2 Home Vision d Time mode display ampm e StartPause sensor field f Cameras g Impact protection h OnOff switch I0 i Depression to open the storage compartment j Silent vacuuming mode sensor field k Turbo vacuuming mode sensor field l Base sensor field m Spot vacuuming mode sensor field n Auto standard vacuuming mode sensor field o Timer indicator p Rechargeable battery status indicator q Side brushes for hard flooring universal side brushes side brushes for car peted flooring and rugs r Roller brush s Front wheel t Sensors toppling protection u Charging contacts v Roller brush cover w Drive wheels x Suction nozzle with sealed unit y Back wheel
  • Page 11 - English - : en Appliance overview B Base station and remote control Base station a Cord rewind b Cord guides c Socket for the power supply plug not visible in the figure d Charging contacts Remote control a Power button switch on and off b Base button direct vacuum cleaner to base station c OK confirmation button with direction buttons around it d StartPause button startstop vacuuming e Mode button select the vacuuming mode f WIFI button activatedeactivate WiFi g Clock button set time of day h Timer button set the timer i Mute button activatedeactivate acoustic signals j Climb button reduce crossing over height k Battery compartment at the back C Dust box a Handle b Cleaning tool with wiper c Wiper button d Lid e Release buttons for the lid f Dust compartment g Prefilter h Exhaust filter i Exhaust filter compartment lid
  • Page 12 - English - : en Caring for the environment Disposal of the packing mate rial The cardboard box and packing materi als protect the appliance during ship ping They have been designed to be biodegradable and recyclable Ensure that any plastic wrappings bags etc are disposed of safely and kept out of the reach of children Dan ger of suffocation Disposal of your old appliance Electrical and electronic appliances contain valuable materials They also contain certain substances compounds and components which were essential for the proper functioning and safe use of the equipment Handling these mate rials improperly by disposing of them in your household waste can be harmful to your health and the environment There fore please do not dispose of your old appliance with regular household waste and follow local regulations on proper disposal Consult with local authorities dealers or Miele in order to dispose of and recycle electrical and electronic appliances Miele assumes no responsibility for deleting any personal data left on the appliance being disposed Please en sure that your old appliance is kept away from children until removal Ob serve safety requirements for appli ances that may tip over or pose an en trapment hazard Disposal of old batteries and power packs Electrical and electronic appliances of ten contain batteries and power packs which must not go into household waste after use Please remove all ac cessible batteries and take them to a suitable collection site where they can be collected free of charge Batteries and power packs may contain sub stances which are harmful to your health and the environment The labeling on the battery or power pack gives further information The crossedout waste bin means that you must never put batteries and power packs into household waste If the crossedout waste bin has one or more of the listed chemical symbols it con tains lead Pb cadmium Cd andor mercury Hg 3EampGJ Old batteries and power packs contain important raw materials and can be re cycled Separately collecting old batter ies and power packs facilitates handling and recycling
  • Page 13 - English - : enUS Functions and features of the robot vacuum cleaner The robot vacuum cleaner is suitable for the daily cleaning of short pile carpets and fitted carpets as well as hard floor ing Please observe the flooring manu facturers cleaning and care instruc tions The robot vacuum cleaner is fitted with cameras and sensors It continually saves room plans as well as information regarding areas it can access freely The robot vacuum cleaner uses this data to create an efficient vacuuming plan of the surfaces to be vacuumed which it can then vacuum au tonomously Included accessories Remote control two batteries Two side brushes Power supply unit with plug Power adapter Base station Magnetic strip Preparing for use Diagrams 1 10 for this section are at the end of these operating instruc tions Insert the side brushesFig 01 Place the robot vacuum cleaner up side down on a level clean surface Press the two side brushes carefully onto their pins until they audibly en gage Take care to comply with the markings L and R Removing the protective foilFig 02 Remove the protective foil from the base station and from the top of the robot vacuum cleaner Placing the batteries in the remote controlFig 03 Remove the battery compartment cover Insert the two batteries supplied Make sure the polarity is correct Close the battery compartment cover Switching on the robot vacuum cleanerFig 04 Slide the I0 switch on the side of the robot vacuum cleaner to the I posi tion The rechargeable battery status indica tor lights up in the display After approx 60 seconds the robot vacuum cleaner will switch into standby The battery status indicator will continue to light up The robot vacuum cleaner is reactivated by pressing any button on the remote control or one of the sensor fields in the display
  • Page 14 - English - : enUS Connecting the base station Figs 05 07 Place the base station on a level sur face against a free wall within easy access of a power socket Ensure that there is an obstaclefree distance of at least 5ft in front and 15ft to the right and left of the base station Fig 05 Insert the supplied power supply plug into the socket at the back of the base station You can wind excess cord around the cord rewind Guide the cord through one of the two cord guidesFig 06 Insert the power adapter into the power supply until it audibly engages and then plug it into the selected power outlet Fig 07 Charging the rechargeable batteryFig 08 The rechargeable battery is supplied not fully charged Before using for the first time it must be fully charged while the robot vacuum cleaner is switched on switch I0 to I The battery can also be charged when the robot vacuum cleaner is switched off switch I0 to 0 In this case the vacuum cleaner indicators will not re act Connect the robot vacuum cleaner correctly to the charging contacts on the connected base station As the rechargeable battery charges the status indicator flashes in the dis play The charging process takes up to 150minutes for the Scout RX2 and up to 180minutes for the Scout RX2 Home Vision The process is finished when the rechargeable battery status indicator lights up green permanently in the dis play You can then vacuum for up to one hour with the Scout RX2 and up to two hours with the Scout RX2 Home Vision Rechargeable battery status indica tor in the display Red Charged capacity approx 0 20 Orange Charged capacity approx 20 50 Green Charged capacity approx 50 100 Setting the time of dayFig 09 Use the remote control to set the time of day The default factory setting for the robot vacuum cleaner is the 24hour time dis play Press the Clock button for at least three seconds The indicator field flashes in the display Press the OK button The hour display flashes in the indicator field Press the or direction button to set the current hour Press the OK button to confirm your selection The minute display flashes in the indica tor field
  • Page 15 - English - : enUS Press the or direction button to set the current minutes Press the OK button to confirm your selection If you want to alter the time of day pro ceed as described above Defining the area to be vacuumed Fig 10 The robot vacuum cleaner is 3 38 high Any items that will be vac uumed under should have a mini mum clearance of 3 716 You can define any areas which the ro bot vacuum cleaner should not have access to Place the magnetic strip supplied with the groove facing downwards on the floor The robot vacuum cleaner will not cross over the magnetic strip Adhesive strips are supplied for perma nent fixing Additional magnetic strips are available to order from the Miele webstore Use Always observe the robot vac uum cleaner during the first cleaning session in a new environment and af ter making changes in your home This way you will be able to detect and remove any problematic obsta cles or section off the relevant areas with the magnetic strip You must also check whether steps and drops in height are recognized properly Your robot vacuum cleaner is equipped with an integrated WiFi module You can view status information or execute control commands using a mobile de vice tablet PC or smartphone If you would like to control the robot vacuum cleaner using a mobile device please read the section Scout RX2 App The operation of the robot vacuum cleaner via remote control and the dis play will be described later in this Use section Switching on and off Press the Power button on the re mote control or any sensor field on the display Starting vacuuming There are two ways to start vacuuming Option 1 remote control Press the button Option 2 display Press the sensor field The area to be vacuumed will be cleaned
  • Page 16 - English - : enUS The robot vacuum cleaner always cleans for at least five minutes regard less of the size of the surface to be vac uumed Finishing vacuuming if vacuuming started from the base station The robot vacuum cleaner will return to the base station and recharge If the battery is low the robot vacuum cleaner will return to the base station and recharge IIwill appear in the indi cator field The robot vacuum cleaner will then continue vacuuming in the lo cation where it had stopped Finish vacuuming if vacuuming started from somewhere in the room The robot vacuum cleaner will return to its starting point and switch into standby after approx 60seconds The robot vacuum cleaner will stand still when there is low battery capacity You should then recharge it Manually controlled vacuuming You can use the direction buttons on the remote control to vacuum a particu lar area of the room While the robot vacuum cleaner is vacuuming press and hold one of the direction buttons The robot vacuum cleaner will turn in the desired direction until you let go of the direction button Press and hold the direction button The robot vacuum cleaner will travel in the desired direction and continue to vacuum Press the button on the remote control or the sensor field on the display The original vacuuming process will continue running Interrupting vacuuming Press the button on the remote control or the sensor field on the display The robot vacuum cleaner stops Press the button or the sensor field again to continue vacuuming Manual navigation without vacuum ing You can use the direction buttons on the remote control to direct the robot vacuum cleaner to a specific area of the room
  • Page 17 - English - : enUS Press and hold one of the direction buttons The robot vacuum cleaner will travel in the desired direction without vacuum ing You cannot direct the robot vacuum cleaner manually to the base station in order to recharge it Directing the robot vacuum cleaner to the base station only possible when vacuuming was started from the base station Press the Base button on the remote control or the Base sensor field on the display The robot vacuum cleaner will travel to the base station and recharge Finishing vacuuming manually Press the Power button on the re mote control The robot vacuum cleaner will switch into standby after approx 60seconds The display is deactivated the rechargeable battery status indicator continues to light up You can switch the robot vacuum cleaner into standby before 60sec onds is up by pressing the Power but ton again The robot vacuum cleaner is reactivated by pressing any button on the remote control or one of the sensor fields in the display Operating modes There are five different operating op tions Auto Standard vacuuming for normally soiled flooring Spot Targeted vacuuming of an area approx 59 x 59 18x18m around the se lected starting point of the robot vacuum cleaner Base Directing the robot vacuum cleaner to the base station Turbo For vacuuming lightly soiled flooring with a short vacu uming duration Silent Vacuuming with low noise development
  • Page 18 - English - : enUS Selecting the vacuuming mode Press the Power button on the re mote control There are two ways of selecting the vacuuming mode Option 1 remote control Press the Mode button repeatedly until the symbol for the vacuuming mode you want lights up on the dis play Press the button to start vacuum ing Option 2 display Press the sensor field of the desired vacuuming mode Press the sensor field in order to start vacuuming Setting the timer only possible if the clock has been set If you would like the robot vacuum cleaner to start at the same time every day you can save the desired start time and vacuuming mode to memory The robot vacuum cleaner can also vacuum in the dark However please be aware that vacuuming may be less thor ough The cameras require light in order to navigate unobstructed Use the remote control to set the timer Press the Timer button for at least three seconds The timer indicator flashes in the dis play and the hour display flashes in the indicator field Press the or direction button to set the hour you want Press the OK button to confirm your selection The timer indicator flashes in the dis play and the minute display flashes in the indicator field
  • Page 19 - English - : enUS Press the or direction button to set the minutes you want Press the OK button to confirm your selection Press the Mode button repeatedly until the symbol for the vacuuming mode you want flashes on the dis play Press the OK button to confirm your selection The settings are shown for approx three seconds on the display The robot vacuum cleaner will now start to vac uum at the same time each day If the timer indicator is lit up in the display then the timer is activated To alter the entries proceed as de scribed above Tip You can save up to seven individ ual combinations for the start time vacuuming mode if you set the timer using a mobile device see section Scout RX2 App Please note that the robot vacuum cleaner always follows the save com mands which were set most recently regardless of whether the settings were configured using the remote con trol or with a mobile device Deactivating the timer Press the Timer button on the remote control briefly The timer indicator goes out on the display Activating the timer displaying a set start time Press the Timer button on the remote control briefly The timer indicator lights up in the display and the set start time is shown briefly in the indicator field The robot vacuum cleaner will start to vacuum at the set time Deactivating the acoustic signals Acoustic signals are set as standard You can deactivate and then reactivate them
  • Page 20 - English - : enUS Press the Mute button on the remote control briefly OFF will appear in the indicator field briefly Acoustic signals for fault messages cannot be deactivated Reducing the maximum crossing over height The robot vacuum cleaner is set to overcome height differences of up to 34quot as standard It is therefore able to vacuum carpets move over door thresholds etc If you would like to reduce this height down to approx 14quot 6mm in order to protect the legs of chairs tables or lamps for example you can deactivate the factory default setting Press the Climb button on the remote control briefly LOwill appear in the indicator field Press the Climb button again briefly if you want to reactivate the maximum crossing over height of 34quot HIwill ap pear in the indicator field Scout RX2 App WiFi You can view status information or exe cute control commands using a mobile device tablet PC or smartphone The robot vacuum cleaner is equipped with an integrated WiFi module for this purpose Please note that despite the manufac turers extremely high security stan dards there may be data security risks for the user whenever networked devices are used For this reason we offer you the option of removing the WiFi module from the robot vacuum cleaner You can find instructions for this at the end of this section Make sure that you have sufficient sig nal strength for your WFi network in the rooms where the robot vacuum cleaner will be vacuuming You can download the Scout RX2 app for free via the Apple App Store or Google Play Download the app from one of the app stores
  • Page 21 - English - : enUS Activating the network function of the robot vacuum cleaner In order to connect your robot vacuum cleaner to your WiFi network you must first activate the network function The network function is deactivated at the factory There are two ways to activate the net work function Option 1 remote control Press the WIFI button The WiFi indicator lights up in the display Option 2 display Press the Base sensor field for at least two seconds The Base sensor field flashes during activation The WiFi indicator lights up in the display as soon as the net work function is activated Start the app and set up a Miele user account You can connect your mobile device di rectly to the robot vacuum cleaner or connect via your WiFi network Follow the instructions in the app Removing the WiFi module Press the depression at the top of the robot vacuum cleaner The lid of the storage compartment will open Unlatch the dust box by lifting the handle upwards Remove the dust box Pull the cover out from the front Remove the WiFi module Put the cover back on Video function for Scout RX2 Home Vision models use the Scout RX2 app The camera on the right at the front of the robot vacuum cleaner sends en crypted images in real time to the se lected mobile device Transmission quality is dependent upon the speed of the Internet connection in your home and the speed of your mobile device The video function indicator in the dis
  • Page 22 - English - : enUS play flashes red when images are being sent The live video is only played back in the Miele app it is not saved The privacy and personal living space of third parties must be respected when using the video function The Miele Scout RX2 Home Vision with video function should therefore only be used in your own home Anyone else present should be informed be fore you start to use the video func tion We recommend cleaning both cameras regularly with a soft dry cloth Maintenance Purchasing accessories Original Miele accessories are available from the Miele Web store Miele and your Miele dealer Switch the robot vacuum cleaner off before doing any maintenance work To switch it off slide the I0 switch on the side of the robot vac uum cleaner to the 0 position We recommend using only genuine Miele accessories bearing the ORIGINAL Miele logo on the pack aging Only these will guarantee the optimum performance of your robot vacuum cleaner and the best possi ble cleaning results Ordering the correct accessories Original Miele accessories are identified by the ORIGINAL Miele logo on the packaging Emptying the dust box Empty the dust box of the robot vac uum cleaner after each use in order to achieve the best possible cleaning re sults At the very latest you must empty the dust box when l l appears in the in dicator field running from bottom to top Press the depression at the top of the robot vacuum cleaner The lid of the storage compartment will open Unlatch the dust box by lifting the handle upwards Remove the dust box Press one or both release buttons in the direction of the arrow and remove the dust box lid
  • Page 23 - English - : enUS Empty the dust box The contents of the box can be dis posed of with the normal household waste providing it contains general household dust only Refit the lid and close the dust box making sure it clicks into place Place the dust box into the robot vac uum cleaner with the handle lifted up and latch it into place by pushing the handle back down Close the storage compartment lid and press down on the depression in order to lock it Cleaning the dust box Clean the dust box as required A cleaning tool is located at the top of the dust box lid Remove the cleaning tool Clean the dust box and the underside of the lid using the cleaning tool Cleaning the exhaust filter Clean the exhaust filter as required The exhaust filter compartment is lo cated in the dust box Remove the lid from the dust box Fold out the filter unit from the dust box Remove the prefilter and clean it as required using the cleaning tool Unlatch the exhaust filter remove it and clean it using the cleaning tool Refit the exhaust filter into the cover Place the prefilter onto the exhaust filter The filter unit is complete Carefully refit the filter unit and clip it into position The exhaust filter must be replaced with a new one after approx six months in order to achieve the best possible cleaning results Cleaning the side brushes Clean the side brushes as required For this you will require the cleaning tool which is located at the top of the dust box lid
  • Page 24 - English - : enUS Place the robot vacuum cleaner up side down on a level clean surface Use both hands to grip two opposite bunches of the side brushes and pull them out Remove threads and hair using the wiper which is located on the bottom of the cleaning tool Hold the wiper over a garbage can Press the button at the top of the wiper several times until all threads and hair have fallen out Press the two identical cleaned side brushes carefully onto their pins until they audibly engage Take care to comply with the markings L and R In order to continue to achieve the best possible cleaning results re place the side brushes with new ones after approx one year Cleaning the roller brush Clean the roller brush as required For this you will require the cleaning tool which is located at the top of the dust box lid Place the robot vacuum cleaner up side down on a level clean surface Remove both side brushes see pre vious description Cleaning the side brushes Unlatch the roller brush cover and re move the cover Remove the roller brush Use a pair of scissors to cut any threads or hairs that have wound themselves around the roller brush
  • Page 25 - English - : enUS Remove the threads and hair using the wiper which is located on the bot tom of the cleaning tool Hold the wiper over a garbage can Press the button at the top of the wiper several times until all threads and hair have fallen out Refit the roller brush Make sure that the side with the pointed end is in serted into the corresponding slot Carefully refit the roller brush cover making sure it clicks into position Refit both identical side brushes see previous description Cleaning the side brushes In order to continue to achieve the best possible cleaning results re place the roller brush with a new one after approx one year Cleaning the dust box seals Clean the seals on the bottom of the dust box as required Place the robot vacuum cleaner up side down on a level clean surface Wipe the seals with a damp cloth to clean them In order to continue to achieve the best possible cleaning results re place the seal unit with a new one af ter approx one year Replacing the dust box seal unit Remove the dust box Unlatch the seal unit from the under side of the dust box so that the arrow points to the symbol Remove the seal unit Insert the new seal unit so that the ar row points to the symbol Lock the seal unit making sure it clicks into position
  • Page 26 - English - : enUS The arrow points to the symbol Cleaning the front wheel Clean the front wheel as required For this you will require the cleaning tool which is located at the top of the dust box lid Place the robot vacuum cleaner up side down on a level clean surface Unclip the cover Remove the front wheel Remove any threads and hair and clean the front wheel the cover and the slot depression using the cleaning tool Refit the front wheel and close the cover making sure it clicks into posi tion Cleaning the sensors Clean the sensors as required Place the robot vacuum cleaner up side down on a level clean surface Clean the sensors carefully using a dry cotton wool bud Changing the batteries in the remote control The remote control requires two AAA 15 V batteries Remove the battery compartment cover Replace the batteries Make sure the polarity is correct Close the battery compartment cover Observe the special instructions re garding the handling and disposal of batteries found in the sections IM PORTANT SAFETY INSTRUCTIONS and Caring for the environment at the beginning of these operating in structions Replacing the rechargeable battery You will require an original Miele lithium ion rechargeable battery YCRM05 for Scout RX2 YCRMT12 for Scout RX2 Home Vi sion The rechargeable battery compartment is located in the robot vacuum cleaners storage compartment Remove the dust box
  • Page 27 - English - : enUS Open the rechargeable battery com partment by unlatching the cover up wards Scout RX2 YCRM05 Carefully pull the cables so that the plug connection is pulled out of the slot Press the latch on the plug connec tion in order to release the plug Remove the rechargeable battery Insert the plug of the new recharge able battery into the counterpart making sure it clicks into place Insert the rechargeable battery care fully making sure it is properly posi tioned see righthand side of pic ture Store the plug connection in the slot at the side Carefully refit the cover of the rechargeable battery compartment and close it making sure it clicks into place Observe the special instructions re garding the handling and disposal of the old rechargeable battery found in the sections IMPORTANT SAFETY INSTRUCTIONS and Caring for the environment at the beginning of these operating instructions Scout RX2 Home Vision YCRMT12 Carefully remove the rechargeable battery until the plug connection is exposed Press the latch on the plug connec tion in order to release the plug Insert the plug of the new recharge able battery into the counterpart making sure it clicks into place Store the plug connection in the side recess Insert the rechargeable battery care fully making sure it is properly posi tioned see righthand side of pic ture
  • Page 28 - English - : enUS Carefully refit the cover of the rechargeable battery compartment and close it making sure it clicks into place Observe the special instructions re garding the handling and disposal of the old rechargeable battery found in the sections IMPORTANT SAFETY INSTRUCTIONS and Caring for the environment at the beginning of these operating instructions Storage Switch the robot vacuum cleaner off if it is not going to be used for a long period of time To switch it off slide the I0 switch on the side of the robot vacuum cleaner to the 0 posi tion If the robot vacuum cleaner is not going to be used for a long period of time make sure it is stored in a well venti lated cool place For optimum care store the robot vac uum cleaner at half charge capacity rechargeable battery status indicator in the display is orange Cleaning and care Maintaining the robot vacuum cleaner and accessories Switch the robot vacuum cleaner off before doing any maintenance work To switch it off slide the I0 switch on the side of the robot vac uum cleaner to the 0 position The robot vacuum cleaner and all plas tic accessories can be cleaned with a dry or a slightly damp cloth or with a proprietary cleaner suitable for plastic Do not use abrasive cleaning agents glass cleaning agents all purpose cleaners or oilbased con ditioning agents Do not immerse the robot vac uum cleaner or any accessories sup plied with it in water After sales service Contact in case of fault In the event of a fault which you cannot remedy yourself please contact your Miele dealer or Miele Technical Service Contact information for Miele Techni cal Service can be found at the end of this document Warranty For more information about warranty conditions please contact Miele Tech nical Service
  • Page 29 - English - : enUS Frequently Asked Questions With the help of the following guide minor faults in the performance of the ma chine some of which may result from incorrect operation can be remedied with out contacting the Service Department Time and money will be saved because a service call will not be needed This guide may help you to find the reason for the fault and how to correct it Switch the robot vacuum cleaner off before dealing with any problems To switch it off slide the I0 switch on the side of the robot vacuum cleaner to the 0 position Problem Possible cause and solution The robot vacuum cleaner switches itself off after it has been switched on using the Power button The rechargeable battery is not sufficiently charged Connect the robot vacuum cleaner correctly to the charging contacts on the connected base station The robot vacuum cleaner does not react The robot vacuum cleaner is switched off Switch it on slide I0 to I The batteries in the remote control have been inserted incorrectly Make sure the polarity is correct The batteries in the remote control are dead Replace the batteries The signal between the infrared transmitter on the vacuum cleaner and the remote control is broken Clean the front of the robot vacuum cleaner and the top of the remote control carefully with a soft dry cloth and make sure that no items disrupt the signal The remote control is too near to the robot vacuum cleaner or too far away from it Increase or decrease the distance and when using the remote control direct it towards the robot vac uum cleaner
  • Page 30 - English - : enUS Problem Possible cause and solution The cleaning perfor mance is poor The dust box is full Empty and clean the dust box The roller brush is dirty or worn out Clean the roller brush Replace the roller brush The seals on the dust box are dirty or worn out Clean the seals and the suction channel between them Replace the seal unit The exhaust filter is dirty Clean the exhaust filter Replace the exhaust filter The side brushes have worn out Replace the side brushes The robot vacuum cleaner is not charging The base station is not connected correctly Connect the base station exactly as described in these operating instructions see section Prepar ing for use Connecting the base station The robot vacuum cleaner does not return to the base station after vacuuming The Auto standard vacuuming mode was started somewhere in the room The robot vacuum cleaner will return to its starting point The Spot vacuuming mode has been selected The robot vacuum cleaner will return to its starting point There is insufficient light for the robot vacuum cleaner to navigate Provide sufficient lighting The base station is not connected correctly Connect the base station exactly as described in these operating instructions see section Prepar ing for use Connecting the base station The signal between the infrared transmitter on the base station and the vacuum cleaner is broken
  • Page 31 - English - : enUS Problem Possible cause and solution Clean the front of the base station and the front of the robot vacuum cleaner carefully with a soft dry cloth and make sure that no items disrupt the sig nal Obstacles on the floor which is to be vacuumed can impede navigation Watch the robot vacuum cleaner during vacuum ing Remove any problematic obstacles Section off the problematic area with the magnetic strip Reduce the maximum crossing over height see Use Reducing the maximum crossing over height
  • Page 32 - English - : enUS Fault messages Switch the robot vacuum cleaner off before dealing with any faults To switch it off slide the I0 switch on the side of the robot vacuum cleaner to the 0 position Fault messages are shown in the indicator field in the display If l l l l appears running from bottom to top you must empty and clean the dust box Problem Possible cause and solution F 1 Wheel raised fault Place the robot vacuum cleaner on a level floor surface F 2 Dirty sensors fault Clean the sensors This fault message is also shown when you start up the robot vacuum cleaner and the collision sensor is located above empty space Remove the robot vacuum cleaner from the edge F 3 Filter not recognized fault Insert the dust box into the robot vacuum cleaner with an exhaust filter inserted F 4 Drive wheels overloaded fault Check whether the drive wheels have become dirty Remove any threads or hair This fault mes sage is also shown if the robot vacuum cleaner is stuck F 5 Brushes overloaded fault Check whether the roller brush and the side brushes have become dirty Clean the roller brush and side brushes This fault message is also shown if objects become caught in the robot vac uum cleaner F 6 Fan motor overloaded fault Empty and clean the dust box Clean or replace the exhaust filter
  • Page 33 - English - : enUS Problem Possible cause and solution F 7 Internal system fault Switch the robot vacuum cleaner off and on again I0 switch F 8 Front wheel dirty fault Check whether the front wheel the cover or the slot depression have become dirty Remove any threads and hair and clean the front wheel the cover and the depression Resetting the fault message after fixing the problem You can reset the fault messages described above in the following ways Switch the robot vacuum cleaner off and on again I0 switch Press the Power button on the remote control Press the sensor field in the display for at least three seconds
  • Page 34 - English - : enUS Copyright and licenses Miele uses software to operate and control the robot vacuum cleaner The copyright authorization from Miele and other relevant software suppliers must be respected Miele and its suppliers reserve the rights to the software components In particular the following are prohibited Copying and distribution Modifications and derivations Decompression reverse engineering disassembling and other such reductions of software Components which fall under GNU General Public Licence and further Open Source licenses are integrated into the software An overview of the integrated Open Source components and a copy of the current license can be obtained at wwwmielecomdevicesoftwarelicenses Miele will provide the source code for all components of software licensed under the GNU General Public Licence and comparable Open Source licenses For source code requests please email infomielecom You can obtain detailed instructions for the use of test modes from Miele Technical Service
  • Page 35 - English - : en Limited Warranty Vacuum Cleaners USA What This Warranty Covers And For What Period The Coverage Extends Miele Inc hereinafter quotMielequot warrants to the original purchaser of this product living in the United States of America who purchased their vacuum from a Miele Authorized Distributor or Dealer a That this product including all of its Miele authorized parts is free of defects in material and workmanship b That this product if found to be defective within the stated warranty period will be repaired free of charge to the consumer both parts and labor by an authorized Miele service agent c The warranty period for vacuum cleaners other than those listed below and the Scout RX1 and RX2 is one 1 year from the date of purchase with the following exceptions vacuum motors power head motors and the structural integrity of the vacuum cleaner casings bodies are warranted for seven 7 years from the date of purchase d The warranty period for the models listed below is five 5 years from the date of purchase with the following exceptions vacuum motors power head motors and the structural integrity of the vacuum cleaner casings bodies for these models are warranted for ten10 years from the date of purchase Model Model Model Model Complete C3 HomeCare Complete C3 Brilliant Compact C1 HomeCare Classic C1 HomeCare HEPA Complete C3 HomeCare Dynamic U1 HomeCare Compact C2 Homecare Blizzard CX 1 HomeCare e The warranty period of the Scout RX1 and Scout RX2 is two 2 years from the date of purchase for the complete vacuum except for the battery which will be warranted for one 1 year from the date of purchase f This warranty only applies while the product remains within the United States and is null and void in any other US territories possessions or foreign countries Commercial Use Vacuum cleaners other than the Scout RX1 and Scout RX2 used for commercial purposes except for their motors will be warranted for a period of six 6 months from the date of purchase The motors of commercially used upright vacuums will be warranted for one 1 year and the motors of all other commercially used vacuum cleaners except for the Scout RX1 and Scout RX2 will be warranted for two 2 years There is no warranty for the Scout RX1 or Scout RX2 used for commercial purposes Thereafter this Limited Warranty shall be null and void What is not covered by this Warranty This warranty does not cover damage or defects caused by or resulting from repairs service or alterations to the product or any of its parts or accessories which have been performed by service centers or repairmen not authorized by Miele or damage or defects caused by negligence accident abuse misuse improper or abnormal usage or maintenance of the product its parts or accessories Ordinary wear and tear or cosmetic damage scuffs scratches gouges dents etc shall not be considered a defect in materials or workmanship Exclusion of Other Warranties Except for the limited warranty provided herein Miele disclaims any and all other express warranties with respect to the product Any warranty of merchantability or fitness for a particular purpose is limited in its duration to the term of the limited warranty provided herein Some states do not allow limitations on how long an implied warranty lasts so the above limitation may not apply to you Limitation of Liability for Special Incidental or Consequential Damages Miele will assume no liability or other obligation with respect to any personal injury or property damage resulting from the use of a vacuum cleaner or its accessories replacement parts etc which has not been purchased from or serviced by an Authorized Miele Dealer Any purchaser who obtains a vacuum cleaner accessories replacement parts etc from someone other than an Authorized Miele dealer proceeds at their own risk Miele specifically disclaims any and all liability whether directly or by way of indemnity for special incidental consequential or other damages whether based on breach of contract tort strict or product liability or any other legal theory Some states do not allow the exclusion or limitation of incidental or consequential damages so the above limitation may not apply to you Special State Laws This Limited Warranty gives you specific legal rights you may have other rights which vary from state to state Service For service under this Limited Warranty or to find an Authorized Miele Dealer in your area please visit us at wwwmieleusacom Effective Date January 1 2018 2018 Miele Inc LIMITED WARRANTY VACUUM CLEANERS USA
  • Page 36 - French - : fr Table des matières INSTRUCTIONS IMPORTANTES DE SÉCURITÉ 37 Vue densemble de lappareil 44 Protection de lenvironnement 46 Fonctions et fonctionnalités de laspirateur robot 47 Accessoires fournis 47 Préparer pour lutilisation 47 Utilisation 49 Appli Scout RX2 54 Entretien 56 Commander les bons accessoires 56 Vidange du bac à poussière 57 Nettoyage du bac à poussière 57 Nettoyage du filtre dévacuation 58 Nettoyage des brosses latérales 58 Nettoyage de la brosse cylindrique 59 Nettoyage des joints détanchéité du bac à poussière 60 Remplacement de lunité de joints détanchéité du bac à poussière 60 Nettoyage de la roue avant 60 Nettoyage des capteurs 61 Remplacement des piles de la télécommande 61 Remplacement de la batterie rechargeable 61 Rangement 63 Nettoyage et entretien 63 Service aprèsvente 63 Contact en cas danomalies 63 Garantie 63 En cas danomalie 64 Messages derreur 67 Droit dauteur et licences 69 Limited Warranty Vacuums Canada 70 Garantie restreinte Aspirateurs Canada 72
  • Page 37 - French - : fr INSTRUCTIONS IMPORTANTES DE SÉCURITÉ LISEZ ATTENTIVEMENT TOUTES LES INSTRUCTIONS AVANT DUTILISER LAPPAREIL Cet aspirateurrobot est conforme à lensemble des exigences ré glementaires locales et nationales en vigueur en matière de sécu rité Néanmoins une utilisation inappropriée de lappareil peut en traîner des blessures et des dommages matériels Veuillez lire le mode demploi avant dutiliser laspirateurrobot pour la première fois Il contient des renseignements importants sur la sécurité lutilisation et lentretien de lappareil Vous serez ainsi en mesure déviter de vous blesser ou dendommager lap pareil Conservez ce mode demploi en lieu sûr afin de pouvoir le consul ter au besoin et remettezle au prochain propriétaire éventuel Mettez laspirateurrobot hors tension avant dentreprendre son entretien et de le nettoyer ou si vous nallez pas lutiliser pendant longtemps Vous devez également léteindre avant de résoudre une anomalie quelconque Pour cela glissez le bouton I0 sur le côté de laspirateurrobot à la position 0 Procédez de même si vous constatez un comportement inhabituel de votre aspirateurro bot Utilisation conforme Conçu pour aspirer les planchers ce robot aspirateur est destiné à un usage domestique ou à être utilisé dans des environnements de travail et de vie similaires Ce robot aspirateur nest pas conçu pour être utilisé à lextérieur Le robot aspirateur ne doit être utilisé que pour des applications domestiques pour aspirer les planchers secs Ne lutilisez pas pour aspirer sur les personnes ou les animaux Toute autre utilisation ou modification nest pas recommandée par le fabricant et pourrait être dangereuse
  • Page 38 - French - : fr INSTRUCTIONS IMPORTANTES DE SÉCURITÉ Les personnes qui ne possèdent pas les capacités physiques lexpérience ou les connaissances requises pour utiliser cet appareil doivent être supervisées ou formées par une personne responsable Sécurité des enfants Risque dasphyxie Jetez les emballages sacs et autres produits en plastique et gardezles en tout temps hors de la portée des en fants Ne laissez pas les enfants sapprocher de laspirateur robot à moins dêtre supervisés Ne laissez pas denfants sans surveillance à proximité de laspira teur robot et ne les laissez pas jouer avec celuici Maintenez la batterie rechargeable et les piles de la télécommande hors de la portée des enfants AVERTISSEMENT Pour diminuer le risque dincendie de décharge électrique ou de blessure respectez les instructions ciaprès Vérifiez la tension nominale de laspirateur avant de brancher le cordon dalimentation à une prise électrique Votre source dalimen tation devrait correspondre à la tension nominale sur la plaque si gnalétique située sur le dessous de laspirateur Utilisez uniquement les prisesCA de la résidence Nutilisez jamais de sources dalimen tationCC Si vous ne connaissez pas la tension dalimentation de votre domicile consultez un électricien qualifié Brancher laspirateur à une tension plus élevée que celle indiquée dans ces instructions peut entraîner des dommages à laspirateur ou même des blessures
  • Page 39 - French - : fr INSTRUCTIONS IMPORTANTES DE SÉCURITÉ Pour réduire le risque de décharge électrique cet appareil com porte une fiche polarisée une lame est plus large que lautre Cette fiche ne peut être branchée sur une prise polarisée que dans un sens Si la fiche ne peut être branchée complètement dans la prise inversez la fiche Si elle ne se branche toujours pas communiquez avec un électricien qualifié afin dinstaller la fiche adéquate Ne mo difiez pas la prise dune quelconque façon Sécurité technique Laspirateurrobot fonctionne sur 144V Il sagit dun appareil de la classe de protection III Doté dune source dalimentation à très basse tension de sécurité TBTS il protège les utilisateurs des risques de décharge électrique Un bloc dalimentation de classe II est utilisé pour recharger laspira teurrobot Avant chaque utilisation vérifiez que ni laspirateurrobot ni les ac cessoires fournis ne présentent de signes visibles de dommages Nutilisez pas un appareil ou un accessoire endommagé La prise de courant doit être équipée dun fusible de 15ampères Comparez les données de raccordement indiquées sur la plaque signalétique de lappareil et sur le bloc dalimentation tension et fré quence avec celles du réseau électrique Elles doivent absolument être les mêmes Seul un raccordement de la station daccueil au réseau électrique public permet de garantir un fonctionnement sûr et fiable de laspira teurrobot Durant la période de garantie de laspirateur les réparations doivent être effectuées seulement par un technicien autorisé de Miele Sinon la garantie sera invalidée
  • Page 40 - French - : fr INSTRUCTIONS IMPORTANTES DE SÉCURITÉ Les réparations ne devraient être effectuées que par un technicien autorisé de Miele Les réparations et autres travaux effectués par des personnes non qualifiées peuvent mettre les utilisateurs en danger Assurezvous que le cordon dalimentation nest pas endommagé plié ou tordu Ne placez pas darticles lourds sur ce dernier Ne laissez pas laspirateur robot passer audessus du cordon dalimentation ou dautres cordons Pour recharger la batterie utilisez exclusivement les accessoires fournis câble électrique bloc dalimentation et station daccueil Les batteries et les piles rechargeables sépuisent au fil du temps Le liquide corrosif qui sy trouve est susceptible de sécouler Évitez tout contact de ce liquide avec les yeux et la peau En cas de contact avec les yeux rincez immédiatement à grande eau et consultez un médecin Laspirateurrobot est doté de capteurs pour détecter les escaliers et les changements de niveau du sol Ne couvrez pas ces capteurs ou lobjectif de la caméra et assurezvous que la fonction des cap teurs nest pas entravée par des obstacles pendant le déplacement de lappareil Ne collez aucune étiquette sur la station daccueil pour ne pas gê ner la transmission des capteurs à infrarouge Ne placez pas dob jets devant la station Nimmergez pas laspirateur robot ou les pièces fournies dans de leau Nettoyez toutes les pièces uniquement avec un chiffon sec ou légèrement humide Ne laissez pas tomber laspirateurrobot ni aucun des accessoires fournis avec celuici Pour des raisons de sécurité il ne faut pas utili ser les accessoires tombés ou endommagés Miele ne peut garantir la sécurité de lappareil que si des pièces de rechange dorigine Miele sont utilisées Les composants défec tueux ne doivent être remplacésque par des pièces dorigine Miele
  • Page 41 - French - : fr INSTRUCTIONS IMPORTANTES DE SÉCURITÉ Utilisation appropriée Nutilisez pas laspirateurrobot sans le bac à poussière le pré filtre et le filtre dévacuation Enlevez du sol tous les objets fragiles ou susceptibles de se ren verser et veillez à ce que laspirateurrobot ne se prenne pas dans des rideaux cordages franges ou autres obstacles Les animaux doivent être maintenus à lécart de laspirateur robot Ne permettez pas aux animaux de se tenir debout sur laspirateur ou de sasseoir sur celuici Prenez les précautions nécessaires pour vous assurer que laspi rateur robot ne peut pas tomber des endroits élevés tels que les balcons Bloquer laccès à ces endroits p ex en installant des bar rières physiques Nutilisez pas laspirateur robot pour aspirer des articles qui ont brûlé ou qui reluisent encore p ex des cigarettes des cendres ou des charbons quils reluisent ou quils soient apparemment éteints Ne lutilisez pas à proximité dun foyer Nutilisez pas laspirateur robot pour aspirer de leau des liquides ou des poussières humides Attendez que des tapis ou des revête ments venant dêtre nettoyés ou traités au shampoing aient complè tement séché avant de tenter de passer laspirateur Nutilisez pas laspirateur robot pour aspirer la poudre dimpri mante Cette poudre utilisée pour les imprimantes et les photoco pieurs peut être conductrice Naspirez pas de liquides ou de gaz inflammables ou combus tibles et nutilisez pas laspirateur robot dans des zones où de telles substances sont entreposées
  • Page 42 - French - : fr INSTRUCTIONS IMPORTANTES DE SÉCURITÉ Ne vous asseyez pas ou ne vous couchez pas sur la surface à nettoyer pendant le fonctionnement de laspirateur pour éviter tout risque de contact de vêtements amples ou de cheveux longs avec la brosse cylindrique ou dautres parties mobiles de laspirateurrobot Mise en garde Sachez que laspirateur robot se déplace de manière autonome Soyez prudent lorsque vous marchez dans la zone où laspirateur robot fonctionne pour éviter de marcher dessus ou de trébucher dessus Manipulation de la batterie rechargeable et des piles de la télécommande Veuillez communiquer avec le service Miele avant de leur envoyer la batterie rechargeable Néchappez pas et ne lancez pas la batterie rechargeable Pour des raisons de sécurité ne continuez pas dutiliser une batterie re chargeable qui a été échappée ou endommagée Maintenez la batterie rechargeable ou les piles loin dune flamme nue ou de toute autre source de chaleur Ne réchauffez pas la batte rie rechargeable ou les piles et ne les placez pas dans les rayons di rects du soleil Ne démontez pas la batterie rechargeable Ne causez pas un courtcircuit en faisant le pontage des contacts de la batterie rechargeable ou des piles soit de façon non intention nelle ou délibérée Ne permettez pas à la batterie rechargeable ni aux piles dentrer en contact avec des liquides Ne tentez pas de recharger les piles de la télécommande Cessez dutiliser la batterie rechargeable si vous remarquez quelle émet une senteur inhabituelle si du liquide fuit de celleci si elle sur chauffe considérablement ou si elle est décolorée ou déformée Je tez la batterie rechargeable immédiatement
  • Page 43 - French - : fr INSTRUCTIONS IMPORTANTES DE SÉCURITÉ Élimination des piles et des batteries rechargeables retirez la bat terie rechargeable de laspirateurrobot et les piles de la télécom mande Isolez les contacts métalliques des piles avec du ruban ad hésif pour éviter tout courtcircuit Déposez les piles et la batterie re chargeable dans un point de collecte dédié de votre quartier Ne les jetez pas dans les ordures ménagères normales Accessoires Utilisez uniquement des accessoires dorigine portant le logo ORIGINAL Miele Sinon le fabricant ne peut pas garantir la sécu rité de ce produit CONSERVEZ CES INSTRUCTIONS
  • Page 44 - French - : fr Vue densemble de lappareil Les illustrations A B et C de cette section figurent sur les pages dépliables à lar rière de ces instructions dutilisation A Parties supérieure et inférieure de laspirateurrobot a Écran b Affichage WiFi c Affichage de la fonction vidéo pour Scout RX2 Home Vision d Affichage de lheure e Touche de démarragepause f Caméras g Protection antichocs h Bouton MarcheArrêt I0 i Touche de déverrouillage du compartiment de rangement j Touche de mode de nettoyage Silencieux k Touche de mode de nettoyage Turbo l Touche de la Station daccueil m Touche de mode de nettoyage ciblée Spot n Touche de mode de nettoyage standard Auto o Affichage de la minuterie p Témoin du niveau de charge de la batterie rechargeable q Brosses latérales pour planchers durs brosses latérales universelles brosses latérales pour moquette et tapis r Brosse cylindrique s Roue avant t Capteurs protection antichutes u Contacts du chargeur v Protègebrosse w Roues motrices x Suceuse avec unité étanche y Roue arrière
  • Page 45 - French - : fr Vue densemble de lappareil B Station daccueil et télécommande Station daccueil a Enrouleur de câble b Guides de câble c Prise du bloc dalimentation non visible sur la figure d Contacts du chargeur Télécommande a Touche Mise en marche bouton marchearrêt b Touche Station retour de laspirateur à la station daccueil c Touche de confirmation OK avec flèches de navigation d Touche DépartPause départarrêt du nettoyage e Touche Mode sélection du mode de nettoyage f Touche WIFI activationdésactivation du WiFi g Touche Heure réglage de lheure h Touche Minuterie réglage de la minuterie i Touche Sourdine activationdésactivation des signaux sonores j Touche Montée réduit la hauteur de franchissement k Compartiment à piles à larrière C Bac à poussière a Poignée b Outil de nettoyage avec balai c Bouton de balai d Couvercle e Boutons de déverrouillage de couvercle f Réservoir à poussières g Préfiltre h Filtre dévacuation i Couvercle du compartiment du filtre dévacuation
  • Page 46 - French - : fr Protection de lenvironnement Élimination des produits demballage La boîte de carton et les produits dem ballage protègent lappareil durant le transport Ils ont été conçus afin dêtre biodégradables et recyclables Le recyclage de lemballage réduit luti lisation de matières premières dans le processus de fabrication ainsi que la quantité de déchets Mise au rebut de votre ancien appareil Les appareils électriques et électro niques contiennent du matériel dispen dieux Ils contiennent également des substances des composés et des élé ments qui étaient essentiels pour leur fonctionnement adéquat et sécuritaire Une manipulation ou la mise au rebut inadéquate de ces matériaux dans vos ordures ménagères peut poser un risque pour votre santé et lenvironne ment Par conséquent veuillez ne pas disposer de vos vieux appareils dans les ordures ménagères et respectez les règlements locaux pour la mise au rebut appropriée Veuillez consulter les centres de recy clage de votre localité comment mettre au rebut et recycler les appareils élec triques et électroniques Miele décline toute responsabilité de supprimer les données personnelles laissées sur lap pareil mis au rebut Veuillez vous assu rer que votre vieil appareil ne pose pas un risque pour les enfants lorsquil est entreposé avant sa mise au rebut Res pectez les consignes de sécurité pour les appareils qui peuvent basculer ou poser un risque de piégeage Mise au rebut des piles et blocs dalimentation usagés Les appareils électriques et électro niques contiennent souvent des piles et des blocs dalimentation qui ne doivent pas être mis au rebut dans vos ordures ménagères après utilisation Veuillez re tirer toutes les piles accessibles et les emmener à un centre de recyclage ap proprié pour une mise au rebut gratuite Les piles et les blocs dalimentation peuvent contenir des substances qui posent un risque pour votre santé et lenvironnement Létiquetage sur la pile ou le bloc dali mentation donne plus de détails Une poubelle barrée indique que vous ne devez jamais jeter les piles et les blocs dalimentation avec les ordures ména gères Si la poubelle barrée porte un ou plusieurs des symboles chimiques énu mérés il contient alors du plomb Pb du cadmium Cd ou du mercure Hg 3EampGJ Les piles et les blocs dalimentation usagés contiennent des matières pre mières dimportance qui peuvent être recyclées Leur collecte séparée facilite la manipulation et le recyclage
  • Page 47 - French - : frCA Fonctions et fonctionnalités de laspirateur robot Laspirateurrobot convient au net toyage quotidien de moquettes à poil court de tapis décoratifs et de plan chers durs Veuillez vous conformer aux conseils de nettoyage et dentretien du fabri cant du revêtement de sol Laspirateurrobot est doté de plusieurs caméras et capteurs qui lui permettent denregistrer en continu la configuration de la pièce ainsi que des données sur les zones auxquelles il peut accéder fa cilement Il est donc capable délaborer une véritable stratégie de nettoyage de toutes les surfaces à sa portée quil nettoiera par la suite de façon auto nome Accessoires fournis Télécommandedeux piles Deux brosses latérales Bloc dalimentation avec fiche Adaptateur dalimentation Station daccueil Bande magnétique Préparer pour lutilisation Les diagrammes1 à 10 de cette sec tion figurent à la fin de ces instruc tions de fonctionnement Insérez les brosses latéralesfigure 01 Placez laspirateurrobot à lenvers sur une surface plane et propre Poussez doucement les deux brosses latérales sur les axes jusquà ce quelles senclenchent avec un clic Respectez les lettres indiquant la gauche L et la droite R Retrait de la pellicule protectricefigure 02 Retirez la pellicule protectrice qui re couvre la station daccueil et le des sus de laspirateurrobot Insertion des piles de la télécommandefigure 03 Retirez le couvercle du compartiment à piles Insérez les deux piles fournies en vous assurant que la polarité est cor recte Fermez le couvercle du compartiment à piles Mise en marche de laspirateur robotfigure 04 Glissez le bouton I0 sur le côté de laspirateurrobot à la position I Le témoin du niveau de charge de la batterie sallume à lécran Laspirateurrobot passe en mode veille au bout denviron 60 secondes Le té moin du niveau de charge de la batterie reste allumé Pour réactiver laspirateurrobot il suffit dappuyer sur une des touches de la té lécommande ou sur une des touches de lécran
  • Page 48 - French - : frCA Connexion à la station daccueil figures 05 07 Placez la station daccueil contre un mur sur un plancher dur avec un ac cès facile à une prise électrique As surezvous de labsence totale dobs tacles au moins 15m à lavant et 05m sur chaque côté de la station daccueilfigure 05 Insérez la fiche du bloc dalimentation fournie dans la prise à larrière de la station daccueil Vous pouvez enrou ler lexcès du câble autour de lenrou leur Guidez le cordon à travers lun des deux guides de câblefigure 06 Insérez ladaptateur dans le bloc dalimentation électrique jusquà ce quil senclenche puis branchezle dans la prise murale figure 07 Recharge de la batterie rechargeablefigure 08 À la livraison la batterie rechargeable nest pas complètement chargée Elle doit être complètement rechargée avant la première utilisation pendant que las pirateurrobot est allumé bouton I0 sur I Vous pouvez charger la batterie même si laspirateurrobot est éteint bouton I0 sur 0 Toutefois dans ce cas aucun message ne saffiche à lécran Branchez laspirateurrobot correcte ment aux contacts de recharge de la station daccueil déjà branchée Le témoin du niveau de charge clignote à lécran à mesure que la batterie se re charge La recharge dure environ 150minutes pour le Scout RX2 et jusquà 180mi nutes pour le Scout RX2 Home Vision Le processus de recharge est terminée lorsque le témoin du niveau de charge de la batterie sallume en vert à lécran Vous pourrez ainsi utiliser le Scout RX2 pendant environ une heure et le Scout RX2 Home Vision pendant deux heures Témoin du niveau de charge à lécran Rouge Niveau de charge denvi ron 0 à 20 Orange Niveau de charge denvi ron 20 à 50 Vert Niveau de charge denvi ron 50 à 100 Réglage de lheurefigure 09 Réglez lheure à laide de la télécom mande Le réglage dusine par défaut de laspi rateurrobot permet dafficher lheure sur 24 heures Appuyez sur la touche Horloge Clo ck pendant au moins trois secondes Lafficheur clignote à lécran Appuyez sur la touche OK Laffichage des heures clignote à lécran Appuyez sur les touches ou pour régler lheure Appuyez sur la touche OK pour confirmer votre choix Laffichage des minutes clignote à lécran
  • Page 49 - French - : frCA Appuyez sur les touches ou pour régler les minutes Appuyez sur la touche OK pour confirmer votre choix Si vous souhaitez modifier lheure pro cédez comme décrit précédemment Délimitation de la zone de nettoyage figure 10 Laspirateurrobot mesure 86mm de haut Les objets sous les quels il doit nettoyer doivent donc se situer à au moins 88mm du sol Sil y a une zone que laspirateurrobot doit éviter vous pouvez délimiter un pé rimètre de nettoyage Posez la bande magnétique fournie au sol rainures vers le bas Laspirateurrobot ne franchira pas cette bande magnétique Pour délimiter une zone de façon per manente utilisez les rubans adhésifs fournis Vous pouvez aussi vous procu rer des bandes magnétiques auprès de la boutique en ligne Miele Utilisation Observez toujours votre aspira teurrobot la première fois que vous lutilisez dans un nouvel environne ment et après avoir modifié la dispo sition des meubles Vous détecterez ainsi les obstacles éventuels et pou vez soit les enlever soit délimiter les zones à nettoyer à laide des bandes magnétiques Il faut aussi vérifier si les escaliers et les changements de niveau du sol sont détectés correcte ment Votre aspirateurrobot est équipé dun module WiFi intégré Vous pouvez affi cher les informations détat ou contrôler laspirateur à laide dun appareil mobile tablette ou téléphone intelligent Pour contrôler laspirateur à laide dun appareil mobile veuillez lire la section Appli Scout RX2 Le fonctionnement de laspirateurrobot via la télécommande et lécran seront décrits plus loin dans la section Utili sation Mise en marche et arrêt Appuyez sur la touche Mise en marche de la télécommande ou sur une touche de lécran Début de nettoyage Il y a deux façons de commencer le nettoyage Option1 télécommande
  • Page 50 - French - : frCA Appuyez sur la touche Option2 écran Appuyez sur la touche Laspirateurrobot commence à net toyer la zone définie Laspirateurrobot nettoie toujours pen dant au moins cinq minutes peu im porte la superficie à nettoyer Fin du nettoyage lancé de la station daccueil Laspirateurrobot rentre tout seul à la station daccueil pour se recharger Laspirateurrobot rentre aussi à la station daccueil pour se recharger si la charge de la batterie est faible IIsaffiche alors à lécran Laspira teurrobot reprend ensuite le net toyage à lendroit exact où il sétait in terrompu Fin du nettoyage lancé de nimporte quel point dans la pièce Laspirateurrobot revient tout seul à son point de départ et passe en mode veille au bout denviron 60secondes En cas de charge insuffisante de la batterie laspirateurrobot sarrête Vous devez alors le recharger Navigation télécommandée pendant le nettoyage Vous souhaitez nettoyer une zone pré cise Vous pouvez utiliser la télécom mande et diriger votre aspirateurrobot à laide des flèches de navigation Maintenez lune des flèches enfoncée pendant que laspirateurrobot nettoie cette zone Laspirateurrobot se dirige vers la di rection indiquée jusquà ce que vous re lâchiez la touche Maintenez la touche enfoncée Laspirateurrobot se déplace dans la direction indiquée tout en continuant de nettoyer Appuyez sur la touche de la télé commande ou sur la touche de lécran Le nettoyage programmé reprendra Interruption du nettoyage
  • Page 51 - French - : frCA Appuyez sur la touche de la télé commande ou sur la touche de lécran Laspirateurrobot sarrête Pour reprendre le nettoyage appuyez de nouveau sur la touche de la télé commande ou la touche de lécran Navigation télécommandée sans nettoyage Vous pouvez utiliser les touches de na vigation de la télécommande pour diri ger laspirateurrobot vers une zone précise de la pièce Maintenez la flèche de navigation en foncée Laspirateurrobot se déplace dans la direction souhaitée sans nettoyer Laspirateurrobot ne peut pas re joindre en mode manuel la station daccueil pour se recharger Retour à la station daccueil nest possible que lorsque le nettoyage a commencé à partir de la station dac cueil Appuyez sur la touche Station de la télécommande ou sur la touche Sta tion de lécran Laspirateurrobot se déplace tout seul vers la station daccueil pour se rechar ger Fin de navigation télécommandée pendant le nettoyage Appuyez sur la touche Mise en marche de la télécommande Laspirateurrobot passe en mode veille au bout denviron 60 secondes Lécran est désactivé mais le témoin du niveau de charge de la batterie reste al lumé Pour mettre laspirateurrobot en veille avant que les 60 secondes soient écoulées appuyez de nouveau sur Mise en marche Pour réactiver laspirateurrobot il suffit dappuyer sur une des touches de la té lécommande ou sur une des touches de lécran Modes de fonctionnement Cinq modes de nettoyage vous sont proposés Automa tique Le mode de nettoyage standard pour nettoyer les planchers normale ment sales