
Loading ...
Loading ...
Loading ...
WASH/RINSE SPIN SPEED SOIL LEVEL BEEPER
EXTRA HOT/COLD
HOT/COLD
WARM/WARM
WARM/COLD
COLD/COLD
EXTRA HIGH
HIGH
MEDIUM
LOW
NO SPIN
HIGH
LOW
OFF
HEAVY
NORMAL
LIGHT
DELAY
WASH
LOAD
SENSING
WASH RINSE SPIN
H O W TO U S E
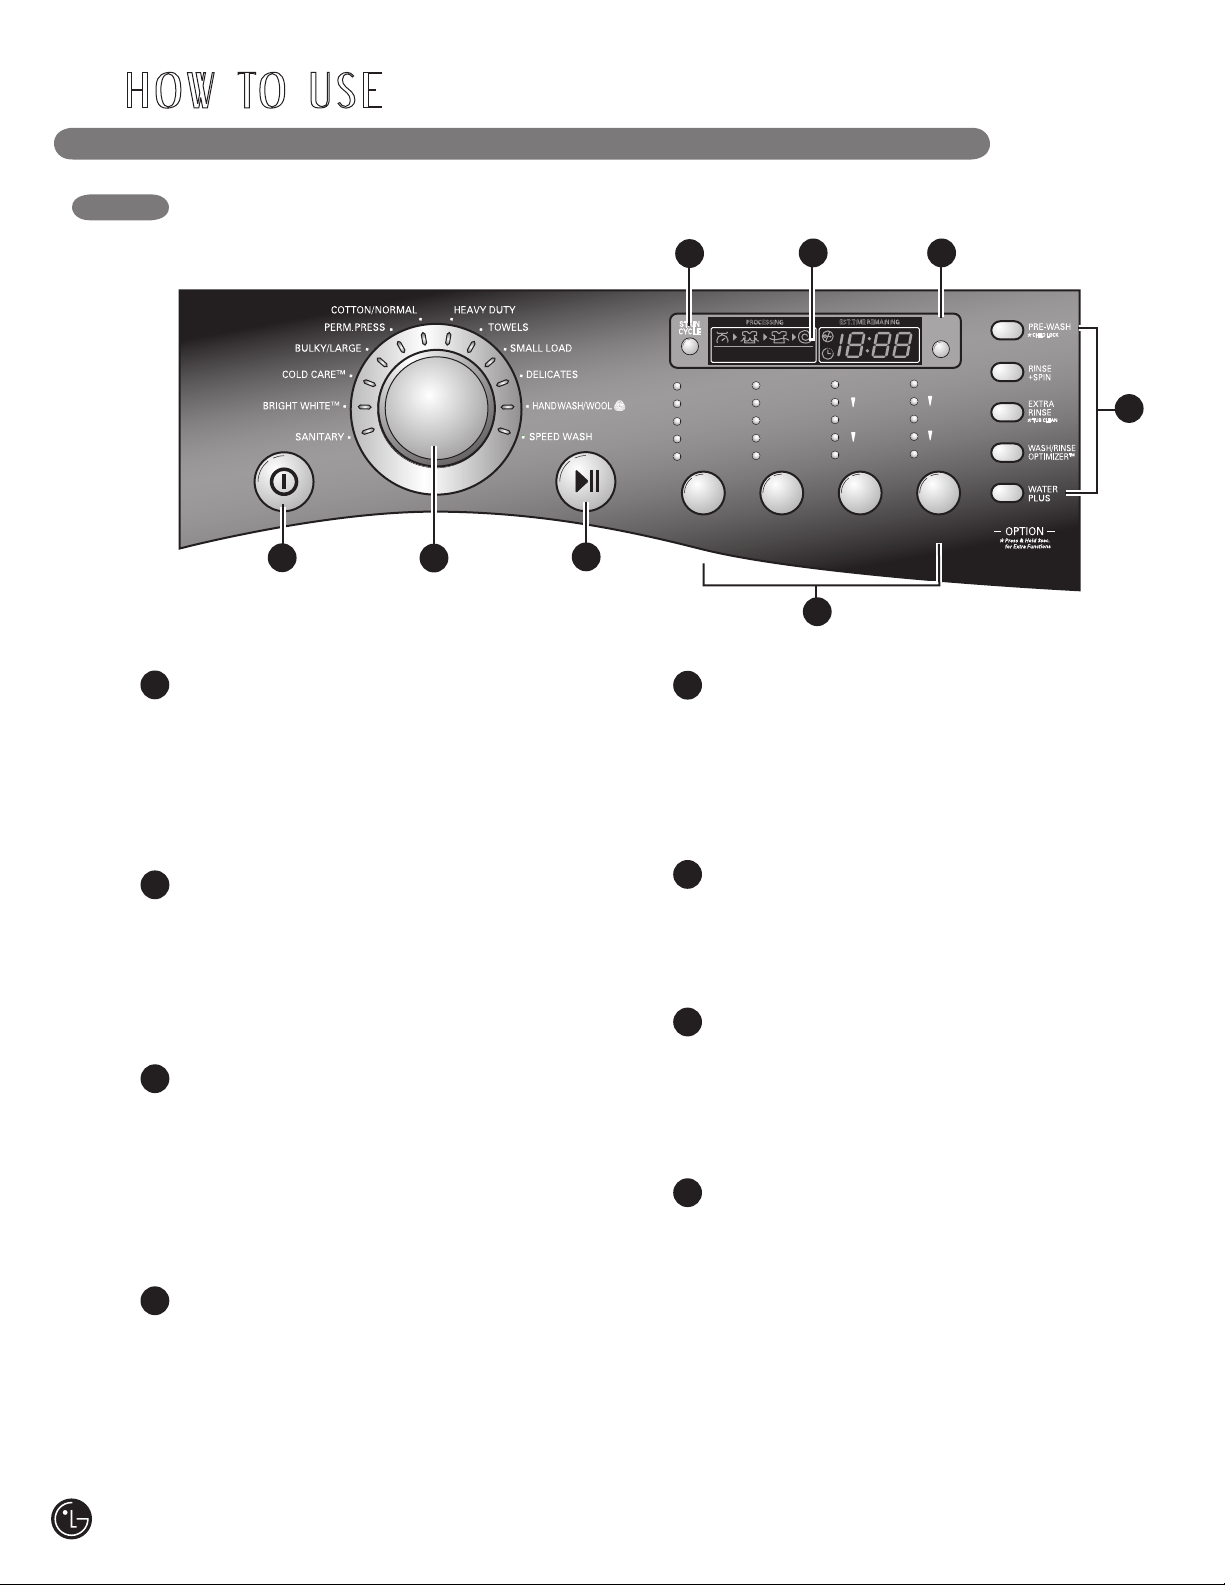
CONTROL PANEL FEATURES
2
POWER ON/OFF BUTTON
Press to turn the washer ON. Press again to turn
the washer OFF.
NOTE: Pressing the ON/OFF button during a
cycle will cancel that cycle and any load settings
will be lost.
CYCLE SELECTOR KNOB
Turn this knob to select the desired cycle. Once
the desired cycle has been selected, the standard
presets will be shown in the display. These
settings can be adjusted using the cycle setting
buttons anytime before starting the cycle.
START/PAUSE BUTTON
Press this button to START the selected cycle.
If the washer is running, use this button to PAUSE
the cycle without losing the current settings.
NOTE: If you do not press the START/PAUSE
button within 4 minutes of selecting a cycle, the
washer automatically turns off.
STAIN CYCLE
Select this option for heavily stained clothes,
such as play clothes or work clothes. Stain Cycle
will add extra wash time to the selected cycle, as
well as an additional rinse cycle.
1
2
CYCLE SETTING BUTTONS
Use these buttons to select the desired cycle
options for the selected cycle. Press the button
for that setting until the indicator light for the
desired value is lit.
DELAY WASH BUTTON
Press this button to delay the start of the wash
cycle. Each press of the button increases the
delay time by one hour, up to 19 hours.
LED DISPLAY
The display shows the settings, estimated
time remaining, options, and status messages
for your washer. The display will remain on
through the cycle.
OPTION BUTTONS
The option buttons allow you to select
additional cycle options and will light when
selected. Certain buttons also allow you to
activate special functions by pressing and
holding the button for 3 seconds.
For detailed information about the individual
options, please see the following pages.
5
6
3
4
7
8
1
3
4
6
5
8
7
18
Loading ...
Loading ...
Loading ...