Loading ...
Loading ...
Loading ...
25
English
4. Store the removed stitch finger <A> and/or
stitch finger W <B> inside of the bed
extension.
<B><A>
NOTE:
Make sure to install a stitch finger when sewing
regular overlock stitches.
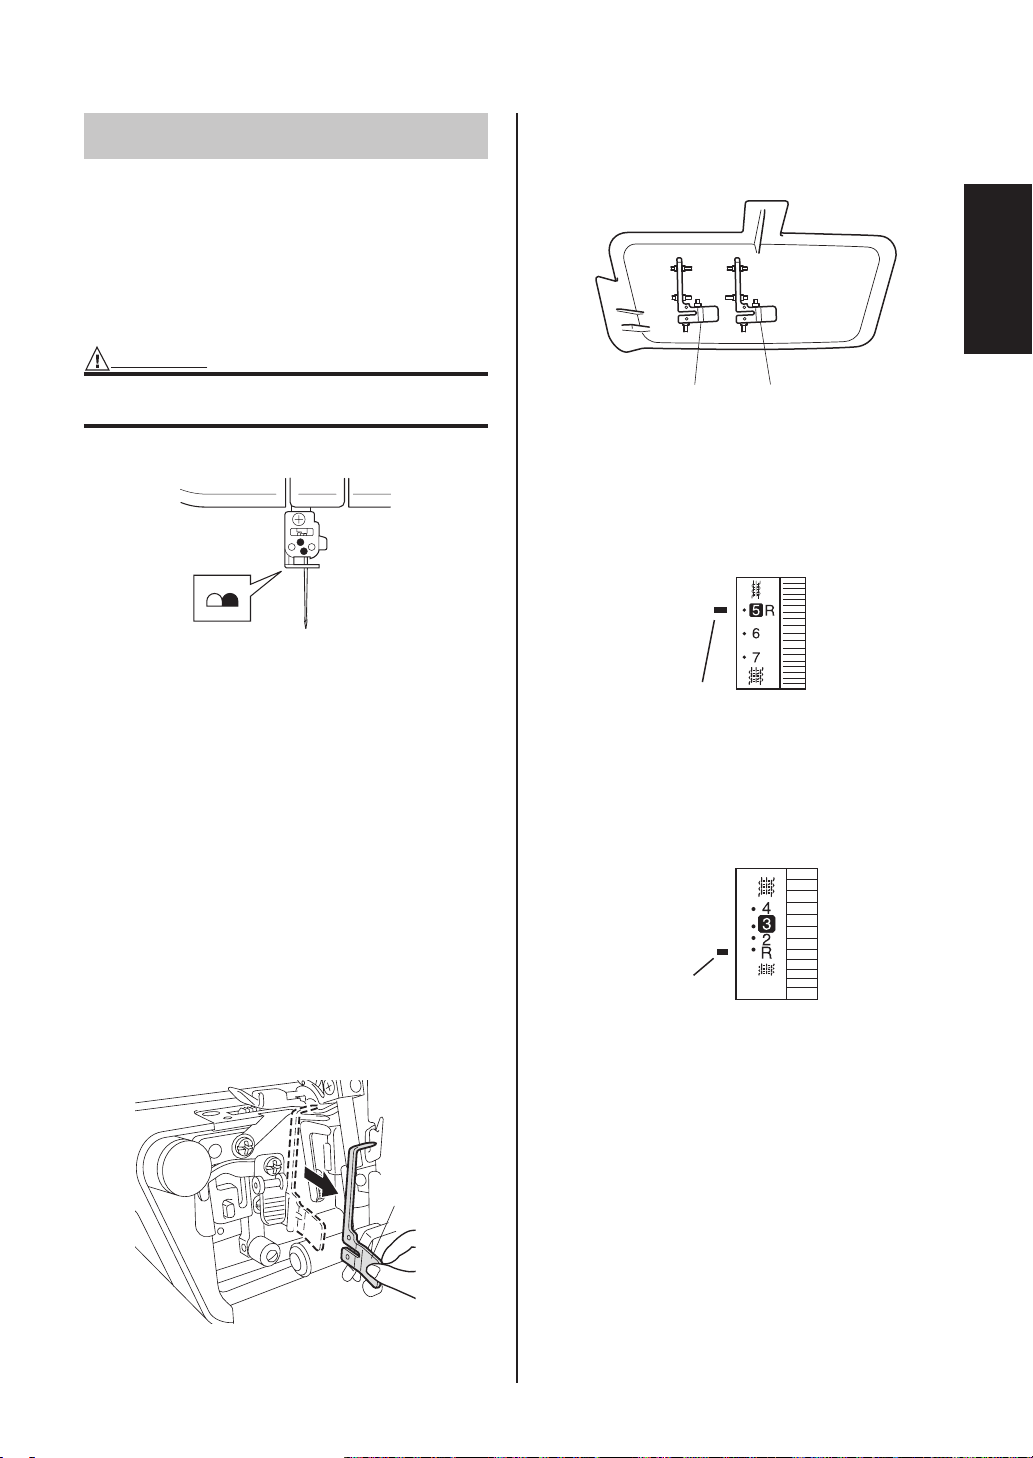
5. Adjust the stitch width adjustment dial up to the
"R" position.
<A>
<A> Selection mark
6. Adjust the stitch length.
Set the stitch length adjustment dial to "R to 2"
position (for narrow overlock stitch: R to 2, for
rolled hemming stitch: R).
3
<A>
<A> Selection mark
Narrow overlock/ Rolled hemming stitch
The Narrow overlock/Rolled hemming stitch is a
decorative finish for lightweight to midweight
fabrics. It is often used to complete the edge of a
fabric. This stitch is sewn by removing the left
needle and using the 3-thread overlock stitch.
Instructions for both narrow overlock/
Rolled hemming stitches
CAUTION
Turn off the main power and light switch before
removing/ installing a needle.
1. Remove the left needle.
NOTE:
For the recommended thread and needle, see
CHAPTER 4 "Sewing materials, threads, and
needles comparison chart".
2. Thread the machine for a three thread
overlock, using the right needle.
3. Remove the stitch finger <A>.
1 Raise the presser foot lever.
2 Pull all threads toward the back of the
machine.
3 Check to make sure that the thread is no
longer wrapped around the stitch finger.
4 Open the front cover.
5 Turn the hand wheel until the upperlooper
is at its lowest position.
6 Pull the stitch finger to the right and remove
it.
<A>
Loading ...
Loading ...
Loading ...